
LEDs (Light Emitting Diodes) have been around for quite long in history of consumer electronics. Since the year 1962, when Nick Holonyak developed the first usable visible spectrum LED while working for General Electric , LEDs evolved dramatically and it’s hard to imagine a world without them. Just look around you while reading this review and count the number of LEDs that surround you- impressive, isn’t it (in case you are in deep woods with printed version of this article, forget about this paragraph)?
For the first decades, light emitting diodes were used mainly as indicator lights for electronic devices and for seven segment displays, as those in alarm clock radios everyone hates so much. LED usefulness took a 360 degree spin at the time when in 1994 , Hewlett Packard’s Optoelectronics Division engineers started to work on high power LEDs that could be driven on higher than regular LEDs currents in order to emit the amount of light comparable to existing light sources. The first high power diode hit the market in 1998 with a brand name LUXEON. That introduction changed the way we look at LEDs and started lighting revolution that clearly impacts our everyday life. From street signals and LED flashlights to street lamps and car headlamps (look at the Audi R8 sexy LED headlamp for example link ) this type of lighting along with the newer invented plasma light bulbs slowly supersedes conventional incandescent and fluorescent bulbs for being brighter, far more efficient and long-life light sources.
Aquarium industry was one of the first to implement LEDs as a source of light. It’s not a surprise considering high luminous efficacy (the lumen to watt ratio) and low heat radiation compared to other light sources used in aquarium fixtures, such as metal halide lamps and T5 fluorescent bulbs. I see LEDs as a technology of the future and with the price of LED chips constantly falling, this type of light will soon become a preffered choice for many industries.
With that lengthy introduction I would like to present you the RapidLED 12 LED Plug-n-Play Retrofit Kit recently introduced to their line of retrofit kits. What separates it from other DIY kits is that there is no soldering required- all LEDs have pre-soldered plugs and terminals to connect them to. But let’s start from the beginning- unpacking the kit itself.
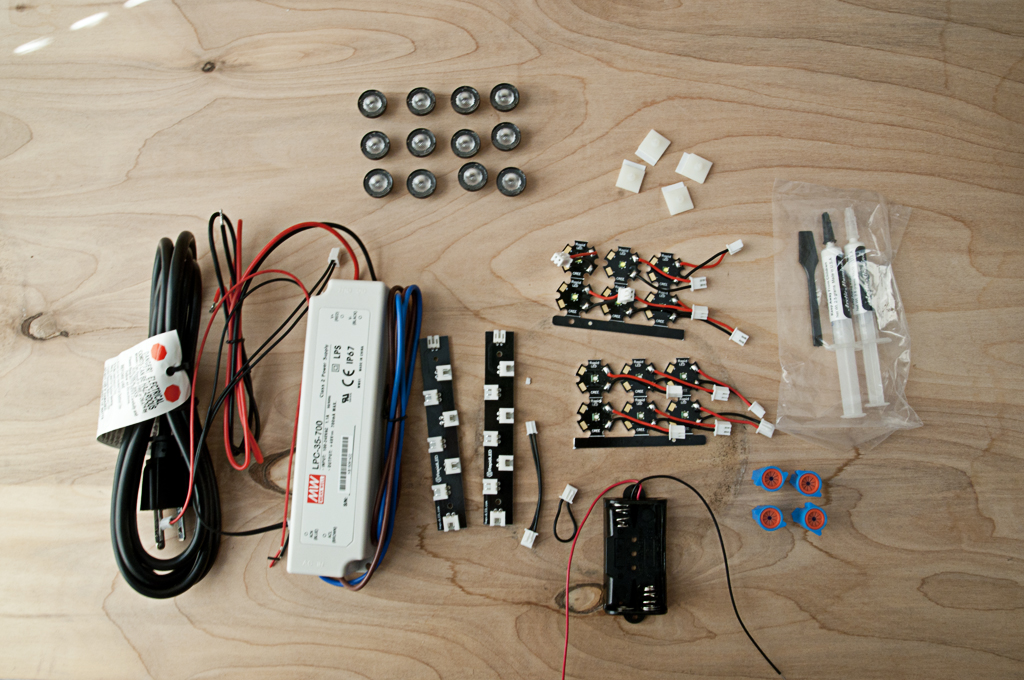 The kit came in a securely wrapped box and all leds have an additional bubble wrap packaging. Here’s what is included:
-6 Cool White Cree XP-G LEDs on star with pre-soldered wires and connectors
-6 Royal Blue Cree XP-E LEDs on star pre-soldered wires and connectors
-12 XP-E/XP-G lenses (you can choose from 40,60 or 80 degrees angle and there are two colors of lenses housing available- black or white)
– Mean Well LPC-35-700 driver capable of driving driving 1 string of 3-14 LEDs in series
– two Plug-n-Play 7 LED Terminals
– one Driver Jumper
-one Terminal Plug
-one Terminal to Terminal Jumper (2″)
-one Terminal to Terminal Jumper (8″)
one- Arctic Alumina Thermal Adhesive (you can ask for tube of Thermal Grease in case you don’t want to glue LED stars to the heatsink)
-two water repellent wire nuts
-power cord
-manual downloadable from rapidled.com site
-battery operated LED tester
The only thing missing in the kit is heatsink- you can order them directly from rapidled.com and they have several shapes and lengths to choose from. The heatsink that came with my kit is of high quality and it’s doing a great job of cooling down LED stars.
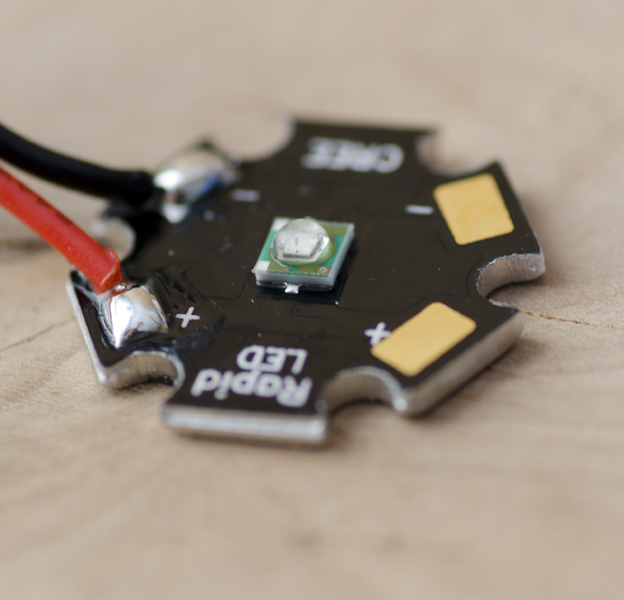
Let’s focus on the most important parts of the whole kit-LED diodes. Cree is a leading high-power LED manufacturer and their XP-G and XP-E series are one of the newest technology LEDs. The default 50:50 ratio between white and blue leds will produce light of color temperature around 10000K but as stated on rapidled.com website, you can customize this kit and ask for a different ratio. At the time of writing this article, three choices are available: cool white, neutral white and royal blue.
 The Mean well LPC-35-700 driver is the basic model (no dimming capability) that comes from a reliable and well known manufacturer. It has factory set current of 700mA so no higher electronic knowledge is required for it to operate properly.
The whole idea of this kit is plug-and-play style of assembly. Let’s see how well it is implemented by assembling it!
I prepared myself for this operation by informing my better half I will play with electronics for a little while. I got a green light, took some necessary tools, sat down and started studying the manual…
I must say, it’s a well written piece. It takes you step by step through the assembly process with detailed description of each step and attached photos. First thing I had to do is check every LED with a supplied tester to make sure there all of them are fine.
No problems here, I can advance to heatsink preparation part.
I decided to drill&tap holes for the LEDs in case I would need to replace them in the future. I calculated arrangement of diodes, drew a grid on the heatsink, marked holes and started drilling. 30 minutes later I was ready for the fun part- screwing LED stars on the heatsink and connecting the driver…
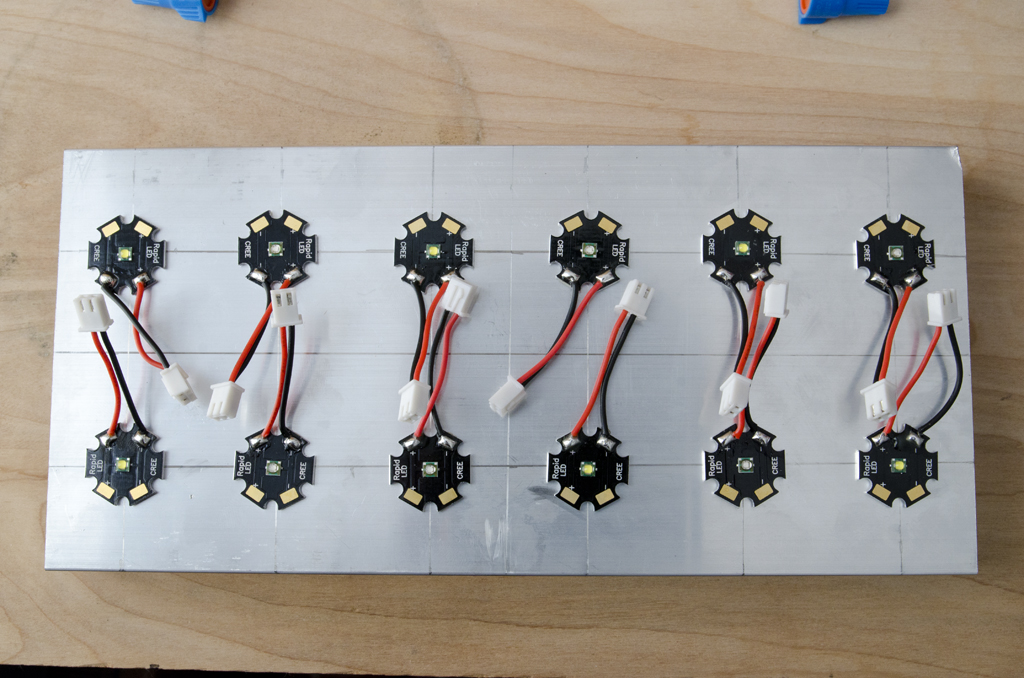 Here’s where this kit really shines. The “idiot-proof” design allows you to connect all the parts together very quickly and there is almost no place for mistakes. The diodes fit in the terminal only one way so there’s no danger of reversing circuit polarity and/or frying LEDs . Should you need longer wires for the leds, you can buy additional extensions on RapidLED ($0.50/pc at the time of writing) The kit is linkable which means you can connect more strings of LEDs if used with drivers that can drive more than 13 LEDs. For setups where less than 12 LEDs are required, RapidLED offers terminal plugs that can be connected to terminal instead of LEDs (one plug comes with the kit). The driver has colored wires too, so there is no confusion here either. In overall, the kit is really easy to assemble and even people who has no previous experience in electronics shouldn’t have troubles making their own retrofit LED lighting.
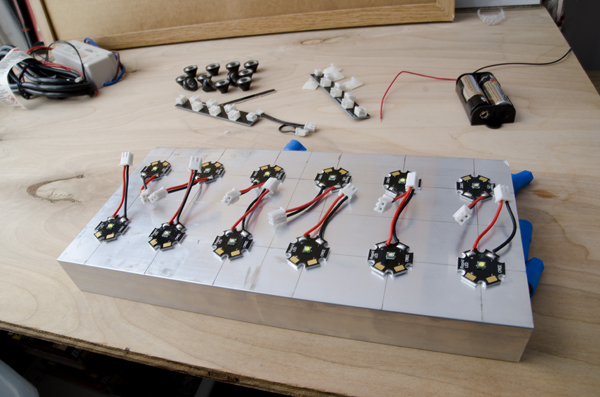
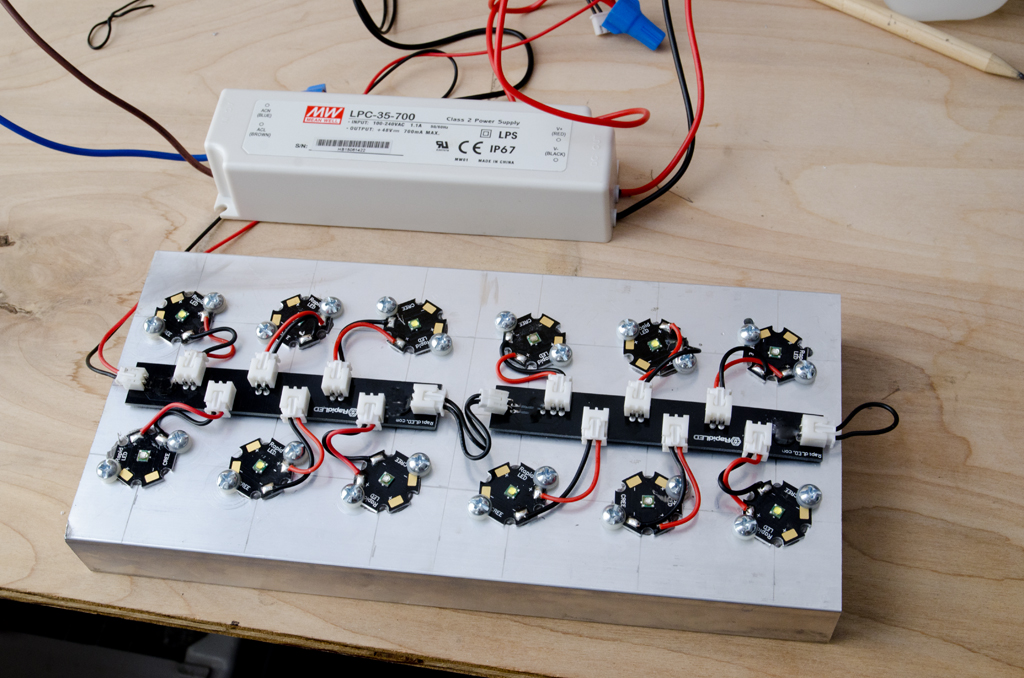 This is a picture of the fully assembled kit.
I should have mentioned that I’m no newcomer to DIY LED lighting and have been running them on my reef for almost 2 years. I don’t have access to PAR meter, but I can assure you that this 12LED kit will be more than sufficient for a SPS dominated nanocube of around 12-15g or even bigger FOWLR tank. Rapidled offers the same kit with dimmable driver as well as 7 and 24 LEDs version of it.
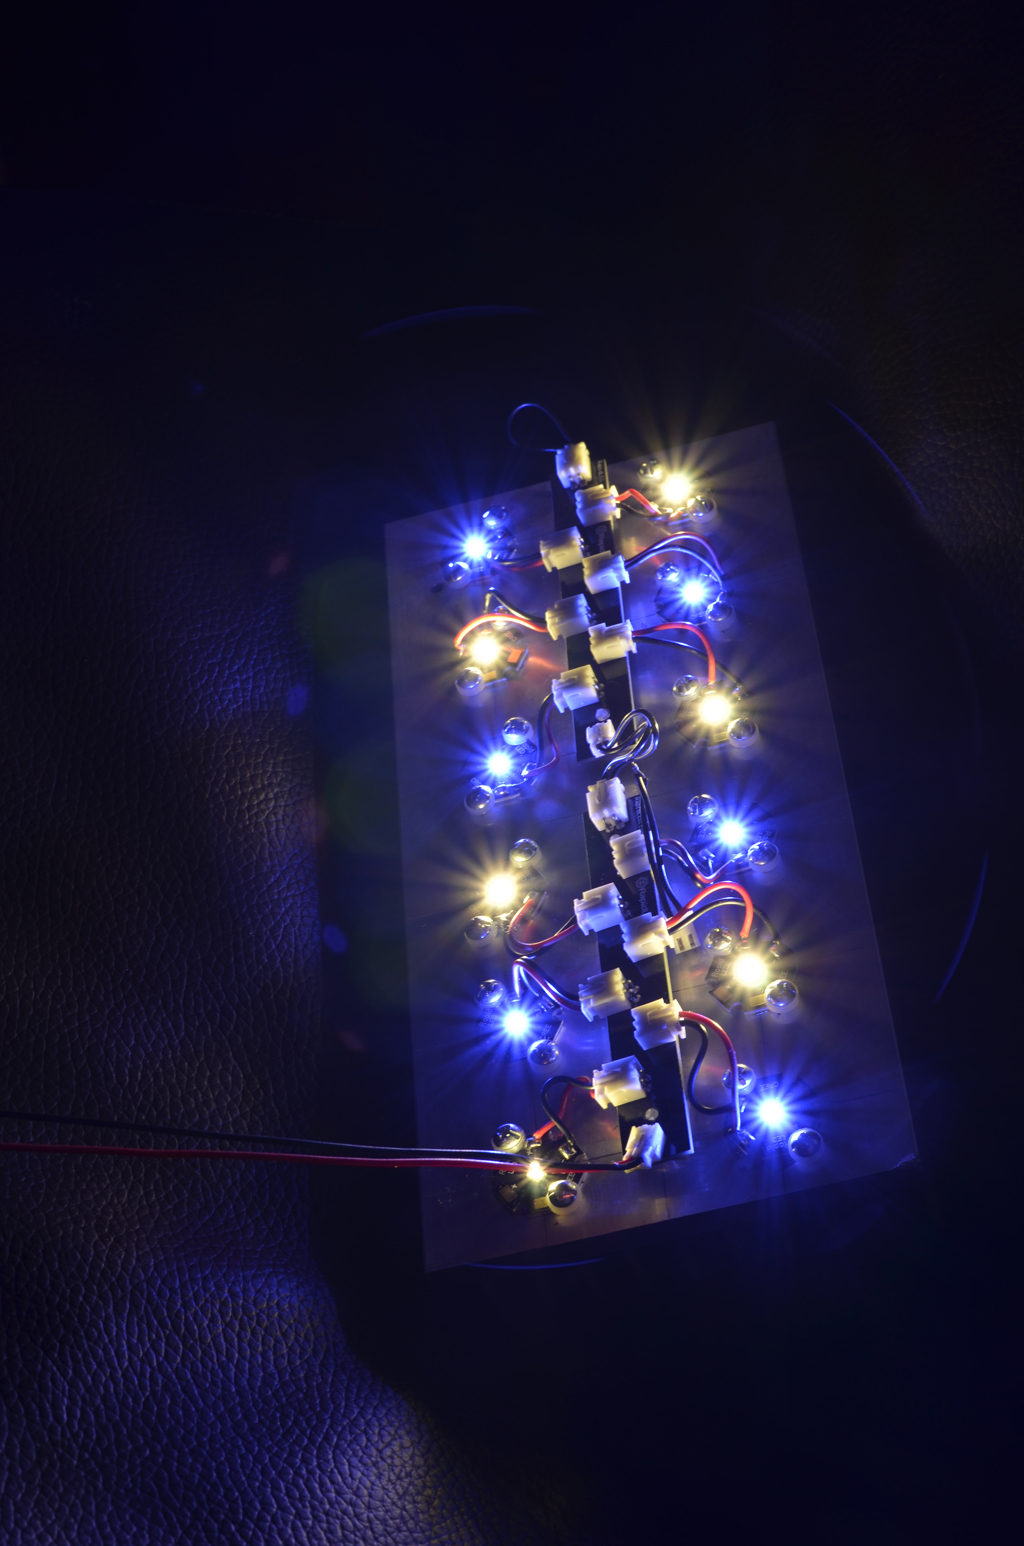
LED test
VERDICT
I really like RapidLED LED Plug-n-Play Retrofit Kit. It blends the fun factor of building a DIY lighting with a simple, “LEGO” style approach. Sure, it’s a basic setup, it doesn’t come with a shiny case and touchscreen and you cannot control it with your smarthphone. However, for the price that is often 1/6 of a brand name fixture ($95 excluding heatsink at the time of writing this article) and for use of high quality driver and LEDs it leaves little to complain about. DIY LED lighting was a topic of electronic handy people who know how to use a soldering iron, but thanks to RapidLED’s new Plug-Play Kit more reef enthusiasts are able to build their own LED light.
You can buy this and other LED kits directly at RapidLED site (www.rapidled.com). Have fun DIYers!
I use the light for my FW breeding tank at the moment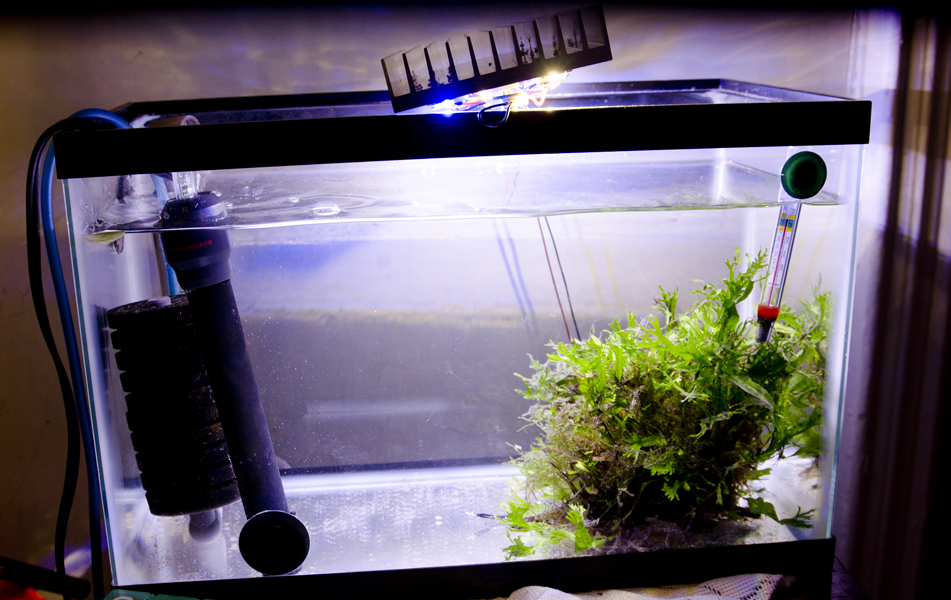


Good, informative read. Thanks,
Bill