
 Last four parts of aquarium photography guide were all about choosing the right camera, learning it’s functions and tweaking with settings to achieve desired results. In this episode I will focus on principal rules that apply to aquarium photography, which to obey and which are meant to be broken (sometimes). Some of them may seem obvious, other not so much, but at the end of the day it’ good to know the little tweaks and tricks used to produce a memorable photograph.
If you missed previous parts, you can find them here:
Part I: http://reefs.com/blog/2011/10/17/aquarium-photography-guide-part-i-choosing-the-right-camera/
Part III:http://reefs.com/blog/2011/12/02/aquarium-photography-guide-part-iii-white-balance-headache/
PartIV:http://reefs.com/blog/2012/01/11/aquarium-photography-guide-part-iv-lenses/
The first chapter focuses on an old dog of photography rules:
1. The ultimate principal – The Rule of thirds
The Rule of third is based on a way human eye sees and process the scene. When we look at a photograph we naturally focus on certain parts first and “read” the picture following these focus points. Rule of thirds divide the scene to into three identical parts both vertically and horizontally creating nine equal rectangles. Where the vertical lines cross with horizontal ones are the focus points. The idea is to frame the scene so the objects you want your viewer to focus his/her attention on lay on the crossings of the lines. That makes the picture more interesting to a viewer. In general, a photo framed following the rule of thirds stands out of the crowd and us easier to memorize for the observer. However, all rules are made to be broken and rule of thirds is no exception. Sometimes it’s better to place the focus point somewhere else in the frame to tell a different story.
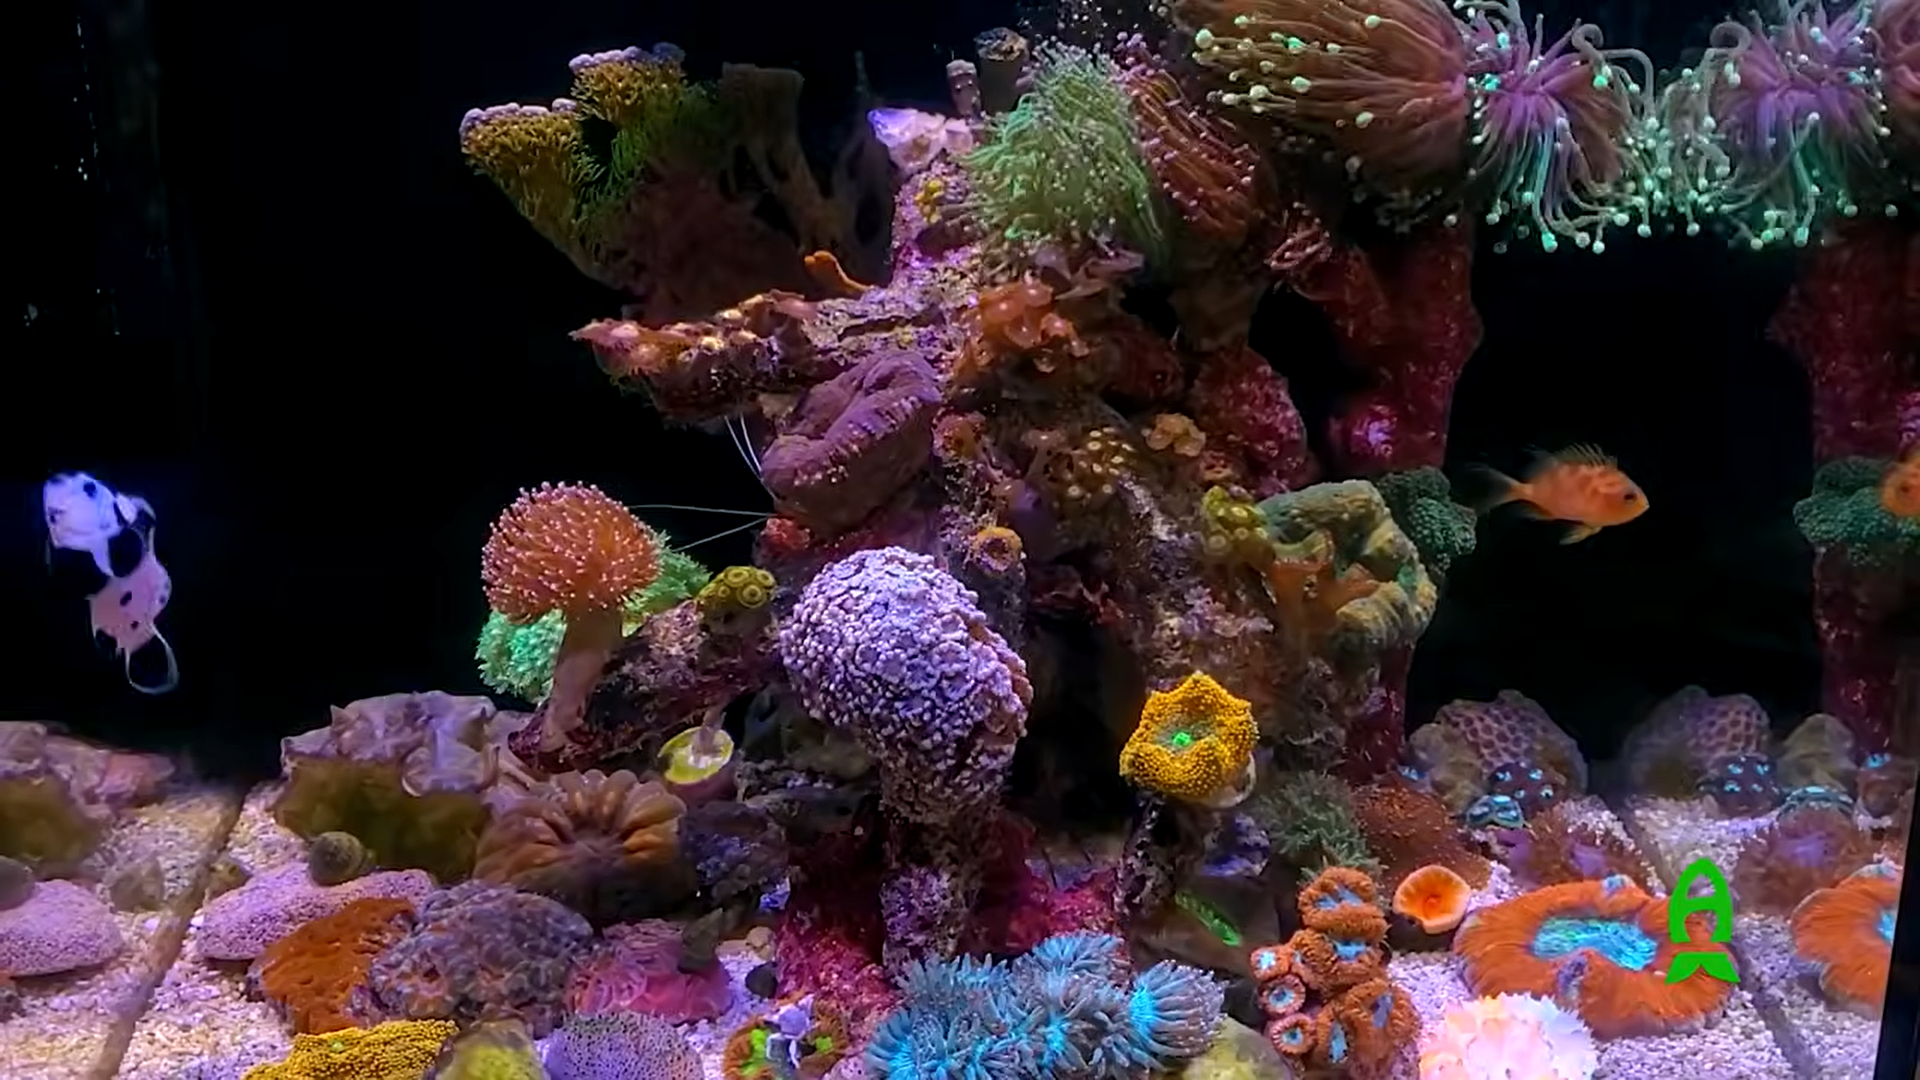
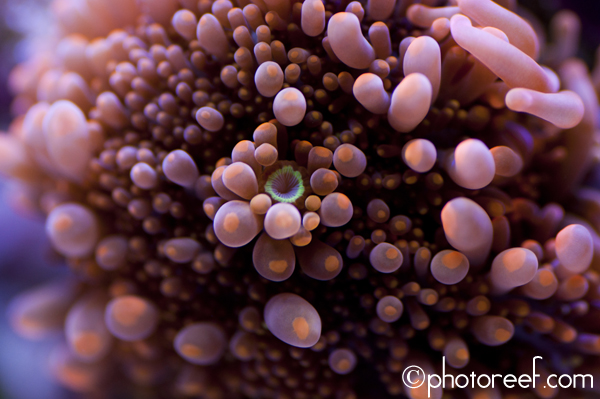 For example in this picture I set the focus point right in the center of the frame to show the mouth of a ricordea florida as a central part of the coral from which polyps grow in interesting pattern resembling sunrays.
Another basic rule that needs to be obeyed in a wildlife photography is focusing on the subject’s eye. Always try to focus on the eye when shooting fish and on the mouth/center of polyp when shooting corals. This rule is not to be broken. It’s not easy to achieve, especially in fish sessions, but properly focused picture of an animal makes a huge difference in the final image. Generally speaking, fish and coral photography benefits from narrower apertures where most of the scene is relatively sharp and in focus, because reef creatures are so fantastically shaped and colorful that it’s mandatory to show it all in your photograph. Unfortunately lighting conditions in a reef tank are often less than perfect and using a combination of small aperture and fast shutter speed is impossible without sacrificing on image quality. That is why it’s very important to focus on the eye. “What if the subject lack eyes” you may say. Well, then look for the next thing that your eye locks on when looking at an animal- a central disk in starfishes, a mouthpiece in feather dusters and urchins and so on.
 3. Use a tripod or other kind of support. I know, it’s not easy to take a shot with a tripod mounted camera when everything is moving, but photographing living things that don’t care about posing for you requires a different approach. You need to be a motionless observer and wait for the right moment when your subject fills the frame. It sometimes take several exposures to “catch” your fish/invert, but patience pays well. However, if your subject of choice is a wrasse species or another fast chaotically swimming fish you may break this rule and grab that camera. Unfortunately, forget about that small aperture/fast shutter speed combo in this situation.
4. Set the white balance before shooting. White balance was explained in part III of this article so I won’t go into details now, but setting a proper WB before the shooting session is a key element to achieve good results. Even with RAW format, it’s far better to start with a properly set WB than adjusting it in post-production.
5. Always point the camera’s lens perpendicular to the glass. There are no exceptions to this rule- shooting in an angle creates ugly distractions and blurry images. Sorry bow-front tank owners…
The above rules are your main concern when it comes to camera’s side of aquarium photography. Let’s now talk about how to prepare your fish tank for a photo session.
I. Clean that glass! (or acrylic, for that matter…)!!!. It seems obvious, but we are lazy creatures and sometimes reaching for that algae scraper feels like a tremendous effort. Putting aside blurred dots on the final image, algae on the glass creates one more disadvantage. When you handhold your camera and chase that extremely hard to get onto frame wrasse, you probably switch your lens/camera to autofocus. Now those algae om the glass forces camera’s focusing system to “hunt” the scene more (hunt in photographers language means struggling to focus) because it had that distraction that is closest to the lens. Everyone has some hard to reach spots in their tank and that is understandable, but everywhere else the glass should be clean as in those windex commercials.
2. Stop or reduce flow before taking pictures- not much to explain here, high flow forces higher ISO/ lower shutter speeds. On the other hand, flow helps create a sense of movement in the photograph, so if you are aiming for that, leave the pumps on. Finally, Top down shots can be taken only with zero surface agitation so in this case all powerheads and return pumps have to be off.
 3. Isolate your subject. This is the hardest thing to do. Basically the idea is to shoot your subject (fish, invert etc.) on a uniform background or a blurred one. A colorful, full of life, live rock may be interesting, but it distracts viewer from your subject. To minimize this, try to look for a cave or darker spot in your aquascape and aim your lens there. Another option is to get closer to your subject so it fills the frame.
4. Get rid of that frag plugs. Seriously, they’re ugly. Wait for the coral to encrust the plug or at least swap it for a piece of rubble if you planning to move the coral. Otherwise your epic shot becomes nothing more than a snapshot to show-off the LE toxic anal explosion frag you recently spend half of your week’s pay on.
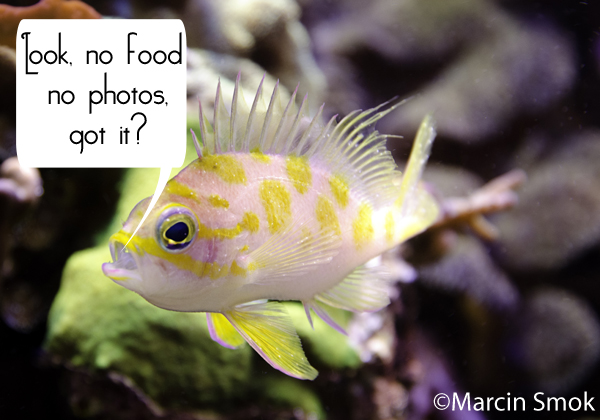
5. Don’t. feed your fish while photographing them. I know, it’s tempting because they all come out and pose, but the final effect looks like somebody threw up in the tank. The only situation when that procedure is acceptable is when you want to show how healthy and responsive your fish are (but that looks better in a video anyway). In contrary, corals can be fed and capturing them devouring a mysis shrimp makes an outstanding shot.
 A good photograph is worth the extra effort, no matter the circumstances. Following few simple rules is all it takes to produce it. I tried to bring up everything I learned about photographing underwater life through the glass, but I am aware there may be better techniques I’m not familiar with that can make your photos shine. Please don’t hesitate to comment. Wish you only the great exposures!


0 Comments