

Rossmont Waver has been really a surprise. We are loving it so much, mainly for what it allows us to do.
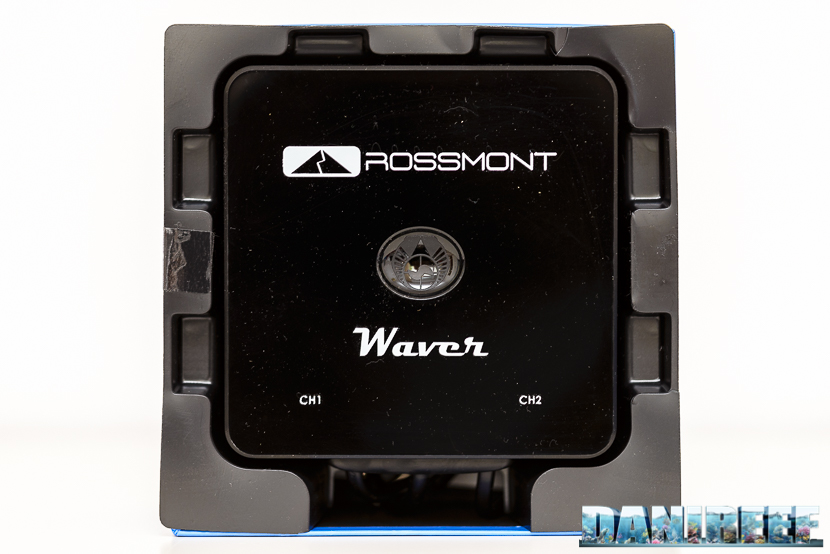
The Rossmont Waver is what we would define as a multipurpose controller. In fact, Rossmont labels it as an All in One module. With this you can control different stream pumps (by Rossmont brand only), and, in the near future, it will be possible to control all the new products being released by the company. Rossmont tells us that there will soon be return pumps, skimmer pumps, test devices (pH? Redox? Density?), lamps, power bars, and much, much more.
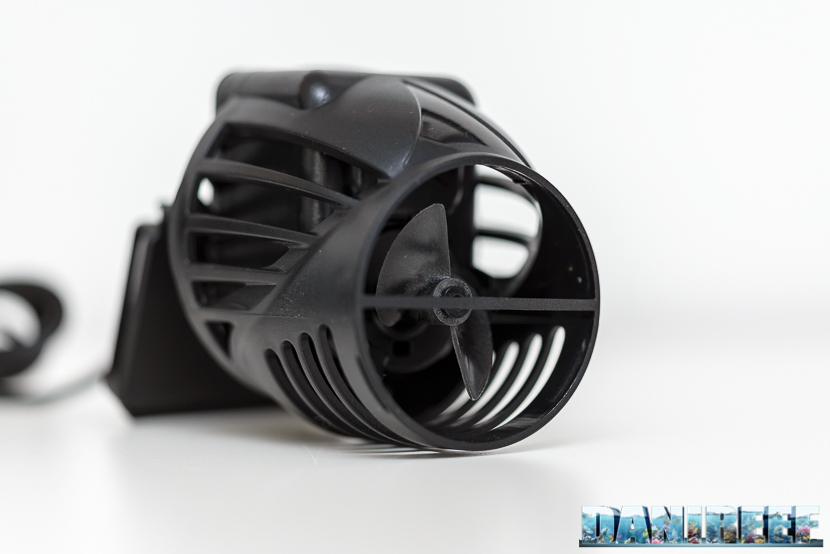
We can connect Waver to a couple of Rossmont pumps and create the movement that we desire in our aquarium. In my case, I tried three different models with the controller. A Rossmont Mover M5800 (review), a couple of Rossmont Mover MX11600 (review coming soon) and a Rossmont Mover MX15200 (review).
Needless to say, it went fine with all of them.
How does the Rossmont Waver work with the pumps
The Waver has three line cords. One of these is the power cord (it must be plugged in) while the two other extensions are needed to connect with the two chosen pumps, or other future accessories.
Rossmont decided to use a web interface, instead of obligating themselves to create several similar applications for every future device.
The test set-up
As I said, I’ve been lucky enough to have three different Rossmont pump models. The primary pumps I have used are a couple of MX11600, which arrived together with the Waver.

Then I wanted to use the Waver with the MX11600 on one side and a MX15200 on the opposite side, with the hope of getting enough flow through the whole tank, as it is in its growing stage.
Once again, the installation was completed without any problems, I had just to pay attention when setting the power of the MX15200 in relation to the MX11600.
Finally, just for fun, I tried using a M5800, together with the MX15200 and the MX11600. Surely, the use of two pumps with such different flow rates brings a weird setup (that no one would use normally). However, we tested it and we had no problems at all.
Let’s see in depth how to use the web interface to manage the pumps.
The Rossmont Waver’s web interface
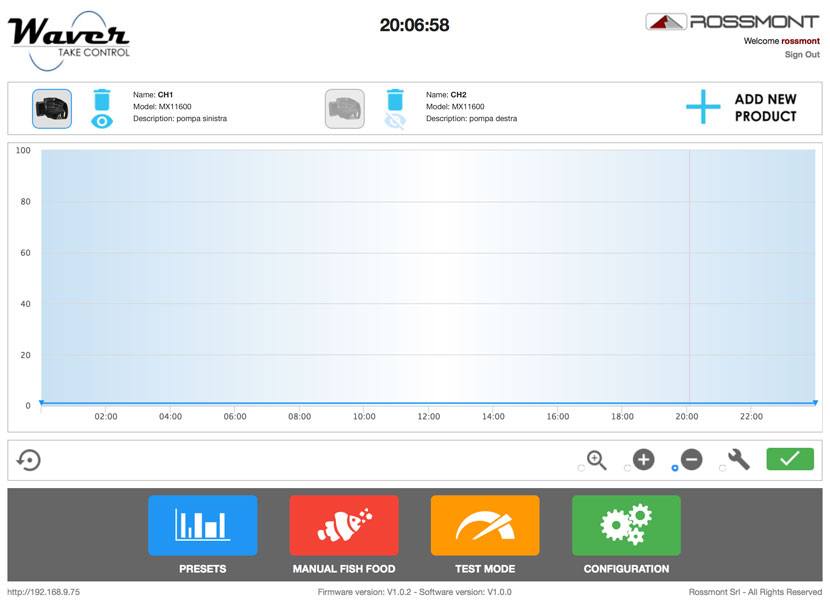
Once powered, the Waver, connected to its wireless network and logged in with access credentials, displays the following screen:
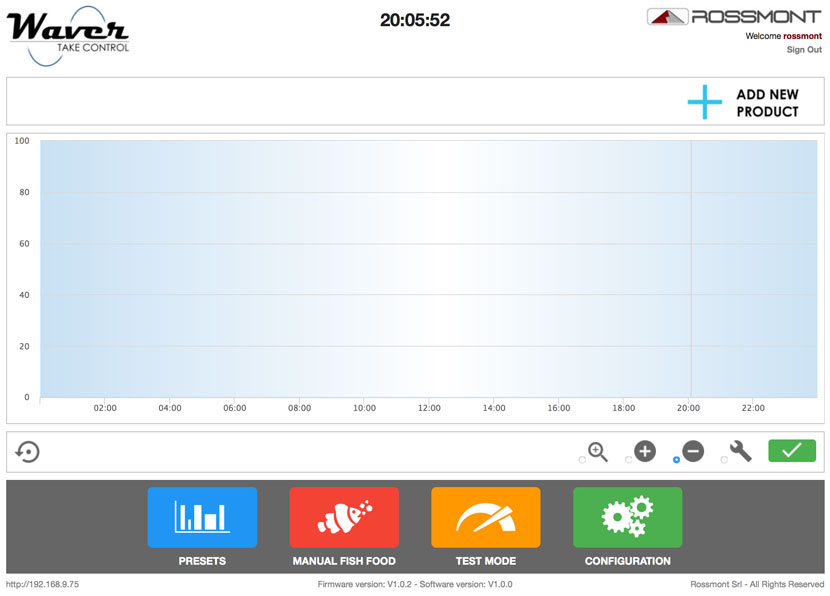
As you can see, it’s an empty screen and at the top right you can see the request to add a new product. Very easy operation.

By clicking on the “ADD” button, we get a multiple-choice tab with all the Rossmont pump models available. You just have to choose your pump and insert a simple description (optional).

As you can see, my choice was quite obvious.
After both choices, you will see a screen like the previous one, where you have to choose the flow power percentage. You can also see both pump flows on the graph simply by clicking on the eye icon.
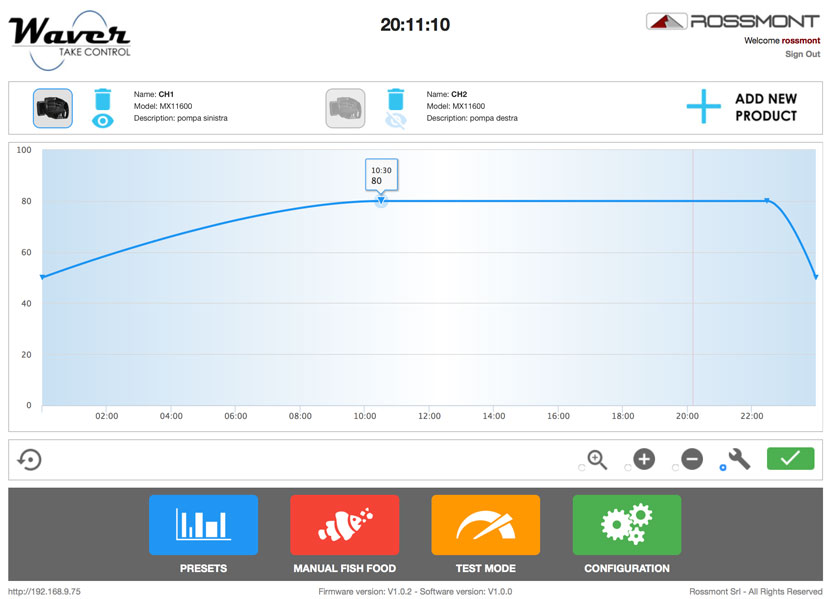
To start with, we entered a first point at 50% of the flow and a second point at 50% too. With the “+” button, we added two middle points at 80%. The program takes care of creating the curve with the right energy. After setting those, we can drag points anywhere, thus changing time and power, in a very simple way.
We wanted to simulate the movement of the tides, so we installed the two pumps facing each other. We added a point every 6 hours. One at 90% and one at 50%. The result is as follows:
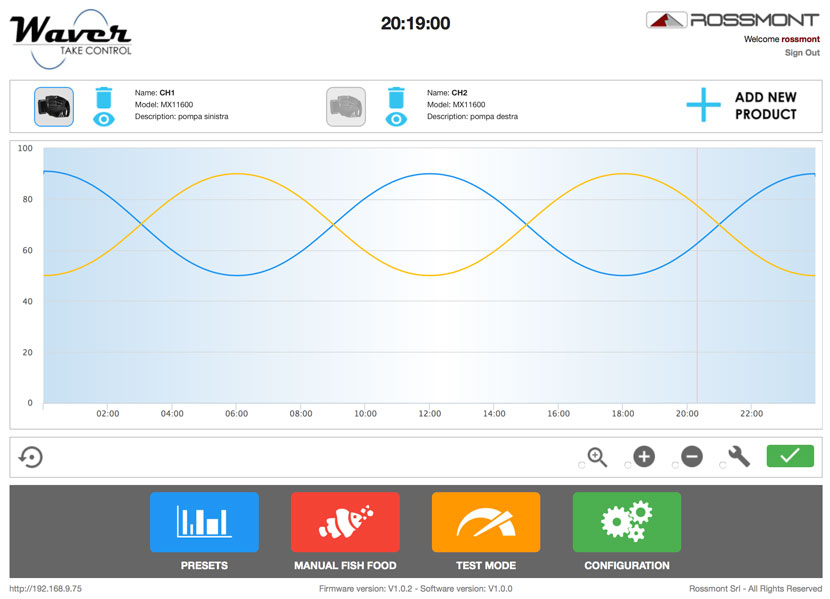
You can do and edit the same thing with your smartphone or tablet. It’s very easy and intuitive.
As you can see from the graph above, we have created a mirrored sinusoidal curve. One is the pump on the right and the other is the one on the left. The red vertical line is the actual time while we are logged in.
The 4 colored buttons
But there’s much more; there are 4 large colored buttons:
- Manual Fish Food: it slows down the pump(s) to a minimum percentage for feeding (this function can also be controlled by Waver’s touch button or by a preset application)
- Test Mode: the full schedule is played in 5 min to check what we have done
- Configuration: the options screen with Waver’s instruction manual, the possibility to reset all the settings to factory default, network settings, etc..
- Preset: the advanced settings of the controller
The advanced settings (preset)
Clicking the Preset button brings us to a screen that allows us to choose an effect among six proposals.
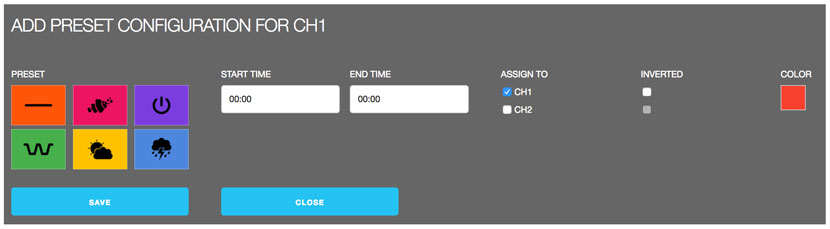
You can choose from the following six effects:
- Fixed: pumps at fixed flowrate (orange button)
- Fish Food: pumps at minimum power (pink button)
- Off: this turns off pumps (purple button)
- Cycle: alternates between minimum and maximum power, for wave simulation (green button)
- Random: casual transitions from minimum to maximum (yellow button)
- Stormy: casual but very fast transitions to simulate a storm (blue button)
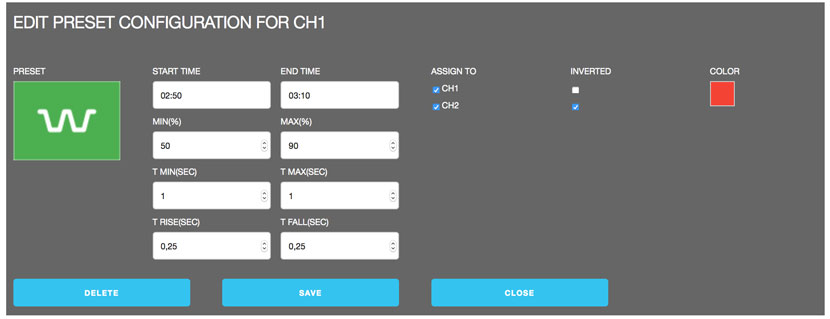
I started with an alternate cycle where my two flows cross.

With this setting, for 20 minutes, the flow goes from a minimum of 50% to a maximum of 90%, always in opposition (you see the tick on CH2 “inverted”), with 1 second pause at minimum and 1 second at maximum power, and a time ramp of 0.25 seconds.
I repeated the effect at every intersection and what you see is the final graph.

Once I close the Preset window, the final graph becomes cleaner.

My setting is currently this one, though I periodically insert or delete some effects and I change the power of the pumps based on the aquarium’s needs.
Interaction with Rossmont Waver
We took a picture of our Rossmont Waver turned on.
As you can see, there are three LEDs. The two blue LEDs are over the two channels, CH1 and CH2, and they show the operation of the stream pumps. The light in the center is a touch button that allows us to interact with the Waver without the need to connect with our smartphone, tablet, or pc.
With the touch button, we can bring the pumps to a minimum percentage for feeding by simply pressing it for 2 seconds. If the button is pressed for 6 seconds, Waver turns off the pumps and the controller remains on.
If you press the button for 20 seconds (enough time to not press it by mistake), it will perform a hard reset to the factory default.

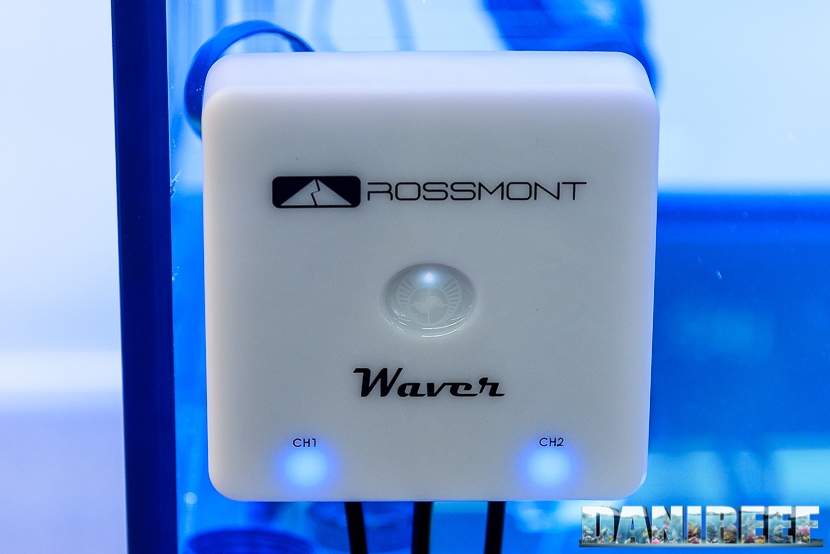
Waver also comes in white, but personally, I prefer the black. These photos were taken during the Interzoo exhibition in Nuremberg (editorial and article about the Rossmont booth), but the white version hasn’t come to the market yet.
Prices
Rossmont Waver is priced 249,90 EUR ($199 US). It’s not inexpensive, but we have to weigh it against the opportunities of this system. If you buy it with the two largest pump models, the Mover MX15200 (review), you should add 139,90 EUR for each pump, for a total amount of 529,70 EUR ($590 US). But we would have in our hands a system that for power, flow rate, and customization possibilities could be compared to a pair of Vortech MP40 (review) with their Reeflink (review). And this last system would cost, at present, 977 EUR. So, we’re talking about half the price.

If we look at Tunze, we would take a couple of Tunze Turbelle Stream 6155, which are comparable in flow rate to the above two systems, we would spend 247,80 EUR for each pump, and 320 EUR for the new Smart Controller 7000 (our preview here). That’s a total of 797,60 EUR. Of course each system has its pros and cons, but this gives you an idea of what this level of product is sold for nowadays.
What did we miss?
Like everything, Rossmont Waver is not perfect. We would like to have more structured presets and the option to create waves in the aquarium, without doing different attempts.
Conclusions
User friendly, the Wave allows us to use pumps that we already have at home. We can increase the power of the pumps simply by changing settings, and without having to spend expensive amounts for new pumps. We can create the flow with just a fingertip, and we can add presets where we want during the day. All of this is sold at a very competitive price when compared to other available pumps, such as tunze and Ecotech Marine. We love it and, considering the price, we can recommend it without any problem. And finally, we have to remember what we wrote on the beginning: other devices and expansions are coming soon.
Thanks to Rossmont for supplying us with Waver and the pumps for our review.


0 Comments