
Testing.
An unavoidable curse every aquarium owner must face, a repetitive chore that takes us away from enjoying the life on the other side of the glass, but also a necessity when keeping a successful tank. There’s no better way to achieve and maintain the fine chemical balance in a living reef than by knowing the parameters of the tank’s saltwater. Of the “Big Eight”- temperature, pH, salinity, phosphates, nitrates, calcium, magnesium, and alkalinity, the first five need to be addressed and mastered in any saltwater aquarium containing living corals, and only when they are, can an aquarist approach the remaining three.
In a living system containing reef-building corals and other invertebrates, bicarbonates present as alkalinity; this, along with calcium and magnesium, engage in a sort of perpetual chemical “dance”, the effects of which is the rainbow of colors a healthy coral reef displays. In a natural mechanism called calcification, corals take up calcium ions and bicarbonate (HCO3-), process the latter into Carbonate (CO3–), and bind it with Calcium to form Calcium Carbonate (CaCo3), the reef building chemical compound that gives corals the ability to build their skeletons. Magnesium’s role in the process of calcification is not yet fully understood, but reef building corals, at different rates depending on the species, often substitute Magnesium for Calcium when secreting their skeletons. It is therefore widely accepted that optimal Magnesium levels in seawater help in stabilizing the other two elements by bonding with carbonate ions, which in turns allow for more carbonate to be present in the water.
As the corals build skeletons of calcium carbonate, the three basic elements get depleted at different rates, and in order for corals to continue their chemical magic in the confined space of a home aquarium, they need to be constantly monitored and adjusted. In an ideal world, regular water changes would be enough to replenish depleted minerals, but in reality, a thriving reef full of fast-growing stony corals will suffer from inadequate Alk, CA and Mag levels if these elements are not manually added to the tank by the aquarist. Alkalinity is the fastest of the “trio” to drop and therefore needs to be measured once a week at a bare minimum, with many successful reefers recommending daily measurements. Second to “go downhill” is calcium, which together with bicarbonate forms the Calcium Carbonate that is used by corals to build their skeletons. Calcium levels should be checked weekly (ideally) but not less than once a month. In a healthy reef, calcium and alkalinity levels are being depleted simultaneously, though at different rates. Finally, magnesium is the slowest to be depleted from the seawater, simply because of its ampleness compared to the other two- magnesium is 5 times more abundant in saltwater than Calcium. A good practice is to test for magnesium monthly and gradually raise its levels over the course of a couple days to an optimal 1250-1400 ppm.
The two products I received for review from Hanna Instruments are their latest consumer-level colorimeters for checking water parameters, and are part of a much larger family of aquarium industry oriented measuring devices made by the company. I decided to explore each of the two products separately and picked the more sophisticated HI758 Checker HC Marine Calcium Colorimeter to be the topic of this review.
Hanna Instruments has a rich history of producing innovative solutions to water testing and is a well known player in the aquarium industry. The company was formed in 1978 in Limena, Italy, and only two years later it came out with the world’s first portable, single probe conductivity meter, followed in 1982 by a pH controlled chemical dosing pump. Since then, Hanna Instruments has invented an impressive amount of testing equipment for laboratories and individual clients alike. I came across the company when I first started measuring pH in one of my freshwater cichlid tanks, using their nifty little portable pH meter.
Perhaps their most important (from an aquarist’s point of view) introduction came in 2010 when Hanna Instruments released the Checker HC line. Extremely affordable compared to other digital meters on the market at that time, the compact colorimeters test crucial parameters in aquarium water, like pH, Alkalinity, Phosphate, etc. The line has been since updated and expanded by several new models- in the company’s 2018 product catalog, the Checker HC line consists of colorimeters measuring the following parameters:
- Alkalinity
- Calcium
- Phosphate
- Phosphorus
- Nitrite
- Iron
- Fluoride
- Ammonia
- Copper
- Iodine
- Silica
- Chromium
- Nickel
- Bromine
- Freshwater magnesium
The HI758 Calcium Checker I am reviewing today is the company’s latest iteration of HC Calcium checkers (which have been on the market for some time), with brand new components and a few other changes.
But before I jump to the review itself, I would like to give you, the readers, a sense of what a colorimeter is, how it works, and what the benefits are of using one as opposed to the traditional color chart and Titration method test kits.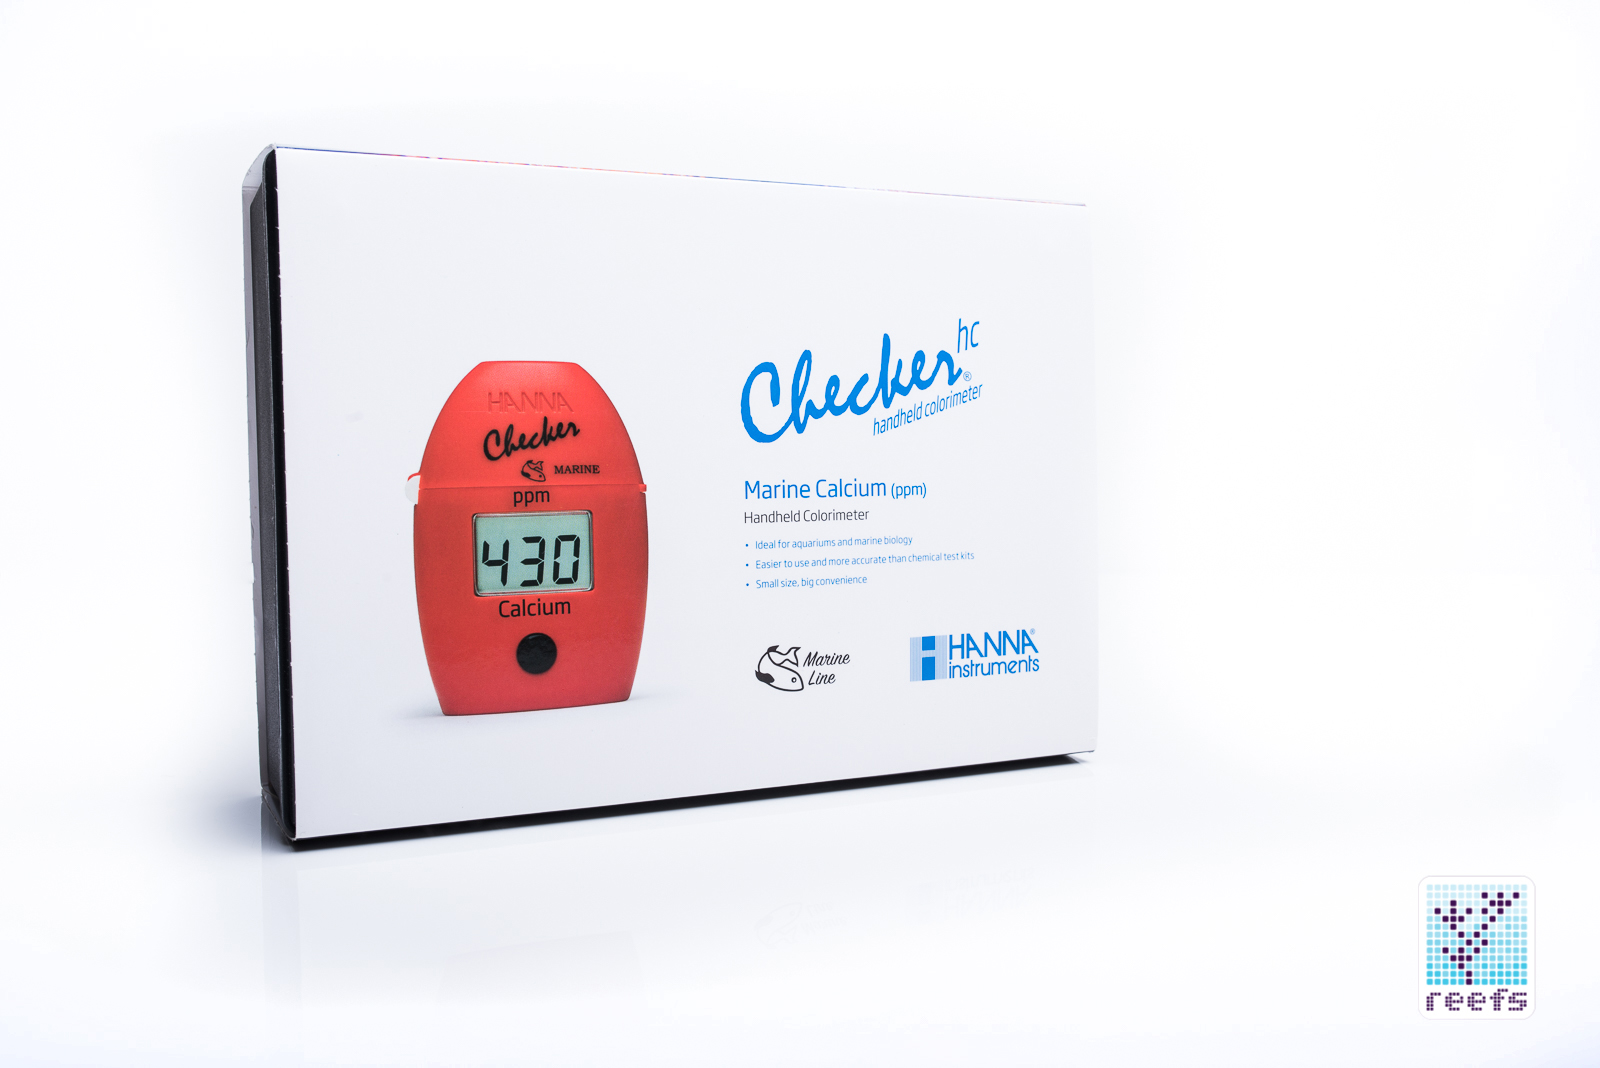
COLORIMETERS EXPLAINED
Boiled down to its basics, a colorimeter is a device that compares the amount of light waves (in a specific range of the spectrum) that go through a test solution with the amount of light that penetrates a reference solution. In the case of aquarium water testing, the reference solution is a sample of fish tank water, and the test solution is, usually an aquarium water sample mixed with reagent(s). A digital colorimeter like the Hanna HC Checker then performs an internal calculation and displays the test result on an LCD screen.
A colorimeter’s build consists of a single source of light (in a specific wavelength) that emits photons that go through a solution. On the opposite side of the light source sits a detector- a photocell that registers photons of light that didn’t get absorbed by the solution. The detector first measures the photons that got through a reference solution and then the test is repeated, using a test sample in place of the reference solution. The difference in registered photons in the two tests is what the final calculation is based upon.
That’s the simple explanation. In reality, the process of measuring Calcium content in a saltwater sample using the Hanna HI758 is much more sophisticated. I asked the good people at Hanna to explain the process in detail and here’s what Kevin Costa, the company’s sales and marketing director for the aquarium industry wrote back:
“The chemistry for the HI758 is pH dependent and contains the following:
- Zincon indicator
- A Zinc complex
- Sodium Hydroxide
When the reagents are added to a sample containing calcium, calcium displaces the zinc in the zinc complex. The free zinc then binds with the Zincon indicator to form a blue complex which is read by the checker. The sodium hydroxide is there to bring the sample in the correct pH range for the reaction to occur.”
Like I said earlier, there’s actual, hardcore science behind the processes that occur in the palm-sized HI758, and by using it, you will almost feel like a scientist. Almost.
COLORIMETER VS TEST KIT
These days, hobby level test kits have impressive accuracy, usually less than ±10% of the reading, meaning that the test results will vary no more than 10% from a known, lab tested reference solution. That is quite amazing and more than satisfactory for hobbyists and professionals in the industry alike, after all, even a deviation of 10% in test results won’t usually affect the aquarist’s perception of his/her fish tank’s well being. Let’s take, for example, Nitrates NO3-, a crucial parameter that, when off of optimal range, may wreak havoc in a reef aquarium if left unresolved. A test result showing that Nitrates content in one’s tank is 2ppm generally means that Nitrates are low and there is nothing to worry about. Even if the test result is off by 10%, 2.2ppm or 1.8ppm doesn’t affect the overall picture. The sSame is true in the high range- if your water test shows you have a 50ppm Nitrate content, 45ppm or 55ppm won’t change the notion that your tank is not doing well at the moment.
There are three known obstacles to achieving the most accurate test results: 1) the test kit is expired, 2) it’s from a known unreliable manufacturer, or 3) the fault lays in the hands of the person performing the test. The first two problems are easy to correct (get a new test kit and only use brands that other hobbyists agree to be reliable), but the third one is really hard to eliminate, because we’re just humans and we constantly make errors… unless you replace a person with a machine.
The fact is, people prove time and time again to be unreliable when it comes to achieving accurate results when measuring stuff. Almost all industries have replace manual testing with computerized testing equipment and for good reason- machines very rarely make mistakes and if they do, you can test again knowing that the measuring procedure performed by a robot will be exactly the same as in the previous test.
Aquarium hobbyists have also embraced this trend, and the last decade has seen a shift toward automation in testing equipment. Most of us reefkeepers have, at a very minimum, a temperature probe and a pH monitor that eliminates the daily chore of manually testing these two important parameters.
When it comes to testing saltwater for its mineral content, namely the “trio” of crucial elements- Alkalinity, Magnesium and Calcium, there are two “classic” testing protocols used by test kit manufacturers. One is colorimetric analysis, where a concentration of the given chemical element is determined with the aid of a color reagent. In that method, a water sample that’s being tested is mixed with a color reagent in a specific ratio and the results are compared with a color chart. This method is actually quite accurate, but the one big problem with this testing method is that most people suck at comparing tested solution with a color card. I can almost see all you nodding your head in agreement with that statement. To me, the difference between having very little phosphates in the water as opposed to way too much looks almost the same on the color scale printed in most (if not all) test kits. Then there are people that are colorblind (Rich)- to all those unfortunate folks a test kit of this kind is pretty much useless.
The second testing method is acid-base Colorimetric titration. In this method, a known volume of chemical reagent is slowly added to a water sample using a precise instrument such as syringe, until enough is added that it reacts with the water sample and shifts the solution color from one hue to another. The result is determined from the amount of reagent left in the syringe and read from a reference chart supplied with the test kit. This method is much more accurate than simply comparing colors of a three dimensional colored solution with a two dimensional color print, but it also has it flaws, as sometimes it is hard to tell at which point the color shift occurred. Colorblind people are again left behind here. In all fairness, most quality titration method test kits are easy to use and read, which has made them a staple in aquarium water testing. A digital colorimeter has advantages of both the traditional colorimetric test kits and the titration based ones- the testing process (more on that later) is similar to either of the two mentioned above, with the only difference being that the test results are calculated and displayed on an LCD screen as opposed to being determined from a printed chart. While human error is still a concern (the user performs the test procedure after all), at least the part where test result is being determined is automated.
So now, on to the review of Hanna Instruments HI758 Checker HC Marine Calcium Colorimeter. What’s in the package? How does it work? How well does it perform? Is it worth the money? Let’s find out.
UNPACKING
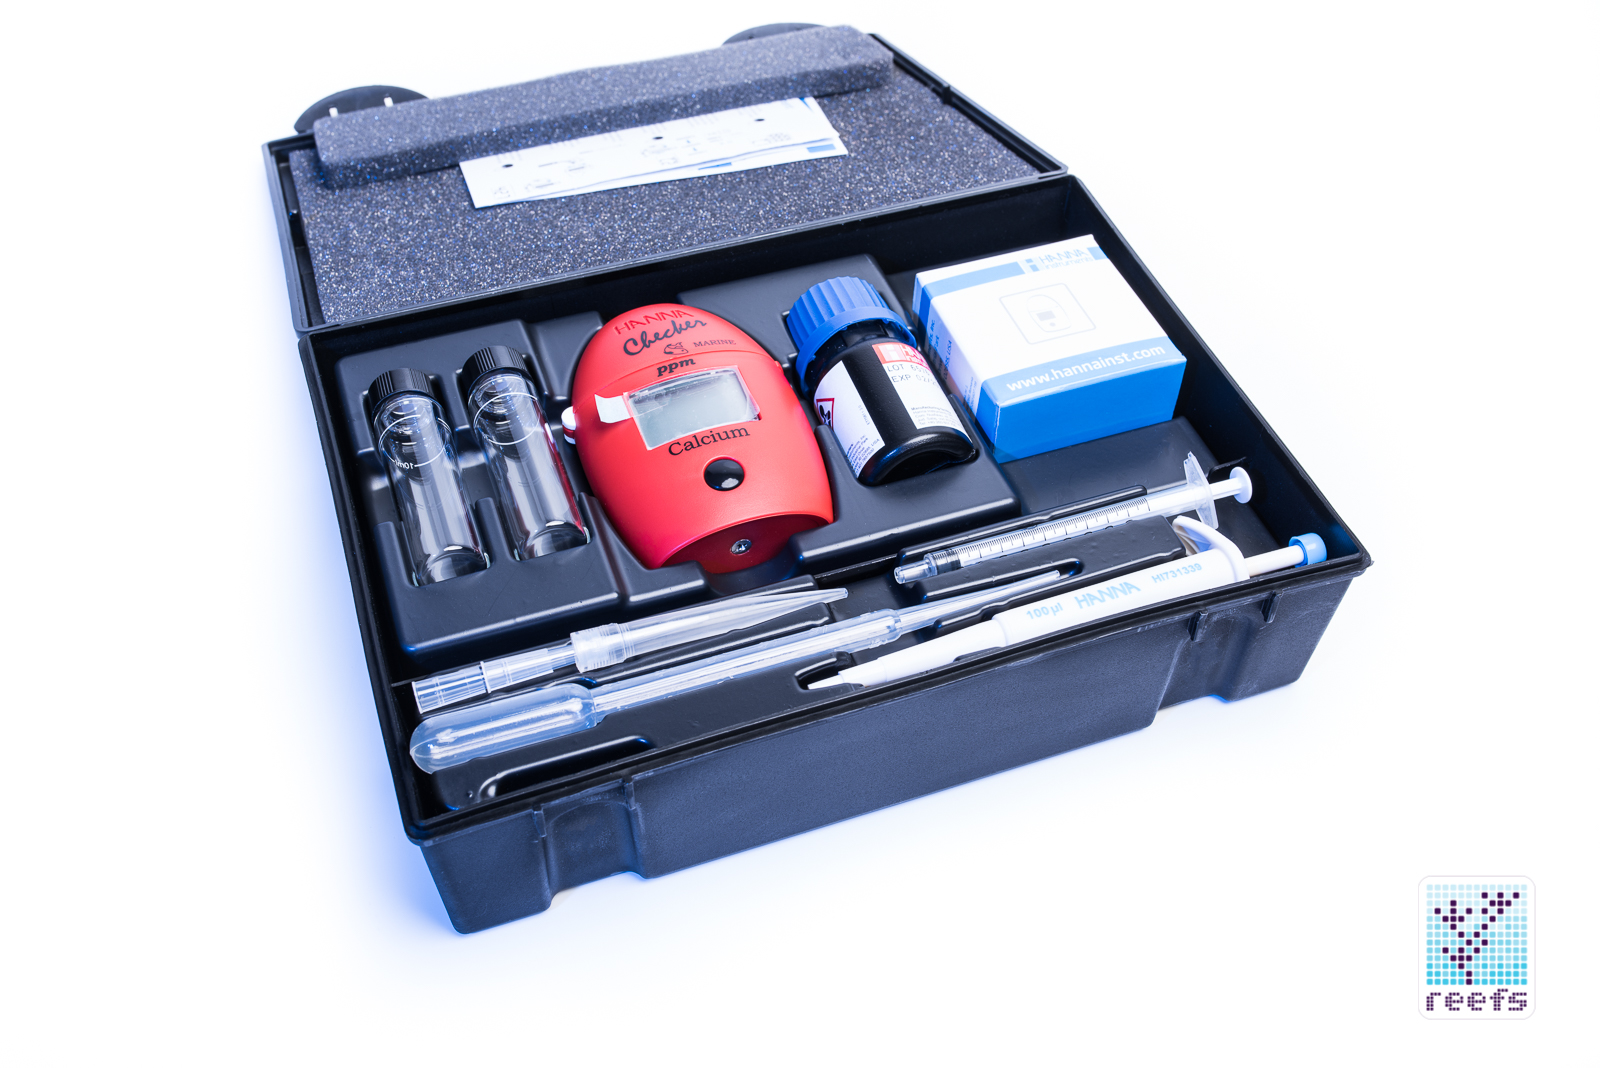
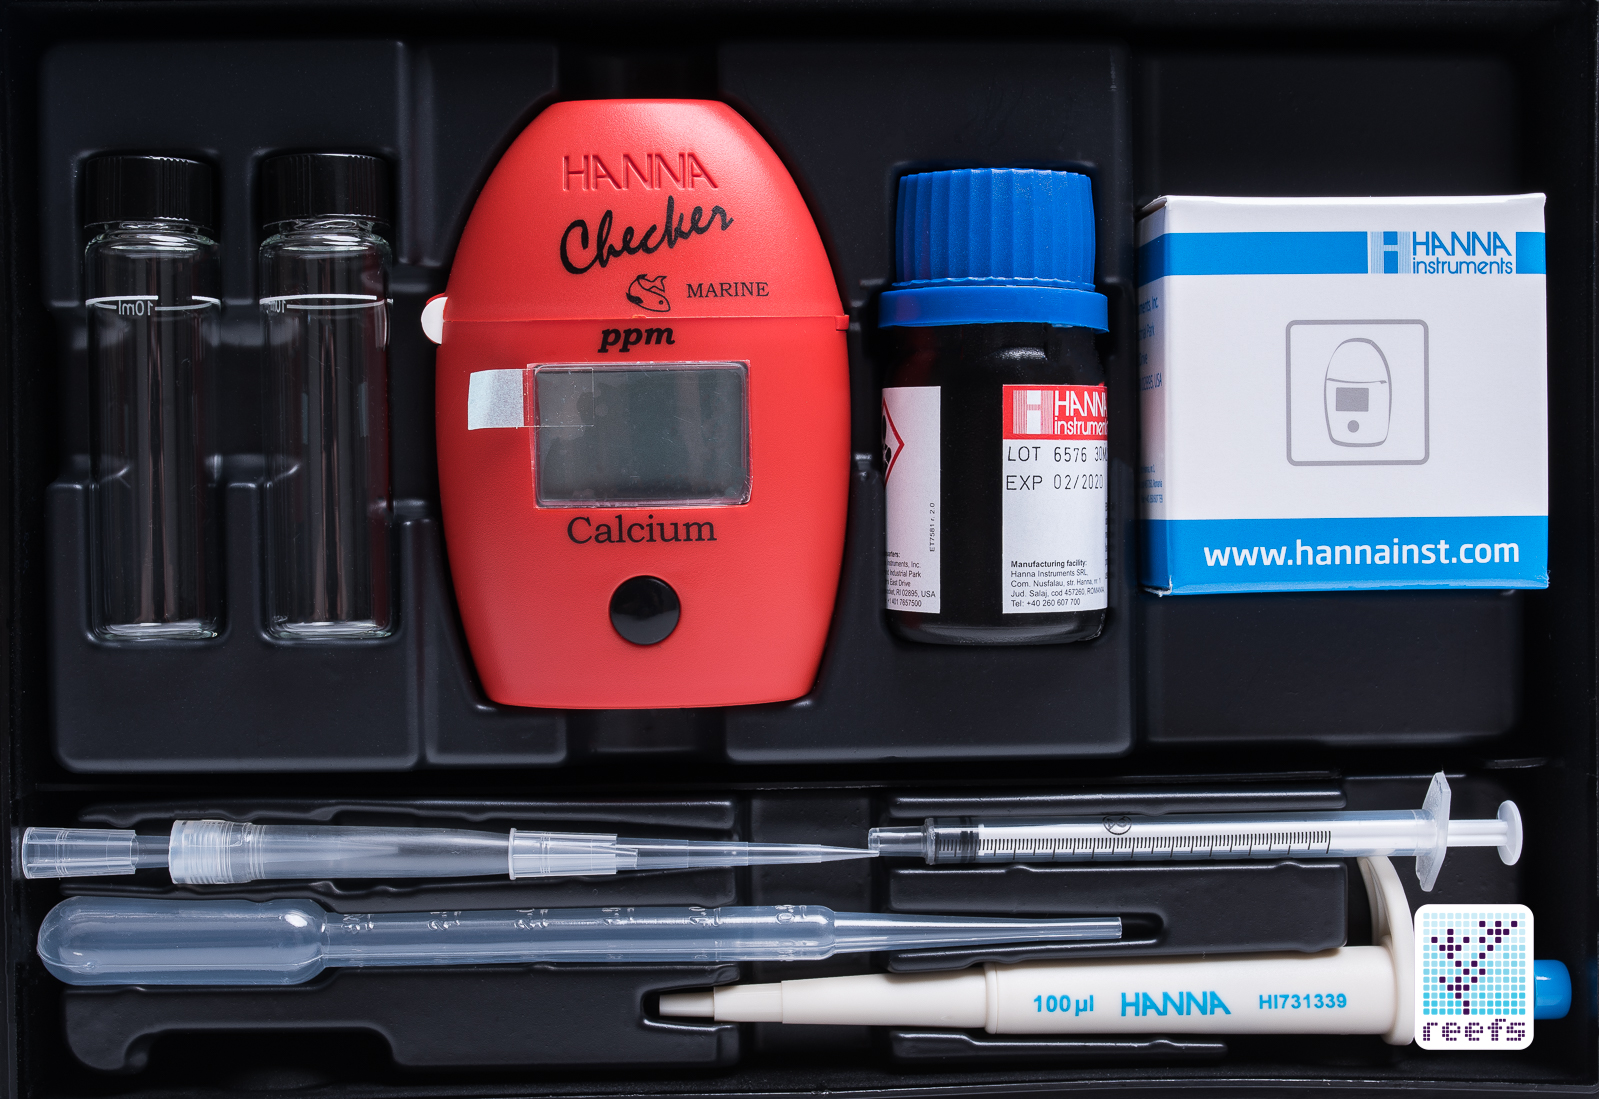
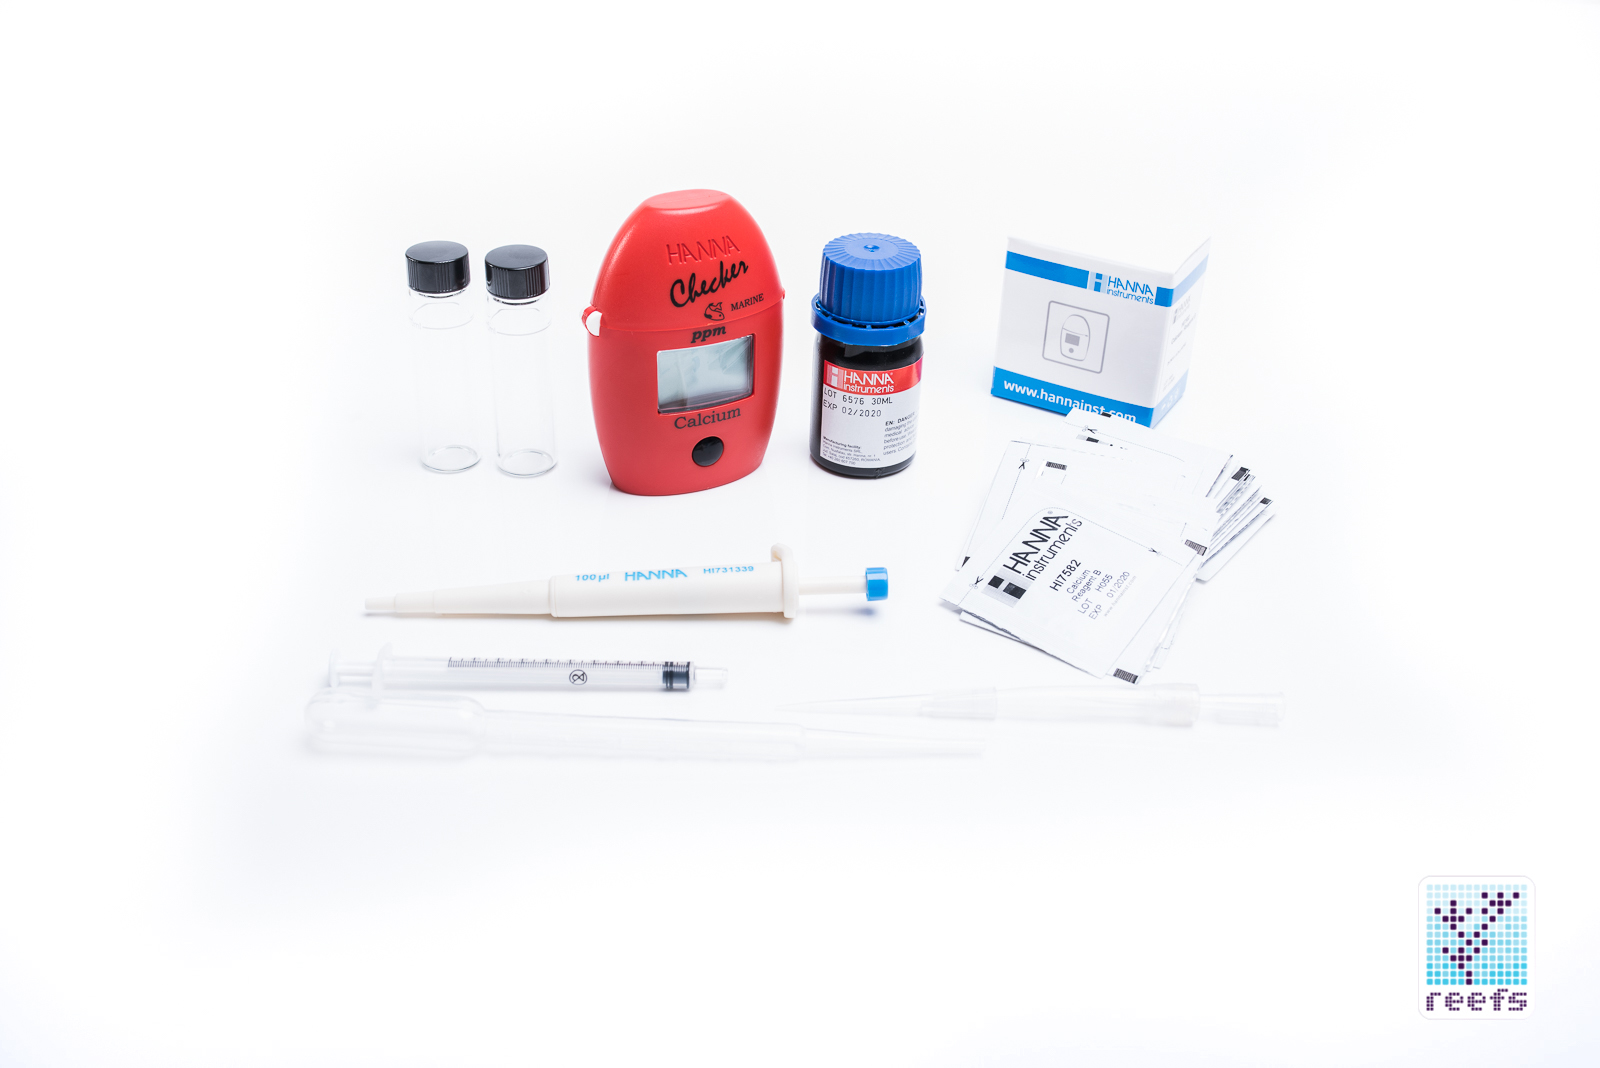
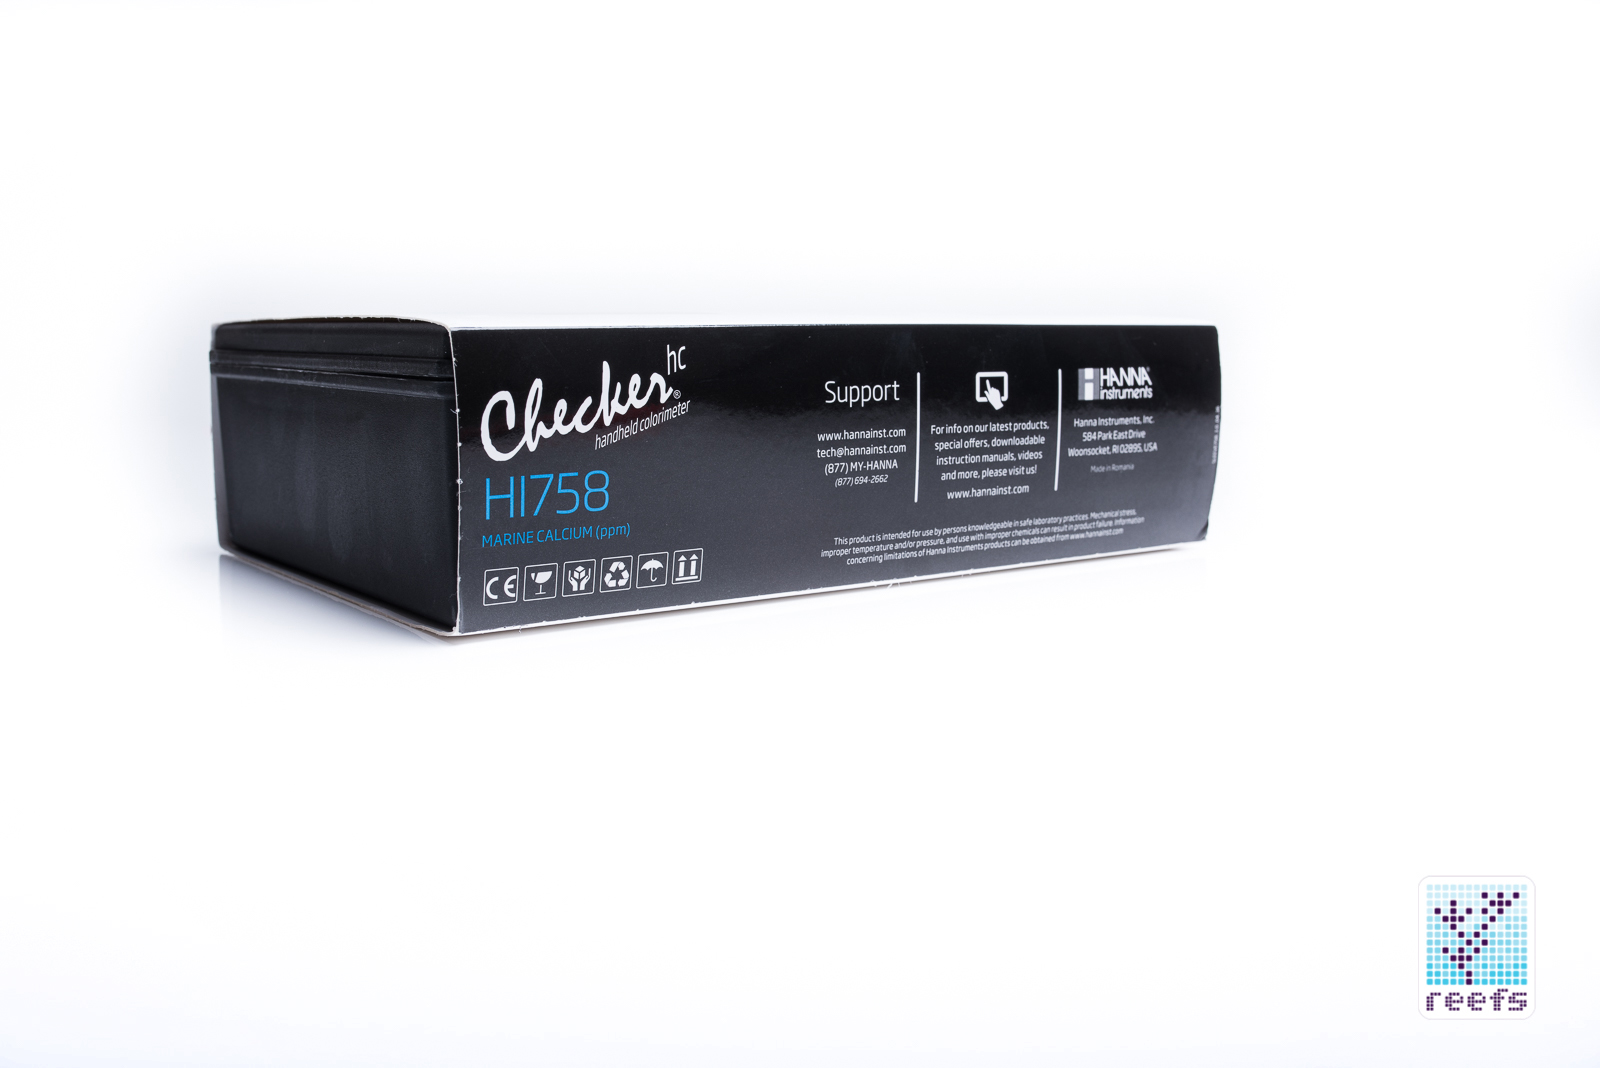
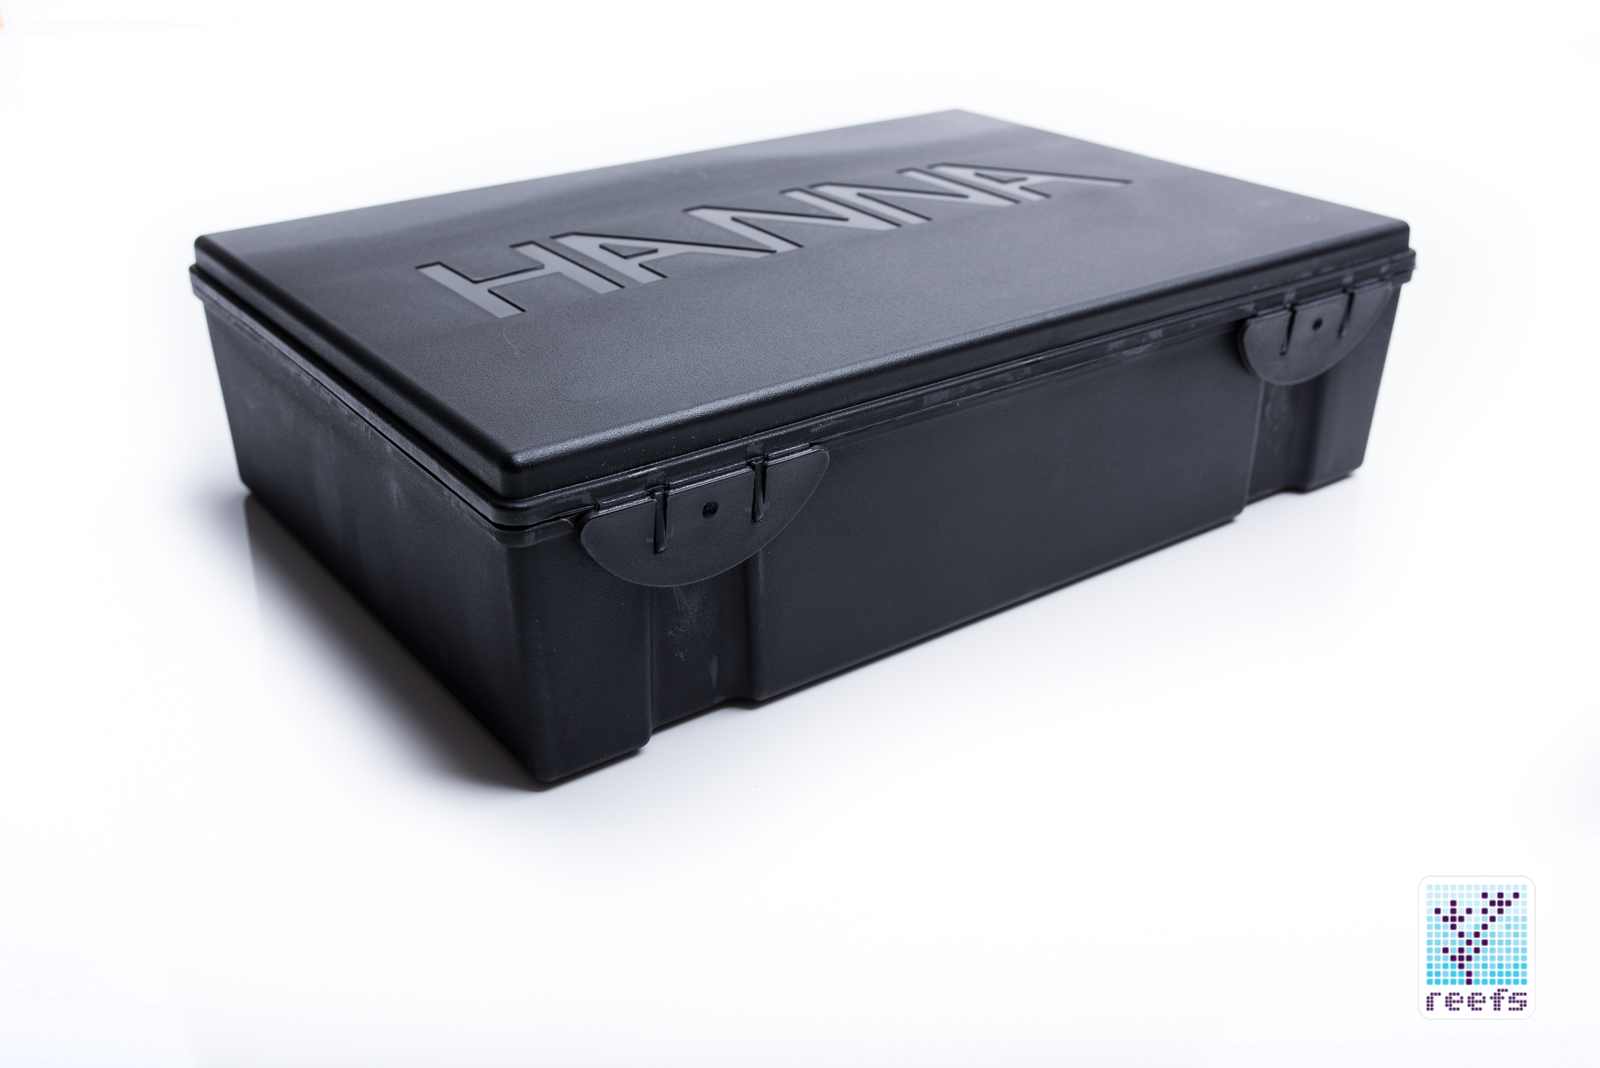
The packaging Marine Calcium Checker HC comes in is pretty perfect. A cardboard sleeve with some basic information about the device printed on all its sides envelops a heavy duty, black plastic case, in which the Checker’s components are stored. The use of opaque black plastic is intentional, as light penetration is one of the main causes of chemical reagent degredation. Inside the case, we have:
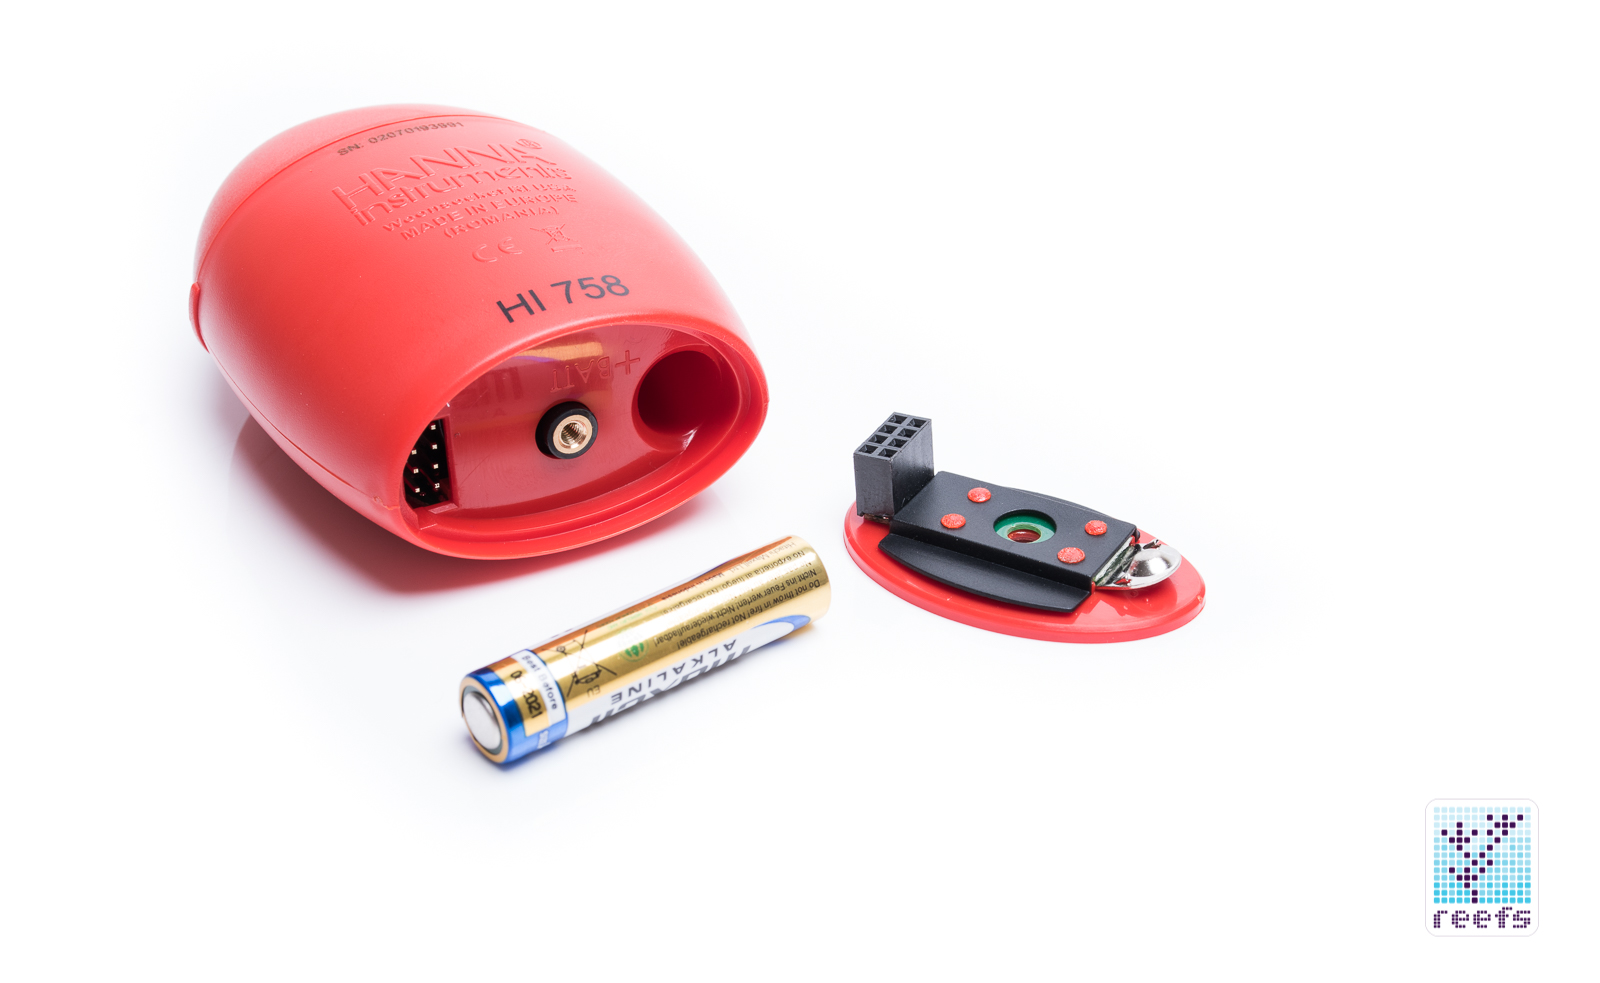
- Hanna Calcium Checker with one AAA battery already in the unit
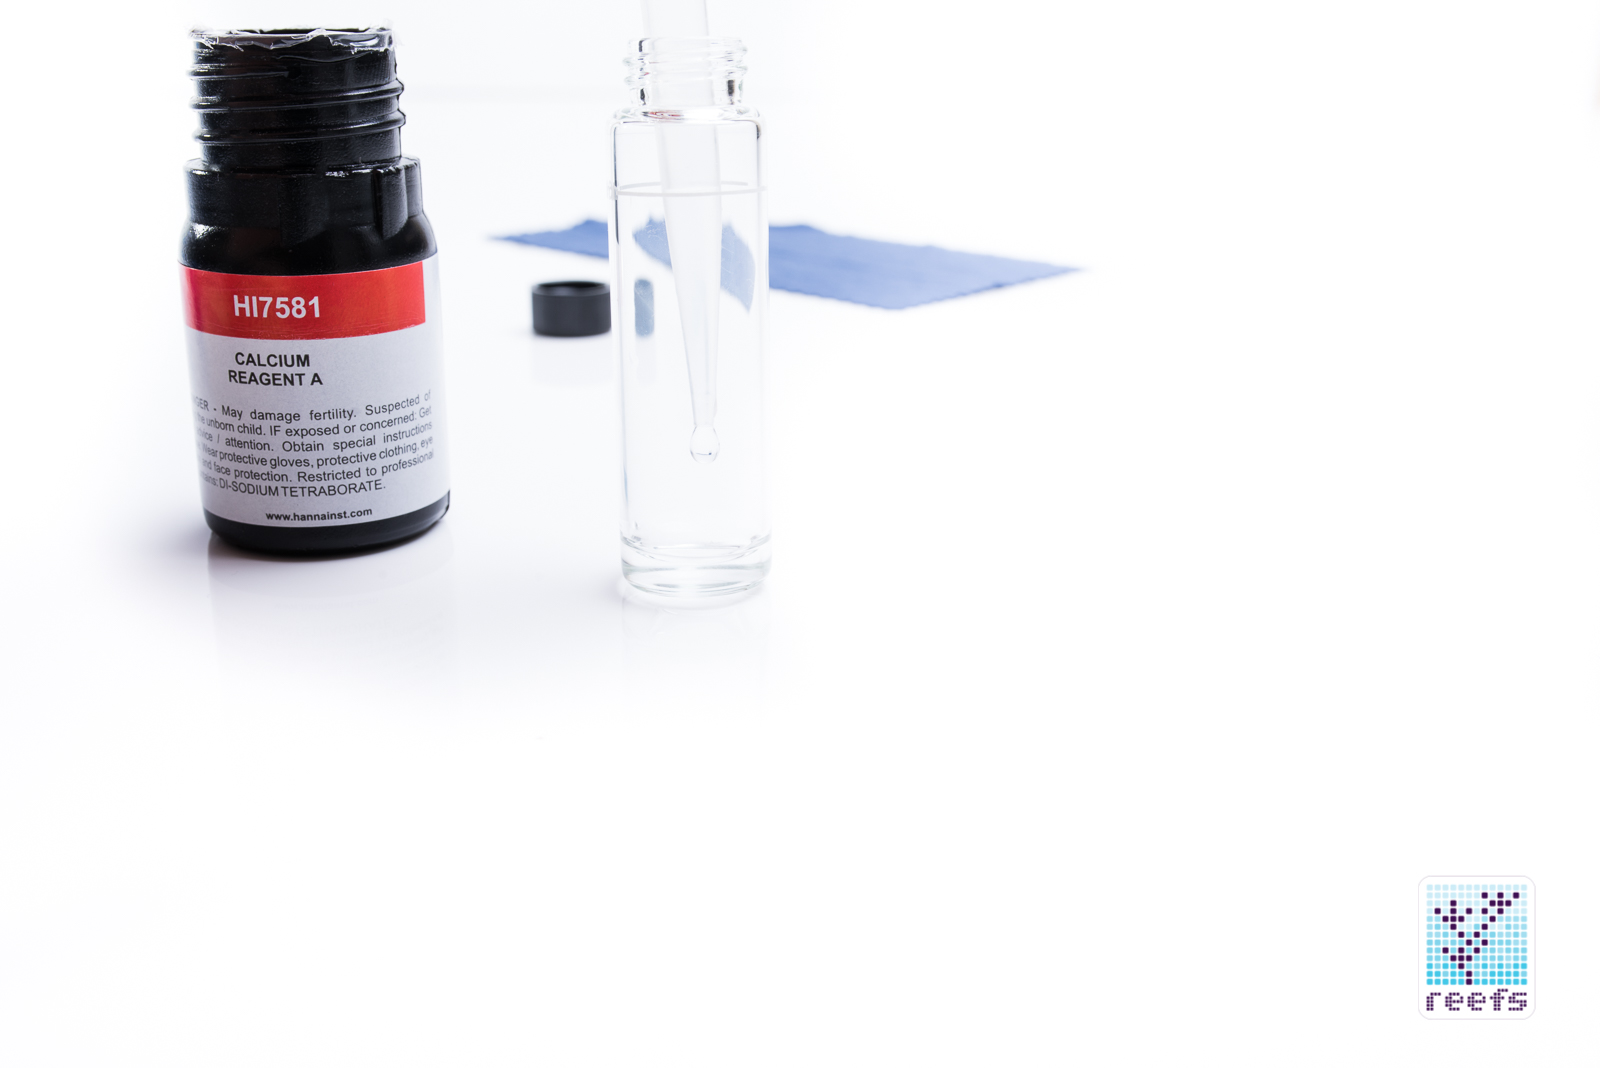
- One 30ml bottle of Calcium reagent A
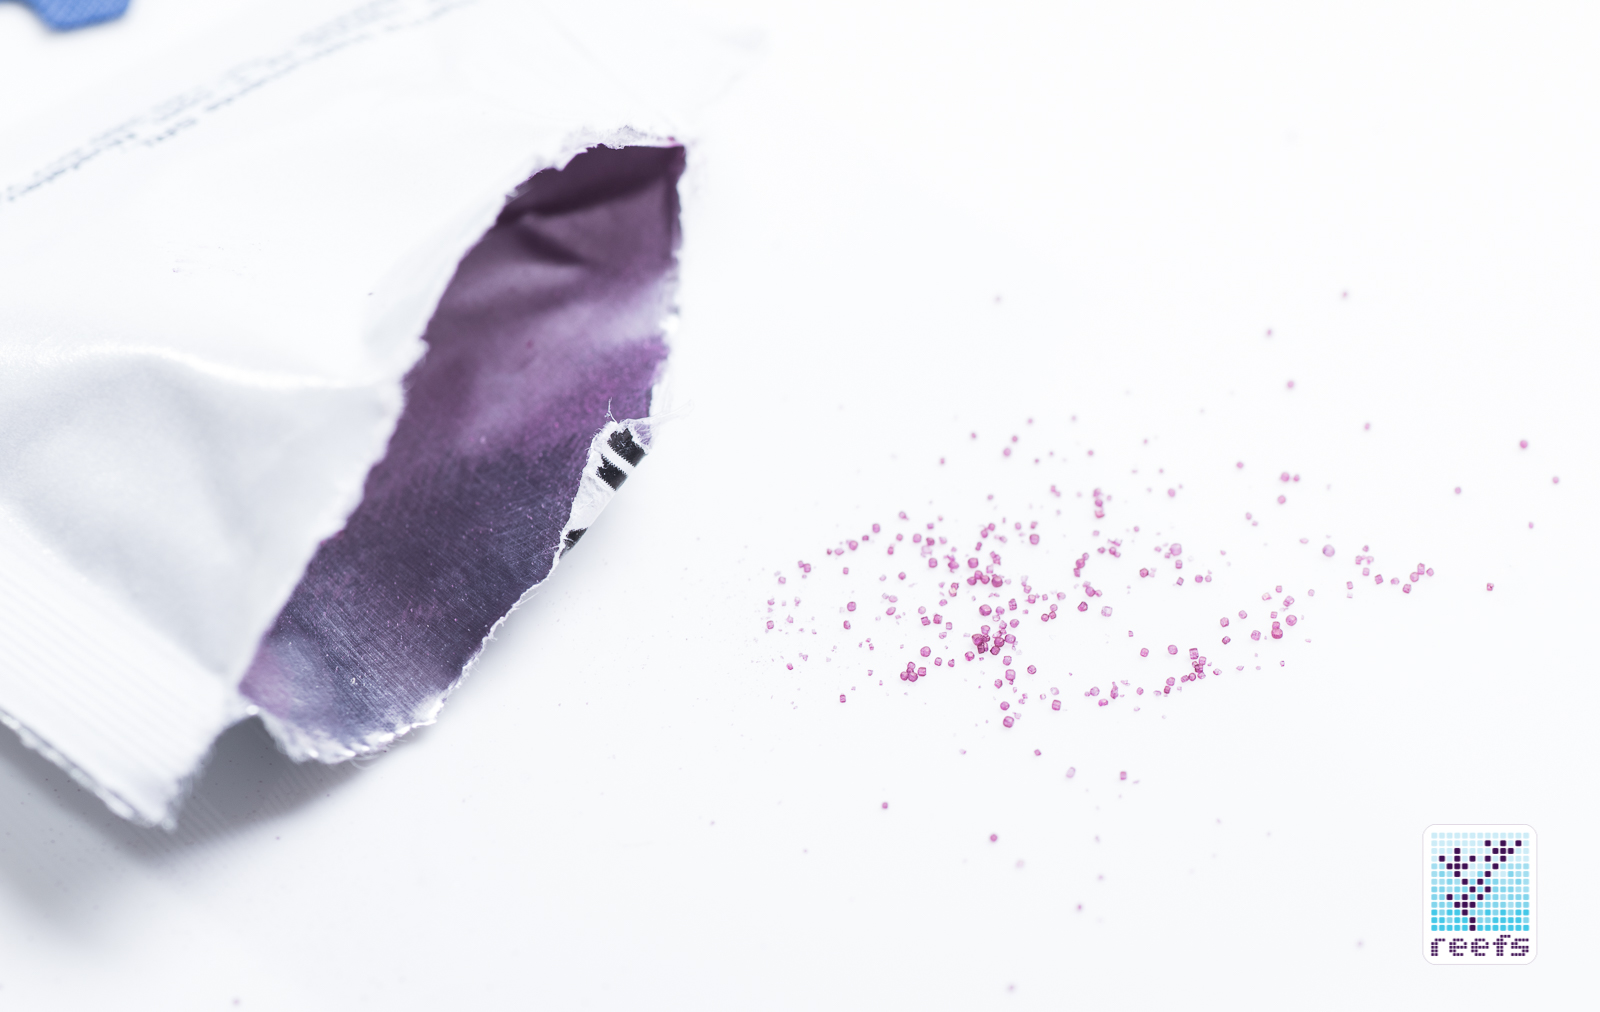
- 25 packets of Calcium reagent B
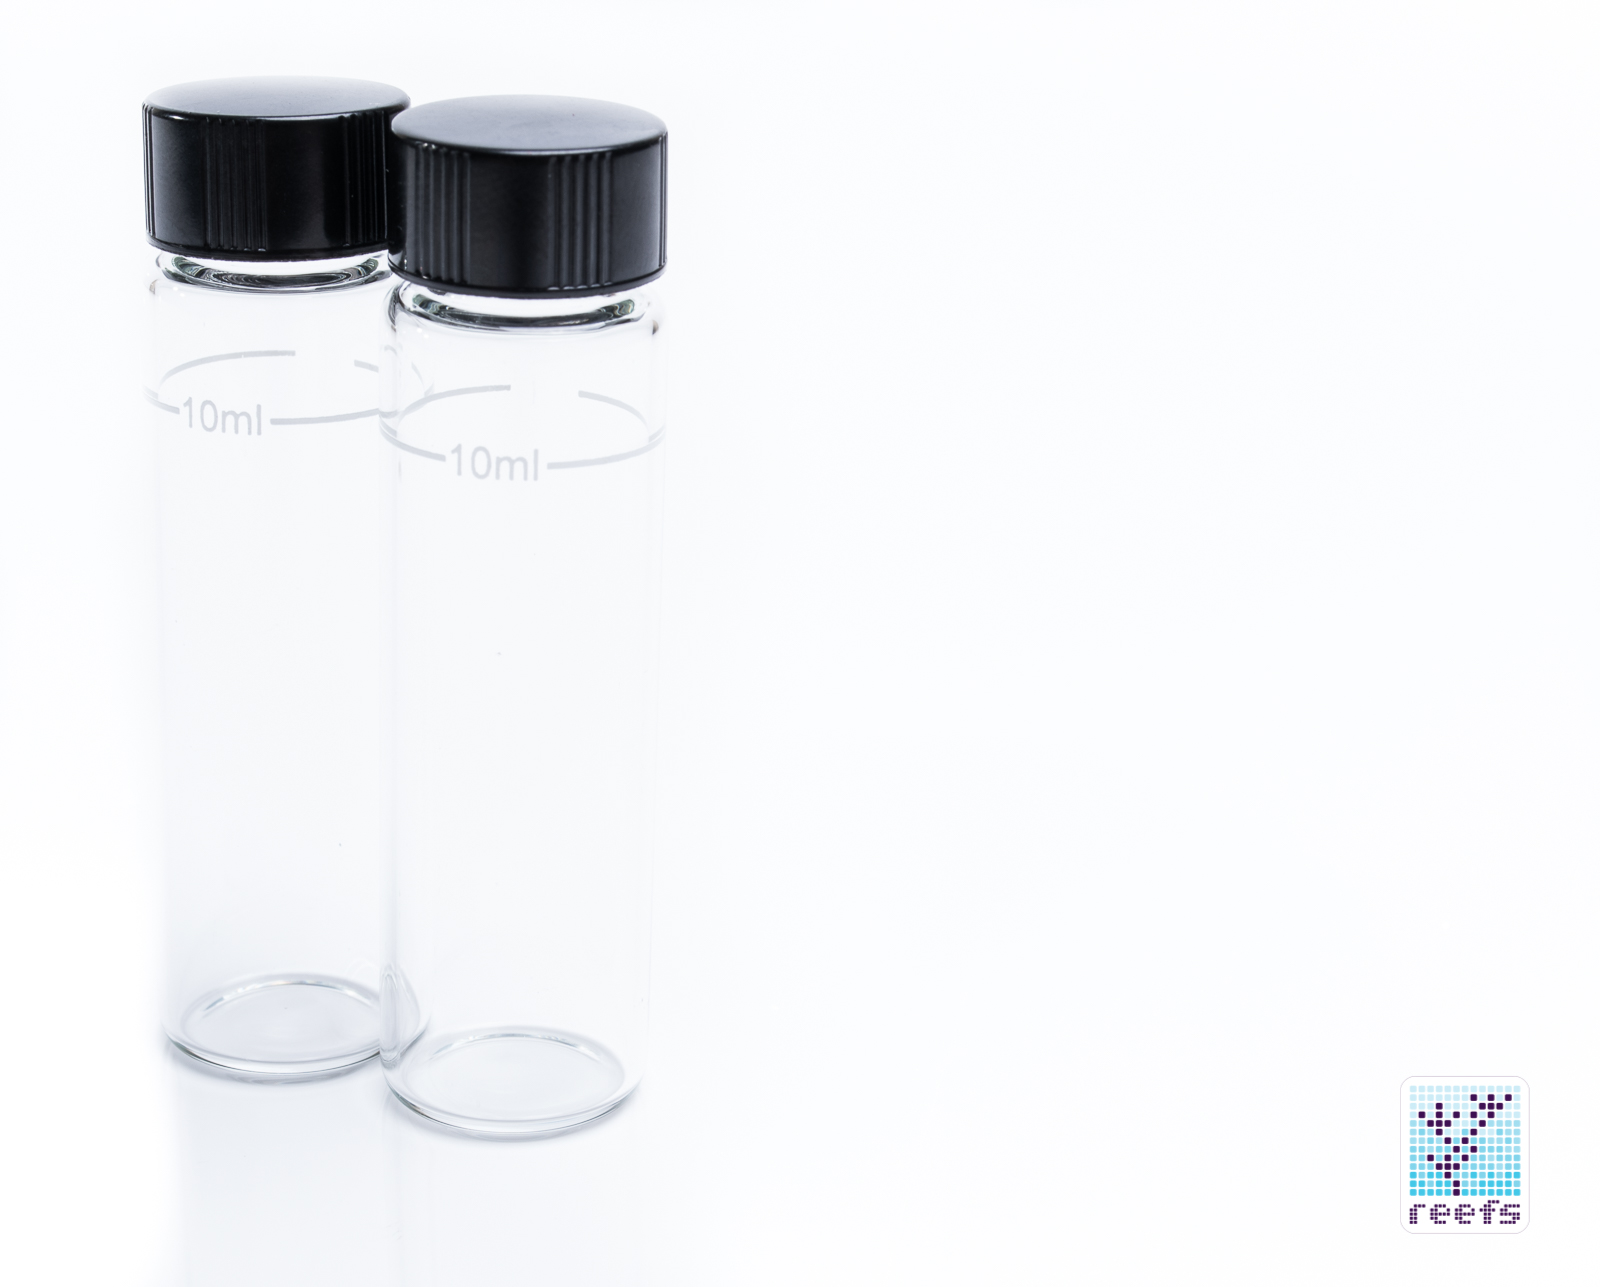
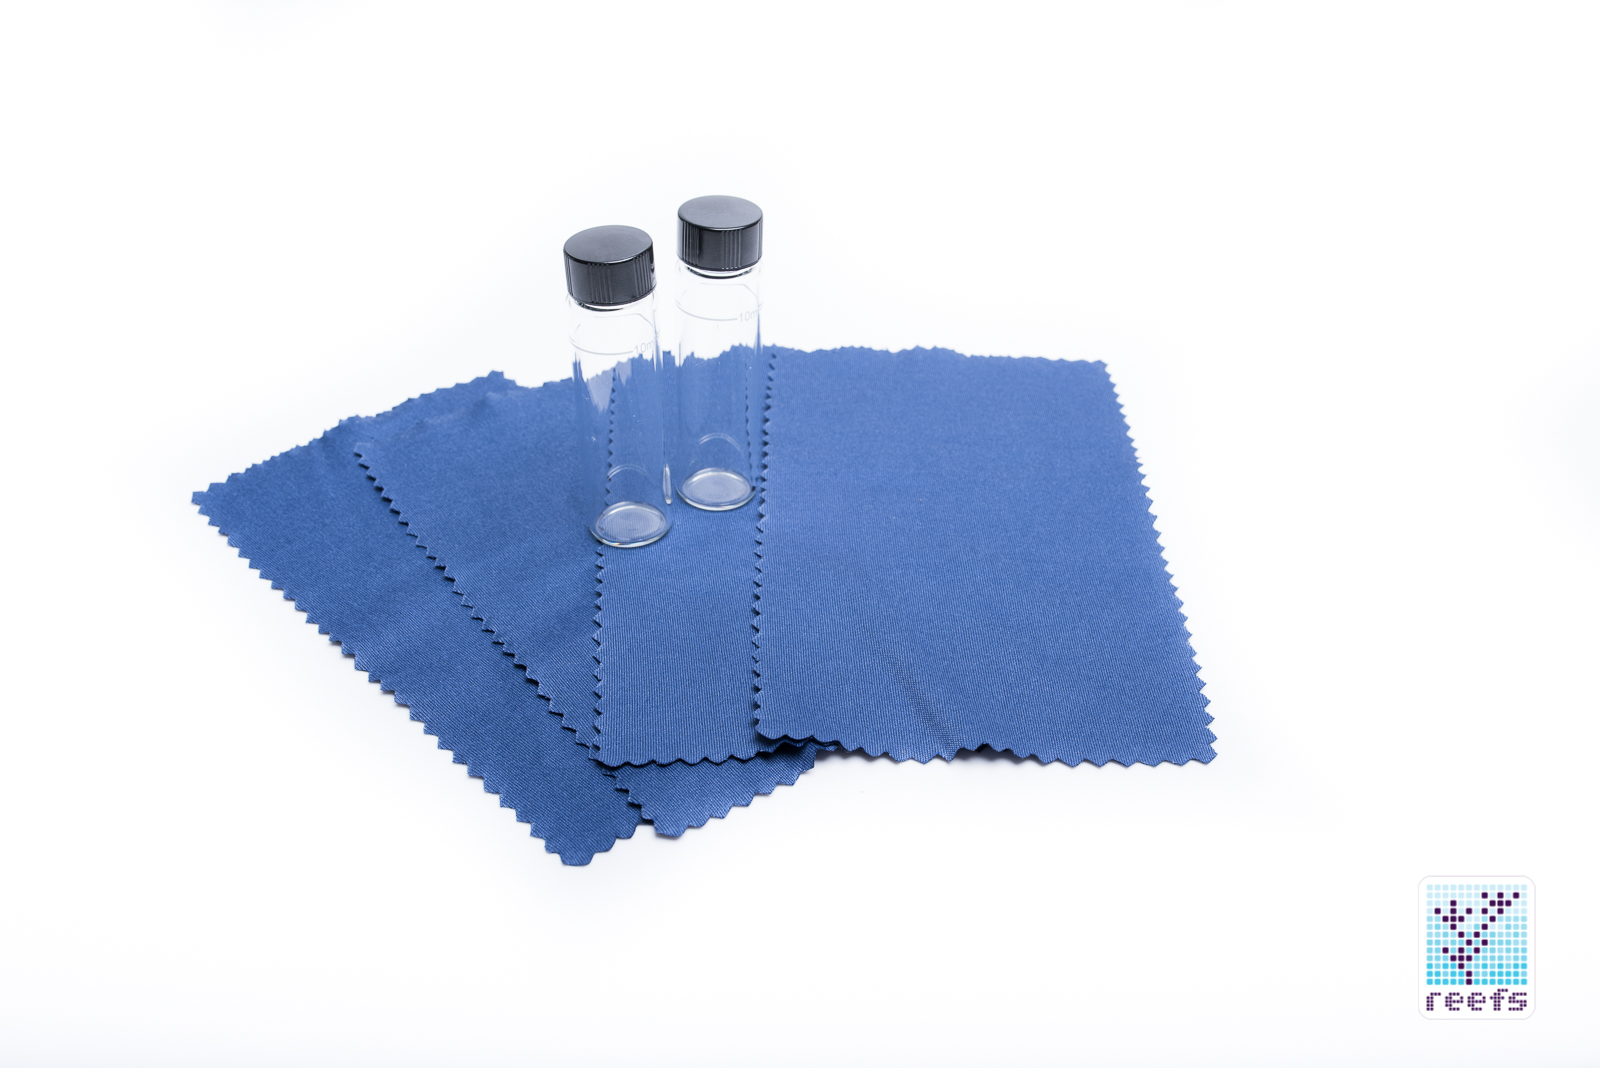
- Two 10 ml glass cuvettes for test samples
- One plastic pipette to draw distilled water
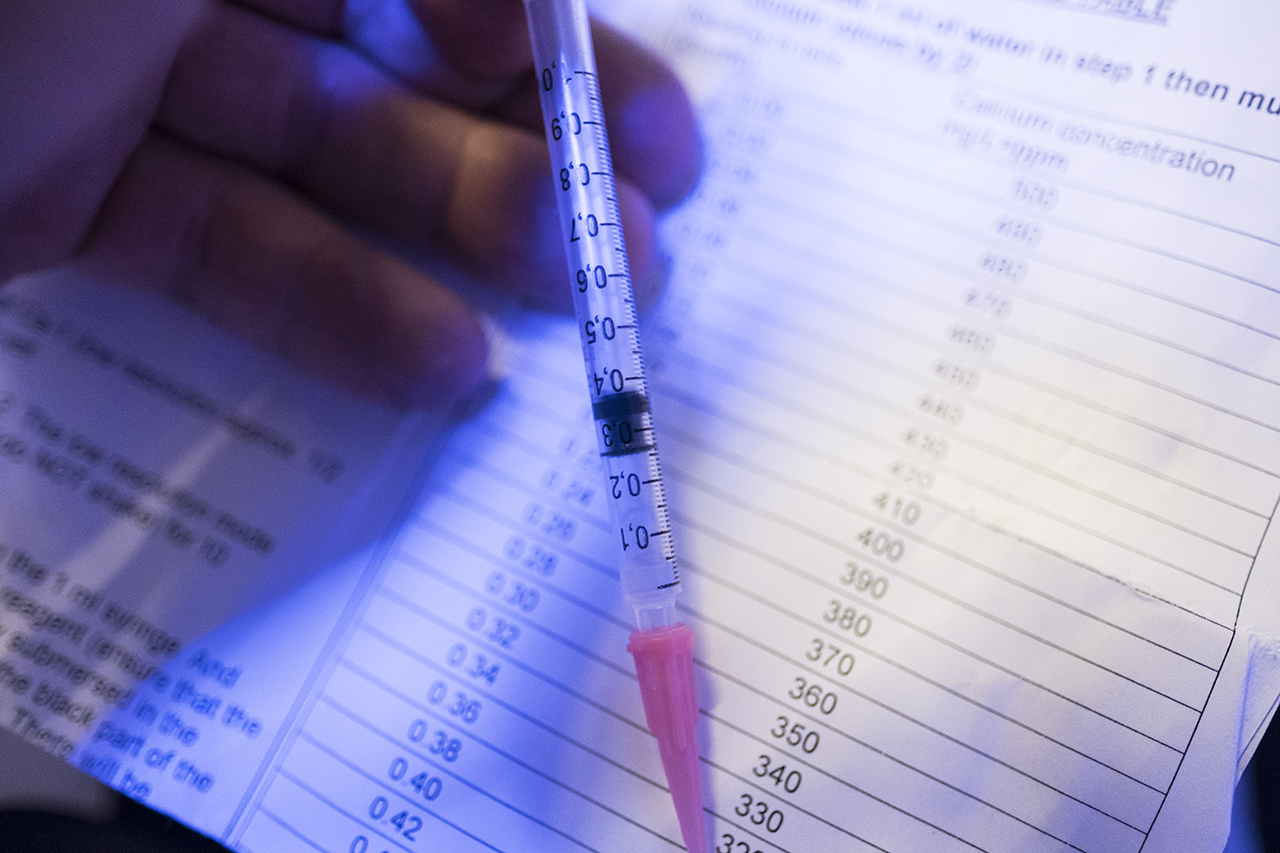
- One 1ml marked syringe with tip
- One 100µL volumetric pipette with disposable plastic tips
- A printed instruction manual and quick reference guide
All the components sit snugly in a plastic mold inside the case and the top has a foam insert for additional protection. It all looks professional and sturdy.
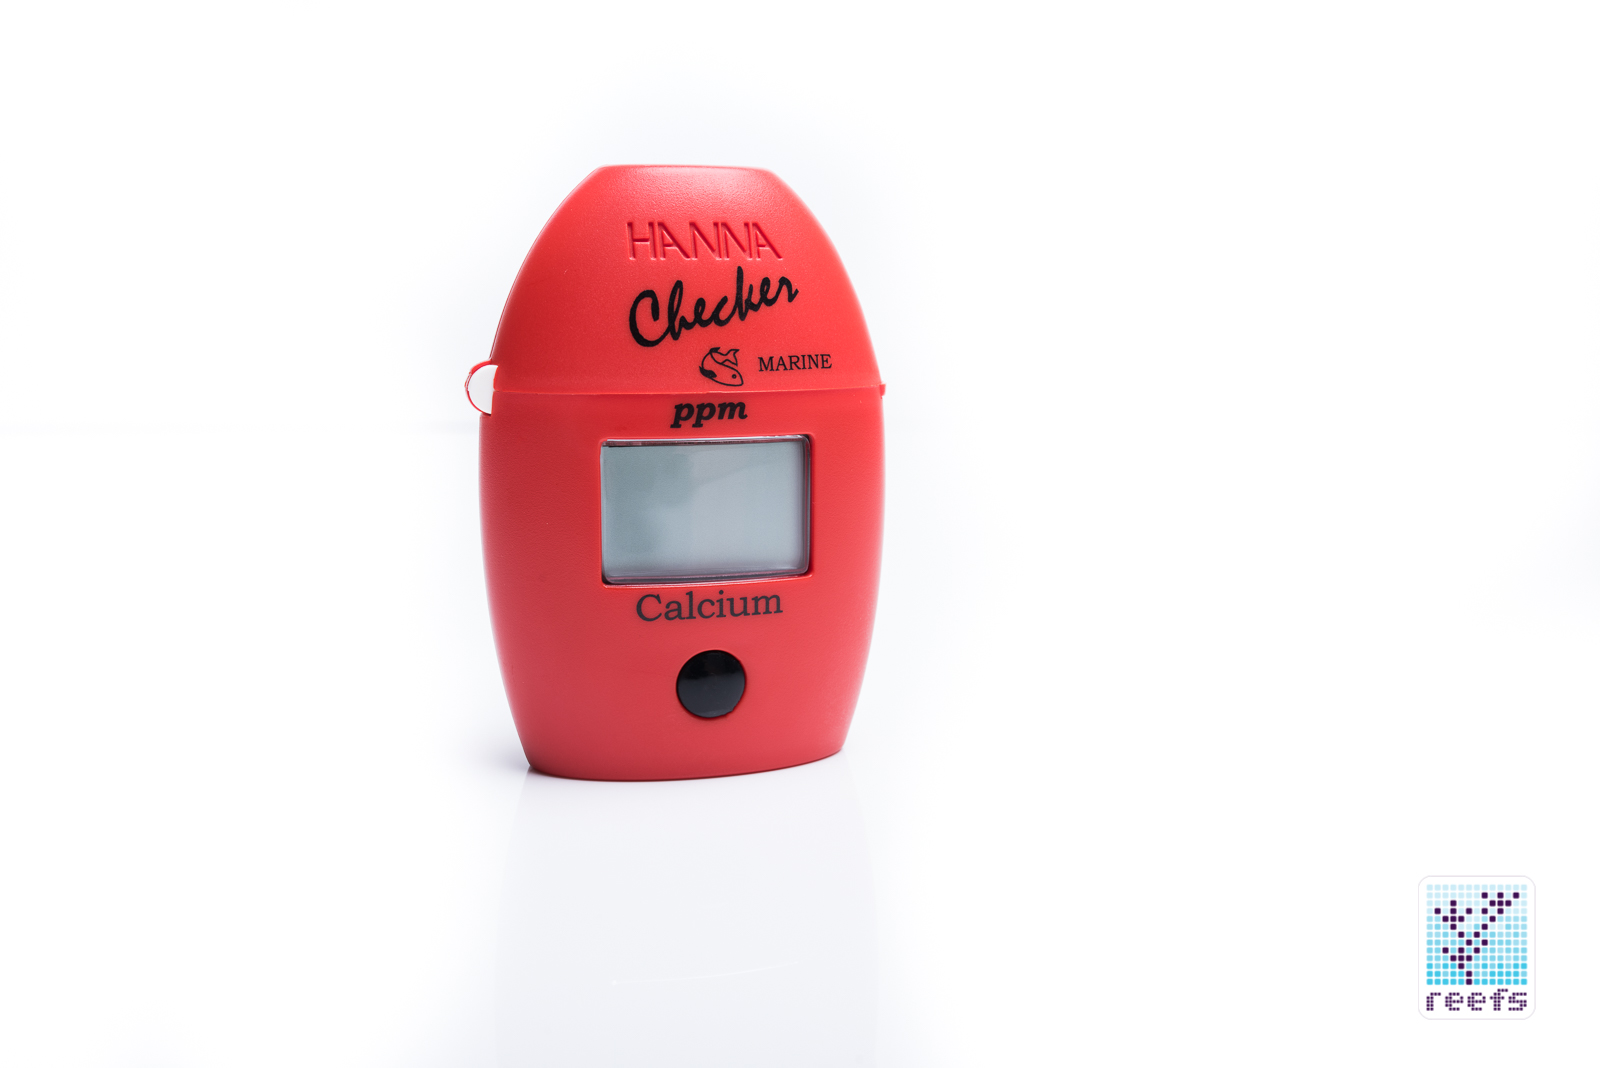
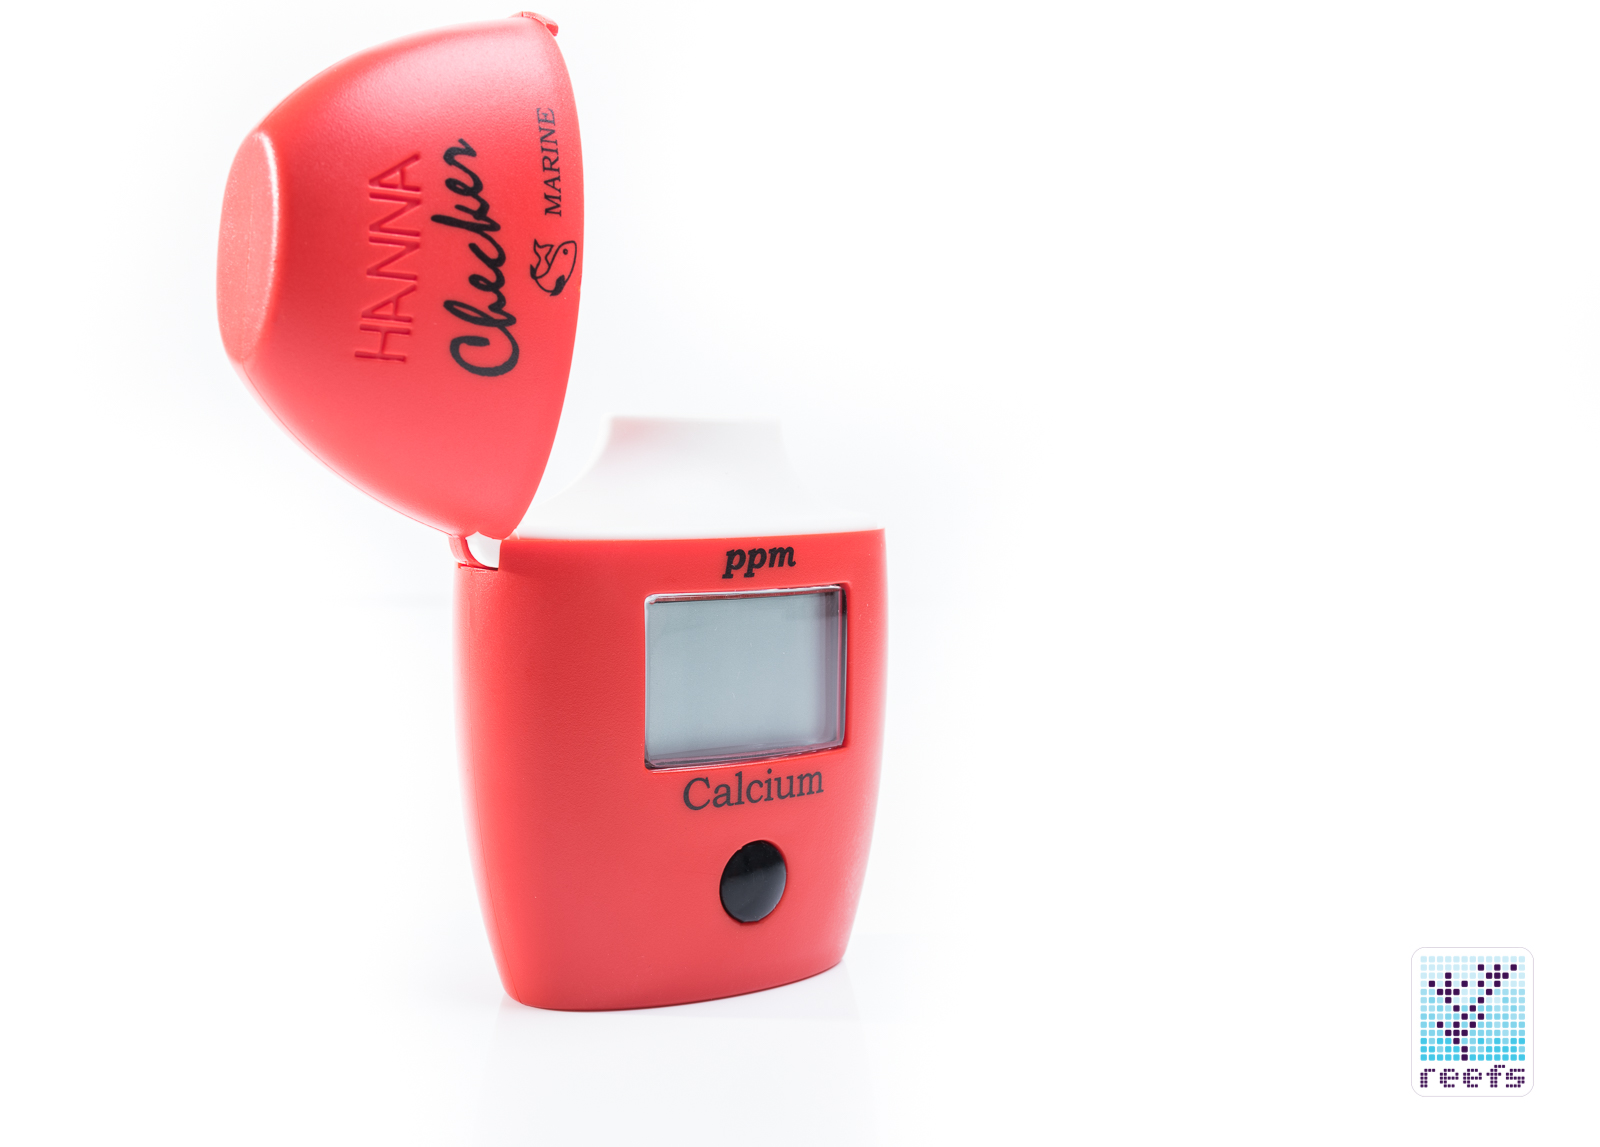
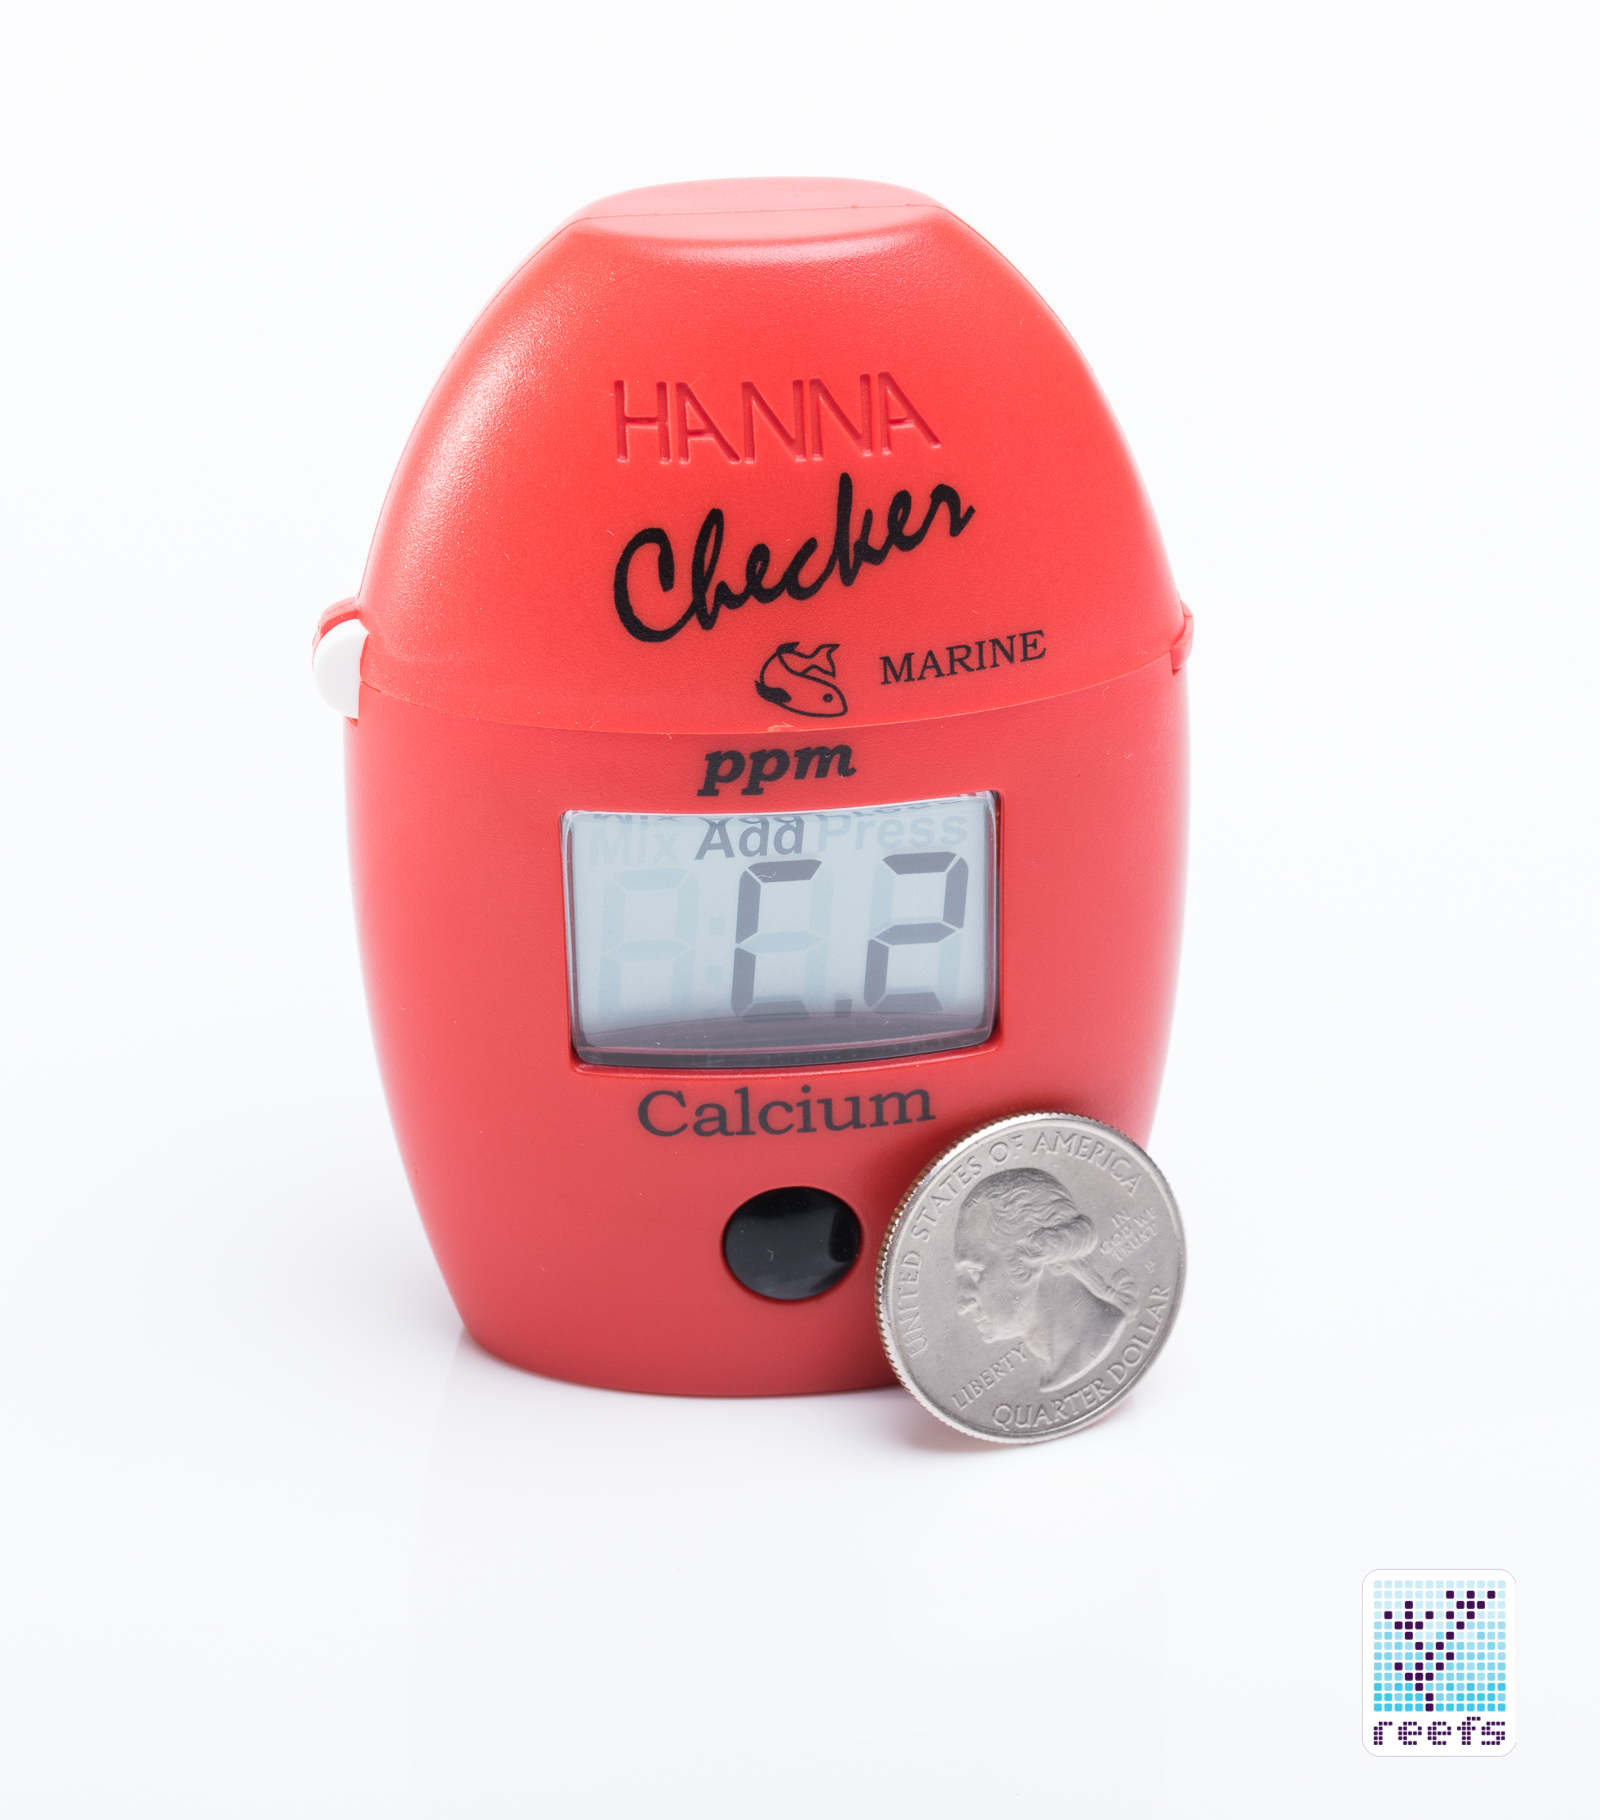
THE CHECKER
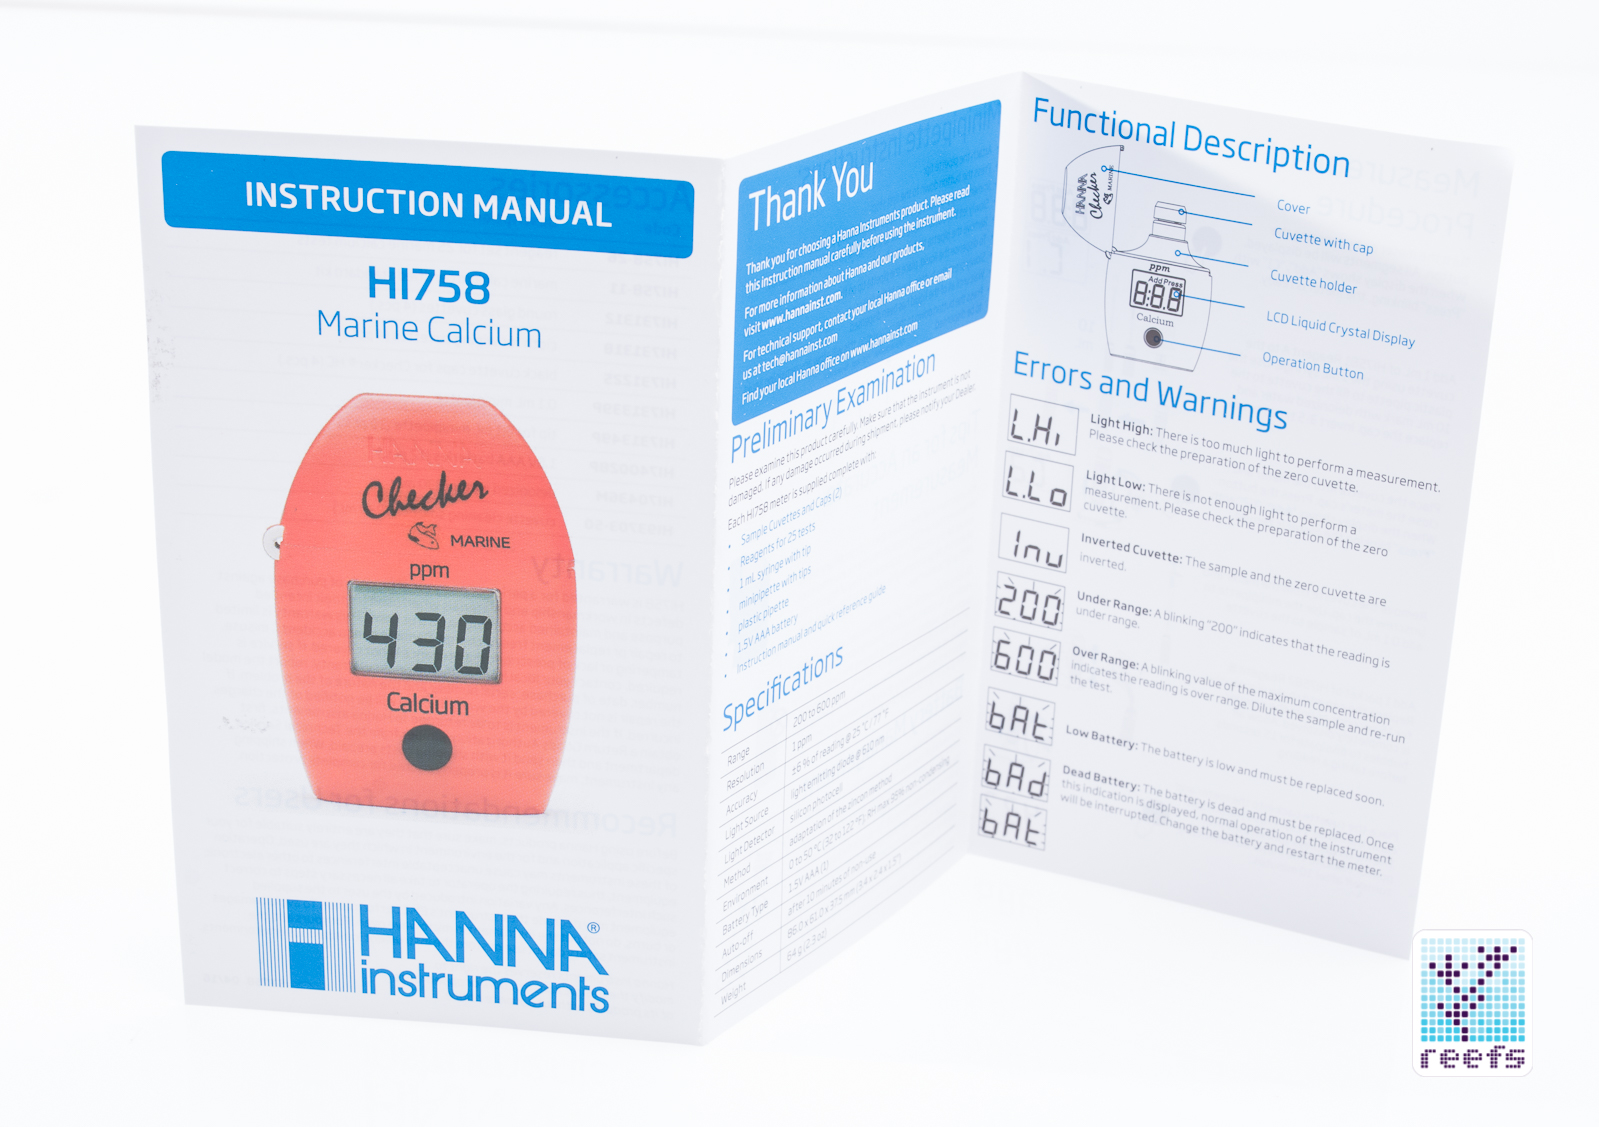
The centerpiece of the whole Calcium Checker package is the Checker itself, of course. If you’ve never had a chance to see one, it is a very compact device, fitting in the palm of one hand. It has a testing compartment on top, accessible through a hinged door, a large, easy to read alphanumeric display in front, and a battery compartment on the bottom. Inside, there are four main parts of the colorimeter- the light emitting diode, a photocell, a cuvette chamber, and an electronic board that controls the testing process. HI758 is identical in size and shape to all the other Checkers in the line, the only visual difference being its bright red color (Hanna color codes all their Checkers).
Hanna Marine Calcium Checker specs are as follows:
Range: 200 to 600ppm
Resolution: 1ppm
Accuracy @25C/77F : ±6% of reading
Method of testing: adaptation of Zincon method
THE TESTING PROCEDURE
I have to start this paragraph by addressing some concerns people have had in the past with the Hanna Calcium Checker, especially with its accuracy of results. The team at Hanna has addressed this by providing a detailed instruction card explaining how to perform the test and how to clean the testing equipment after each session with the new checker. The reason aquarists experienced these irregularities lays in the fact that Calcium testing using a colorimeter is a rather precise procedure that involves the use of deionized water in both the test phase as well as the cleaning procedure after each completed test. I’ll explain it as I go through the testing procedure.
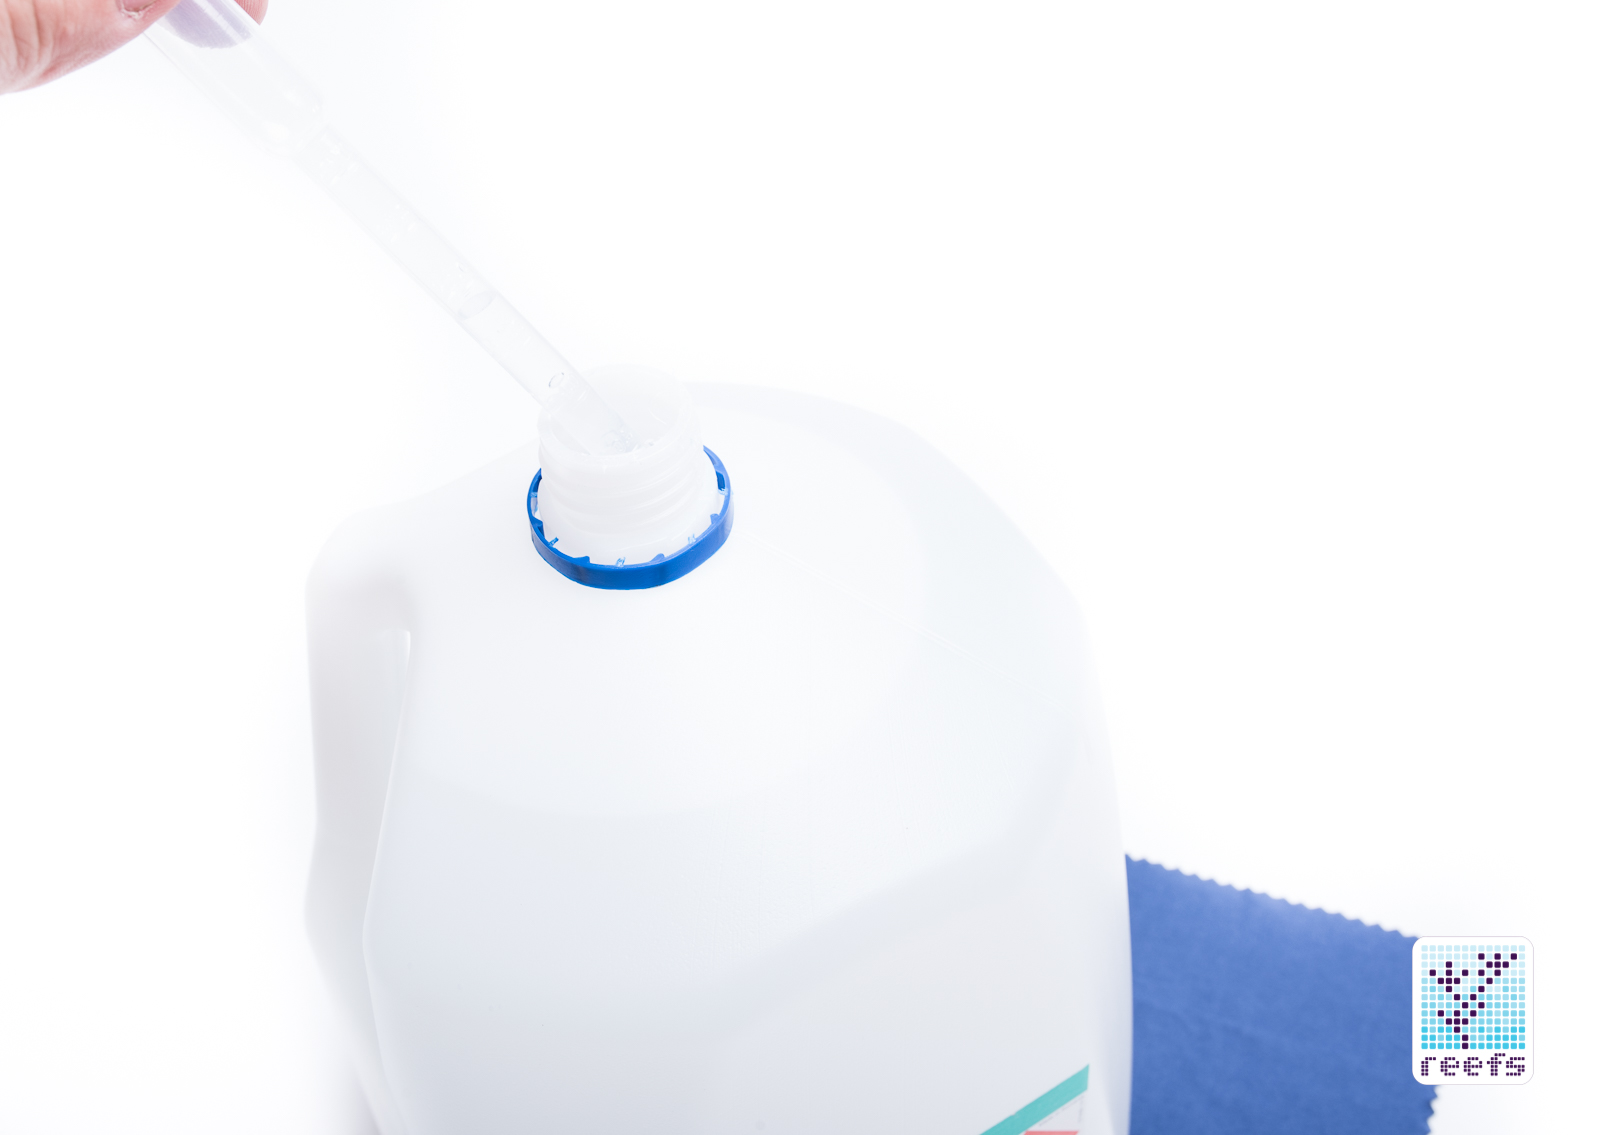
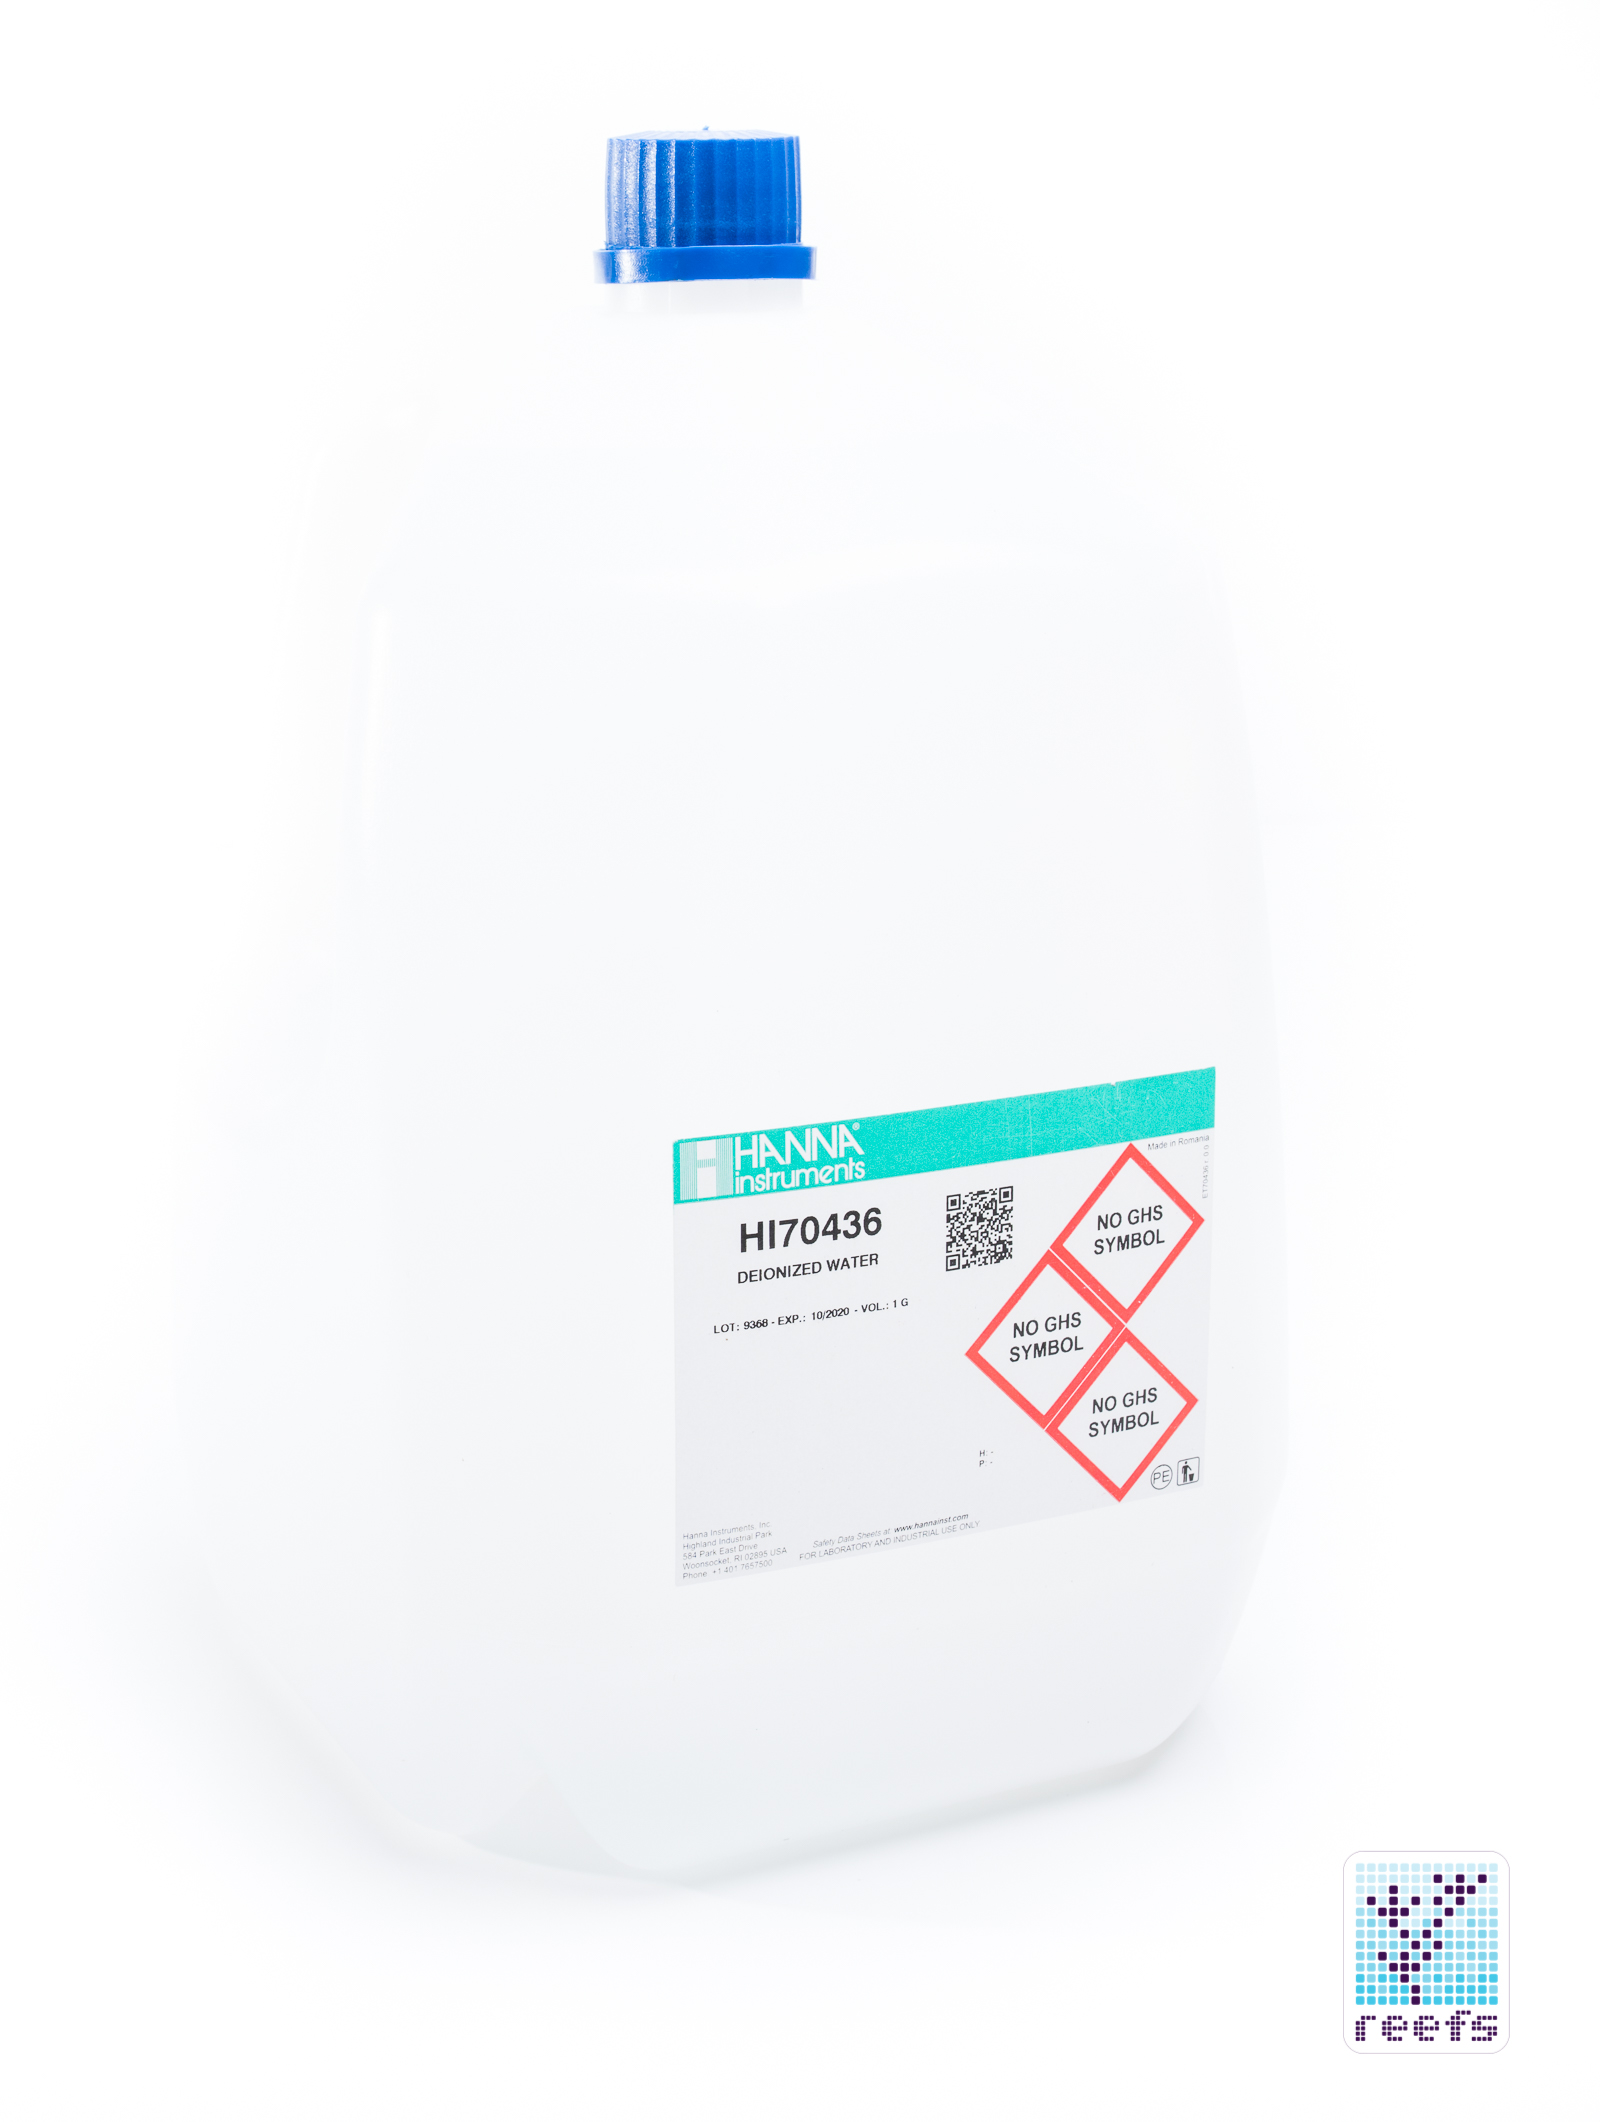
The first thing you need to acquire when testing Calcium content in saltwater using Hanna Checker is a source of deionized water. RO/DI water we all use to make fresh saltwater for water changes works for that, but it’s even better to have a bottle of lab certified DI water for the test and the cleanup. You can get that online or locally, in chemical supply stores. Hanna sells its own deionized water in 230ml bottles (HI70436M) and 1 gallon jugs (HI70436), too. This part is absolutely crucial to achieving accurate test results and should not be omitted. I actually received a gallon of deionized water from Hanna for the review and that is what I’ve been using to clean all my test cuvettes.
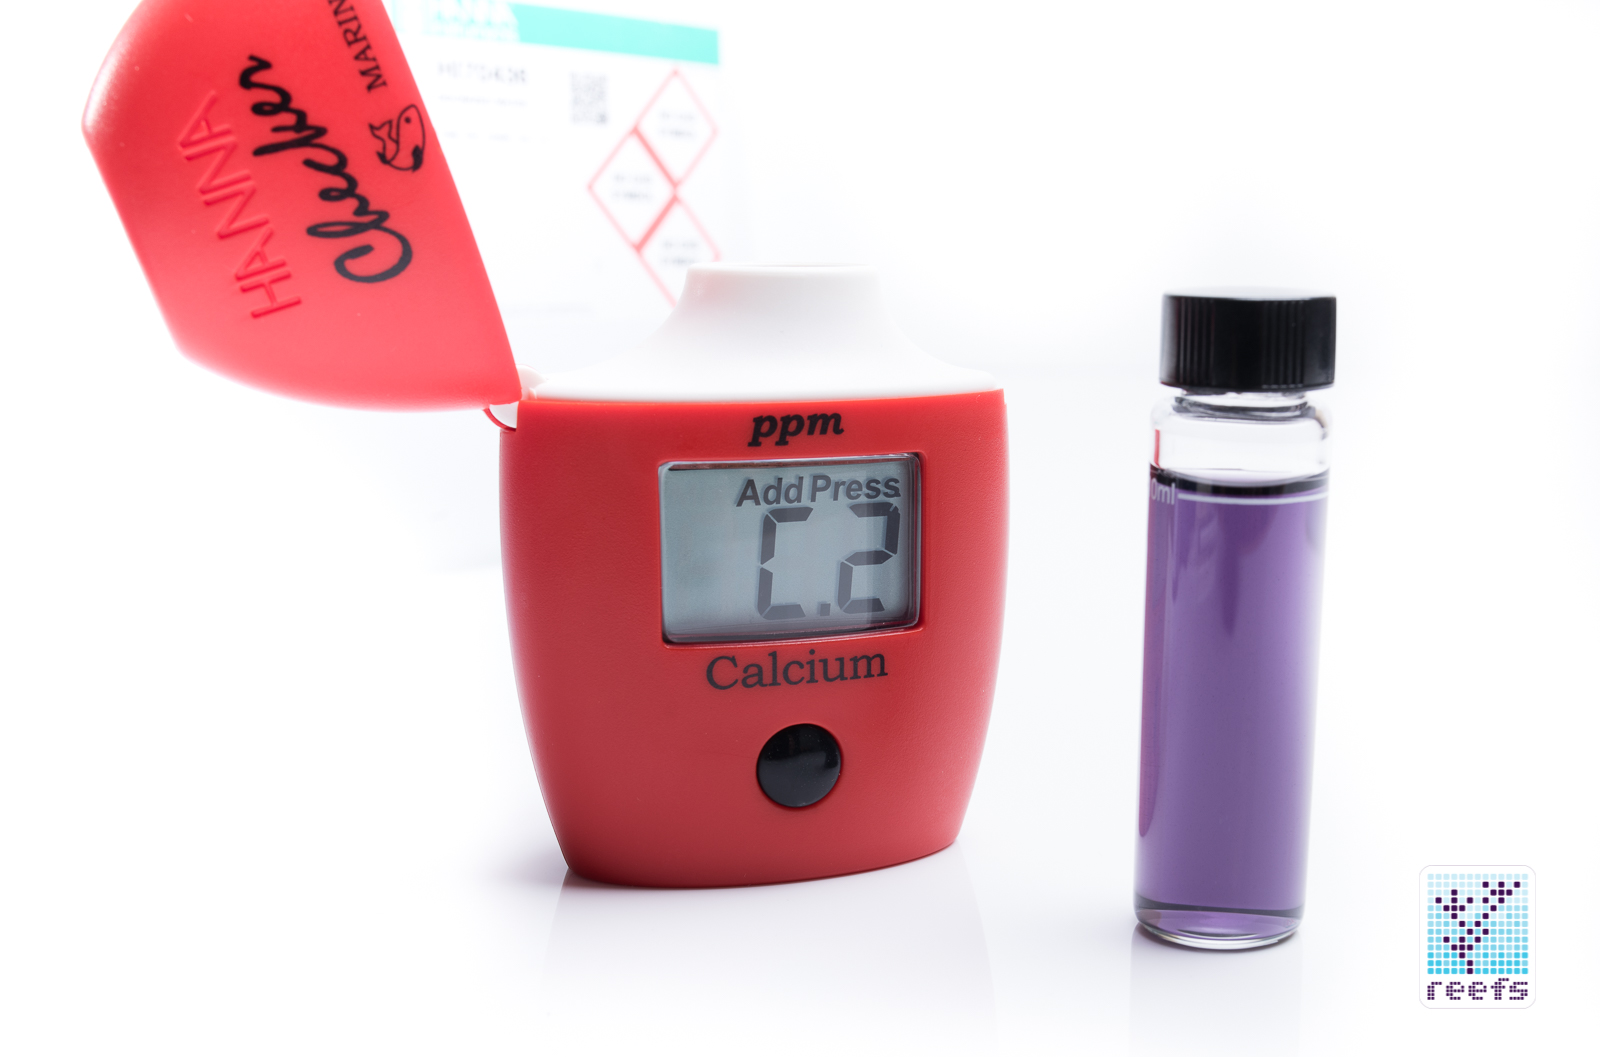
Running a test with the Hanna Calcium Checker is a multi step task, and therefore the supplied “Measurement Procedure” card is of great help. It is, in my opinion, a good practice to take all components used in a test out of the plastic mold and set them up on a table in the order that they are going to be used. First goes the Checker itself, which operates by means of a single button that, when pressed, turns the unit on. After about 2 seconds, the alphanumeric screen displays “Add C1” with the word “Press” blinking, at which point the actual test begins. It goes like this:
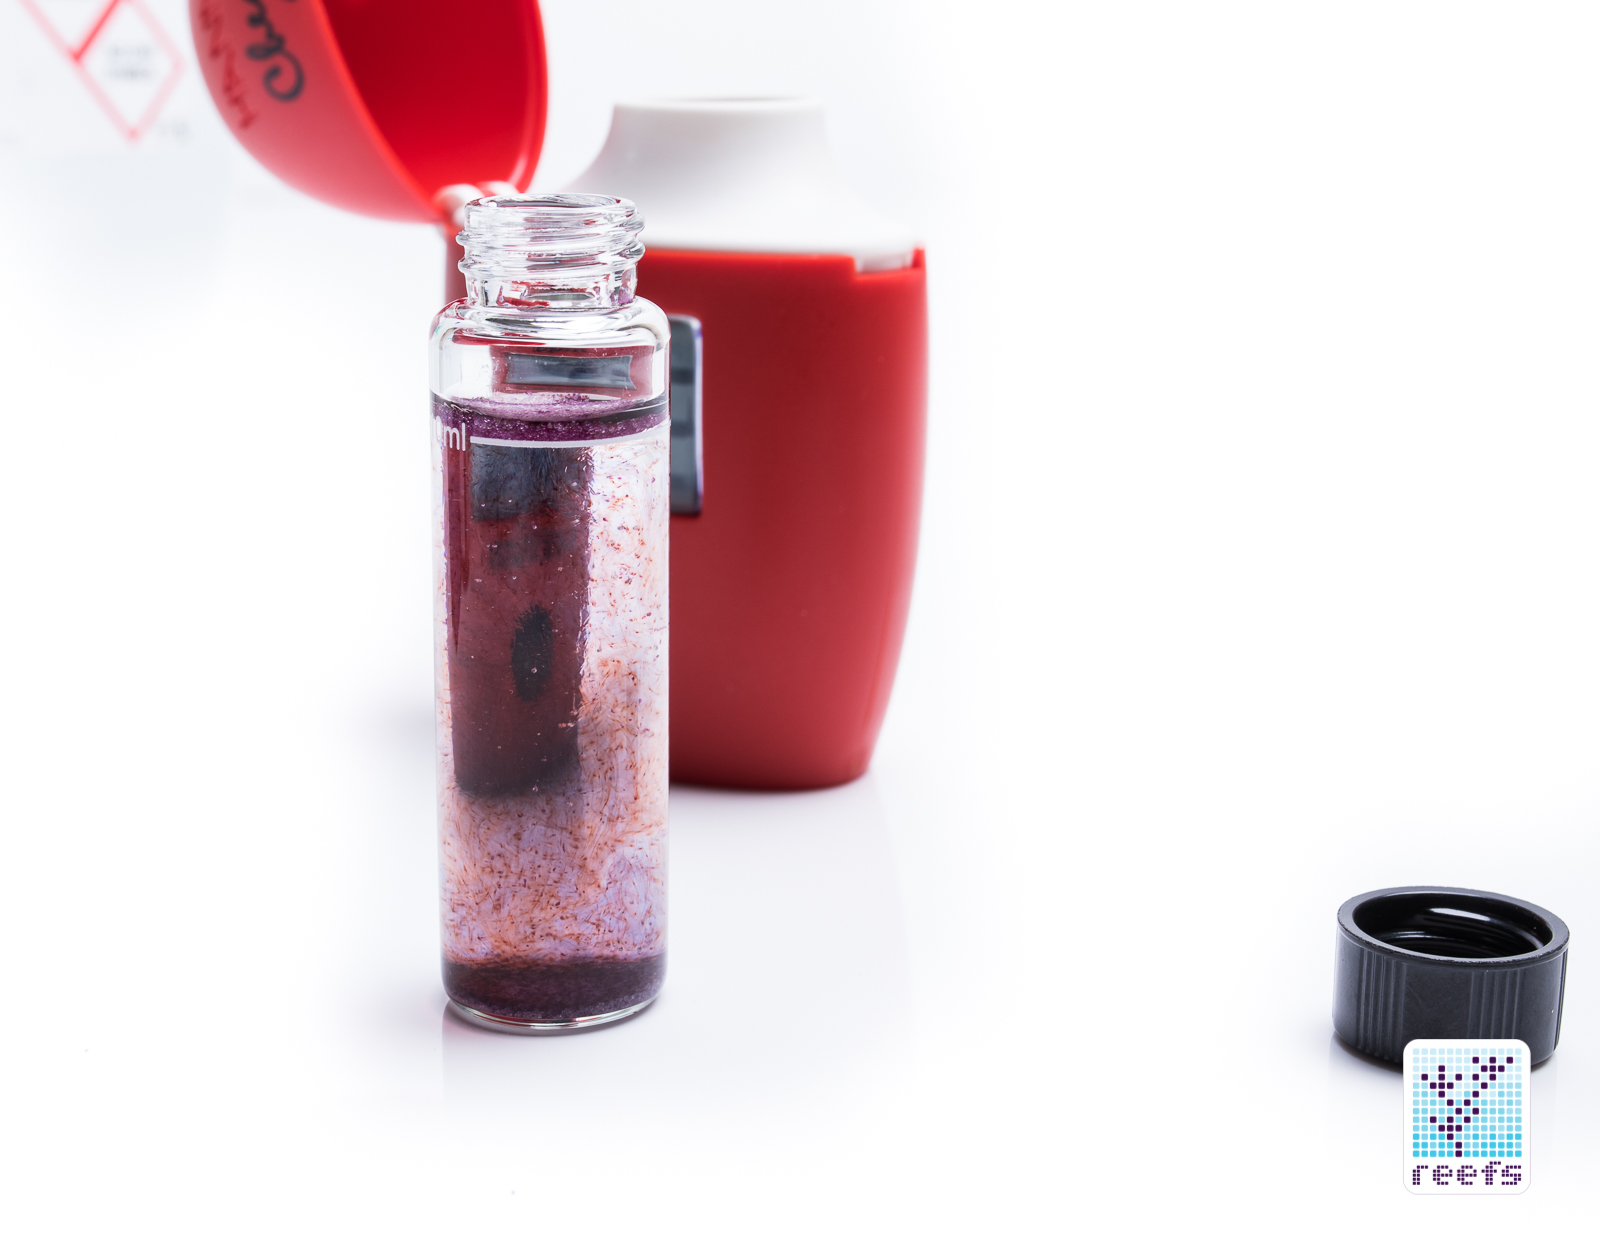
Grab one of the the two glass cuvettes (doesn’t matter which one, they are clones) and add 1ml of Calcium reagent A using the 1ml syringe fitted with the plastic tip. The next step is the essential one as it involves the use of deionized water. Fill the cuvette with the DI water to the 10ml mark, close the cap, invert the cuvette a couple of times and carefully wipe the glass with some microfiber cloth to get rid of any fingerprints, which may affect the reading. Close the cuvette and press the button- Hanna checker is now measuring the solution and after few seconds, zeroes and displays “Add C2” with “Press” blinking again on its screen. For the next step, take the cuvette out of the Checker, unscrew the cap and draw a sample of water to be tested using the volumetric pipette. The volume of water sample is extremely small (100µL), so it’s important to make sure the sample is taken from the water column rather than from some “dead zone” in the sump. At first use, the volumetric pipette may seem a little overwhelming, as it looks like a tool that belongs in a serious chemistry lab rather than aquariumkeeper’s fish closet (if you happen to have a fish closet, you lucky few), but taking a sample with it is quite easy. Simply use one of the plastic tips, press the plunger on the pipette down to “stop 1” (you can feel it, there’s a good amount of resistance to it) and place the tip underwater, slowly releasing the plunger. Place the tip in the cuvette and fill it with the water sample, pushing it all the way down to “stop 2” of the plunger. Next, open one packet of Calcium reagent B (pro tip- cut the packet alongside the dashed line printed on the packet with scissors and fold the two corners where cut ends- it makes for a nifty slide that fits the cuvettes opening) and dump the powder in the cuvette. Screw the cap on and shake the solution until all the powder is dissolved and there are no visible air bubbles. Clean the cuvette thoroughly and place it in the Checker. Close the top, press the button and wait approximately 5 seconds for the test results to show on the display.
After each test, the volumetric pipette tip and the glass cuvette should be rinsed in deionized water and never in tap water. As I mentioned before, the main reason previous users had inconsistent results while using Hanna Calcium Checker was because of the use of tapwater to clean the equipment. You saw in my description that the water sample is really small in volume and with most water running from our home taps being high in Calcium content, even a slight residue may skew the test results.
A TEST OF THE TEST

To check the Hanna Instruments Marine Calcium Checker’s accuracy and consistency of results, I performed several tests, all within 30 minutes from the first one to the last. First, I made 3 tests (which I labeled A, B and C), one after another, using deionized water provided by Hanna to clean equipment and to add water to the cuvette. Then, in the next test I cleaned the cuvette with tap water instead (test D). Finally, in the last test, using water form the same tank, I did two tests using Salifert Calcium Test Kit, a respected test kit known for its high accuracy (Test E and F).
The results are as follows:
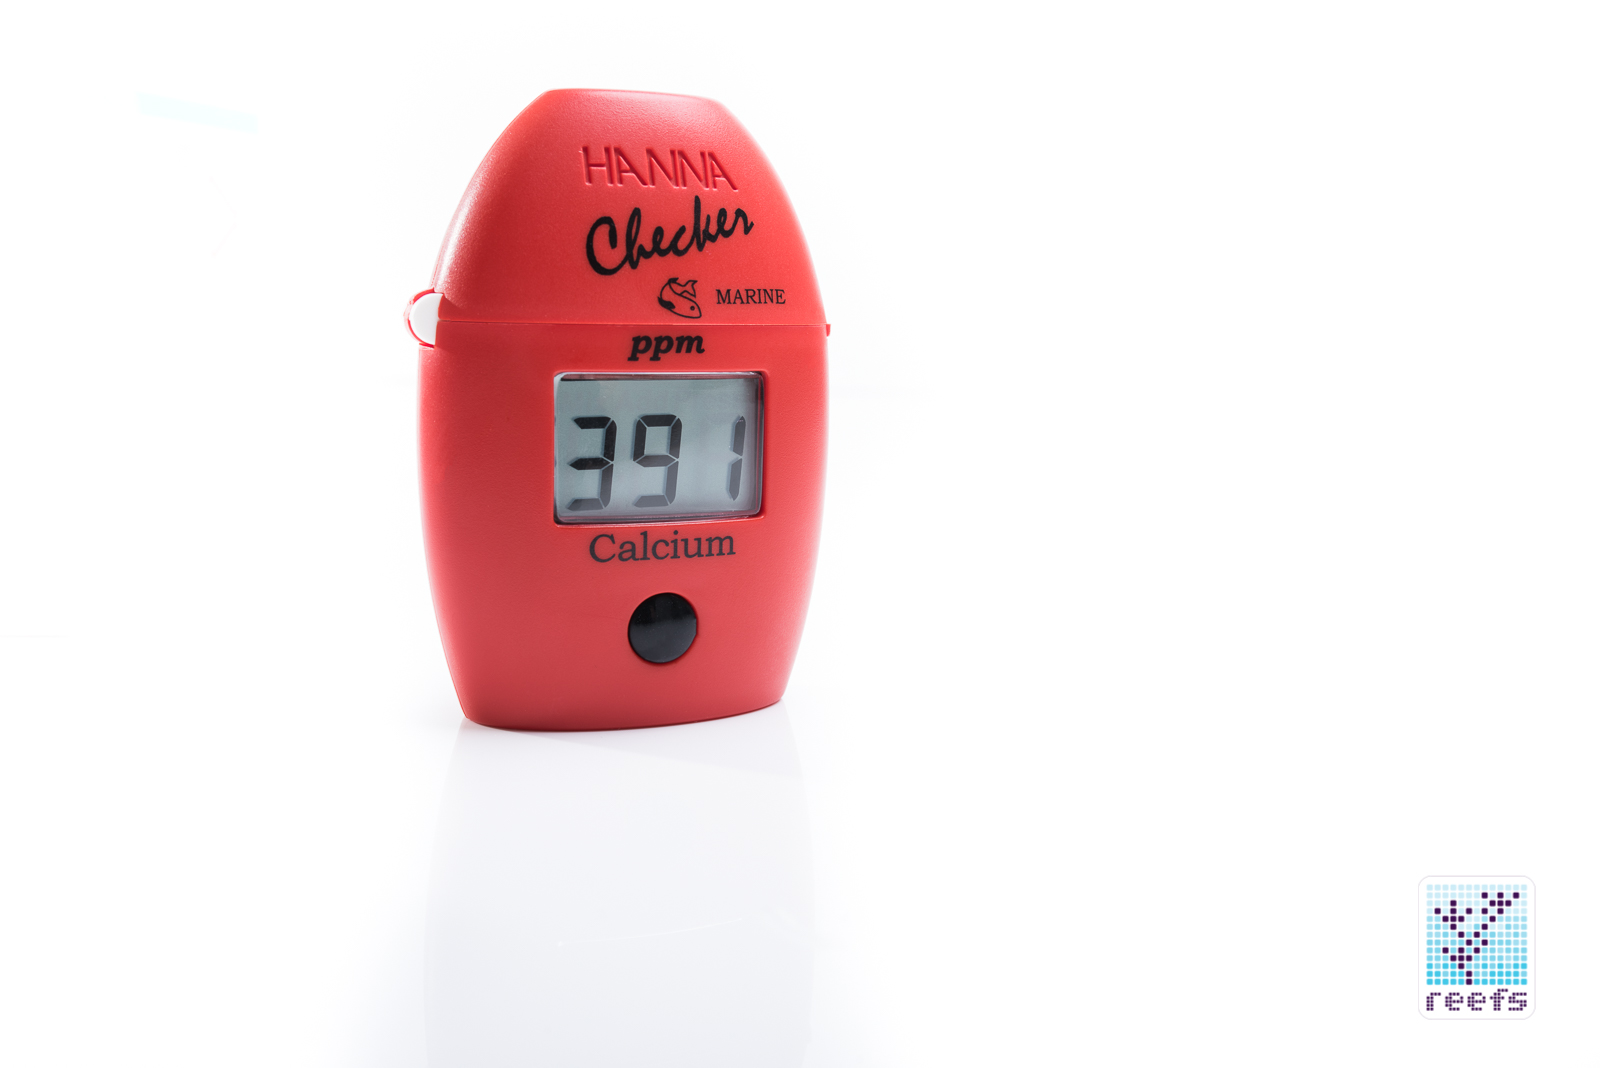
Test A: 375ppm
Test B : 377ppm
Test C: 374ppm
Average: 375.3ppm
Test D: 346ppm
Test E: 370-380ppm
Test F: 370-380ppm

There are several conclusions one can draw from my tests- first of all, my Calcium is on the low end right now 🙂 In all seriousness, when you strictly follow the testing procedure according to Hanna’s instructions, the Calcium Checker produces very accurate and consistent results. A deviation in the procedure (cleaning cuvettes with tap water instead of RO/DI or deionized water) however, skews the result rather significantly. This clearly shows the importance of good testing practices, which, to be fair, are not that hard to follow.
The two tests I made using Salifert Calcium test yielded identical results, showing Calcium content of between 370-380ppm (it’s hard to determine precisely when the water sample shifts its color, therefore I included both possible test results)
In addition to these tests, at the time that I was reviewing this product I had some problems with my tank and I sent the water sample to a professional lab (Aquamedic Water Testing). The results the lab returned where almost dead on with the Hanna Checker (430ppm on Hanna Checker and 432ppm in the Aquamedic lab analysis)
ACCESORIES

Before I conclude the article with some final words, it’s worth mentioning that Hanna Instruments sells a whole range of accessories to their line of colorimeters, which include but are not limited to:
- lab grade deionized water for use with the Calcium Checker in 230ml bottles (HI70436M -$10) and 1 gallon jugs (HI70436, $20)
- Cuvette Cleaning Solution 230ml (HI93703-50, $25)
- Microfiber Cloth for Wiping Cuvettes (HI731318, $14 for a set of 4)
- Glass Cuvettes and Caps for Checker HC Colorimeters (HI731315, $8 for a set of 2)
All these items are available for purchase on the Hanna Instruments online store.
RECOMMENDATIONS & FINAL WORDS
When Hanna Instruments introduced its first wave of portable colorimeters back in 2010, they somewhat revolutionized the market, not because colorimeters didn’t exist before that year, but because Hanna made them affordable and easy to use. I remember thinking “This is a godsend” when I first performed a Phosphate test using Hanna Phosphate Checker and being free of the color guessing that had previously accompanied PO4 testing.
Hanna Calcium Checker goes even a step further, as it is even more sophisticated and involved. Some may find it daunting to be forced to follow stricter rules when doing a Calcium test, while others will welcome the meticulous approach Hanna offers in its testing device. I personally belong to the latter group, and not for the good reason of wanting to be 100% sure the test result is spot on every time I test my water, but because I am lazy and don’t test for Calcium nearly as often as I do for other parameters, such as Alkalinity. I would rather spend 10 minutes every week or two (yes, I admit, I don’t always test for Calcium weekly, especially when I see that my Alk is not fluctuating) using Hanna Checker rather than 5 minutes doing it the old school way. Yes, you have to be more careful not to taint your sample with unwanted particles and yes, you have to use distilled water to get consistent results, but there is no doubt in my mind that Hanna Checker is a professional-grade, highly accurate tool when used correctly. Plus, its attractive price ($49 at time of writing for the kit showcased in this review) and low price of reagents ($23 for a set of one bottle of reagent A and 25 packets of reagent B) only adds to its value. In summary:
Positives:
-Highly accurate and consistent test results
-Eliminates the guesswork traditional test kits require
-Affordable price and fairly inexpensive reagents
– Testing with Hanna Calcium Checker is actually a really enjoyable experience
Negatives:
-More complicated testing procedure than with traditional test kits
-The need to have a source of deionized water to accurately perform the test
-One little thing Hanna may improve in the future- the wiping cloth should be included in the kit in my opinion
I highly recommend checking out the Hanna HI758 Marine Calcium Checker, especially if you are serious about knowing exactly what the calcium content of your aquarium’s water is and don’t mind the extra steps involved in getting the results from this great little colorimeter from Hanna. Stay tuned for another review I am brewing, on the Hanna Alkalinity Checker.
Thanks for reading!
Literature used in writing this review:
Use of a colorimeter by Dinshaw Dadachanji, Ph.D.
Hanna Instruments Blog: How to Test Calcium in Your Aquarium by Kevin Costa
Chemistry and the Aquarium: Calcium by Randy Holmes-Farley
Useful links
Hanna Instruments Online Store
Hanna Calcium Checker instructions page
GALLERY


0 Comments