

By Jonathan Hale
 “Murphy’s Law” often rears its ugly head in the reefkeeping world and as most of you have heard ad nauseum, “If something can go wrong it will.” One common and unfortunate problem is water going places you don’t want it to go. This was the impetus behind the creation of the Floodstop product. Created by someone who suffered water damage from a water heater malfunction, Floodstop does one simple job and does it well– it detects leaking water immediately, and shuts down the water source before the leak can become a problem.
 I’m a firm believer in redundant engineering for reef systems. For safety-critical applications, engineers design three sub components. If one component should fail there are two in place for back up. I’ve taken this process and applied it to my auto-top off system. I could write a whole article on the filter system itself, but for this review I will just explain that my top off is tied directly to my RO/DI filter and is activated by an electric float switch in the sump. The float switch opens two solenoid valves in tandem that let water flow into the sump via the DI resin housing. I’ve had this system in place for three years with no accidents so far. Preventing floods is the safety-critical application I’m most concerned with and I’ve always felt there was a missing piece to making the system as safe as it can be.
 I recently discovered Floodstop and decided to order two of them. I planned to use one under the sink next to the RO/DI filter, and one under the stand next to the sump. At $88.00 a piece, I thought it well worth the investment for the additional peace of mind.
 The installation is pretty straight-forward. If you’ve installed your RO/DI unit then you know everything you need to know in order to install the Floodstop. Each one took me about 20 minutes to install, and that was including the time spent taking the photos for this review.
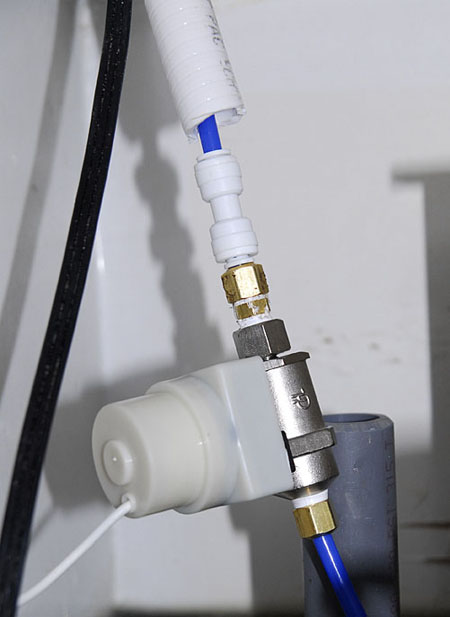
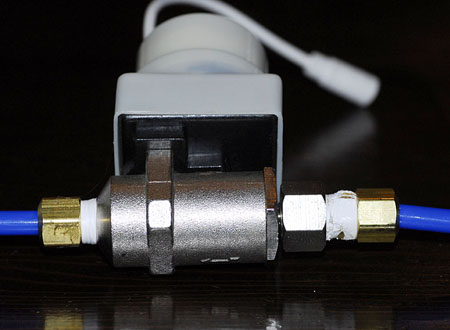
Floodstop has three components; there is the motorized ball valve that is placed inline at the water source, the controller box, and a water sensor. The ball valve is a heavy-duty piece of brass, plated in chrome, and the model I ordered came with 1/4” threaded fittings. Additionally, there were a few readily available plumbing parts I needed to buy for my applications.
The installation is pretty straight-forward. If you’ve installed your RO/DI unit then you know everything you need to know in order to install the Floodstop. Each one took me about 20 minutes to install, and that was including the time spent taking the photos for this review.
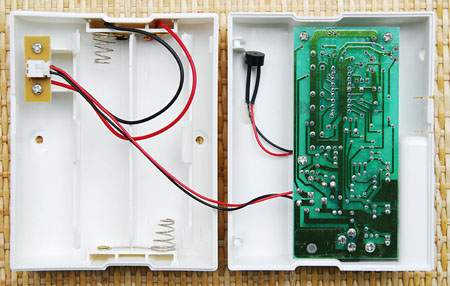
Floodstop has three components; there is the motorized ball valve that is placed inline at the water source, the controller box, and a water sensor. The ball valve is a heavy-duty piece of brass, plated in chrome, and the model I ordered came with 1/4” threaded fittings. Additionally, there were a few readily available plumbing parts I needed to buy for my applications.
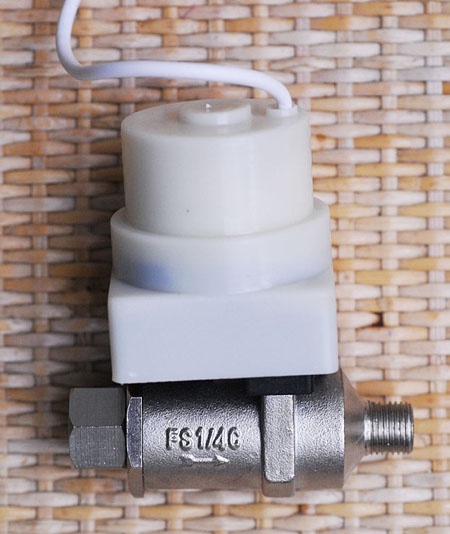
 The ball valve is a heavy-duty piece of brass, plated in chrome, the model I ordered came with 1/4” threaded fittings. There were a few additional plumbing parts I needed to buy for my application, any hardware store with a plumbing section should carry what you need.
The installation is pretty strait forward. If you’ve installed your RO/DI unit then you know everything you need to install the Floodstop.
The ball valve is a heavy-duty piece of brass, plated in chrome, the model I ordered came with 1/4” threaded fittings. There were a few additional plumbing parts I needed to buy for my application, any hardware store with a plumbing section should carry what you need.
The installation is pretty strait forward. If you’ve installed your RO/DI unit then you know everything you need to install the Floodstop.
 The first unit I installed went under the tank next to the sump. My reason for placing one in this spot was to prevent the sump from flooding in case the two solenoids should ever fail in an open position. The chances of that happening are probably never, but better safe than sorry…. particularly when you live in a NYC apartment.
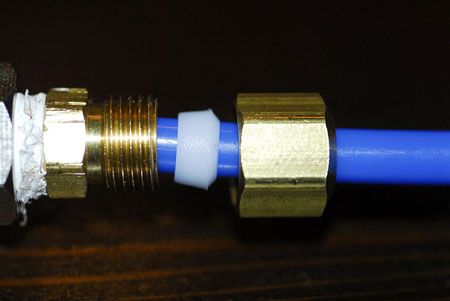
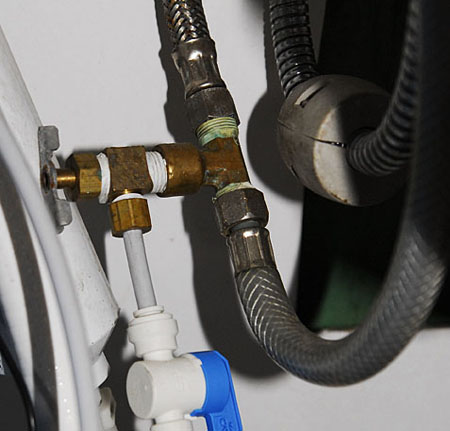
 As you can see I have encased the 1/4” tubing in 1/2” spaflex. This prevents the 1/4” tubing coming from under the sink from ever being punctured, and if it ever were to spring a leak the water would be contained and run into the sump, or under the sink.
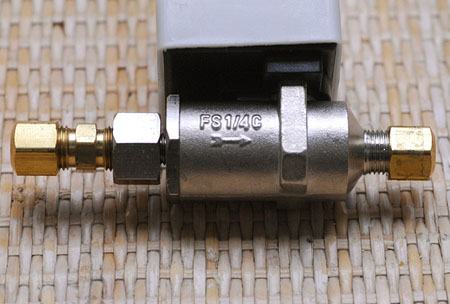
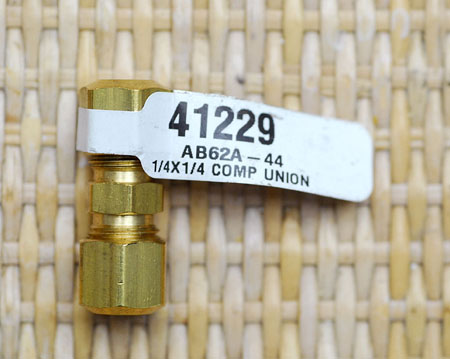
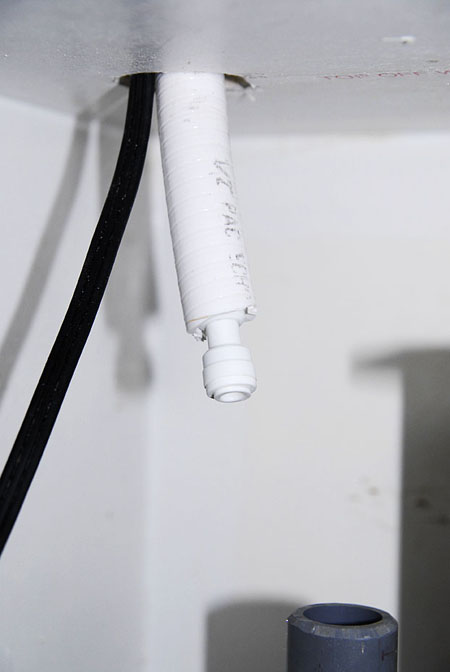 I had to cut back the 1/2” spaflex to accommodate the Floodstop valve. I decided to place a quick release coupler in front of the valve. If it ever needs replacing it will be easy to swap the old for the new one.
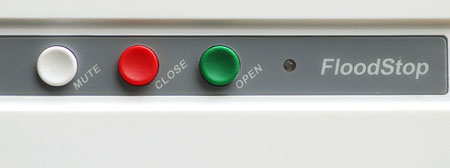
 I located the control box away from the water on the outside of the stand. This also allows the alarm to be heard, and gives quick access to the controls.
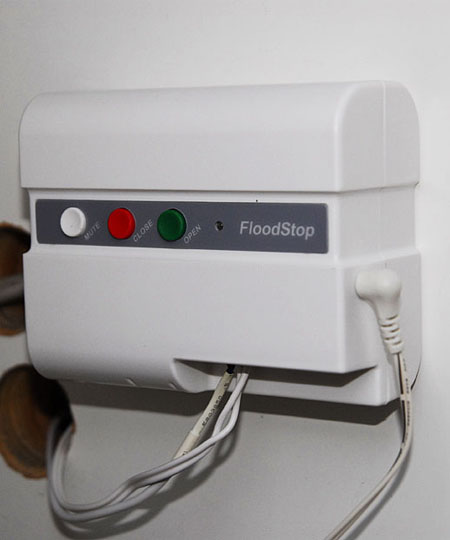 After the box was screwed to the stand all that was left was to attach the sensor and plug the unit in. I was curious how sensitive the sensor would be, and how loud the alarm was going to sound.
 I first tested the plumbing fittings to make sure they did not leak. I activated the float switch to open the solenoids and the Floodstop fittings did not leak at all. One thing to note is that the Floodstop valve stays in the open position only as long as the unit is being powered. If there is a black out, or someone unplugs the unit, the valve will close. Since my auto-top off is electric to begin with, having no power will not matter much, as there will be far greater problems to worry about. As for the plugs, they are set back behind a sprinkler pipe with a sign warning not to touch them.
 Once the fittings passed the leak test I plugged the unit in. The Floodstop valve opened, and with the float switch still on, water flowed through as normal. Then it was on to the most important test, the water sensor.
 To test the sensor I opened the float switch again, and as water was flowing from the RO/DI, I dripped one drop of water onto the sensor pad. There was a one second delay; the control unit began beeping, the valve closed, and the water stopped running. I did a few more tests to see how sensitive the sensors are. Using a damp paper towel activated them, so I’d say they are plenty sensitive for an under the stand application. The alarm was much quieter than I thought it was going to be. It was not as loud as a smoke detector. It was even a bit lower in sound than the beeps my microwave makes. It’s plenty loud enough to hear if you’re in the room, but it will not wake up the house if it is activated. However, if it does it’s job properly, there is no need for immediate action. If you like, the control unit has two outputs that can be hooked up to your house alarm system, a phone dialer, or any X-10 device. This would allow you to receive an alarm via your cell phone, or some other electronic means. I thought that was pretty neat and may implement that in the future.
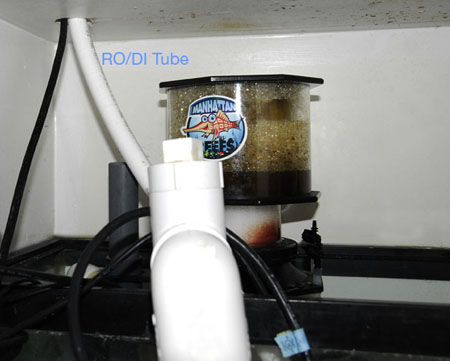
 The next unit went under the sink; I placed the Floodstop valve at the water source for the RO/DI filter. If anything was to ever leak in the filter I wanted the whole thing shut off.
Happily, the installation and testing went as flawlessly as the first time. One nice feature is that you can connect more sensors and run them in a chain. I ordered an extra sensor for under the sink and placed this one right under the 1/2” spaflex that runs to the sump. If there is ever a leak in the 1/4” tubing and water was to run back down to the sink, then that sensor will sound the alarm and the water supply will be shut off. To be completely covered I need one more Floodstop valve to go between the RO storage tank and the DI housing.
The next unit went under the sink; I placed the Floodstop valve at the water source for the RO/DI filter. If anything was to ever leak in the filter I wanted the whole thing shut off.
Happily, the installation and testing went as flawlessly as the first time. One nice feature is that you can connect more sensors and run them in a chain. I ordered an extra sensor for under the sink and placed this one right under the 1/2” spaflex that runs to the sump. If there is ever a leak in the 1/4” tubing and water was to run back down to the sink, then that sensor will sound the alarm and the water supply will be shut off. To be completely covered I need one more Floodstop valve to go between the RO storage tank and the DI housing.
 Having installed the Floodstops I feel a bit safer and confident that I’m staying one more step ahead of that old adage. I’m going to install one on my washing machine as well, hey you never know, a flood in the basement can be just as bad.
I sincerely hope this review helps someone prevent a flood. If that happens I’ll be a very happy person. If anyone is curious I did buy the products myself and gave the company no notice of the review beforehand. If you would like to purchase a Floodstop you can find them online. I purchased mine from floodstop.com. The salesperson I dealt with there was very informative and pleasant to deal with. The other materials I used in my system came from autotopoff.com and flexpvc.com.
Thanks for reading,
– Jonathan

0 Comments