
LED light emitters glittering over a reef tank’s water surface, providing life giving energy to the corals and other photosynthetic animals beneath, is as much of a typical sight nowadays as metal halides hanging over reef aquariums were in the nineties and early 2000s. The debate over the ability of high power, light emitting diodes to grow corals is largely over, buried under the overwhelming photographic evidence of beautiful tanks lit exclusively by this source of artificial light. Today, almost everyone that has had experience with the technology, agree that indeed, they do grow coral and they do so efficiently. And so the debate has shifted to topics like light wave distribution throughout its spectrum, optimal PAR ratings, optics and light spread, color blending, etc. It may sound controversial, but my experience with LEDs over the years using various types and models from different manufacturers has taught me that, to a certain point, “numbers” are just talking points if there’s no substance. In other words, with different goals come different approaches.
Let me explain with a photography analogy- you can have a $5k camera setup, take wonderful pictures you later convert into jaw dropping, large format prints that, in your eyes, justify owning such a high end rig, while another person may be blown away by photographs taken by a good camera phone he/she sees online, and an so decides that a camera phone is the best photo rig out there. Similarly, I have witnessed a heated back and forth between people over specific PAR numbers or color spectrum, and later learned that each side of the argument has vastly different reefing goals; the fight is pointless. “To each his/her own” is what I believe in, and has guided me since I introduced the first LED light into one of my reef aquarium setups. It was a DIY panel consisting of only two types of LED emitters- the Cree XP-E Royal blue and the Cree XT-E Cool White chips, manually dimmed by an old school potentiometer and hidden beneath a generic 90 degree lens mounted on each LED. It also happened to be one of the most, if not the most, successful mixed reefs I’ve managed to maintain, full of all kinds of SPS and LPS corals. It wasn’t a sophisticated setup in terms of its PAR output or color spectrum, but it did the job amazingly well, and it still amazes me how much joy such a tiny source of light produced.
Does this mean that I would go back and use that light instead of the Wi-Fi accessible and programmable machine I use now? Of course not! I like technology and I welcome the changes that the LED revolution has brought to the reef hobby. We can do all kinds of things with good LED panel that we could only dream of just a decade ago.
To me, there are a number of basic principles and characteristics a given light must poses in order to get my “seal of approval”- does it provides enough light energy to grow corals, what’s the built quality, what kind of LED chips and drivers are used in its electronics, how well is the LED array vented, what kind of lens is used, what extra features does the light offer, how easy is it to use its functions, and finally, does the price tag justify the LED panel’s overall value compared to others in the market? I will answer these and other questions, as well as provide some raw data produced by my testing equipment, in my evaluation of today’s Definitive Review subject- the C-Ray 200 from Cobalt Aquatics.
COBALT GOES LED
From fish food and filtration media to aquarium equipment such as heaters, return pumps, and all in one aquariums, Cobalt Aquatics has cemented its position in the American market as a solid supplier of quality equipment for the aquarium industry. C-Ray 200 is the company’s debut in the highly competitive segment of high end, high power reef LED lights. A quick look at the advertised specs conveys the “seriousness” of Cobalt’s new flagship LED light…
ON PAPER

Three digits and a letter- 200W – says quite a lot about C-Ray 200; that level of power consumption ranks Cobalt’s new LED panel amongst the most powerful aquarium LED lights on the market. It doesn’t necessarily say much about its ability to grow corals, but it provides a general idea on where it aims to belong in the LED lighting segment of the industry- the top shelf, naturally. Let’s look at the advertised specifications to learn more about what the light offers:
-a peak 200W power draw
-an external, waterproof transformer
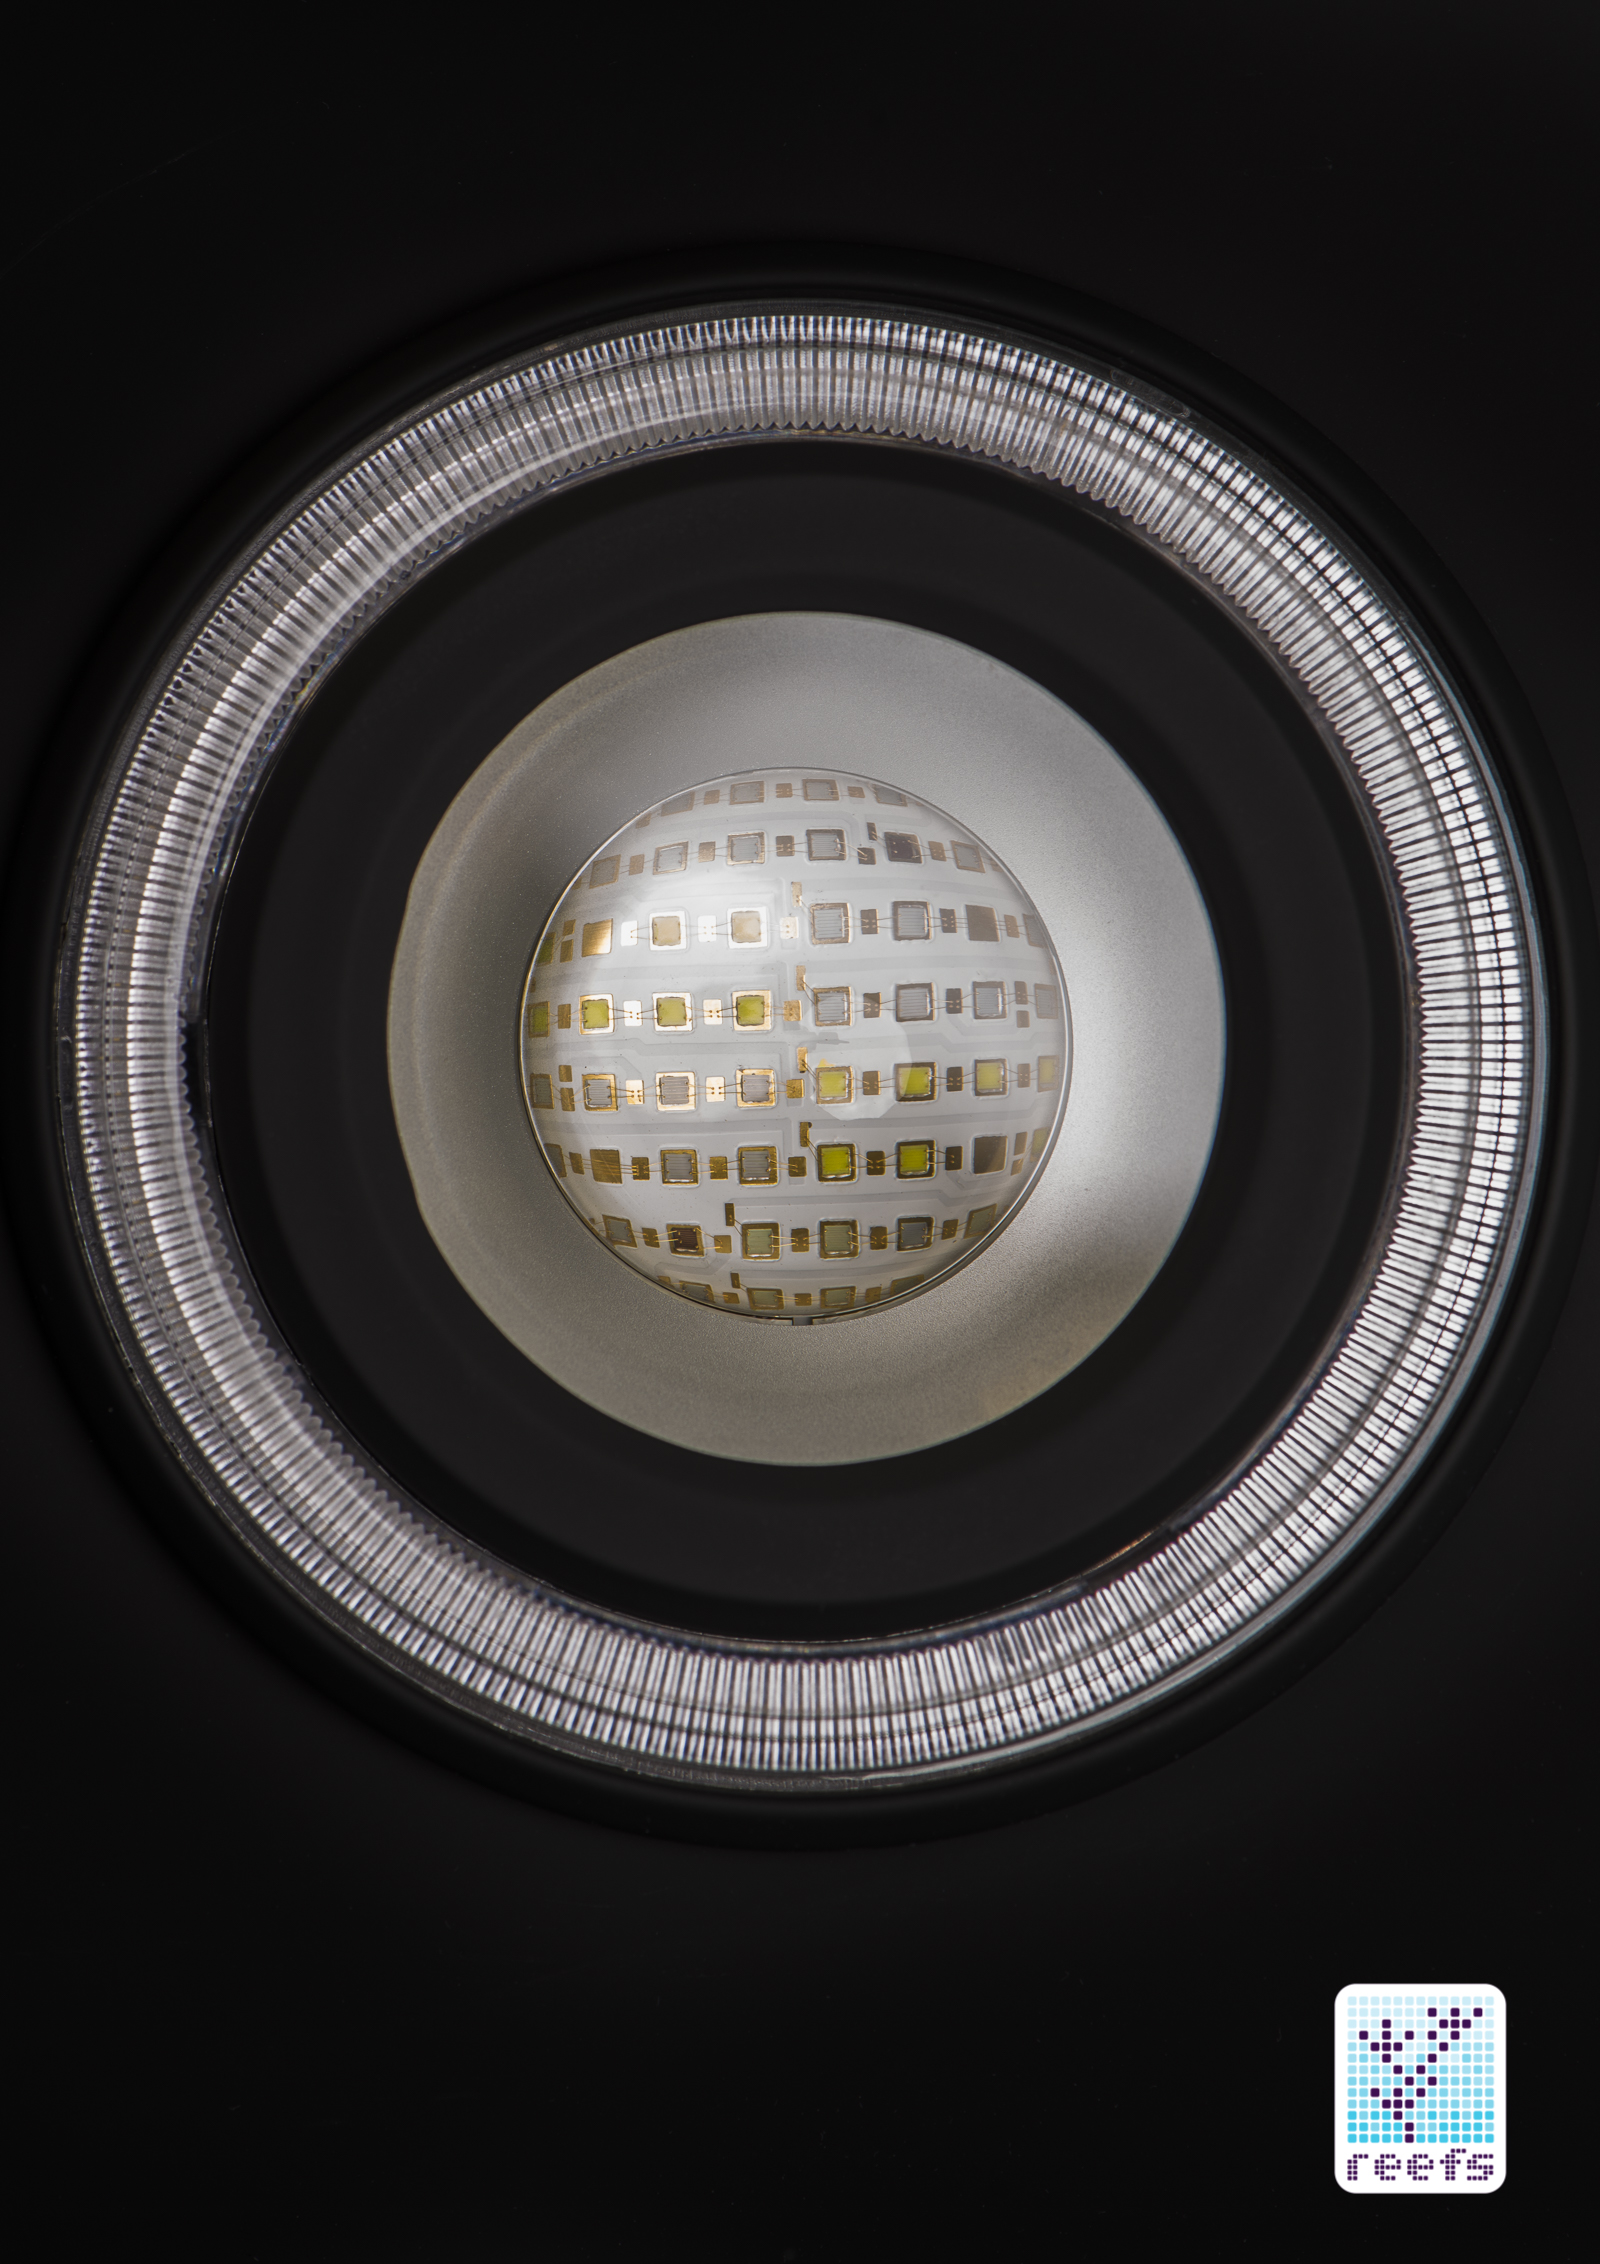
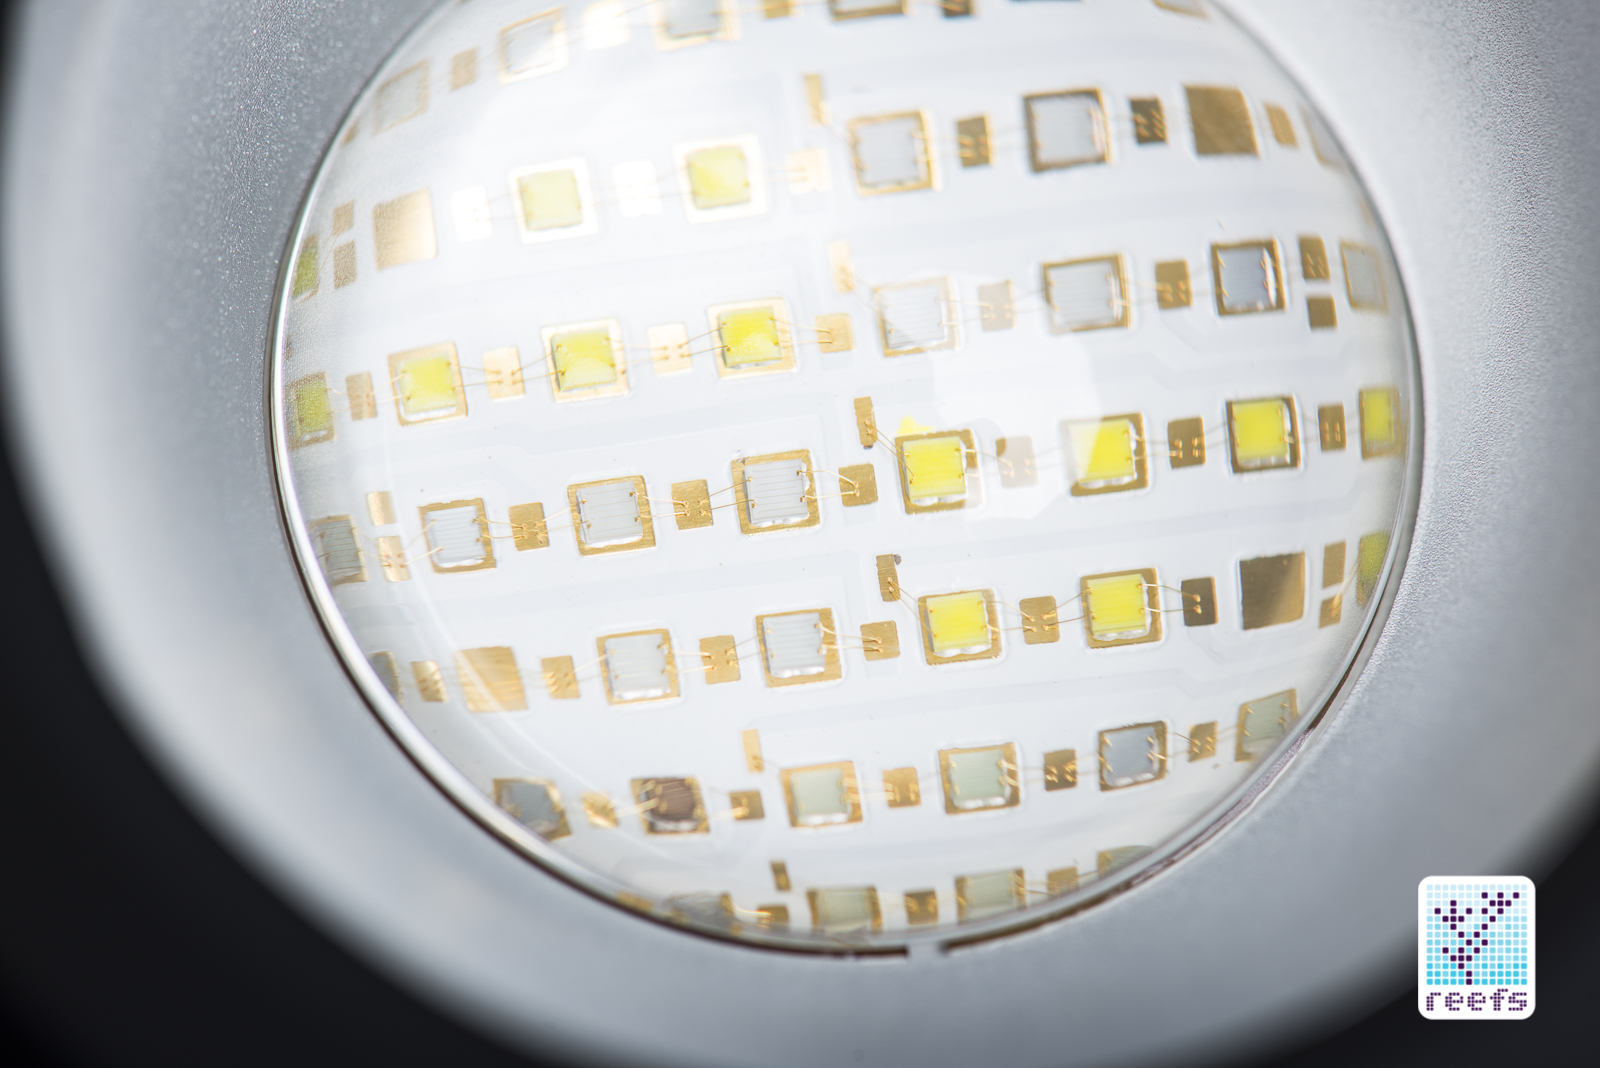
-two high-density LED pucks made by Cree, each consisting of 52 individual emitters (based on my count looking at my macro photograph of the array)
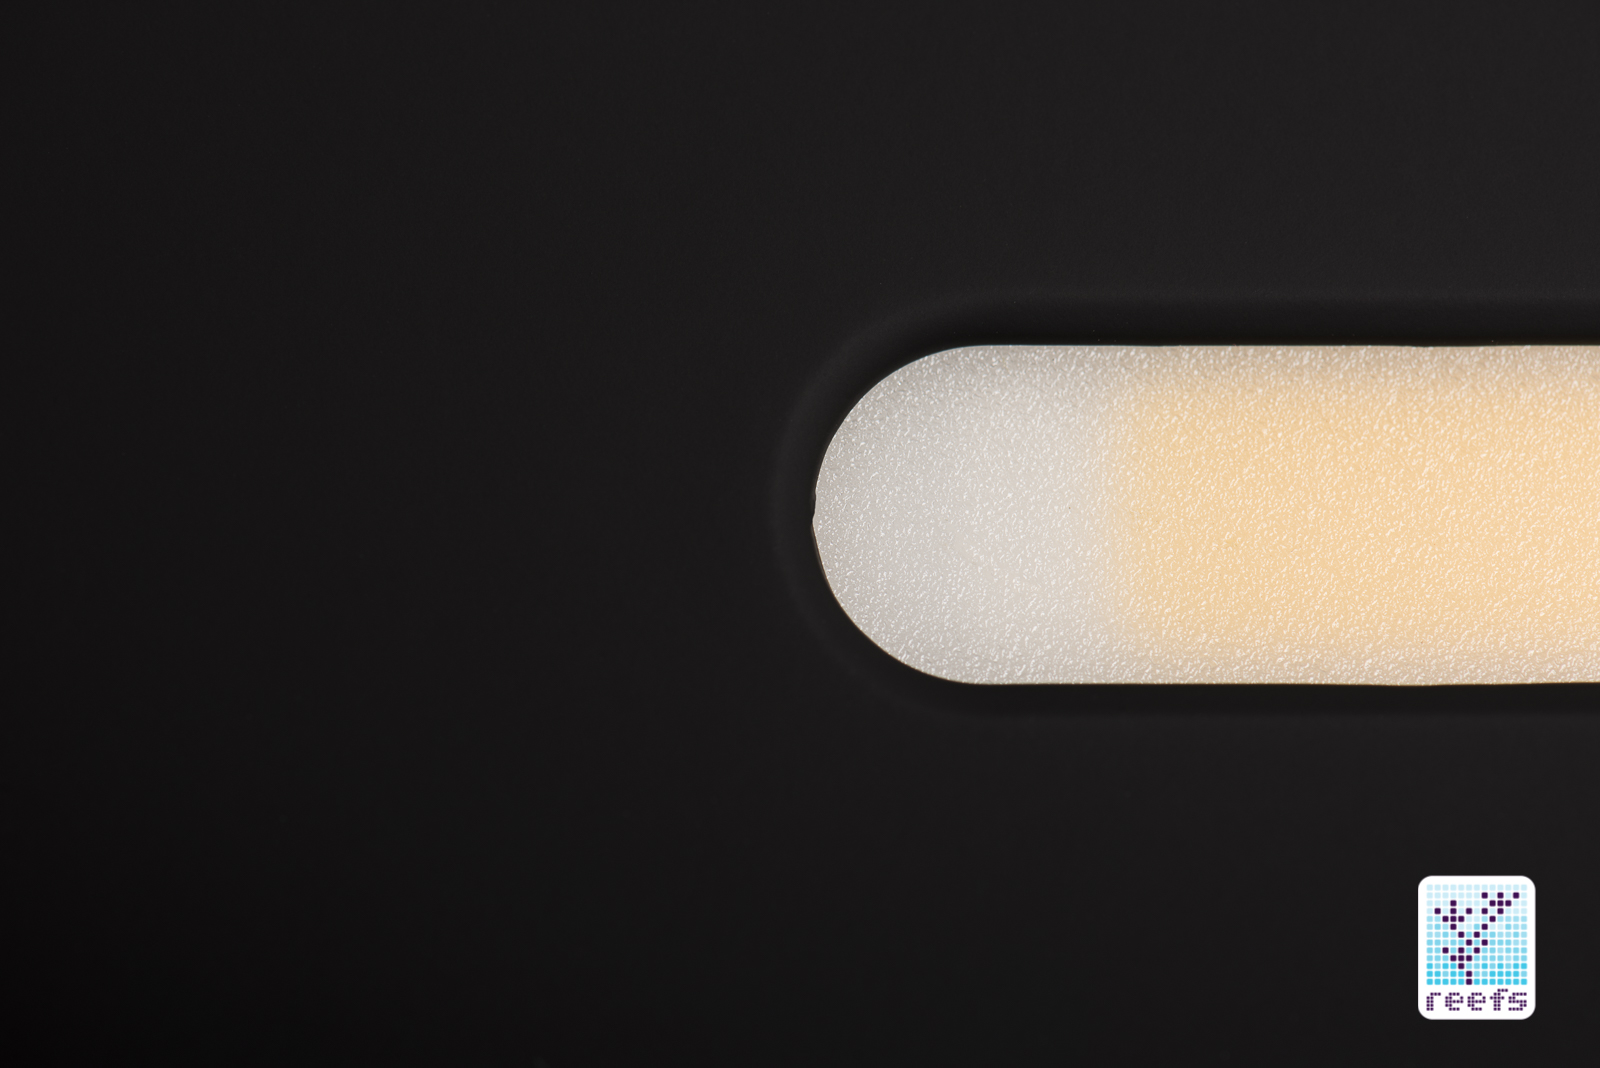
– a fill light LED strip sitting in between the LED pucks
-120° Quartz Wide-Angle Optics and an advertised useful light spread of up to 48”
– halo monolights circling each Cree chip that serve as moonlights
– 6 channels of control and built in light presets such as storm, lunar cycle, sunset/sunrise, etc.
-a built in Wi-Fi module for wireless programming, paired with a free dedicated app available for Android and Apple phones
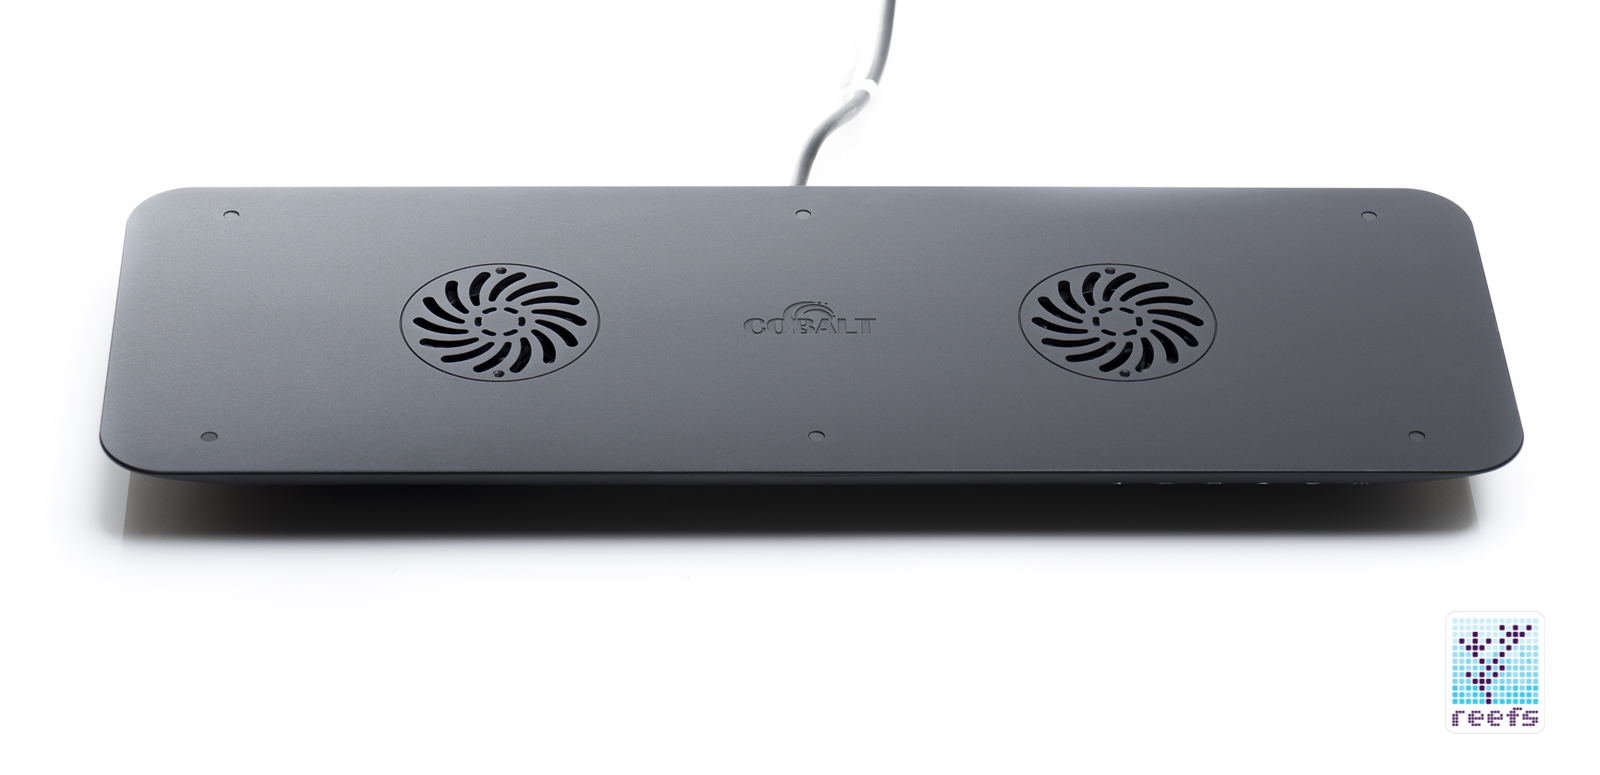
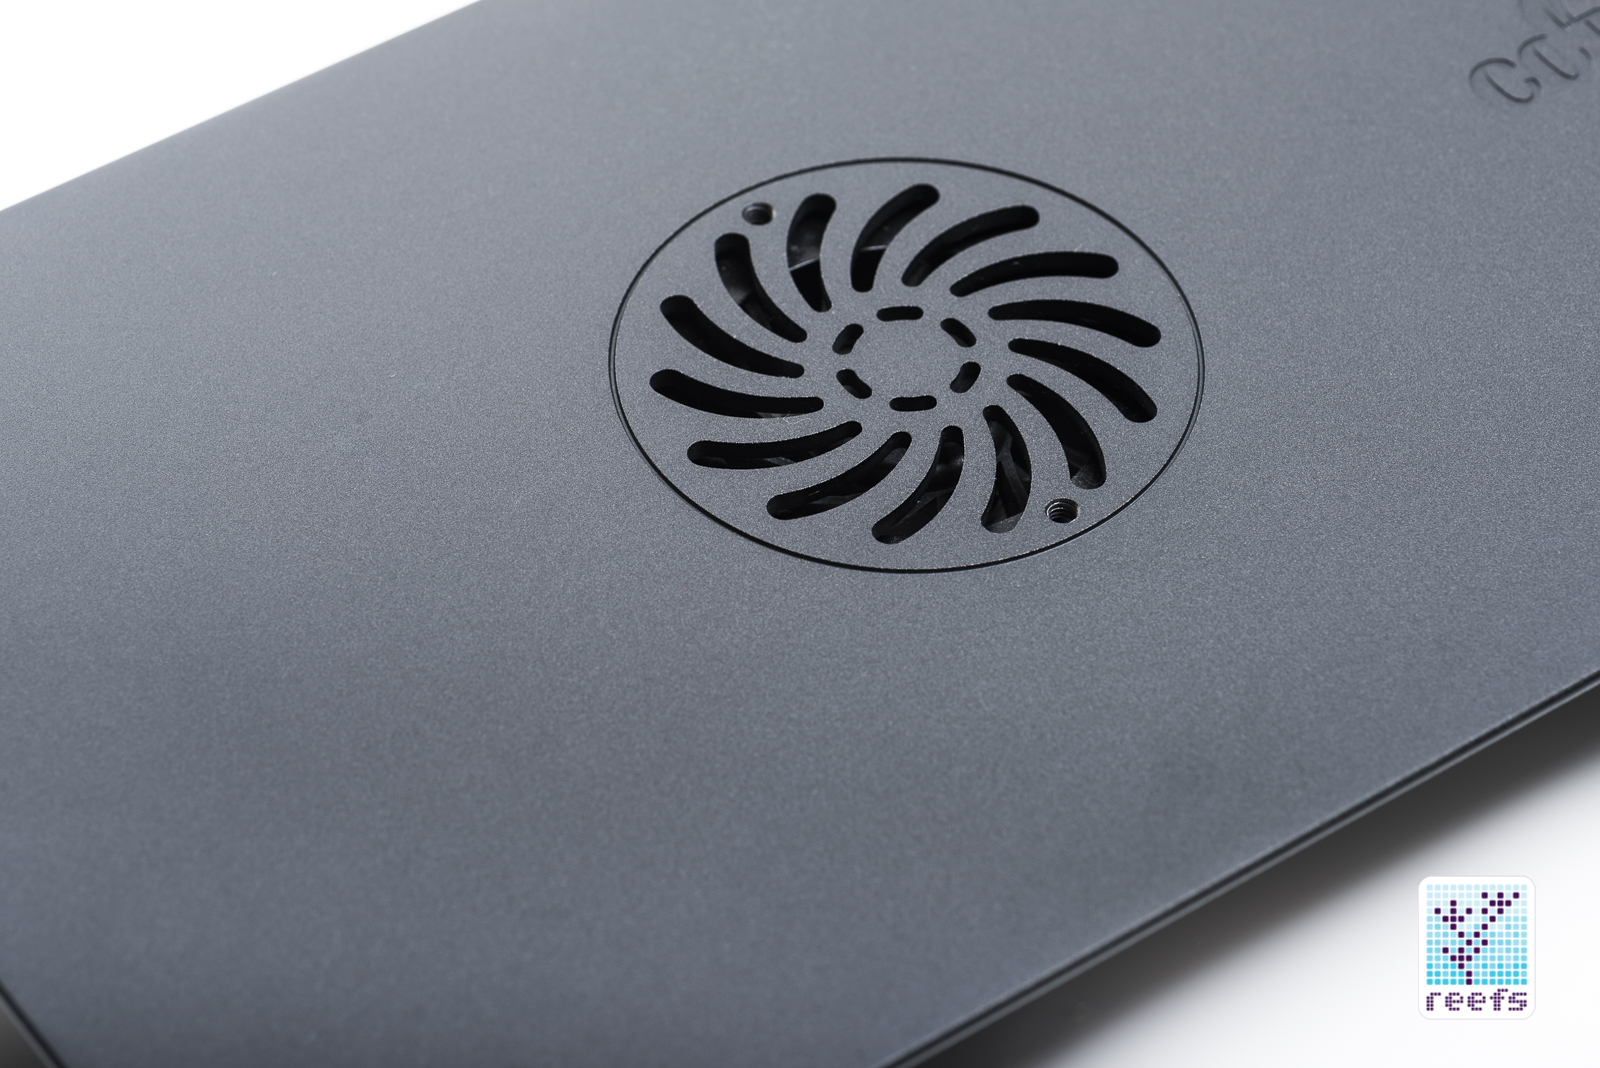
-an oversized copper sink and dual, temperature controlled fan setup for heat dissipation
-touch sensitive buttons built in the light for controlling basic functions
-hanging kit included as standard, with an optional aluminum arm sold separately
There’s a lot to unpack here, and what better way to start than seeing what’s inside the box…
UNBOXING
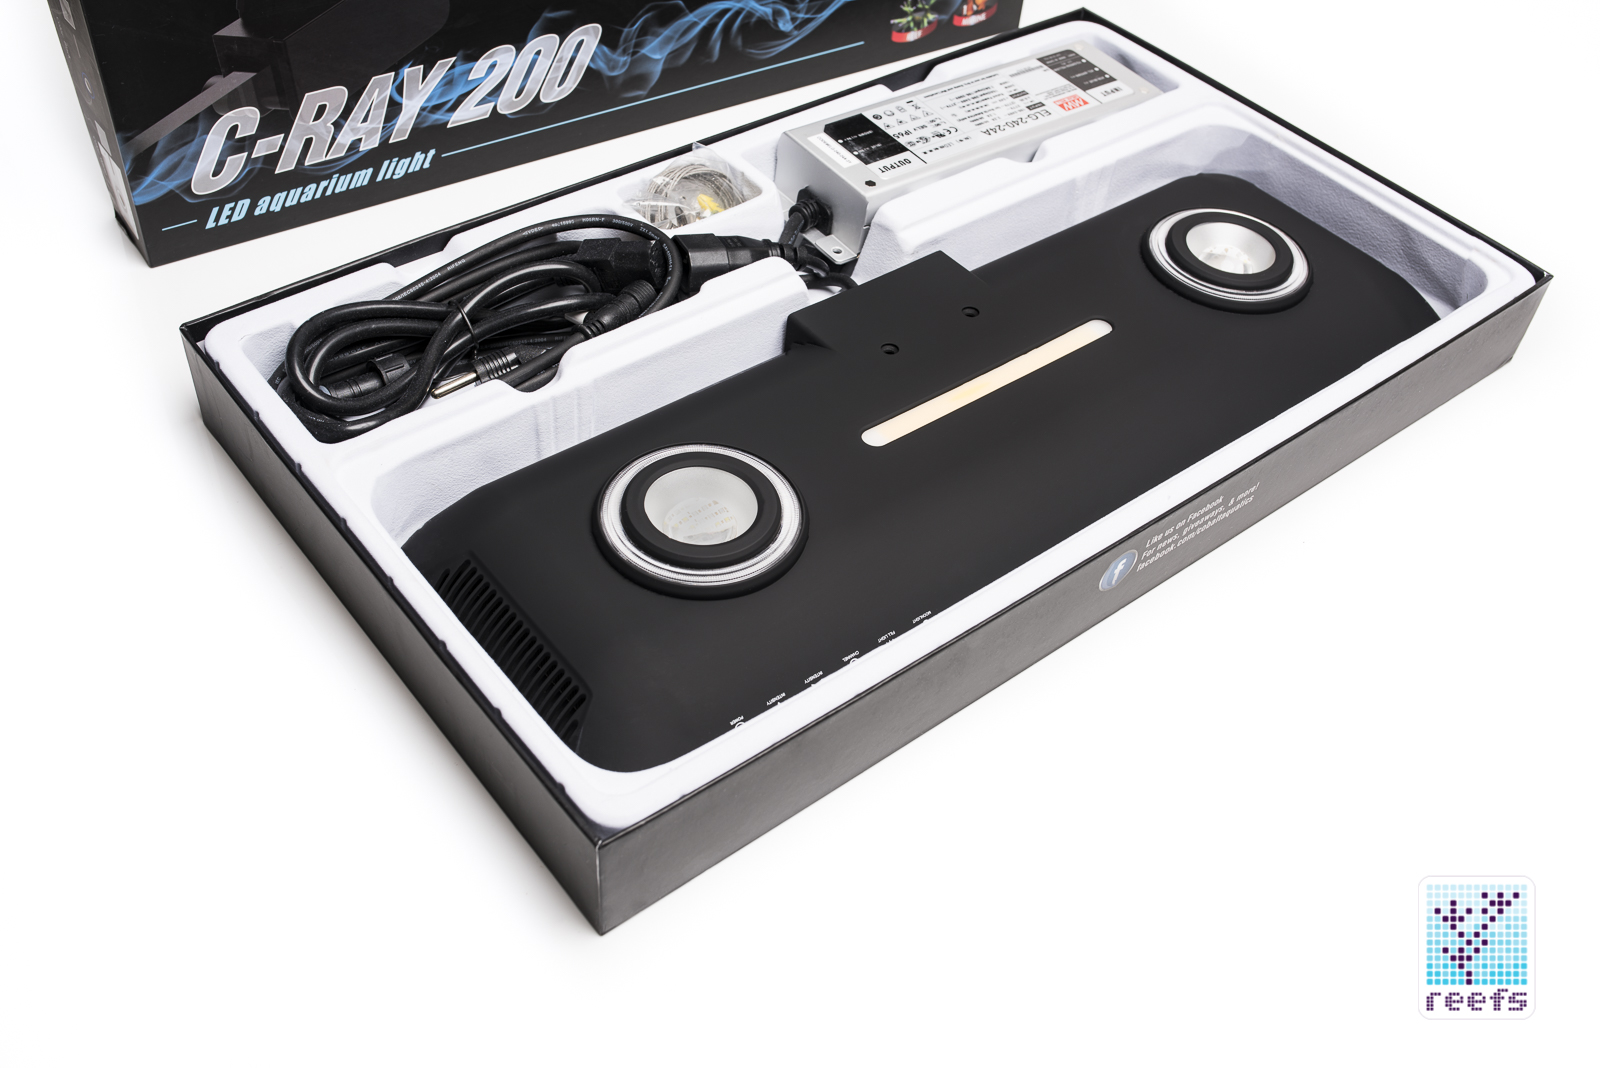
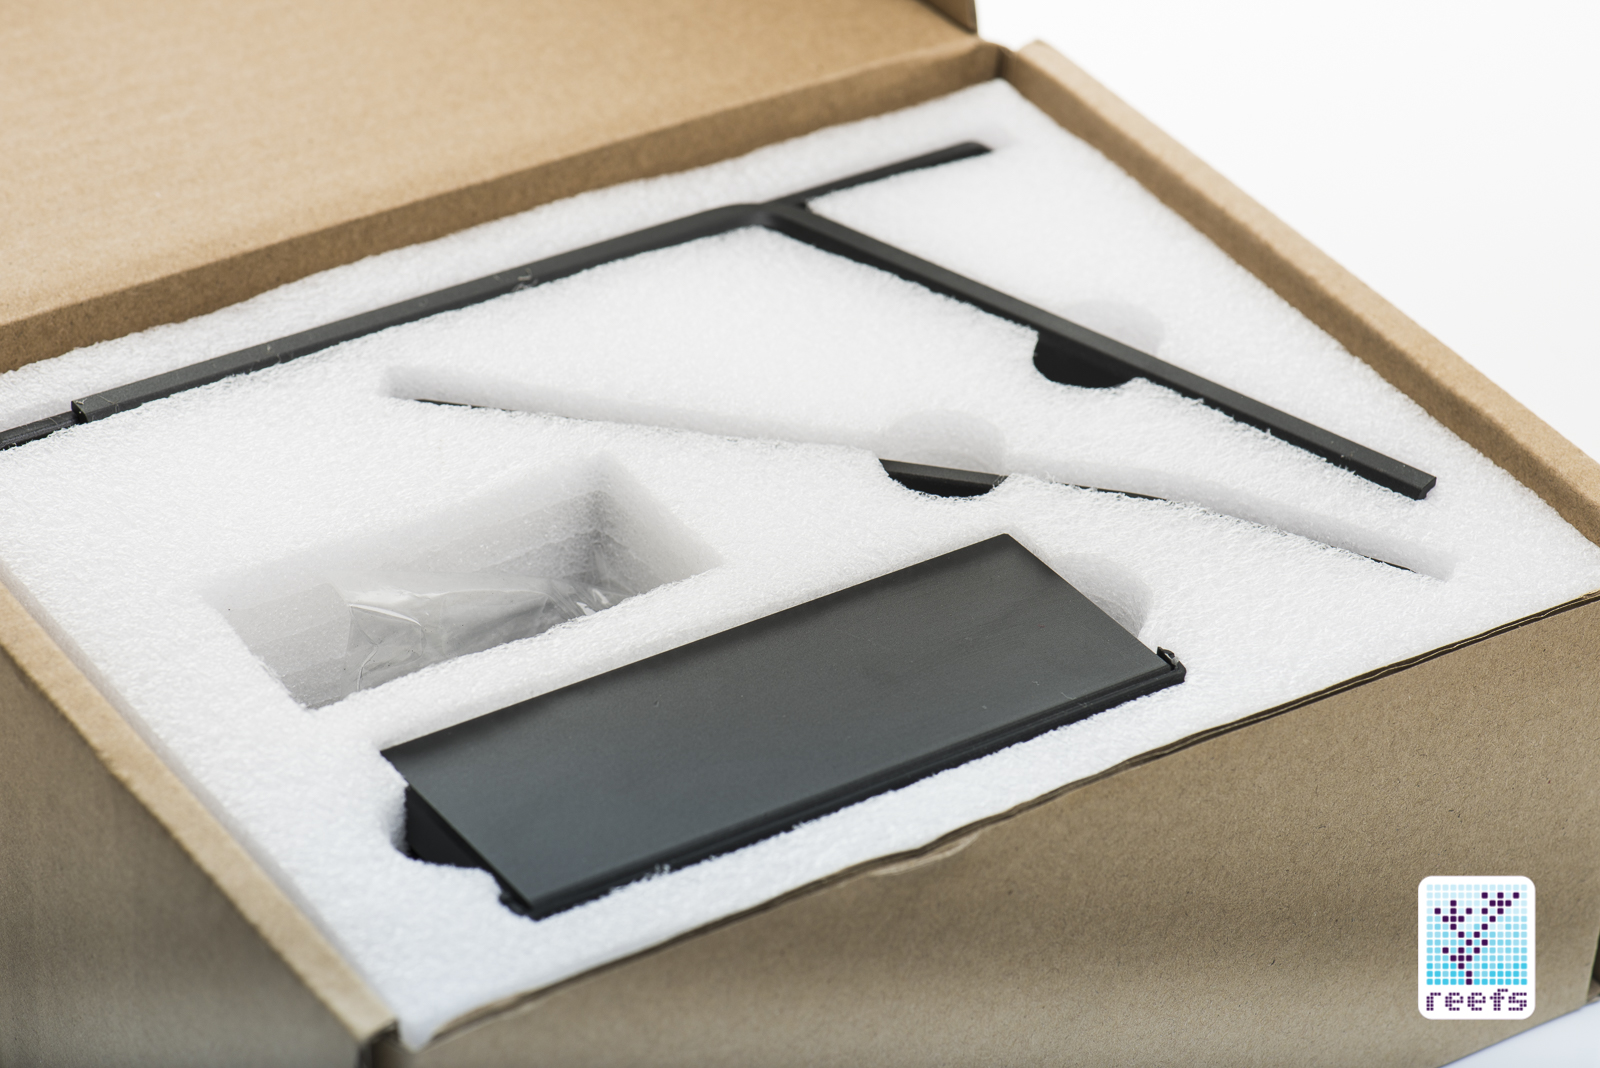
A premium light deserves a premium packaging and Cobalt doesn’t disappoint. A slick, black box with pictures of the light and some basic information printed on each side of the packaging dominates the theme. When opened, a white plastic mold with a velvet-like coating protects the items that come with the light. These are:
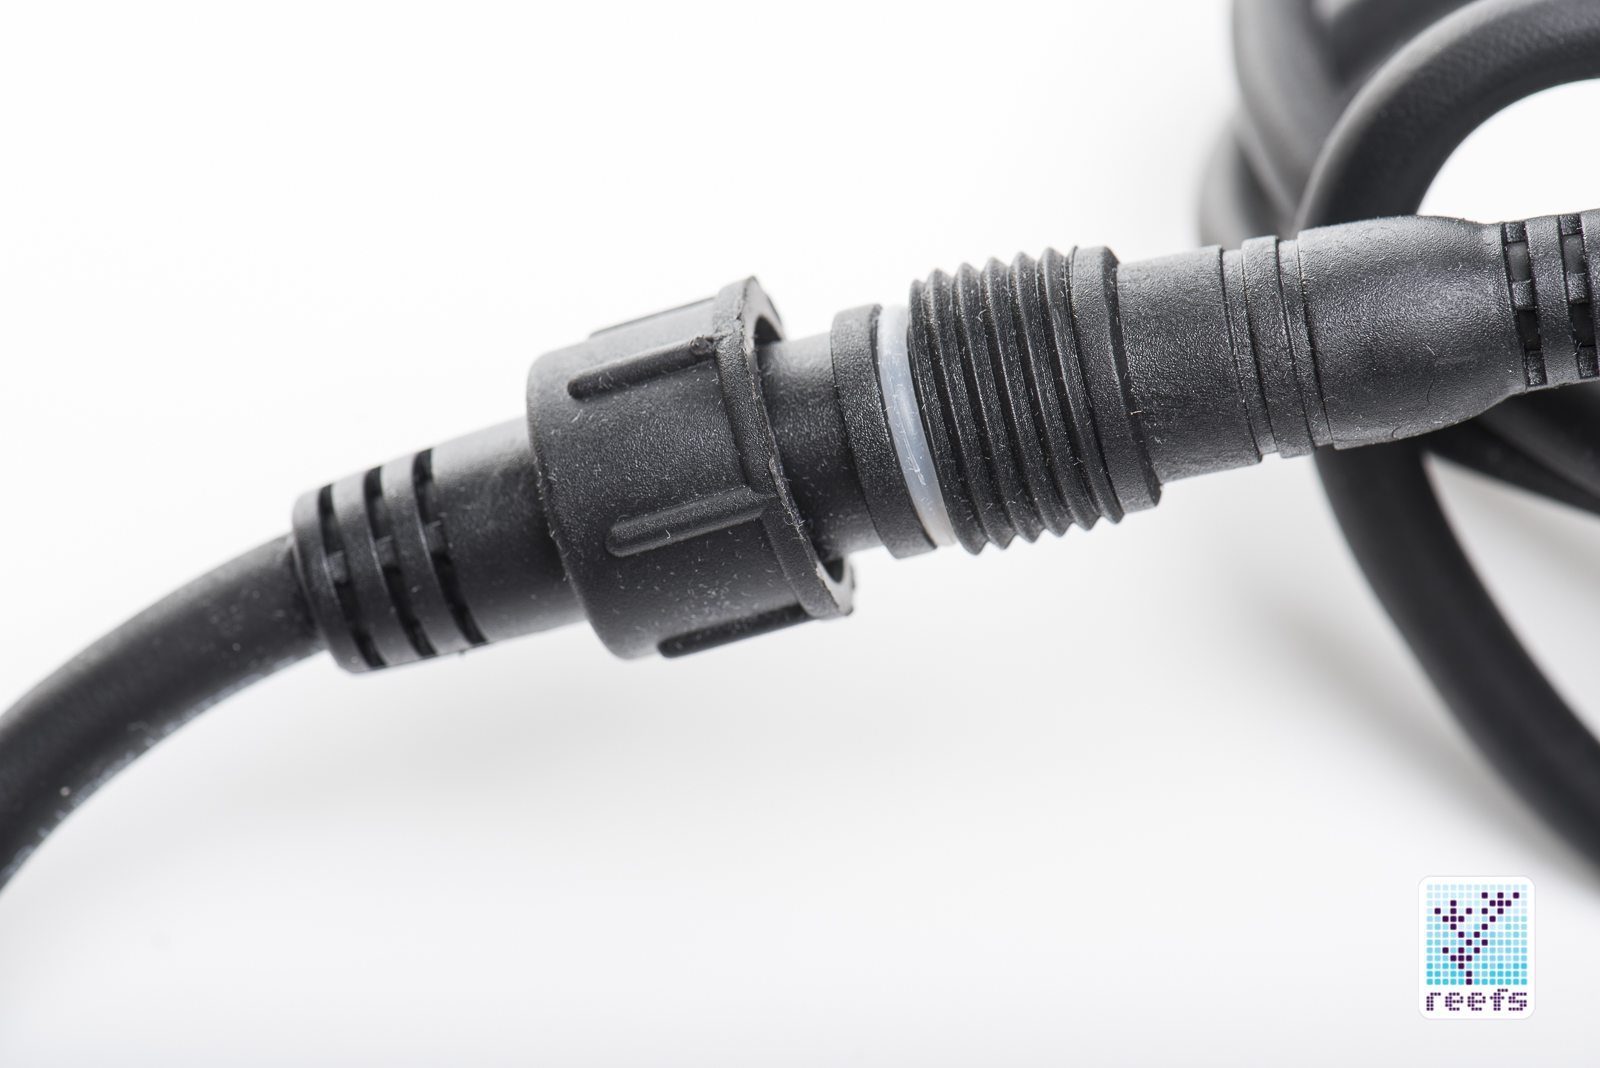
-LED panel with a quick connect power cord
-a waterproof LED driver/transformer made by Mean Well (model ELG-240-24A)
-a steel cable hanging kit, complete with quick- adjust fittings and ceiling anchors
Printed instructions ares not included, but there is a very detailed user manual built into the app, which explains everything about the hardware and software.
THE LIGHT
I must say upfront, I was quite skeptical about C-Ray 200 before I saw it in person at MACNA 2017 in New Orleans, and even then, I didn’t really “feel” the light, as can happen with any product presented at a show of this size. The skepticism on my part was based on two things: first of all, Cobalt is not well known as a LED distributor here in the US and it is the company’s first product of this type. In addition to that, I’d learned that the suggested retail price was set at $799, which meant that C-Ray 200 was positioned to compete with flagship panels from companies such as Ecotech, Aquaillumination, Kessil, and such. This bold price point prompted me to dig deep into its build and functionality, in order to answer the ultimate question “Is there enough “there” in C-Ray 200 to justify the premium price?” With that in mind, I took C-Ray on a months-long test drive.
Despite the fact that C-Ray 200 has been available for a while now, there is not much information on the Internet about it, and so I’ve done my own investigation and gathered raw data from different sources, including Cobalt representatives. The most important thing I learned was that Cobalt Aquatics doesn’t make the light themselves, but they partnered with a factory in China that produces C-Ray 200 for them. If you have already done some research before reading this review, you might have found that an identical looking light is sold in Europe by Aqua Medic, although the team at Cobalt told me the only thing the same about the two products is their casing; the electronics inside are different. I’ll have to take them at their word. C-Ray comes in two colors, an all white version and a black one, which I received for this review. The tank bracket for each matches the color of the light.
THE BUILD
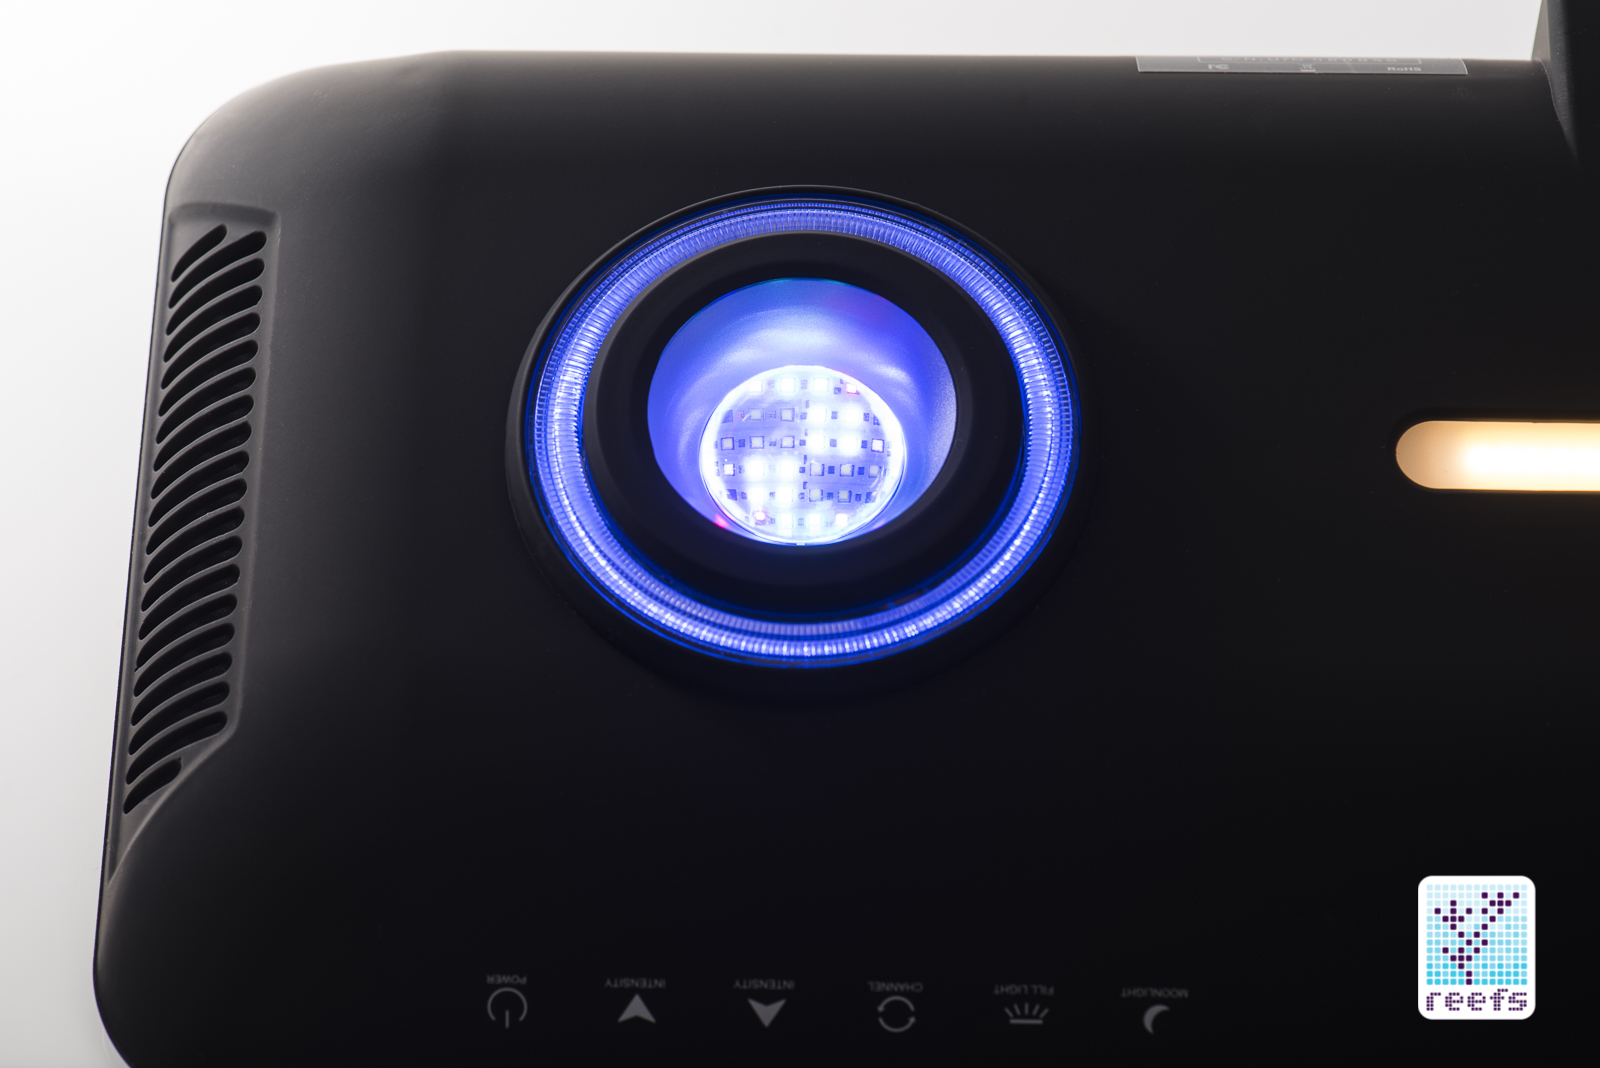
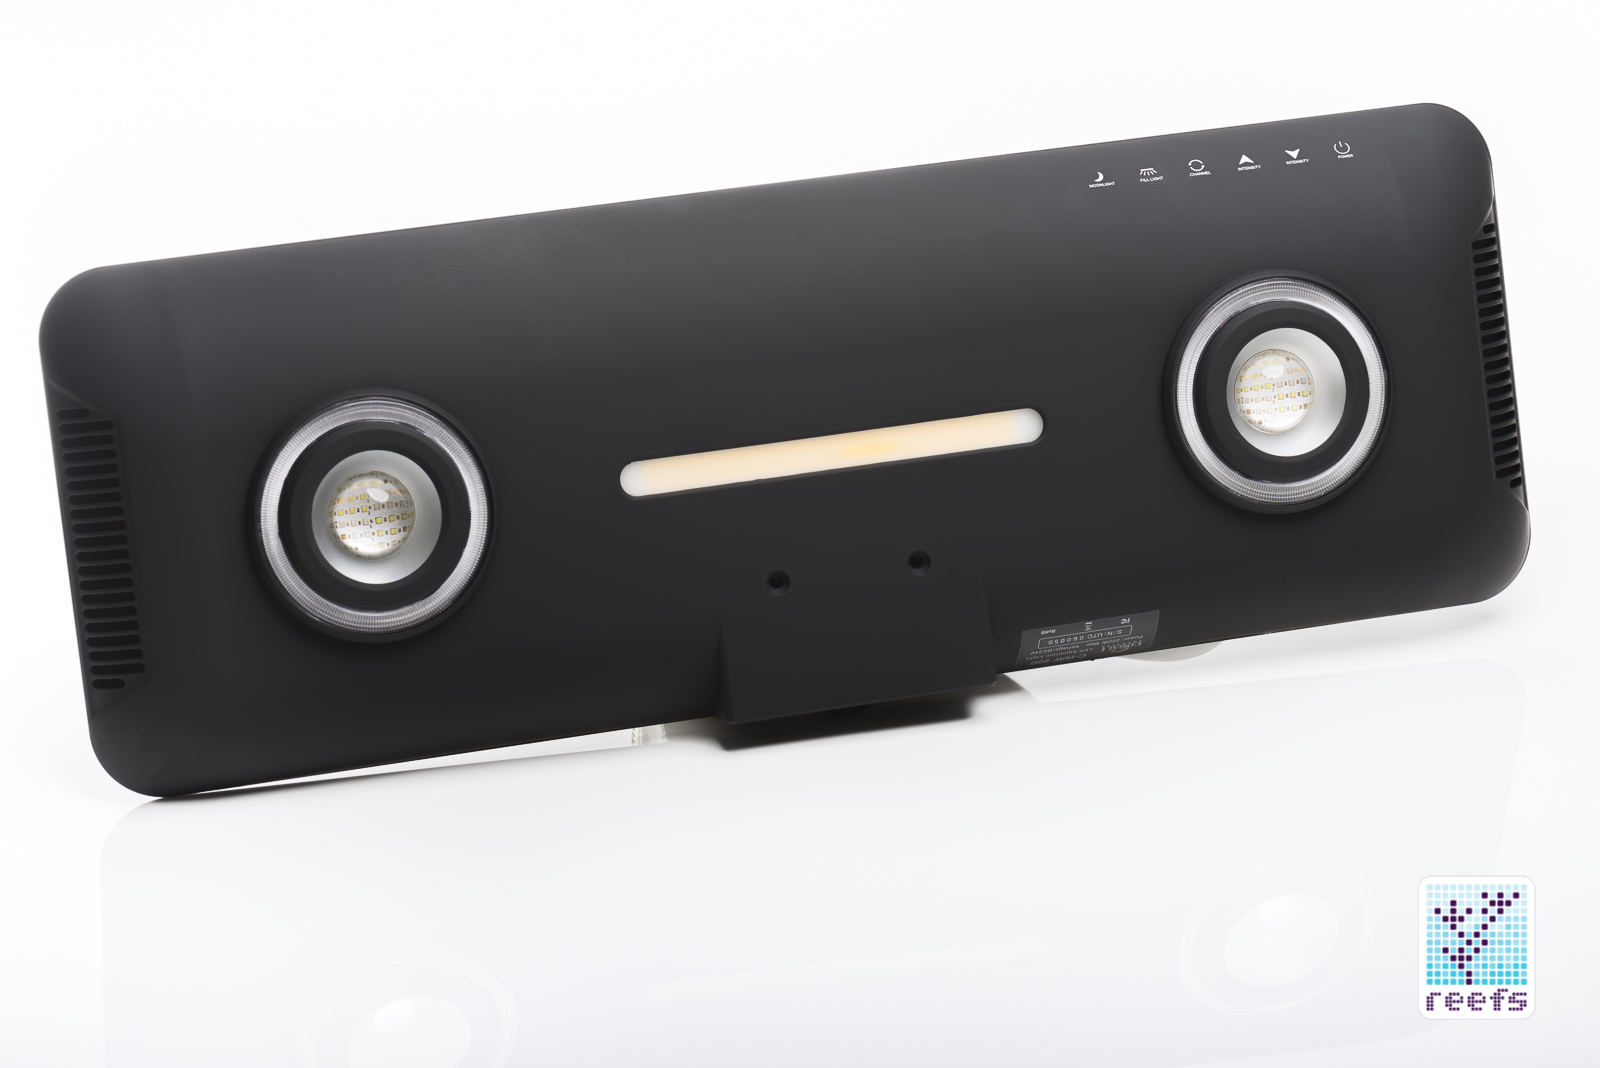
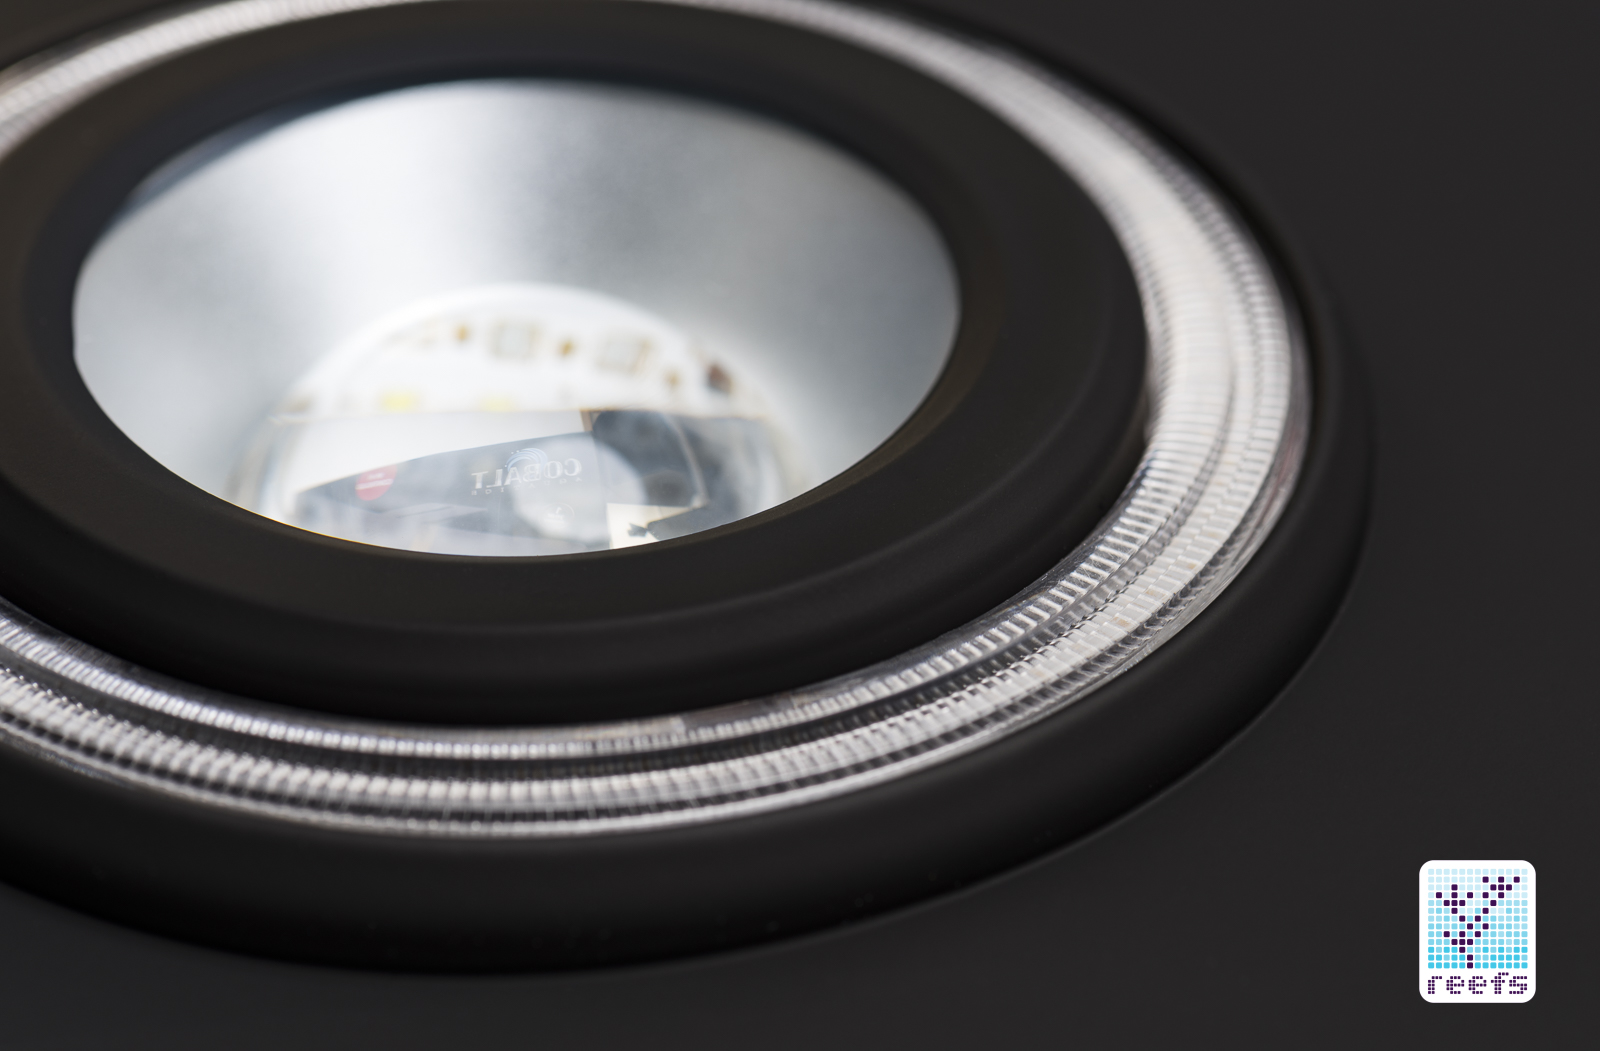
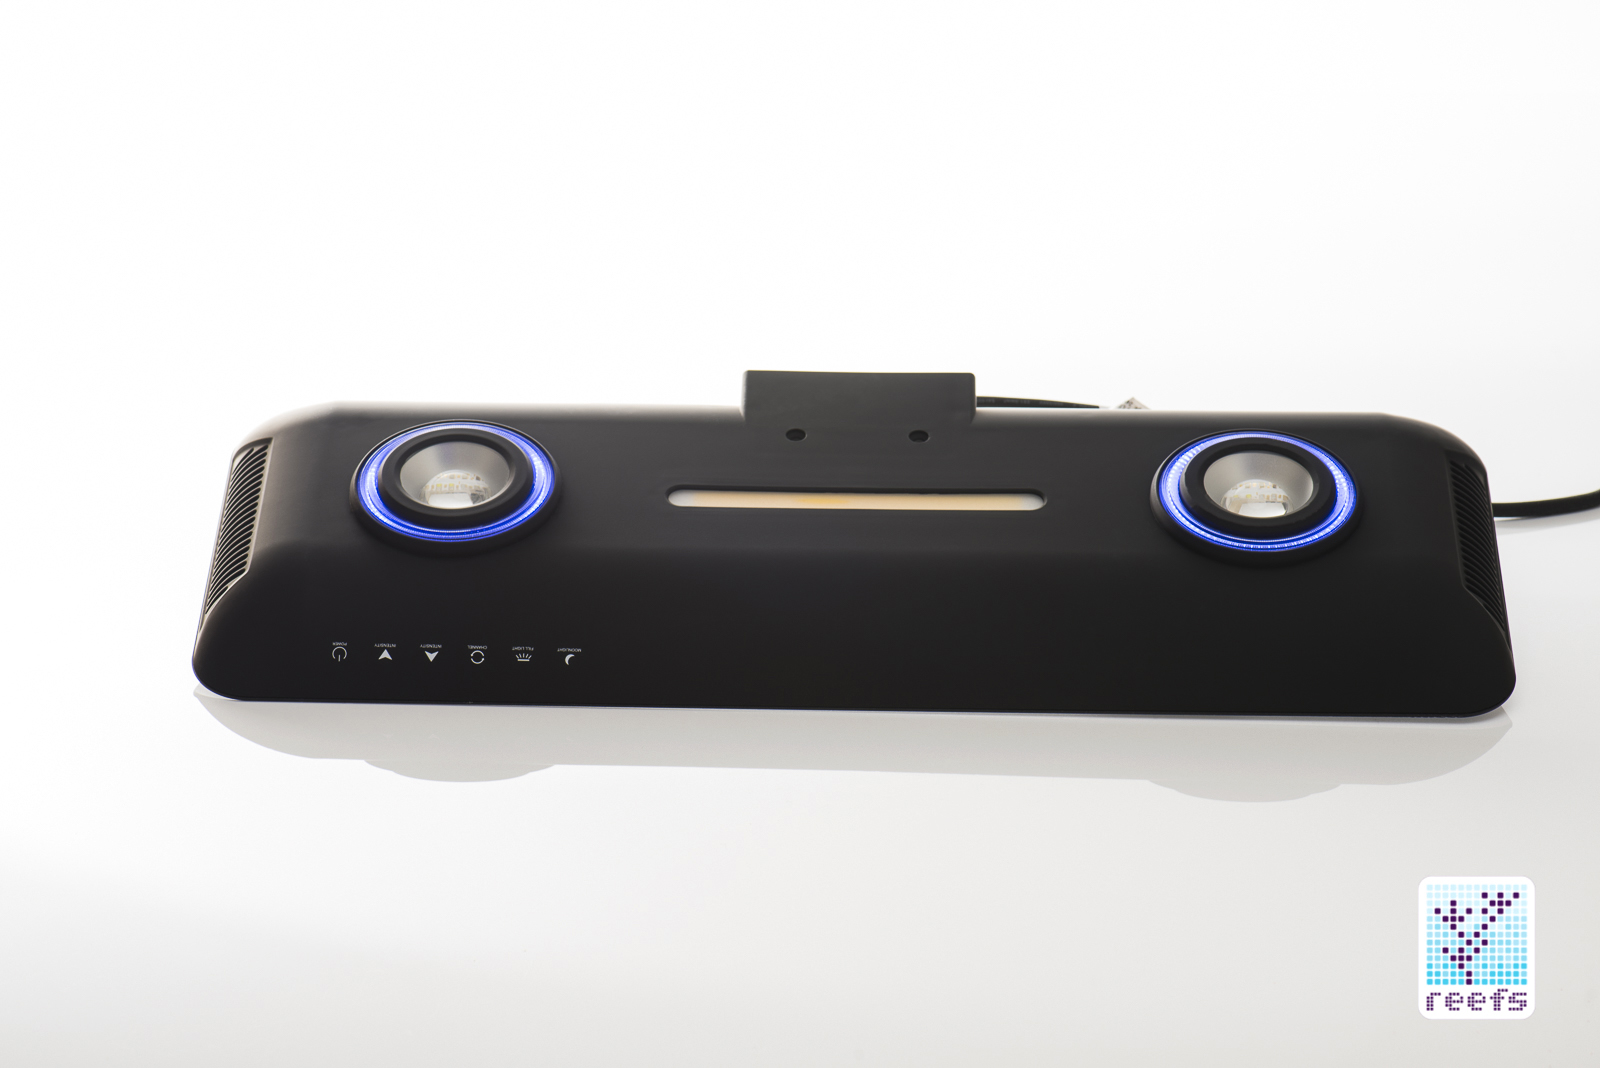
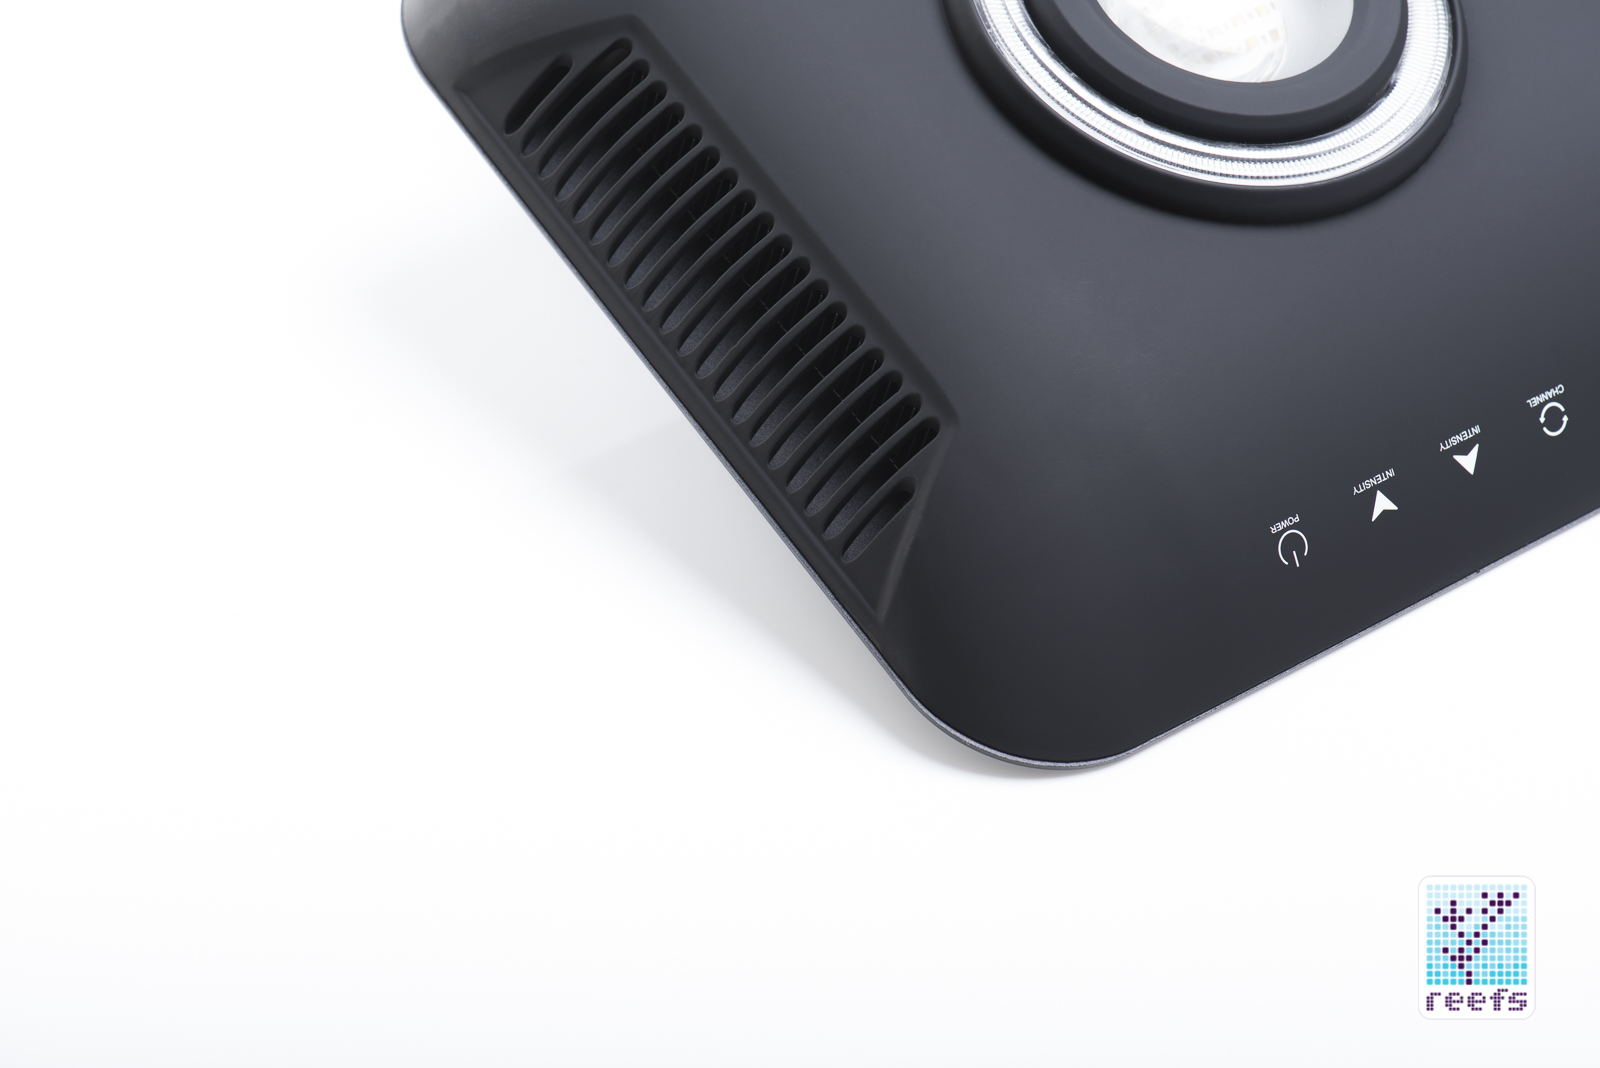
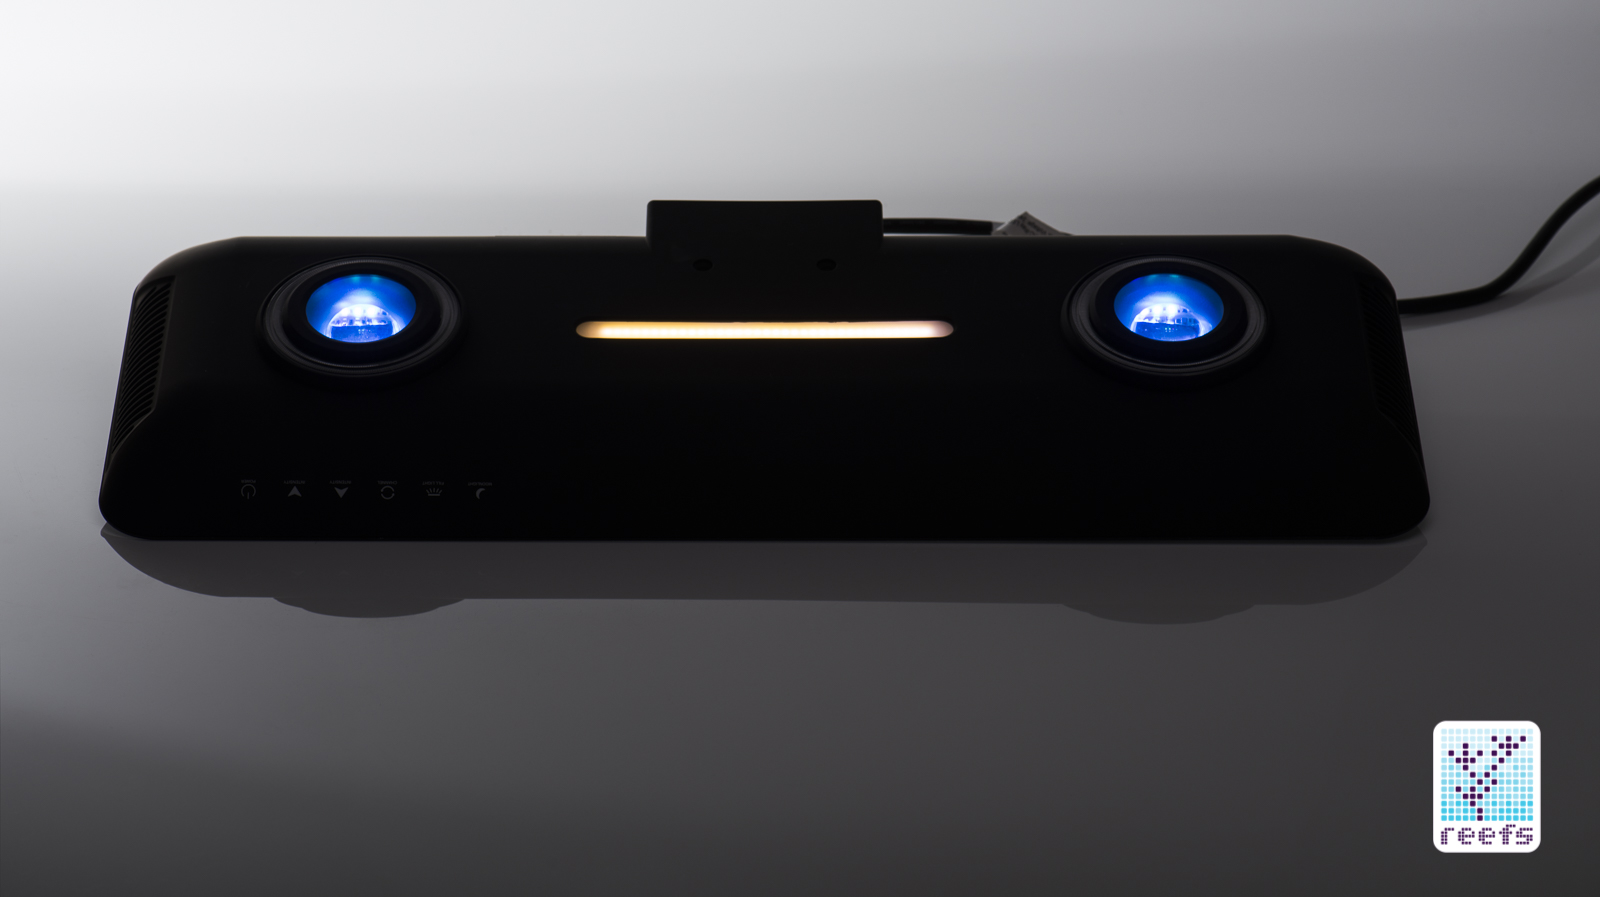
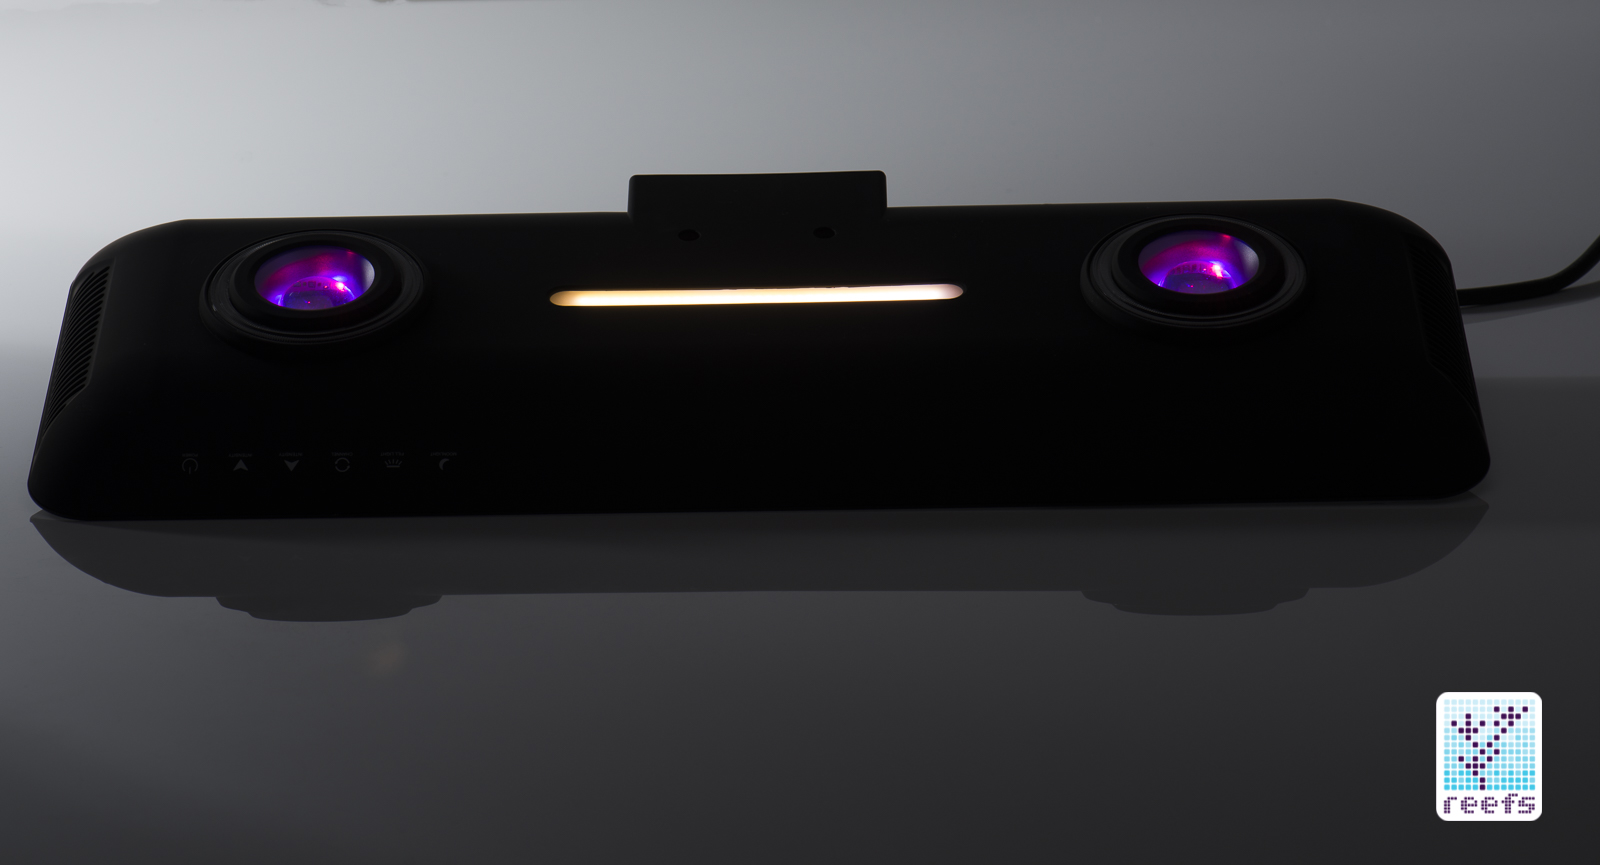
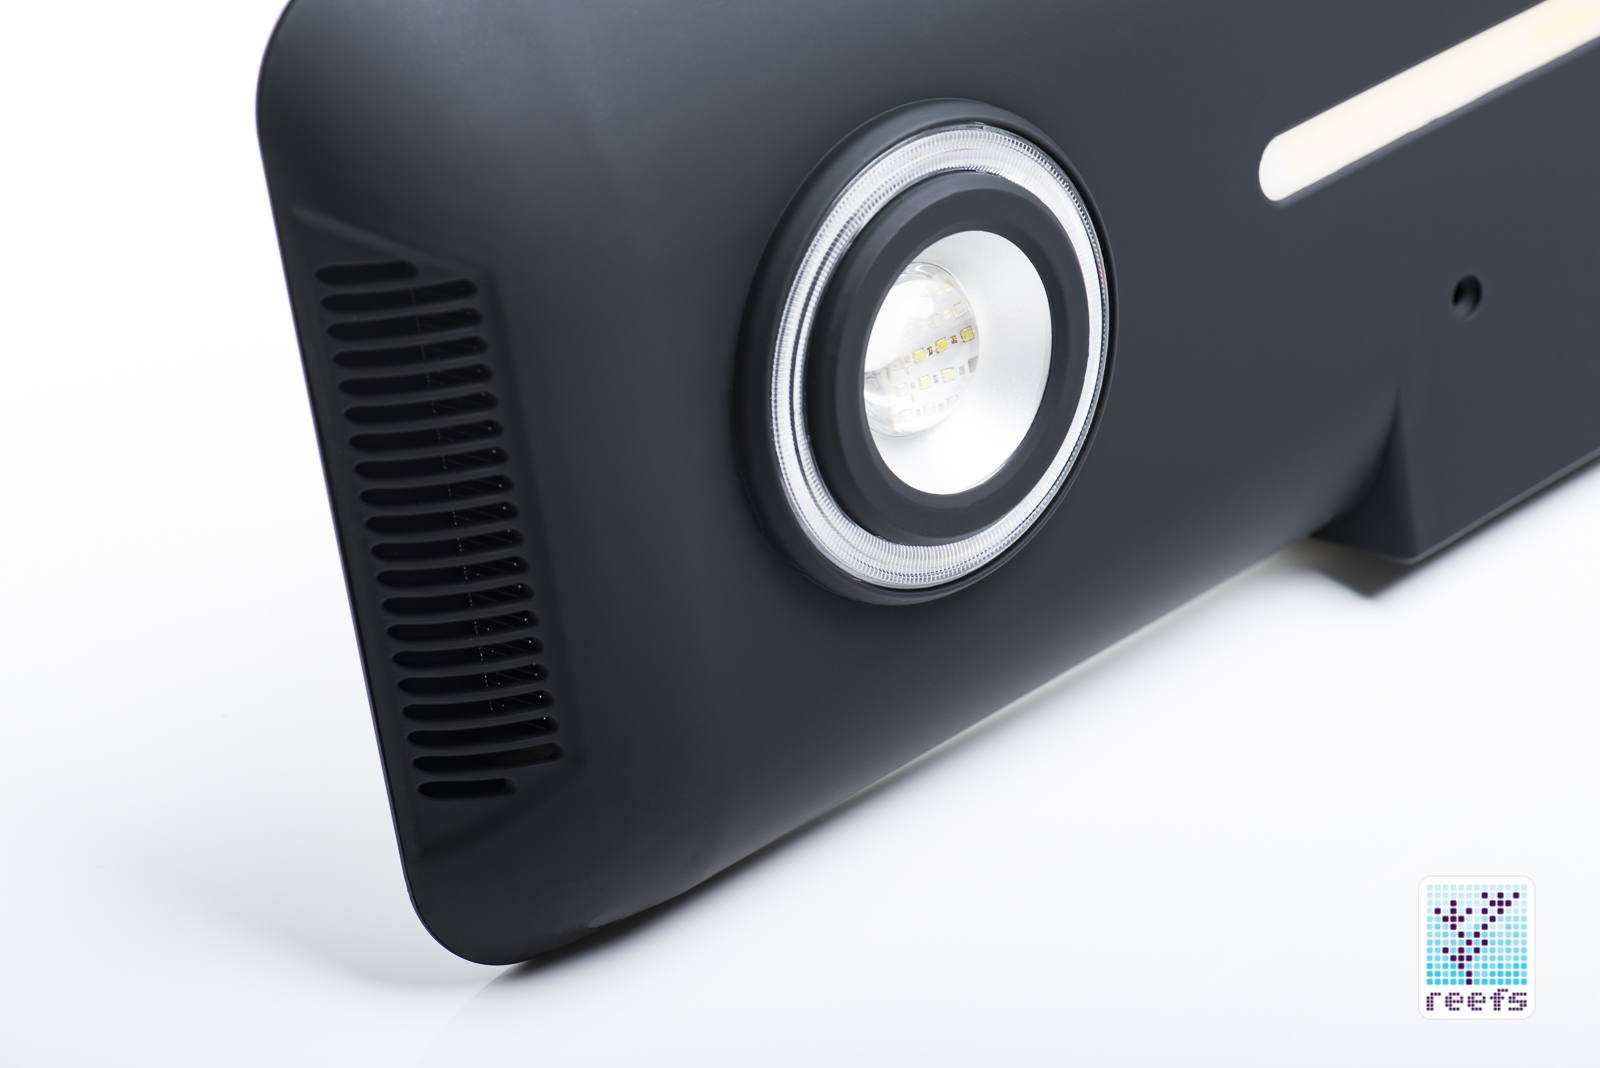
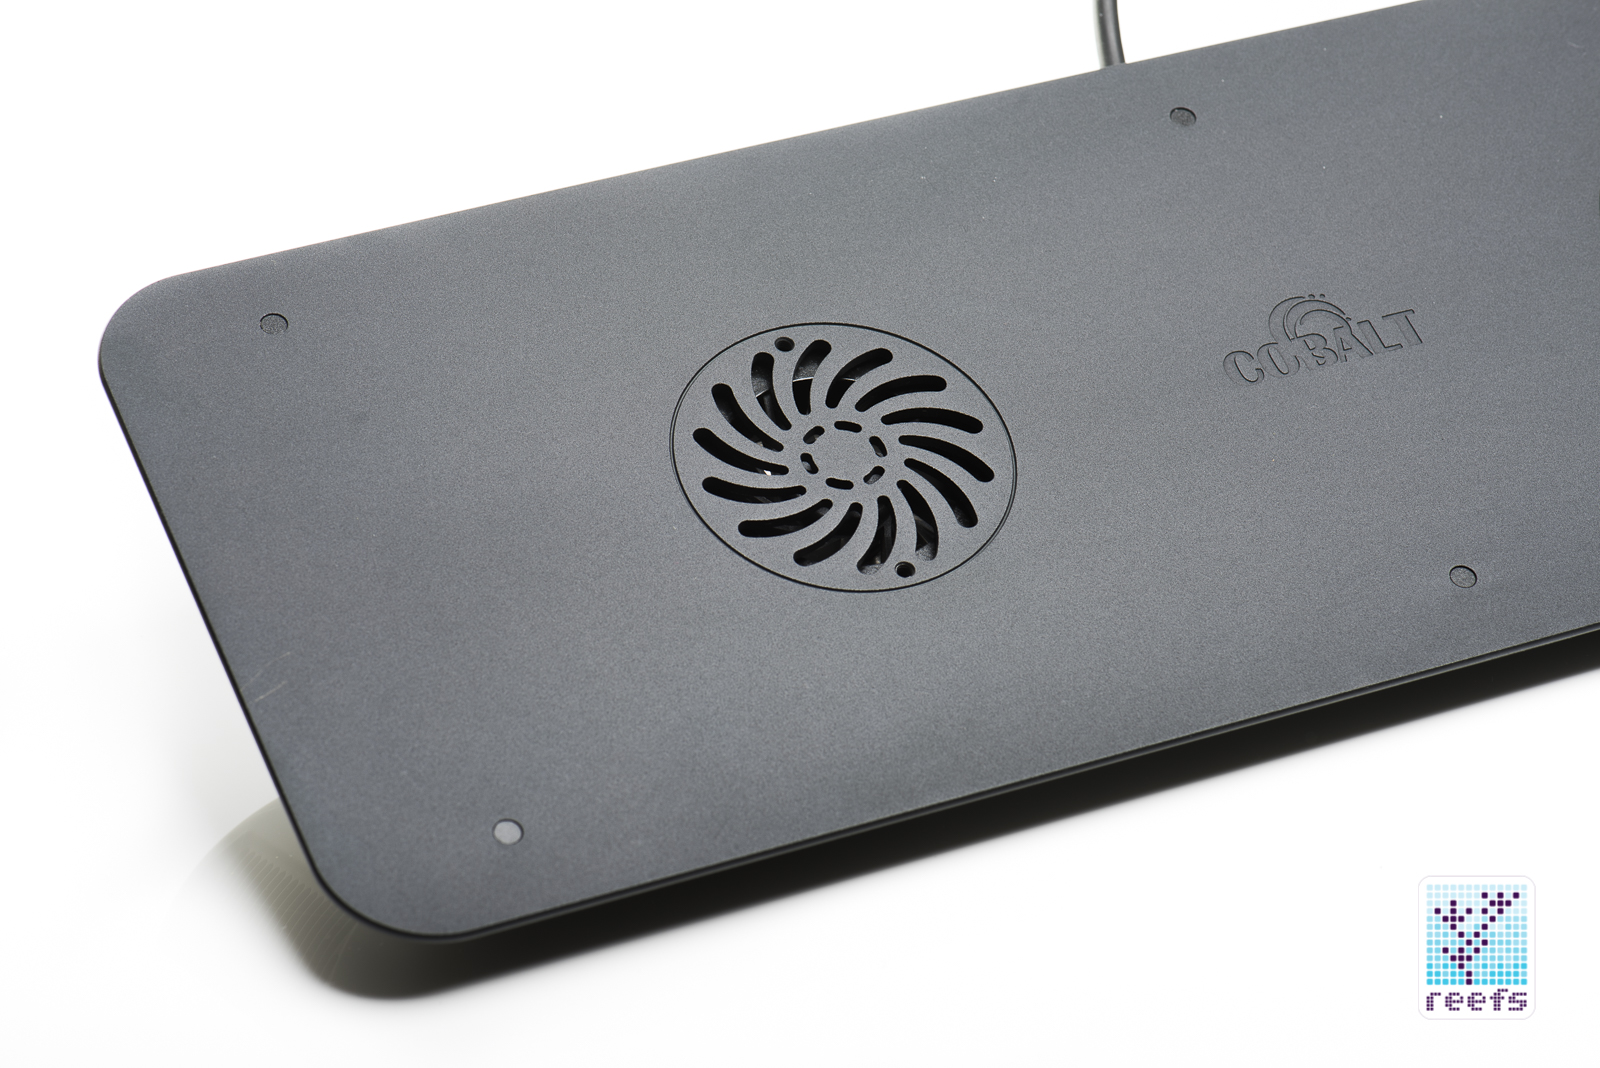
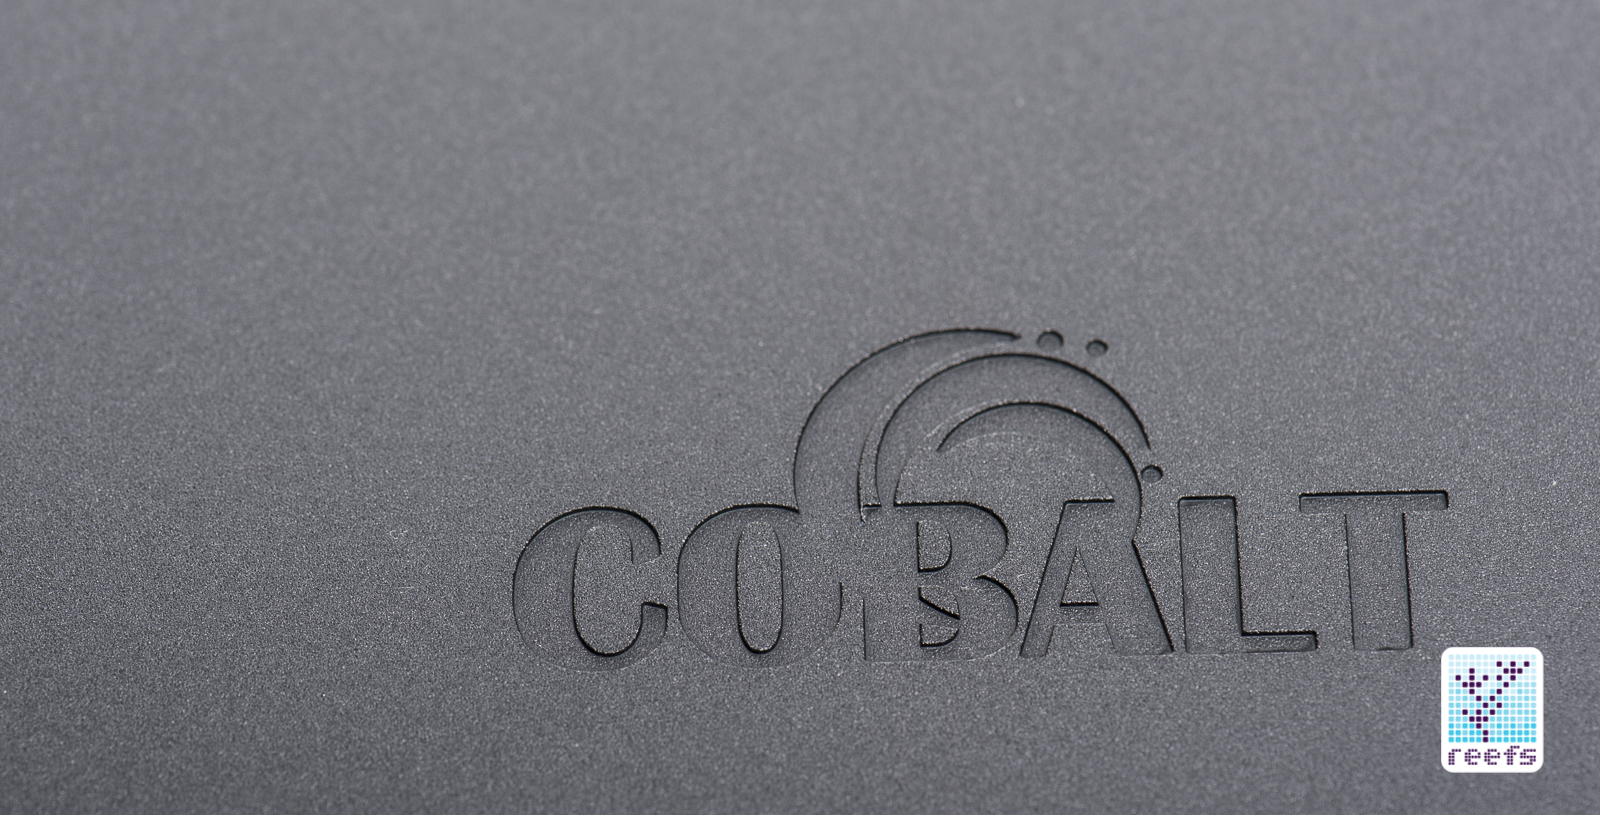
My first observation, upon lifting the LED panel out for examination, is that C-Ray 200 is SOLID. The top cover is made entirely of anodized aluminum, with flush mounted grill cutouts that serve as air intakes for the fans hidden inside the case, as well as four threaded holes for the included hanging kit. The bottom part is also aluminum, coated with a soft velvety finish that is just stunning to look at. It’s also a fingerprint magnet, but oh well, it’s that or the glossy black plastic other manufacturers use, both materials are aesthetically pleasing but painfully hard to clean. The two main LED chips, surrounded by the halo ring of emitters (more on that later), sit 12-½” apart (around 33cm, center to center); the overall length of the light is a little over 20” (51cm). The convex shaped lens mounted on the LED array is protected by an additional flat glass cover that’s dead simple to clean (yes, I tested that:)), plus it provides an additional level of splashproof-ness to the light. A centrally located, 5-½” long (14cm) fill striplight has its own light dispersing lens cover that blends with the frame seamlessly.

The back of the light is molded to accept an optional tank arm, while the front has 6 touch buttons for manual operation of the LED channels. The power cord sticks out of the back of the light and can be incorporated into the arm for a cleaner look.
Overall, C-Ray 200 is one slick looking LED panel- the bottom panel blends uniformly with the top cover, with all components seamlessly incorporated into the “flow” of the case. From a design standpoint, C-Ray 200 leaves nothing to be desired, unless you are not a fan of its unorthodox, bold design (some say it looks like a UFO). While doing my research, I learned that some aquarists find C-Ray to be very similar in build to the Kessil Ap700 LED light, however, when looking at both lights in person, I don’t see much similarity between the two, besides the shape and the fact that both use two LED arrays as their main source of light.
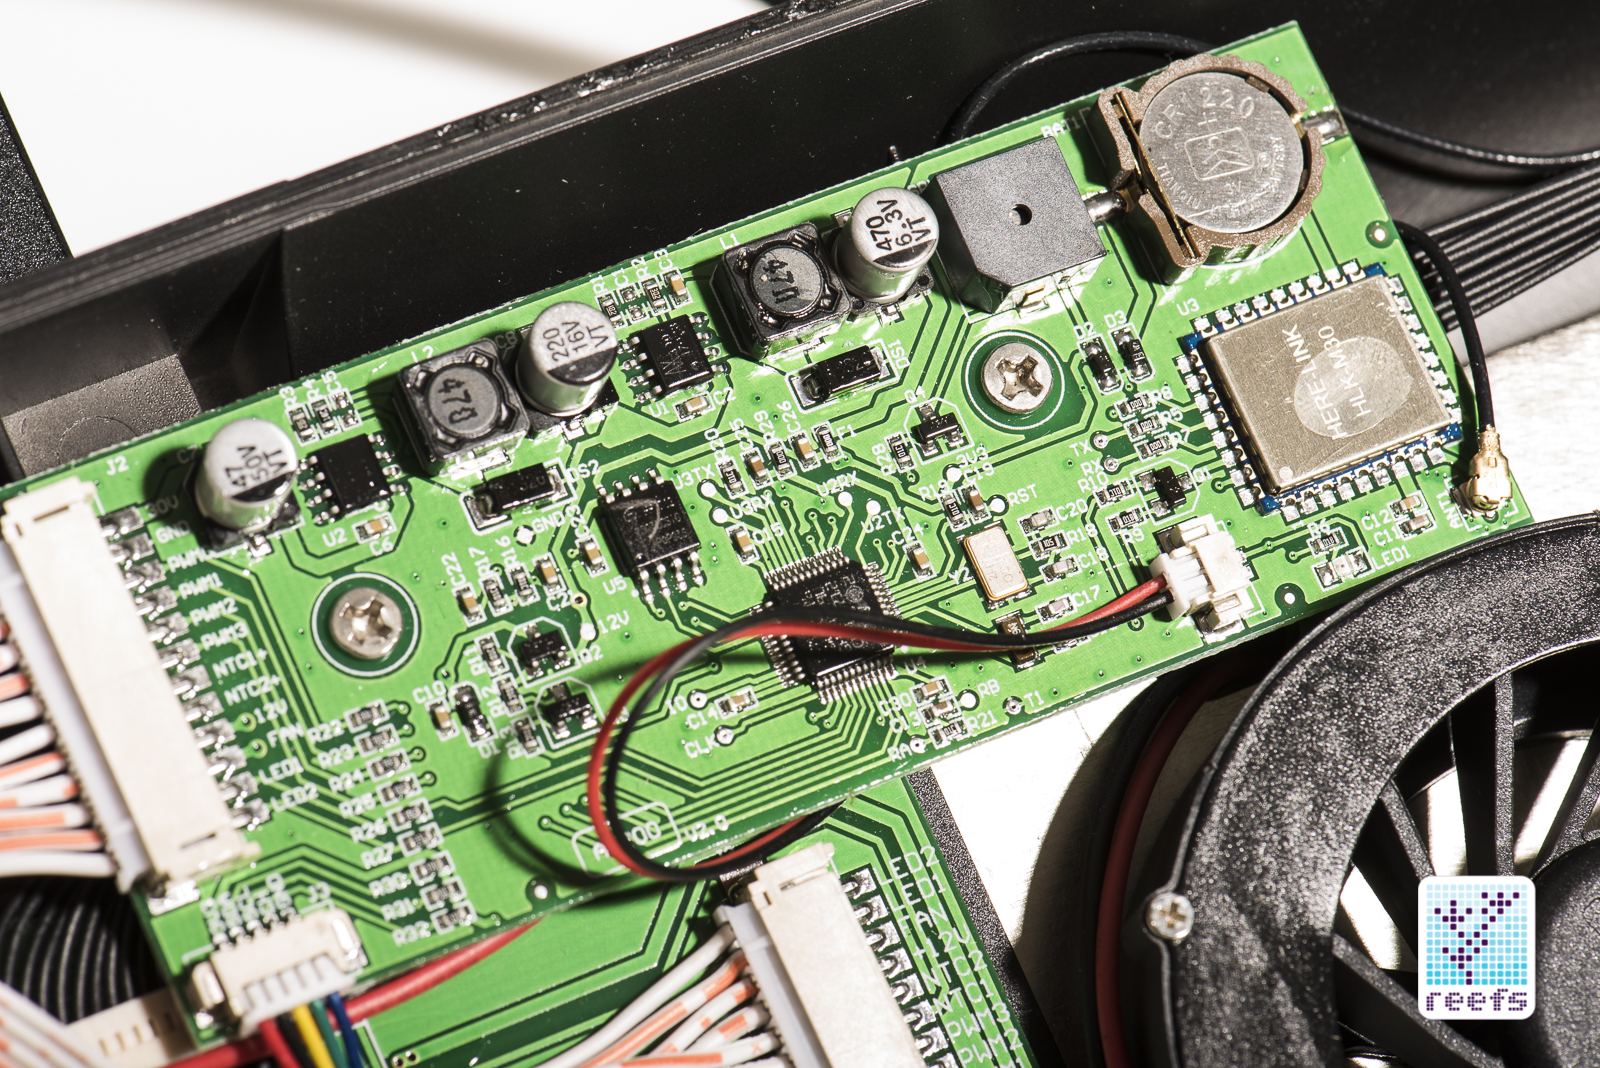
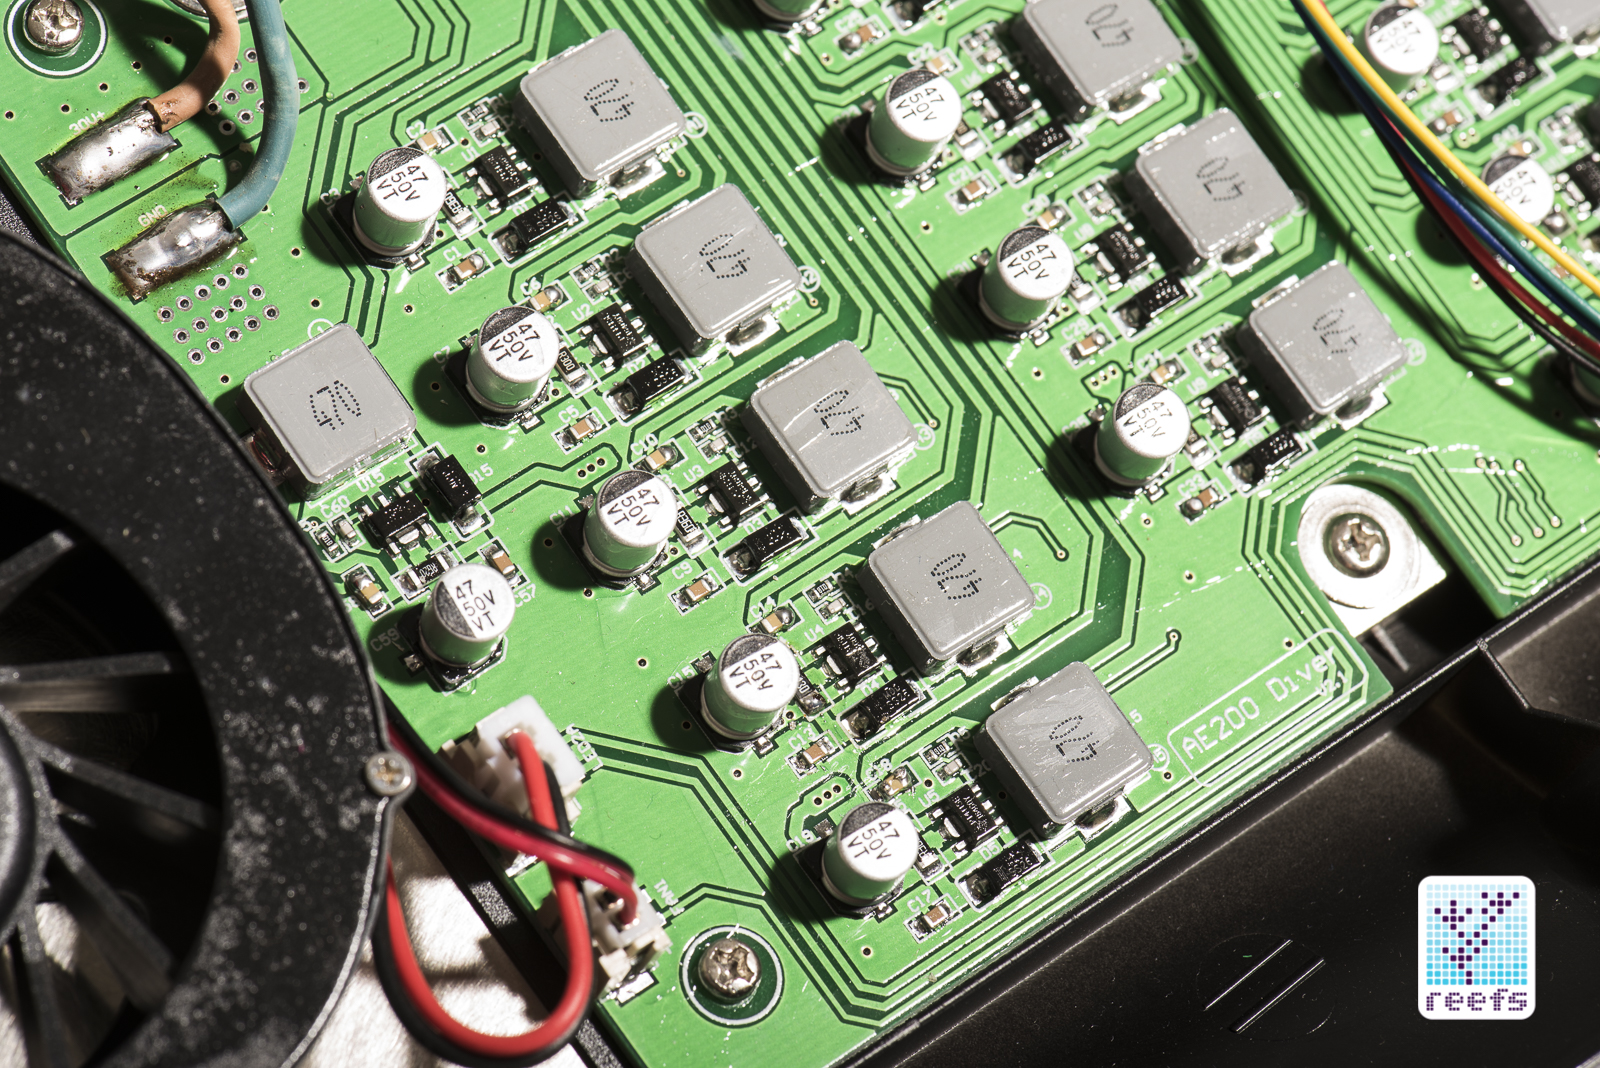
GUTTING
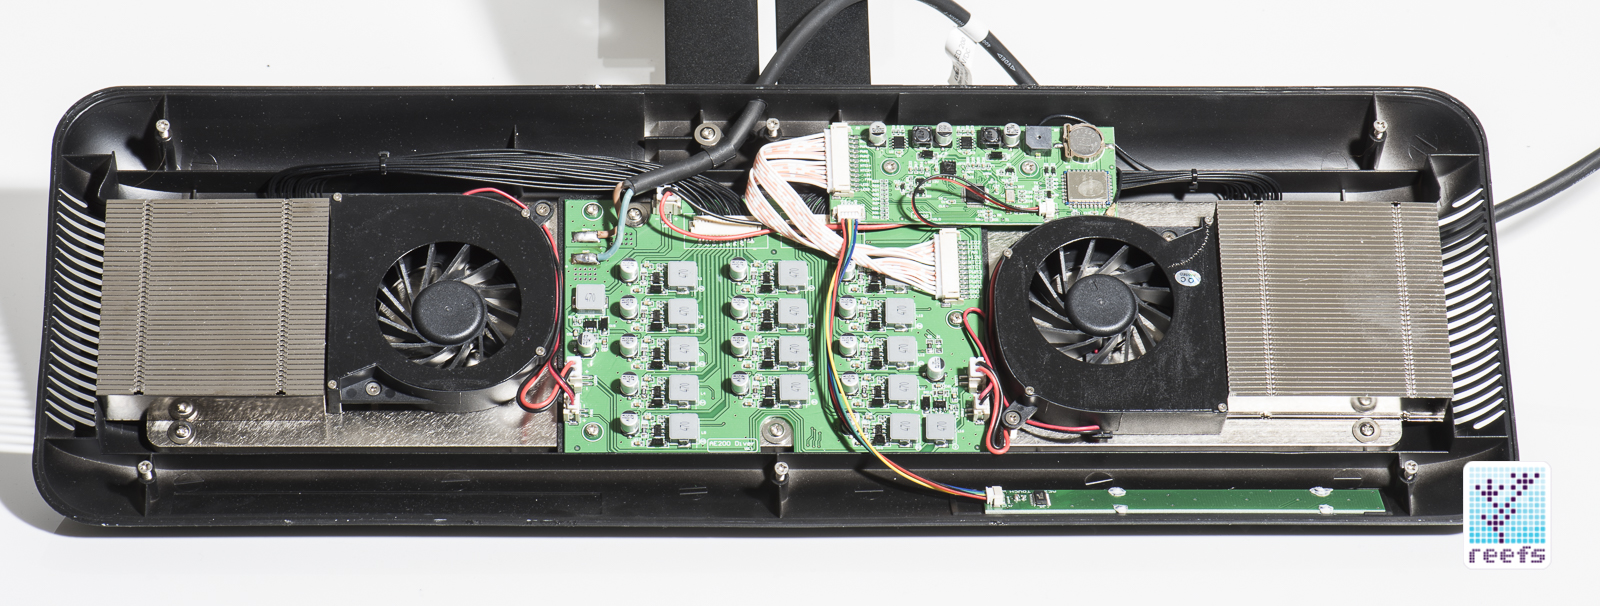
I was so eager to see what was inside C-Ray 200, I have had to fillet it (mostly likely losing the warranty in the process). What I found confirmed my overall opinion on the light’s build quality. The electronic components are neatly and compactly arranged, with plenty of room for air circulation. An oversized heat sink, paired with dedicated blower fan, is mounted on each side of the light. The fans are temperature controlled, meaning they turn on only if the LED chip heatsink reaches a certain threshold temperature. A close examination of the main board reveals the built in Wi-Fi module and antenna, as well as the dimming module that operates using the PWM protocol as opposed to a less sophisticated 0-10V signal. So far so good.
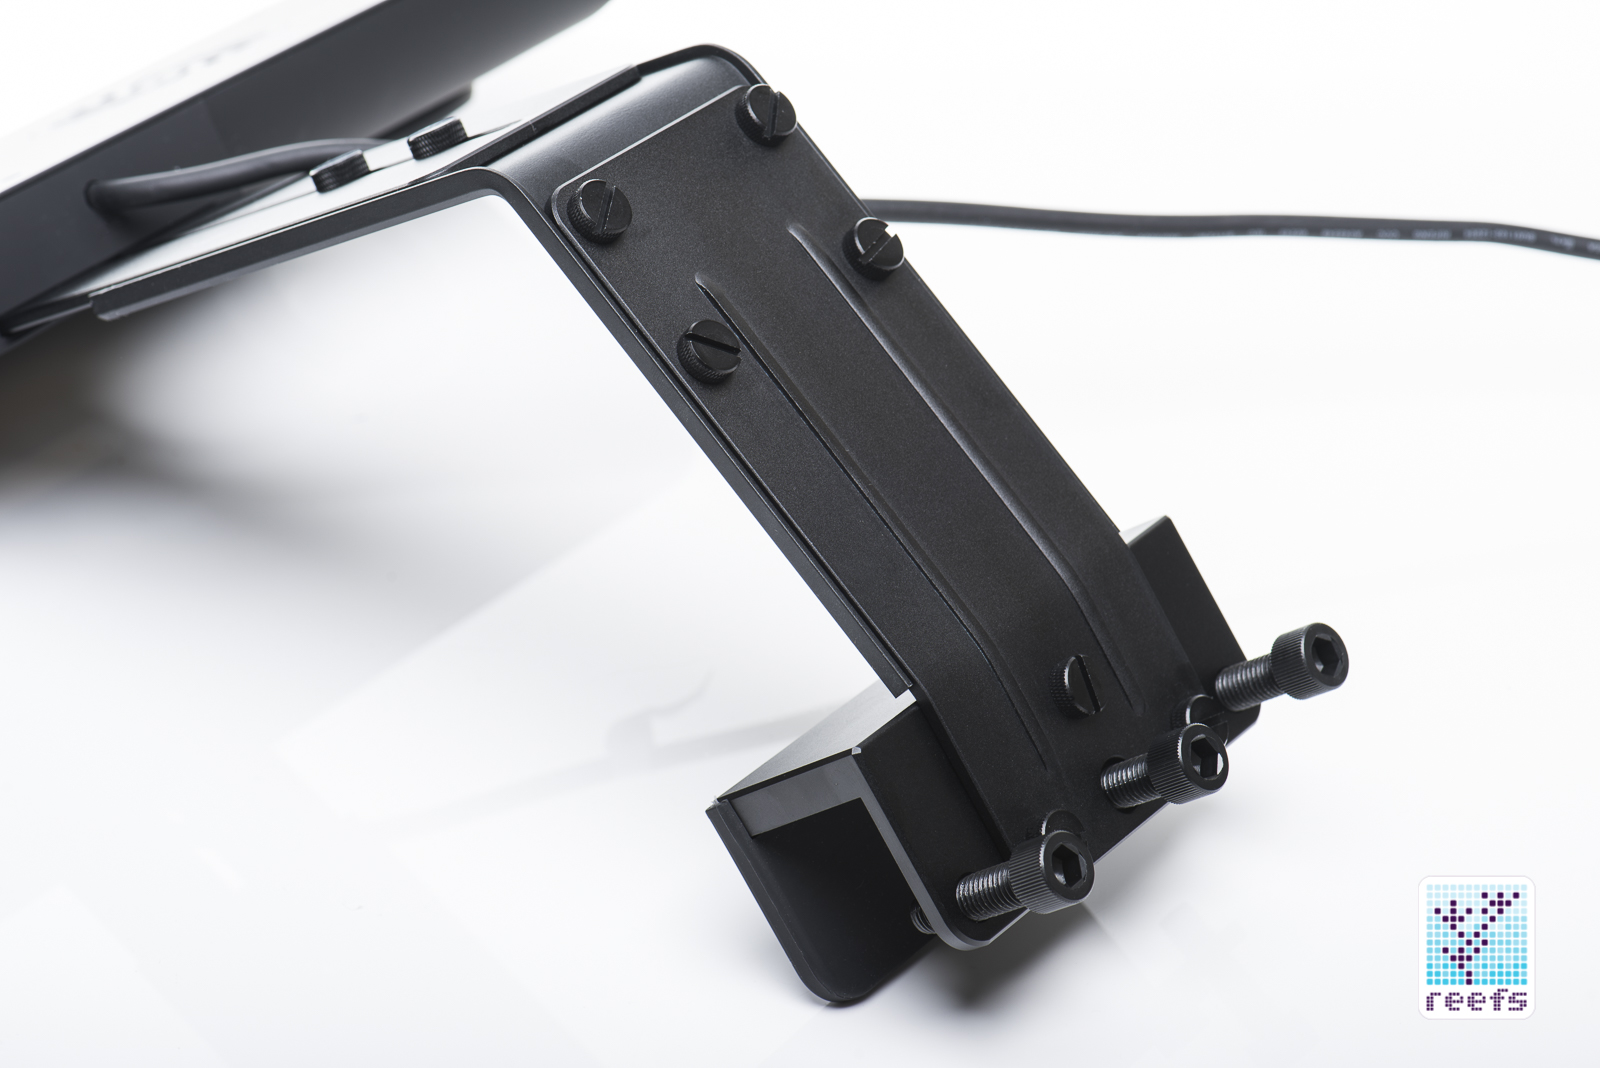
TANK MOUNT
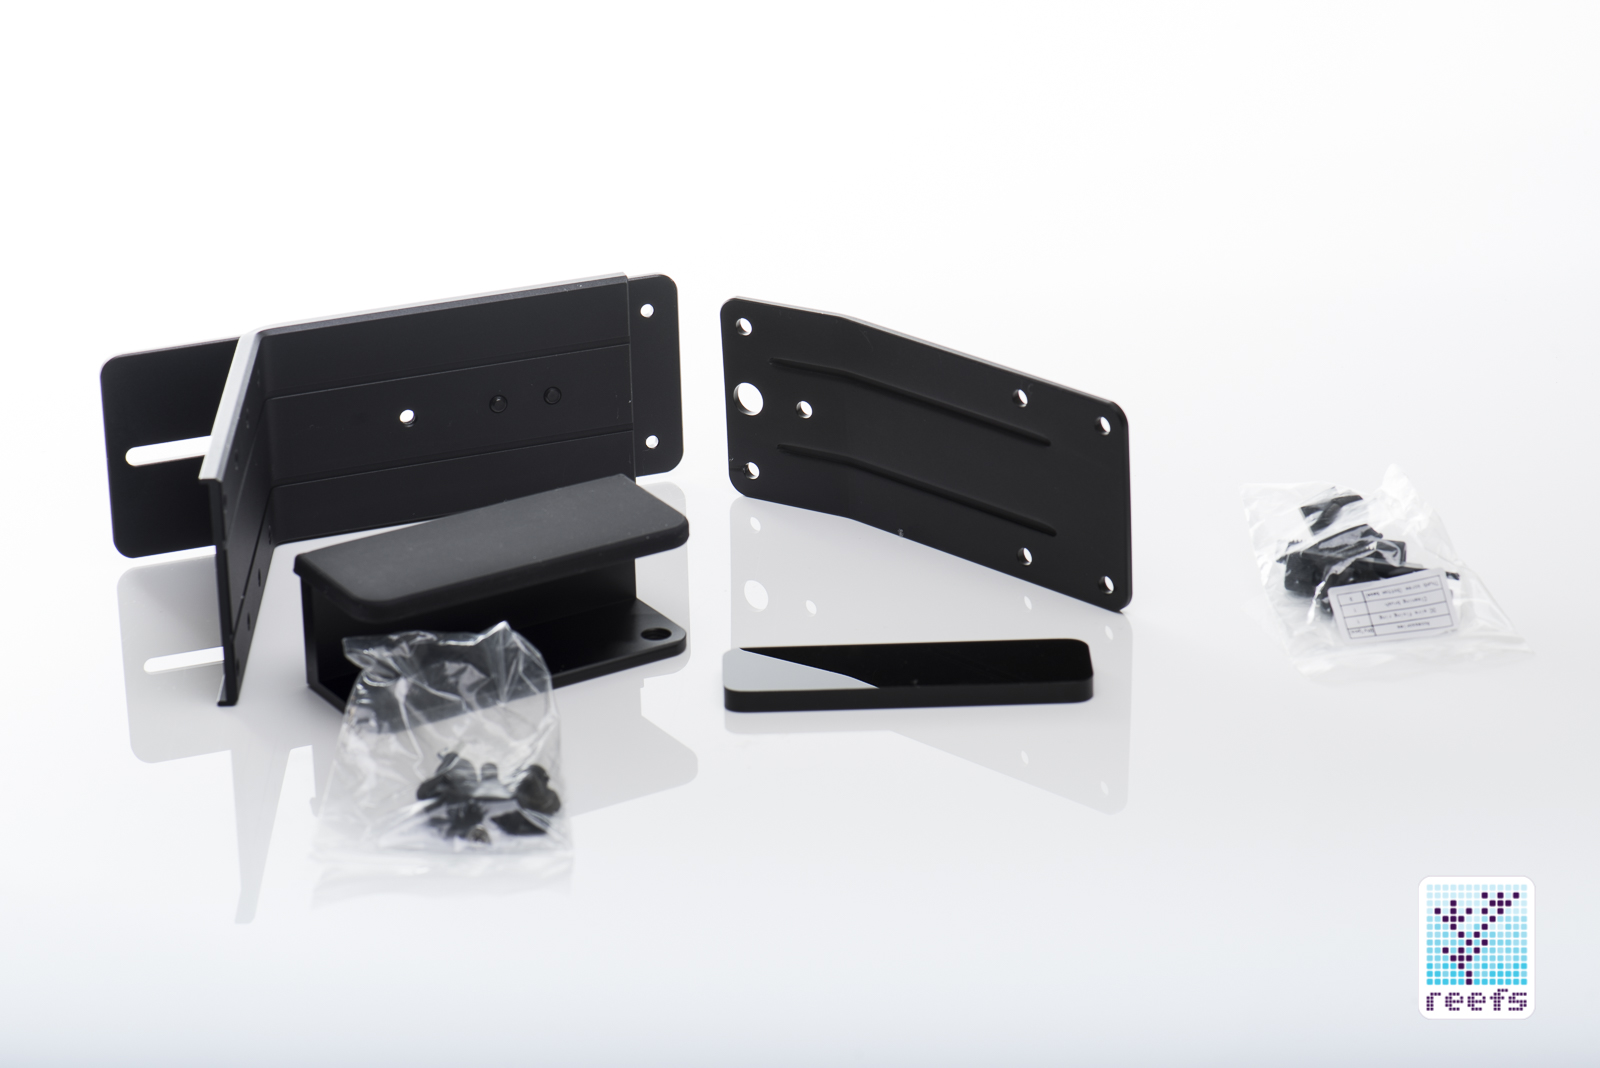

Before I leap into the testing part of the review, let’s talk a little about the optional tank mount, available as an add-on in two colors that match the two light option finishes. Just like the light itself, the aquarium arm is very well built and has an all-metal (aluminum) construction and three beefy nylon screws to secure it to the tank’s rim. The inside of the tank attachment has a rubber gasket to avoid scratching the back panel and can accommodate tanks with panels up to 1-¼” (32mm) thick. The bracket has an adjustable reach, secured by four thumb screws, extending from 9” (23cm) from the inside lip of the bracket to the center of the LED arrays at its minimum setting, up to 12” (30.5cm) at its maximum reach. That means you can have the LED panel dead center width-wise on a tank up to 24” (61cm) wide while using the bracket. The height is fixed at 5” from the tank’s rim to the underside of the light. There is no swivel on the bracket, which is understandable, given the light’s length; the bracket is well thought out and accompanies the light perfectly.
THE DRIVER
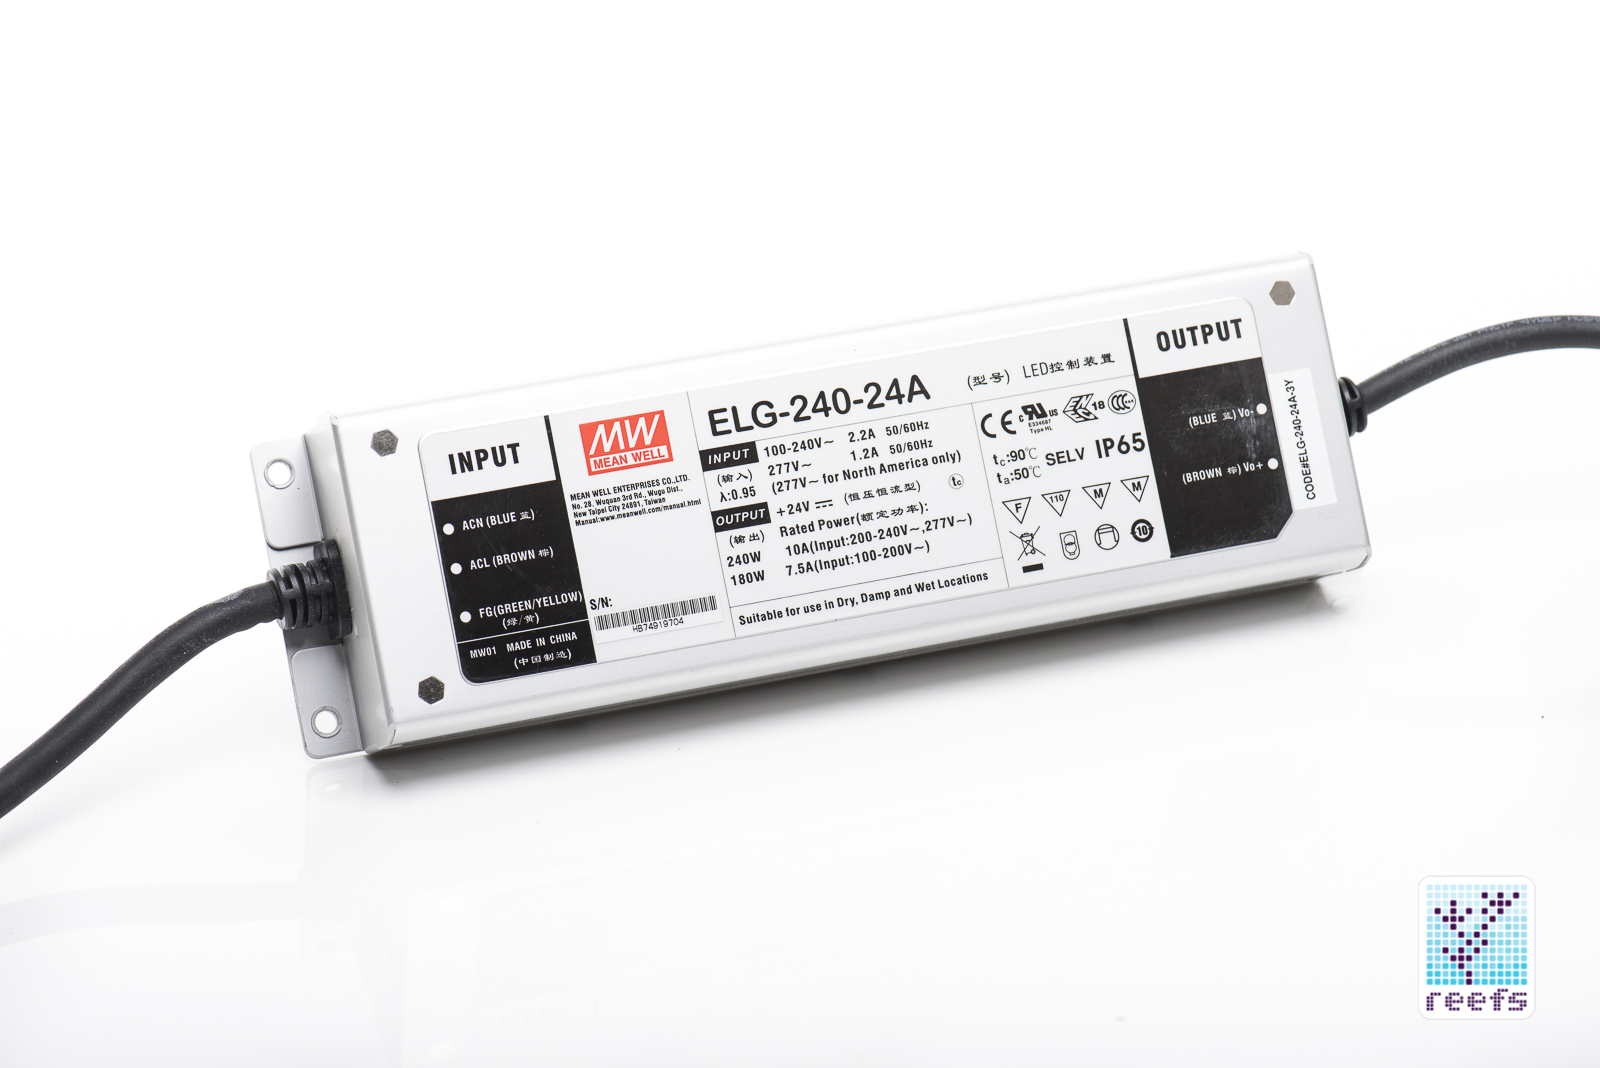
I was happy to see that Cobalt C-Ray 200 uses a really good driver from a well established company. I’ve been using Mean Well drivers in all my DIY fixtures and they have never failed on me. The model used here, ELG-240-24A, is a 24V, 10 A driver with a maximum output of 240W. It has an IP65 rating, meaning it is dust-proof and waterproof to the point that you can directly spray it with a water nozzle and it won’t be damaged. The driver itself is universal in terms of voltage, so you can use it anywhere in the world; the American version comes with a computer power adapter-like cable that plugs into the wall outlet. ELG-240-24A is a fairly large and heavy driver (8-½ L x 2-½ W x 1-½” H), but a sufficiently long cable (9 feet -2.7m) from the back of the light to the driver and another 5 feet (1.5m) from the driver to the plug allows it to be mounted almost anywhere in the vicinity of the aquarium.
LIGHT’S ON
Putting Cobalt C-Ray 200 together is a straightforward operation and only requires a phillips screwdriver. With the light secured to the tank’s rim and the driver plugged in, I dug into the online manual to see how to operate it locally. Although the vast majority of users will probably never touch the on-board buttons after initial setup, the light has a fair amount of controllability even if you don’t use the dedicated app. Let’s talk about that.
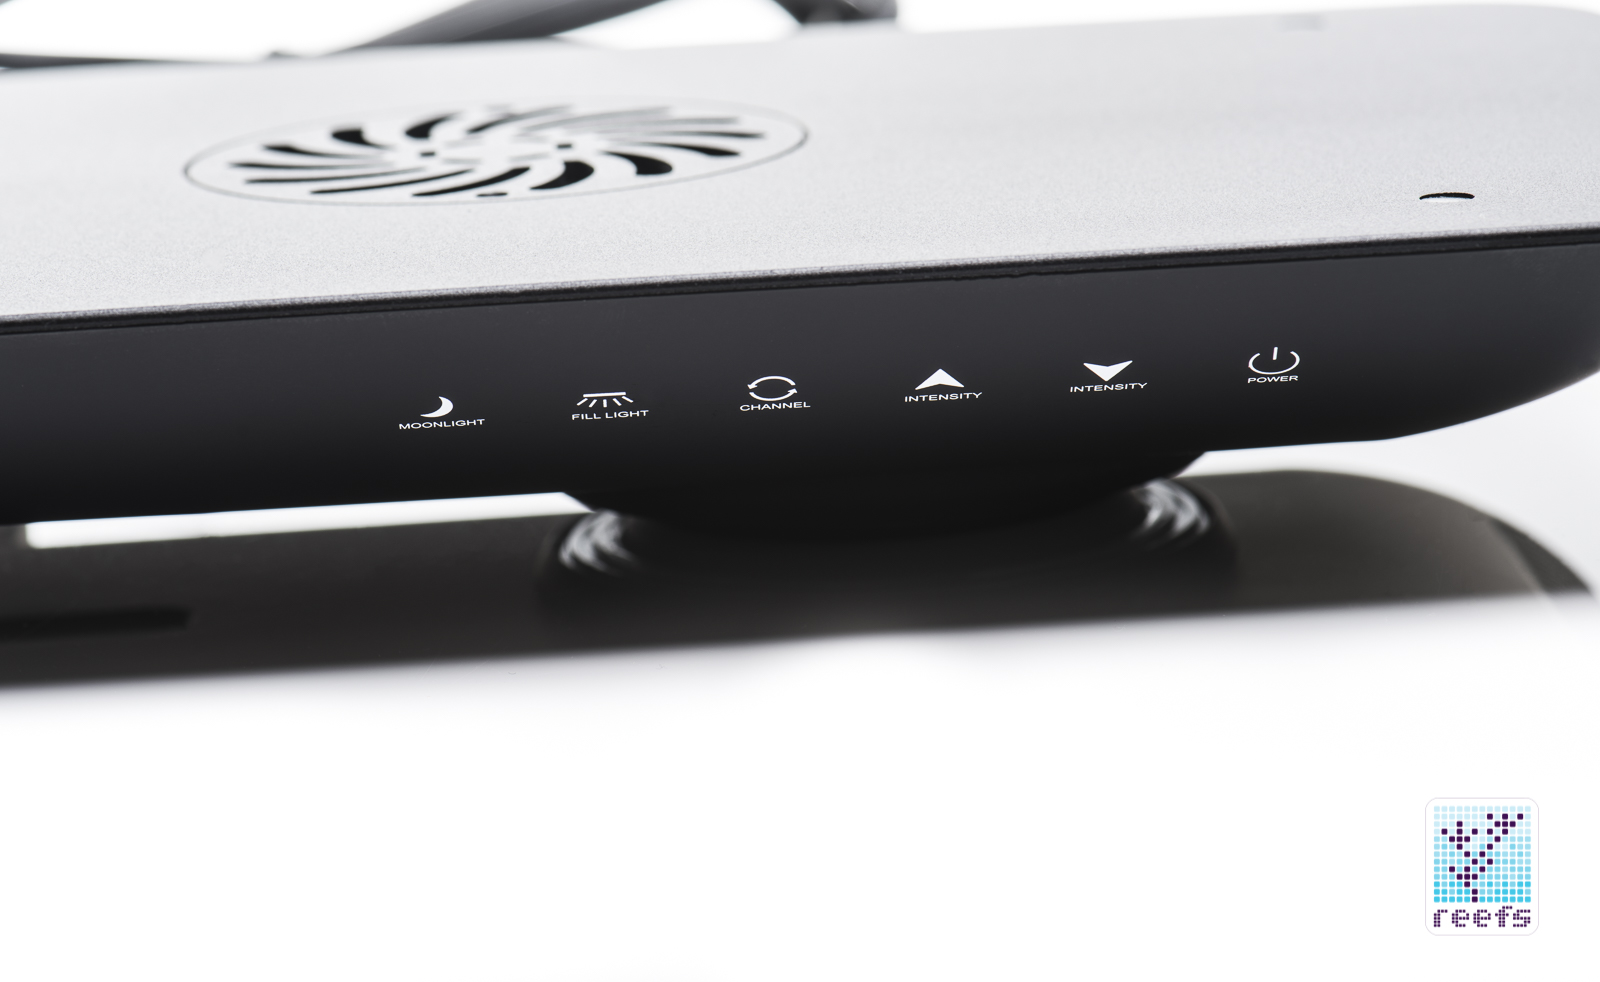
The 6 buttons, labeled from left to right, Power, Intensity (up), Intensity (Down), Channel, Fill Light, and Moonlight, are capacitive touch, which means that they are sensors on the inside of the case and completely integrated into the outside surface, much like controller panels in most modern kitchen appliances. I have to admit, I was never a fan of those type of buttons and prefer mechanical buttons, mainly because touch sensitive buttons tend to fail to register feedback from time to time. There was an aquarium light I reviewed a few years ago that featured capacitive touch buttons and I remember pulling my hairs out after hitting the “ON/OFF” button numerous times just to turn it on. To my surprise, this is not the case here- C-Ray on board buttons work every time and all the time. I even performed the “salty hands” test, trying to change settings right after pulling my hand out of saltwater and the light had no problem registering my fingers. It’s quite cool actually to have this type of button on the light when they work…
The first time you approach the light, all buttons are locked to prevent accidental presses. To unlock the light, you hold the Intensity Up and Down buttons for 2 seconds. The light gives out a “Beep” sound, informing it is ready to go. The “ON/OFF” button turns the light on/off (duh) and the Intensity buttons dim it in gradual increments. A combination of Channel button and Intensity buttons allows for dimming the Cree chip channels. There are 4 of those- “Cool white”, “Blue”, “Royal Blue” and “Red” (Keep in mind the names of channels are only arbitrary, based on my previous experience with Cree emitters, they actually are unnamed in the Cobalt app) and each has 6 intensity settings.
Moving on, the Fill Light button turns the middle warming bar on. Repeated presses shuffle through the fill light’s 4 dim settings. Finally, Moonlight turns the halo LED ring on/off and again, there are 4 dimming stages for that channel. You can’t physically set photoperiod or trigger any of the built in effects, but again, who cares when there’s an app for that. In fact, Cobalt C-Ray 200 has more on-board controllability than most other high end lights on the market, not that it really matters in my opinion.
THE APP
When downloaded and installed, the free dedicated application called “Cobalt”, available in Google Play and Apple App stores, opens up a world of opportunities when it comes to controlling C-Ray 200. Frankly, if you are thinking of purchasing that light, or any app controlled high end light for that matter, and do not plan to use the remote control ability, don’t do it. I am gonna repeat myself here, but it’s like getting a Ford Mustang Shelby GT500 and putting a governor on it.
Cobalt C-Ray 200 is equipped with a Wi-Fi module that allows it to be controlled remotely. Just to clarify, it’s not an over-the-Internet controllable light, but rather a direct Wi-Fi connected device. It means that the light generates its own Wi-Fi hotspot, to which you can connect using your mobile device. I personally think that an aquarium light is something I “set and forget” and tweak it only if I feel the need for it, in which situation I stand in front of my tank to see the changes in real time.
To unveil C-Ray 200’s full range of capabilities, you need to install the app (side note, I am reviewing the Android version of the app as my phone uses Google operating system, but I’ve forced my non-reefer friend to install it on his Iphone and the interface between the two apps is almost identical). Upon opening it for the first time, a page from the manual comes up, explaining how to set up the Wi-Fi connection. That activates the Wi-Fi module and enables the phone (or other mobile device) to connect with the light. The Wi-Fi network of the light starts with AE200 and has a range matching that of a typical home router, meaning you can easily tweak the light from another room if you need to.
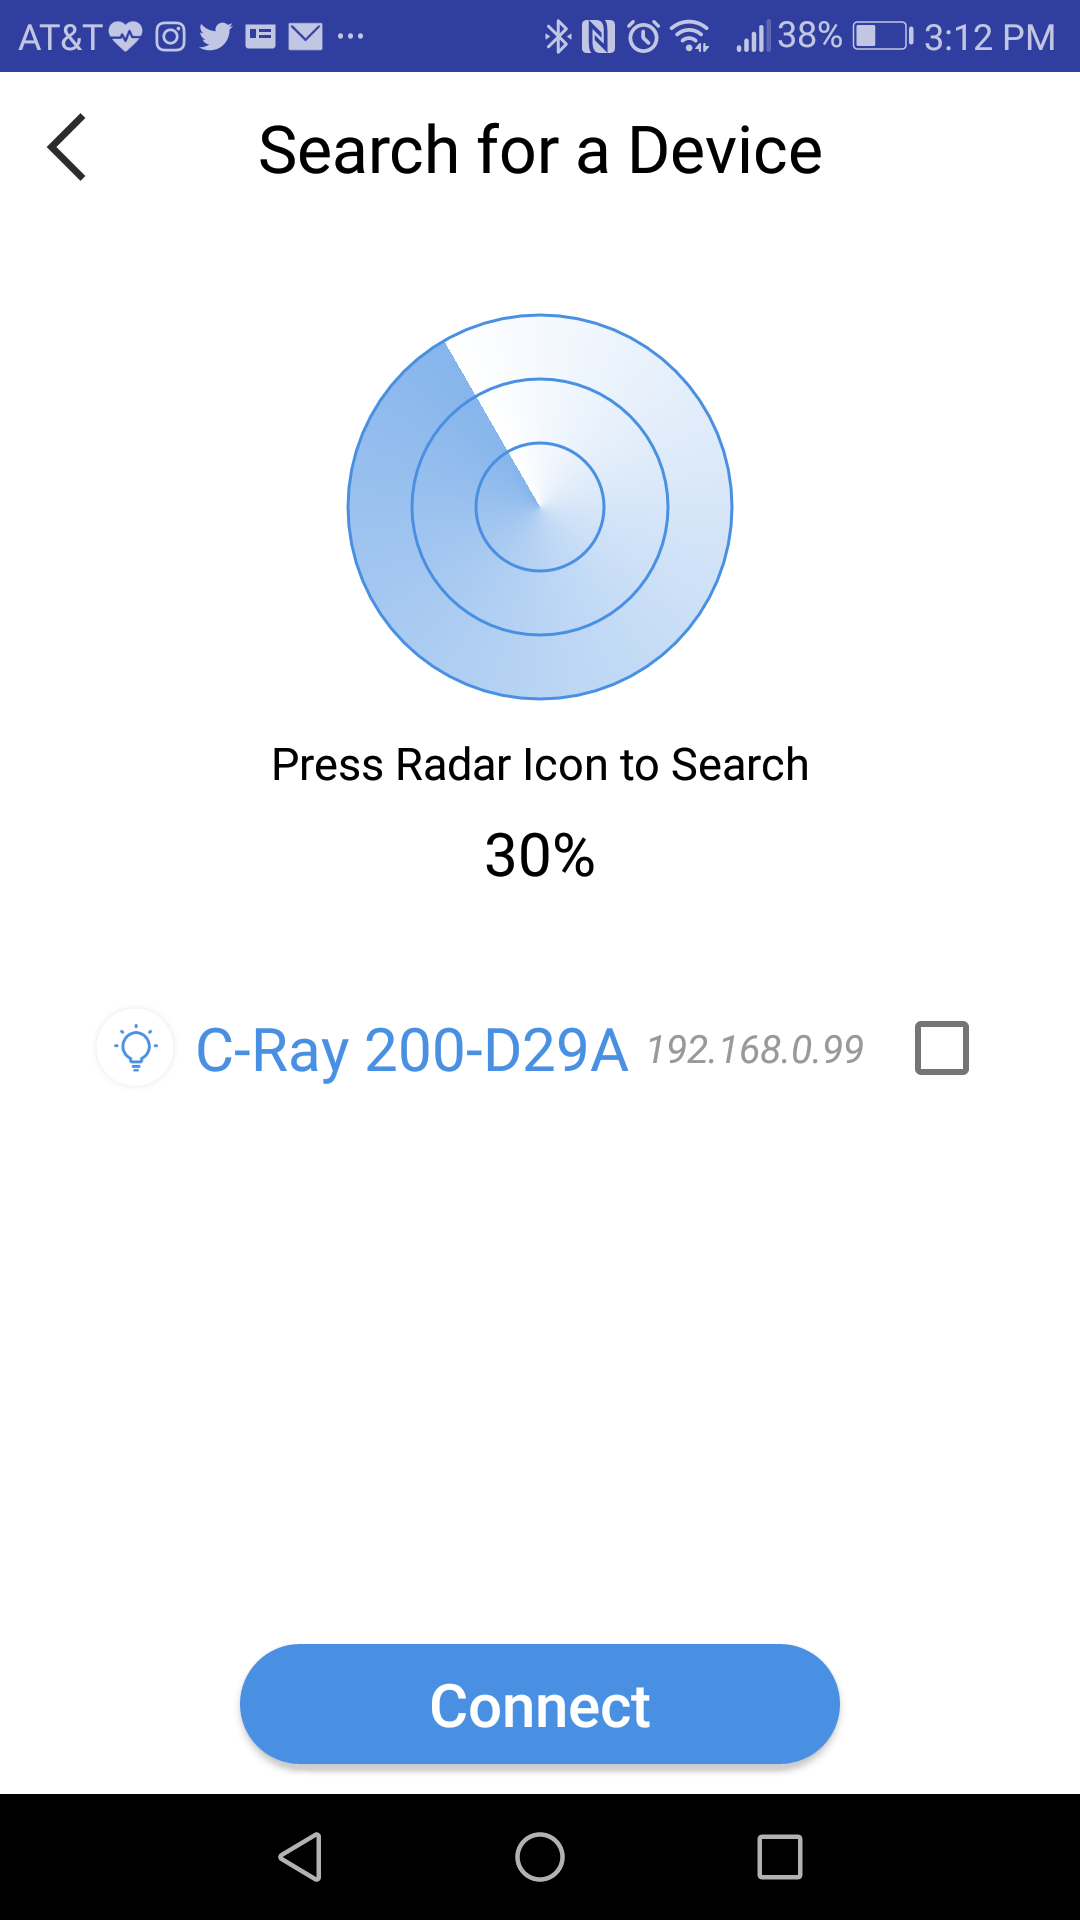
After connecting to the light’s hotspot, you hit “Connect “ in the app and it starts looking for all nearby C-Ray 200s. In my case, it took only few seconds for the app to find the light and jump into the main control panel of the app.
The main screen is clean to read and very intuitive- you have current time on the top, the four icons representing 4 channels of the main LED array and below, icons for fill light, moonlight and the power button. There’s a number under each channel icon that displays the current dimming level. On the very bottom of the main screen, we have four tabs, labeled “Home”, “Manual”, “Effects” and “Program”, plus there’s “settings” in the top left corner. Let’s break down each of the app functions…
- Settings
Hitting the settings tab, represented with the familiar three horizontal bars icon, takes us to the settings sidebar. Here, you can:
- turn the indicator light, represented as two blue blinking LEDs on each end of the fill light bar, ON/OFF, which indicates the connectivity status between the light and the app (this setting is set at OFF by default and I recommend leaving it as is)
- Restore factory settings
- Check for updates to the firmware/software
- Open the digital version of the user manual
- Go to “Contact us” page on the Cobalt website, where you can register your light and find manufacturer’s contact information
- Check software and firmware versions
- Manual
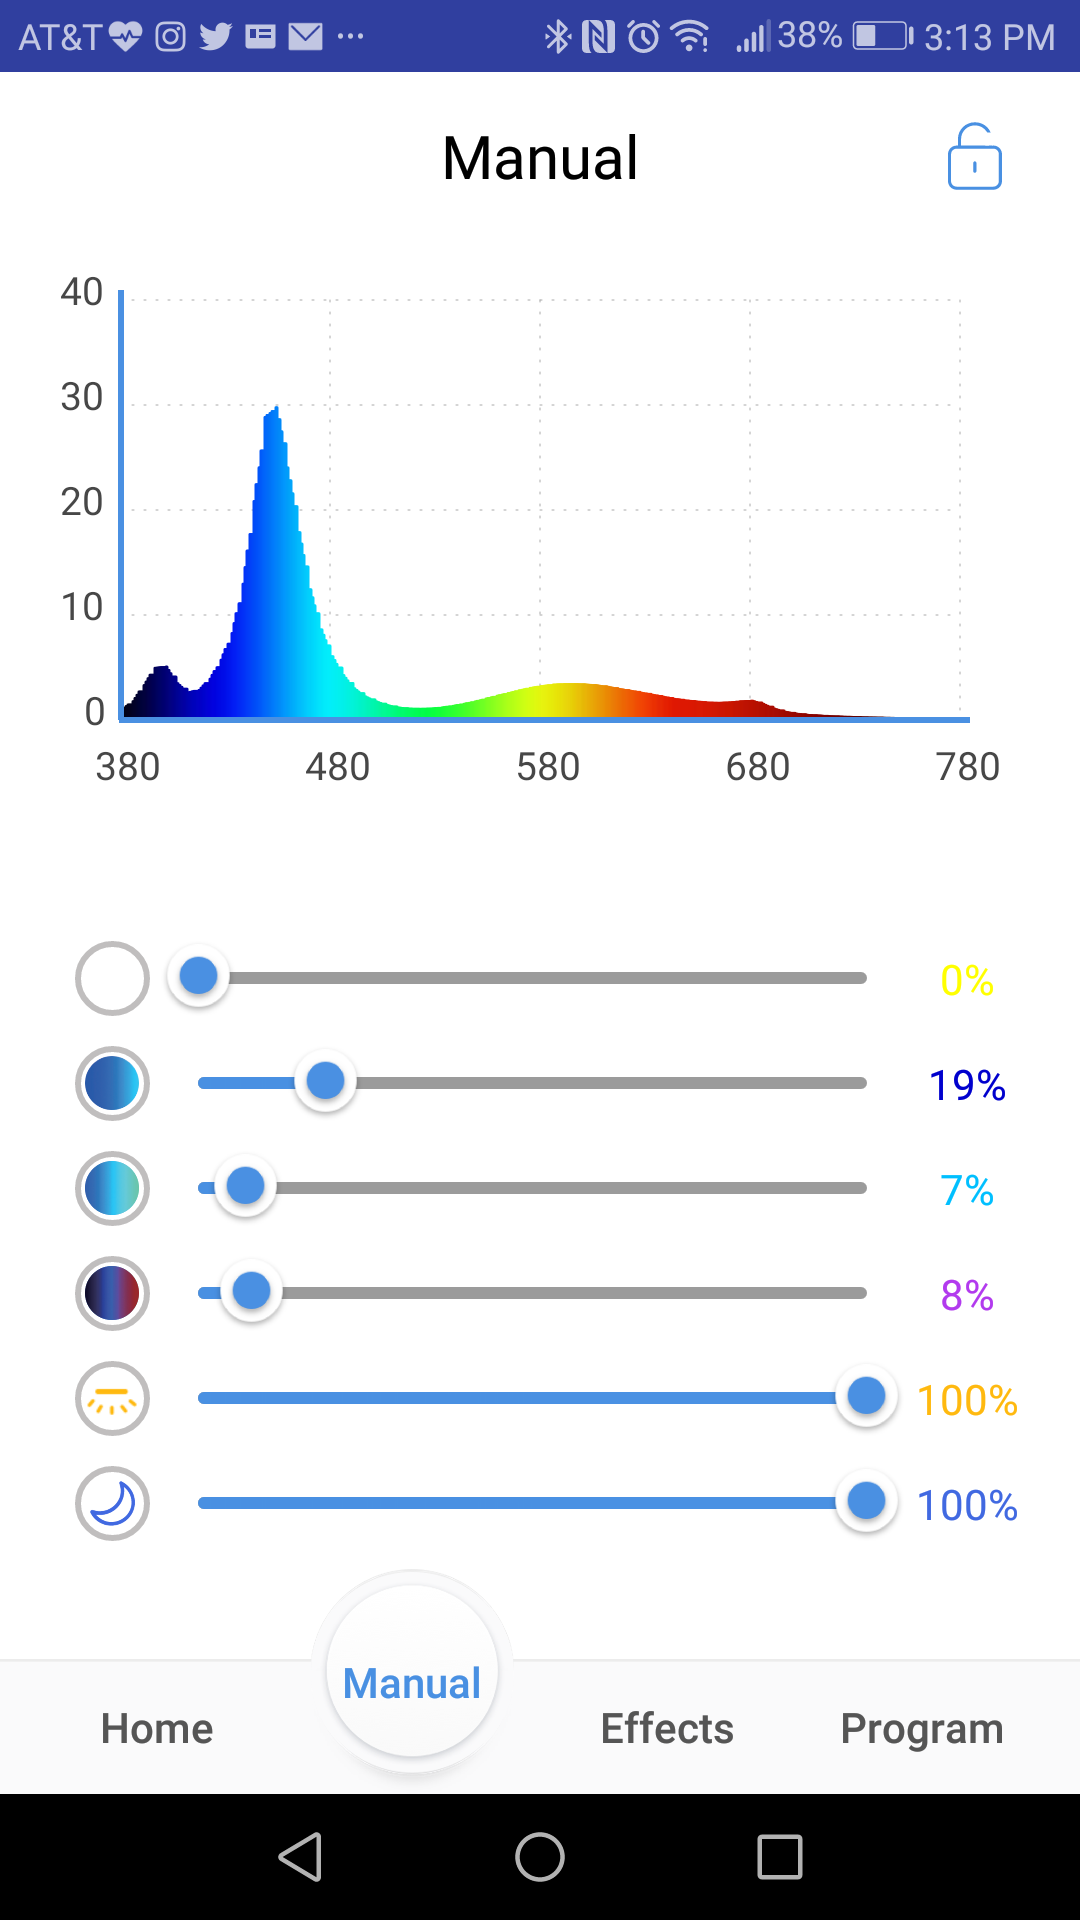
This tab allows the user to take full control of the light’s dimming channels without setting up a photoperiod program. To me, Manual mode acts as a way to play with the light’s spectrum in real time to be later used in the program mode, but some people may use it as the primary way of controlling their light fixture. One way or another, Manual mode represents the full extent of controllability built in the light and I would like to stop and talk in detail about the built in channels. When you enter Manual mode, the screen is occupied by a spectral graph, accompanied with a set of 6 sliders, each representing the light’s individual dimming channels.
The “white” or “daylight” channel, however you prefer to call it, is the main source of PAR radiation emitted by C-Ray 200. It covers the lion’s share of the light’s overall spectrum, from about 400nm to 680nm, with peak at about 430nm. Next is the deep blue channel that covers the spectrum range between 380 to 480nm, with peak intensity at around 450nm. Following, the blue channel adds light in the light blue-green wavelengths, from 420ish to 530nm, with peak at 480nm. The last channel on the Cree chip covers the far end of the light spectrum usable for coral photosynthesis, 380-450nm (peak at around 400nm) and 630-700nm with sharp peak at 680nm. The centrally located LED strip plays the role of a fill light (hence the name) that smooths the spectrum curve, providing light of wavelengths between 450-480nm and around 520-680nm. Finally, the moonlight is designed strictly to bring up the fluorescence in corals, peaking at 450nm.
- Effects

A standard set of “show-off” effects you can impress your friends with is present in Cobalt C-Ray 200. We have “cloud”, which dims LEDs from left to right and in reverse, a “storm” with flickering jolts of intensity from the emitters and a Lunar Cycle that activates the halo LED rings surrounding Cree chips. While the first two effects are operated manually (but can be programmed into the schedule, see below in next paragraph), the lunar cycle can be scheduled to turn on/off at a specific time right from the “effect” tab.
- Program
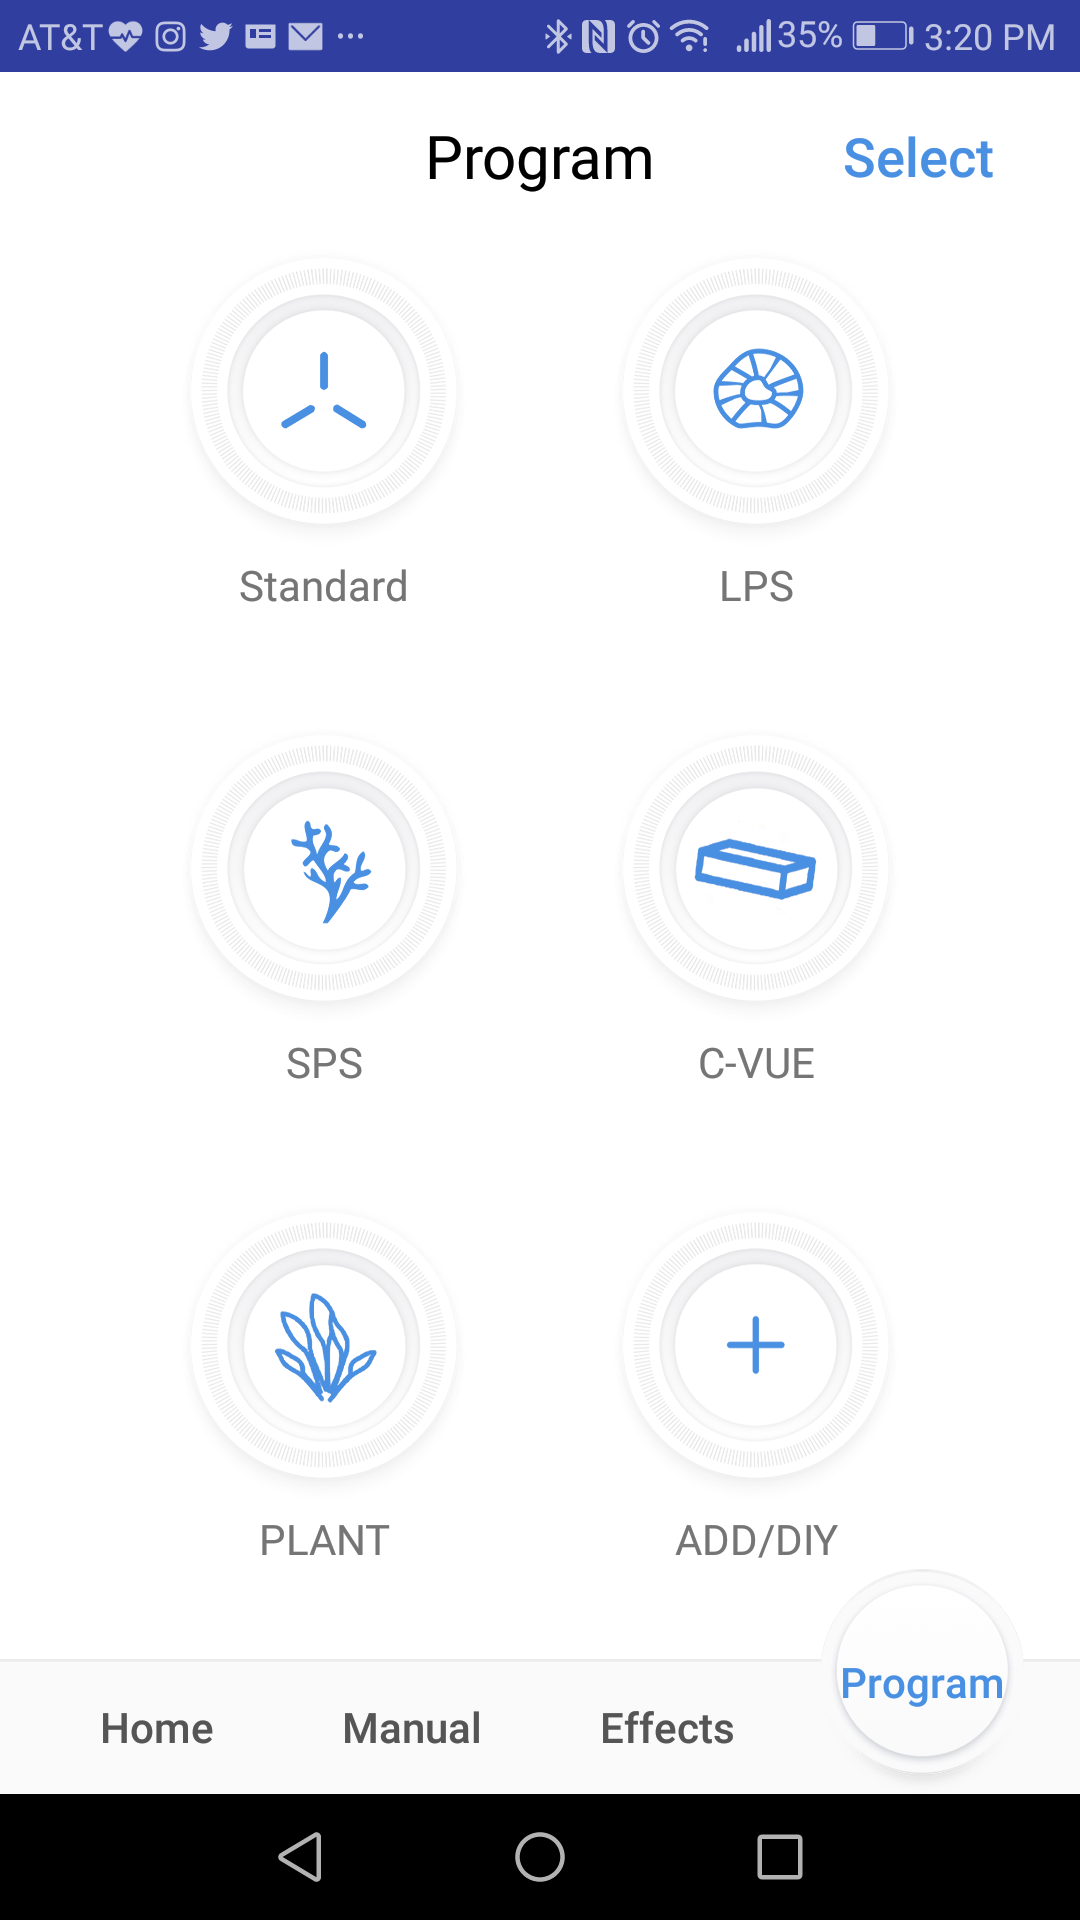
Finally, the most important feature of any light in this price segment, the “program” tab gives a user the full advantage of the light’s capabilities. There are five presets built into the app, labeled “Standard” (for mixed reefs), “SPS” (for “sticks” dominated aquaria), “C-Vue” (designed to accompany Cobalt’s C-Vue line of tanks), “LPS”, and “Plant” (for planted tanks if you willing to use C-Ray 200 for that purpose). Each of the five presets can be modified to your own liking, and you can save the tweaked schedule as a new preset.
Alternatively, you can start from scratch and create your own DYI schedule. Adding new presets is very easy, simply press the “Add/DIY” button and name your new preset, after which the app takes you to the program screen. Again, the programming interface of C-Ray 200 is very organic and I didn’t really have to reach for the instructions to understand how to write a schedule for the light. The top part of the new program tab is occupied with the visual representation of the 6 dimming channels with their current intensity levels next to their icons, plus an “Add” and a “Delete” timepoint buttons. There is also a “Download” button in the upper right corner if you wish to download preset data and save it on your device and/or share your schedule with others. Underneath the dimming channels icons is a time/intensity graph with a slider just below it and on the very bottom of the screen, the three “Effects” buttons I mentioned in the previous paragraph.

The programming process goes like this: you begin with a “blank slate” on the graph, and forming a photoperiod schedule is as easy as moving the slider to a point in time of your liking and hitting the “add point” button represented with a blue clock icon. That action takes you to a screen similar to the one in “manual” mode where you can set the intensity of each individual dimming channel. There is even a small lamp icon that, when pressed, sets the light to the current setting. Saving these settings gets you back to the main window and the point is added to the timeline (unfortunately, there is no way to save an individual setting you need to save the whole schedule in the main screen). Repeat the process as many times as you want, adding new points and removing unwanted ones as you build your photoperiod schedule. Each added point generates a corresponding icon above the channel icons, so you can quickly go back to a given point should you need to tweak it. The app lets you test the program and upload it to the light directly from this screen.
The remote control and scheduling aspect of C-Ray 200 is excellent. What struck me the most was how fast the light reacts to the command you send to it via the app. The lag between executing an action and seeing the result is usually not more than 2 seconds. On top of that, the Cobalt app connects with the light every time and I haven’t experienced a single issue when playing with it for the prolonged period of crafting this review. The app is very intuitive and easy to use and the learning curve is virtually non-existent. Big thumbs up to Cobalt for that, I haven’t experienced this level of trouble-free remote controllability in a long time.
TESTING
Before you draw any conclusions about my methods of testing, please understand that I am just a hobbyist and I always try to do my best to evaluate products from a hobbyist perspective. I gathered the best possible equipment and methodology I can afford in order to perform the below tests, but I do not own nor have access to lab equipment, therefore if you find my test results inaccurate to your own findings, I am happy to share and gather knowledge to improve my testing regime. With that cleared, here’s what I came up messing with the light over the time I’ve had it over my tank:
- Wattage

Power draw may be a concern to some people and an excitement to others. Cobalt claims that C-Ray 200 outputs 200W of electric power with all channels set at 100% intensity and my measurements, using Kill-A-Watt unit and a TP-Link Smart Outlet confirms that claim, clocking 202 Watts in three repeated tests.
- Noise level
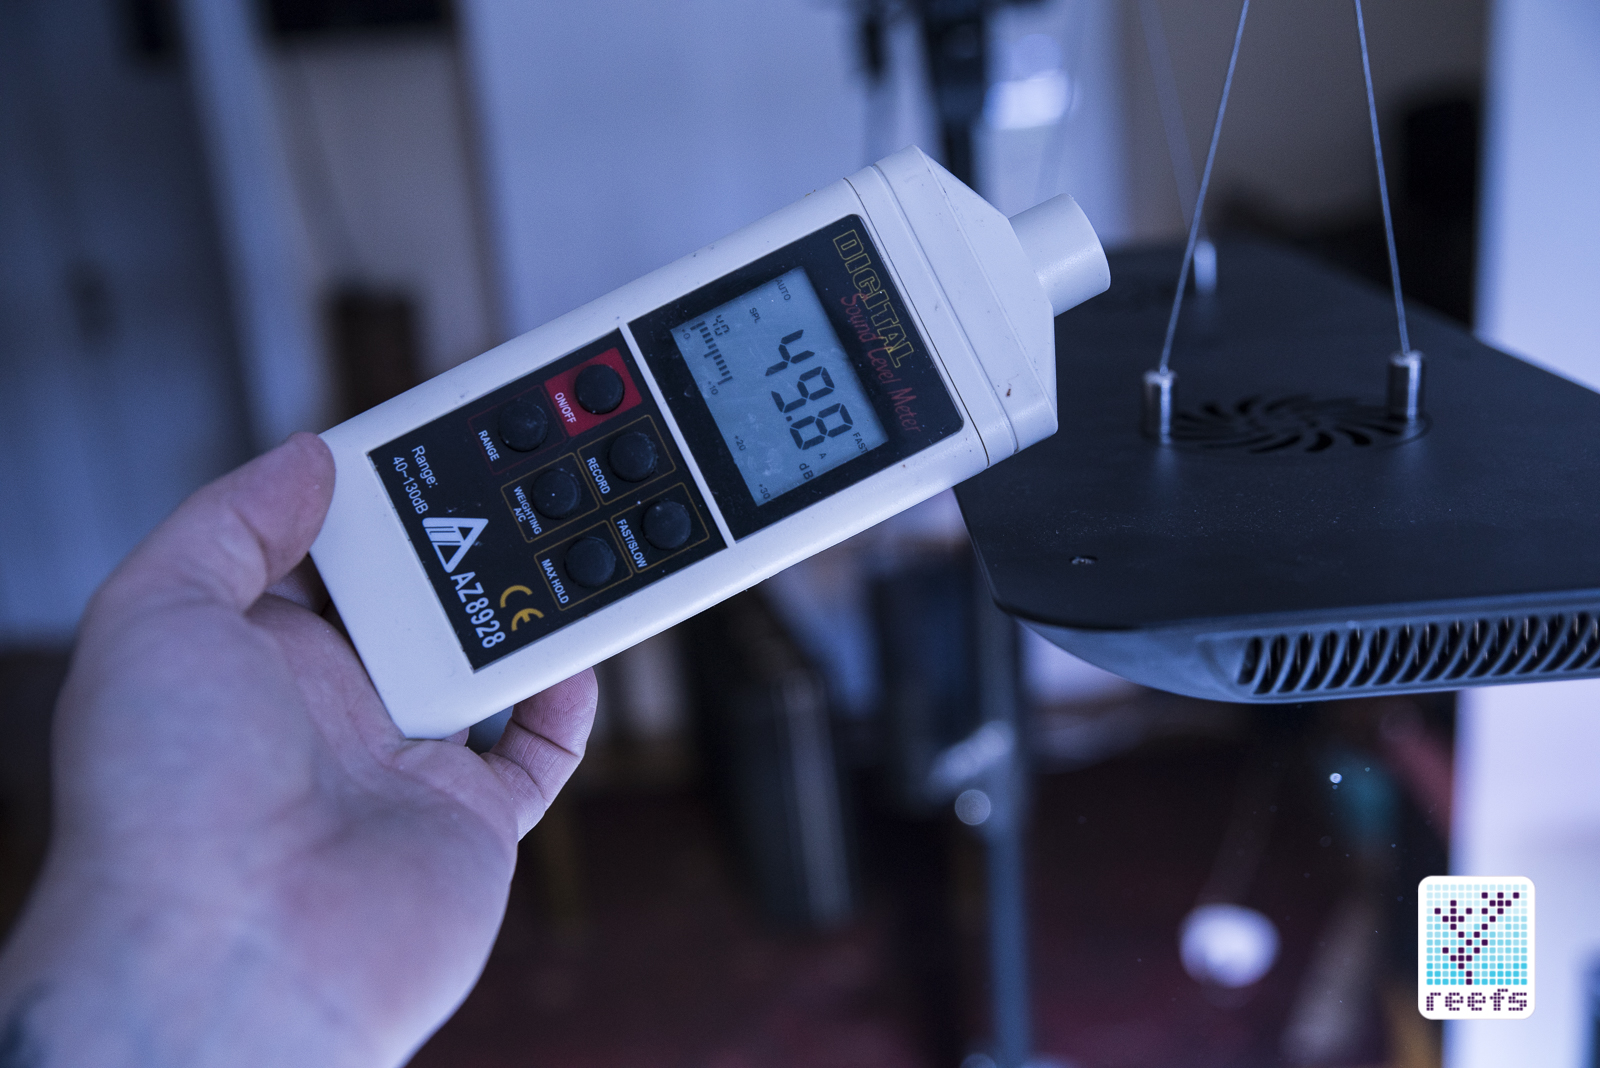
As I mentioned in one of the initial paragraphs, Cobalt C-Ray 200 is equipped with dual, temperature controlled fans, each consisting of a copper radiator and a blower style fan chassis. The fans do not turn on all that often when the light output is set below 60-70%, but at 100% intensity, it goes on rather frequently. The noise level, measured at 49.8dB, is comparable to other LED light panels boasting high output emitter clusters, meaning that you can hear the fans running when you get close to the light, but not to the point where the hum disrupts the viewing experience. In other words, the fan system inside Cobalt C-Ray 200 is industry standard when it comes to its noise level- not completely quiet, not obnoxious either. I would argue that widening the ventilation slots on top of the light would bring the noise level to practically silent, but it would also eat into the light’s overall sleek design in the process. Compromises, compromises, no company can escape this…
- PAR readings
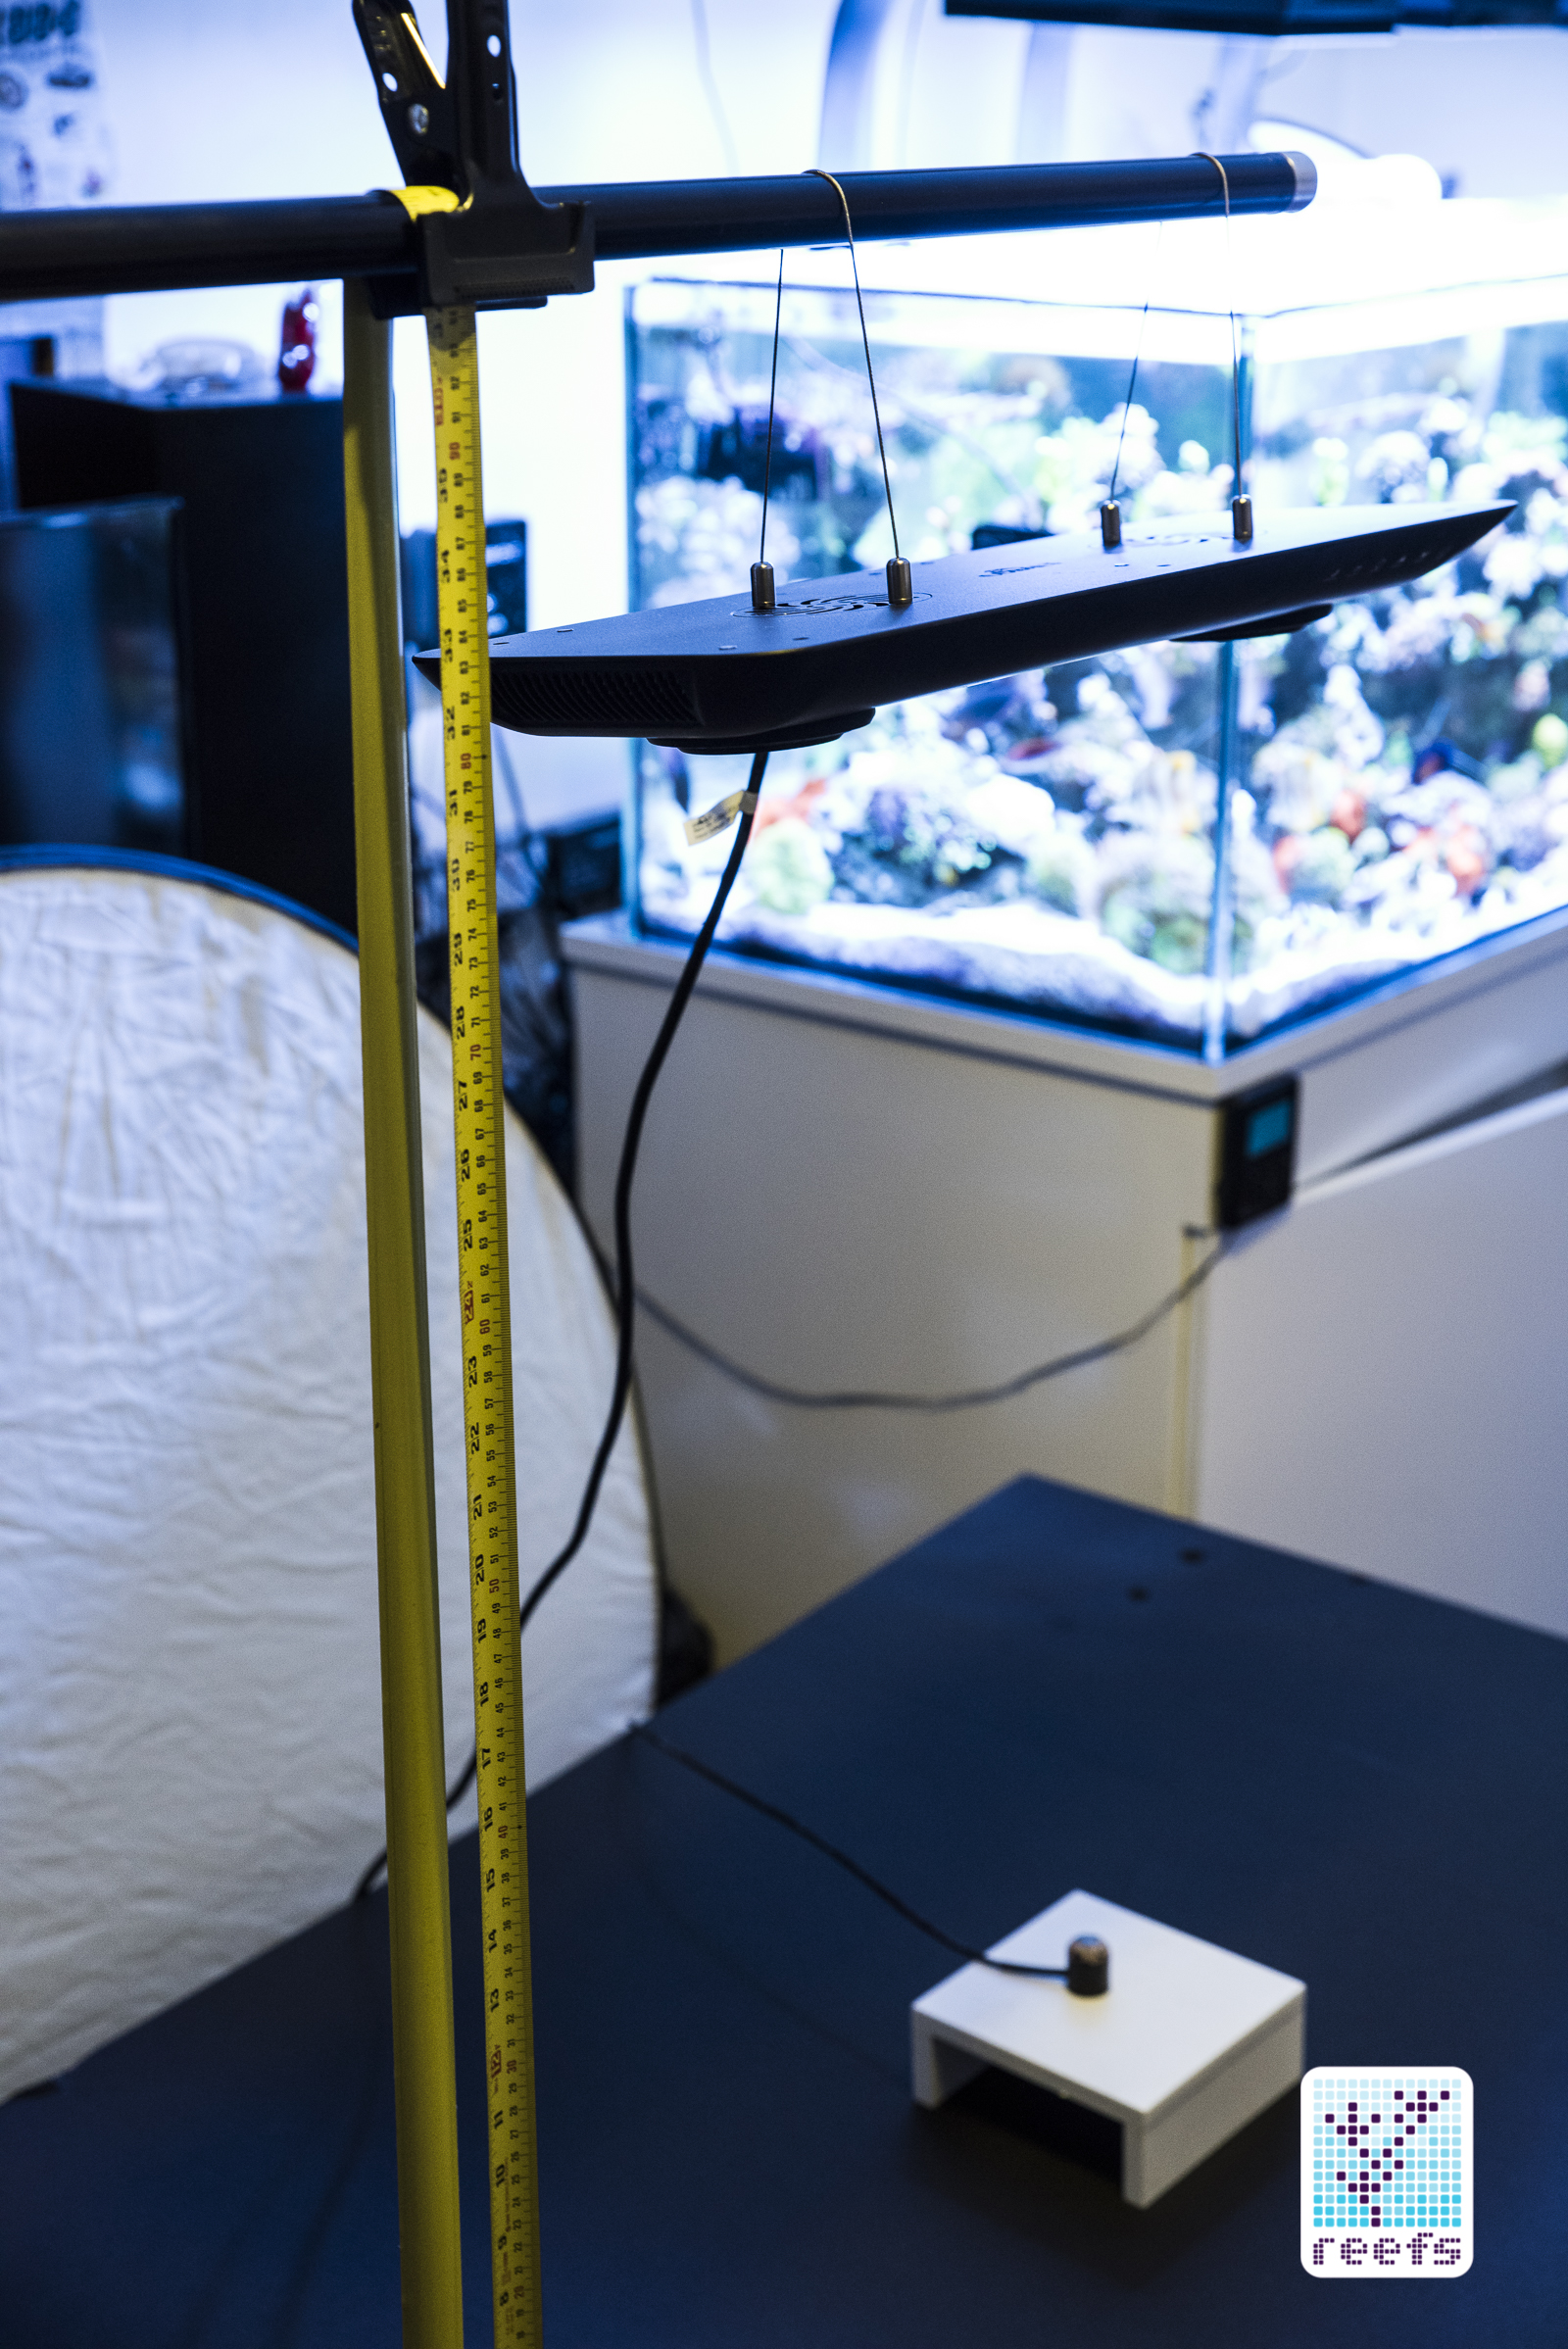
PAR values, the megapixels of the reef lighting industry. I wouldn’t be able to pull off this review without checking how much usable light C-Ray 200 outputs with its two LED arrays, combined with a fill light and a moonlight halo. After all, numbers may not decide the given light’s fate, but they do matter, especially in the top shelf segment. I upgraded my testing ground to a brand new rig, made of a photography boom stand setup to be parallel with the testing surface, on which the test light rests, a light absorbing black matte foam, and an apogee PAR sensor that’s a part of neptune Systems PMK, mounted on a custom made bracket that positions the sensor perfectly perpendicular to the light source. The test foam, 36”x 48” in size, as scribed with a matrix of test points, provides a base for a surface chart made out of individual PAR measurements. All tests were performed out of water as this is how Apogee recommends using their original PAR sensor. PAR measurements taken in air read higher than those taken underwater, because of so called immersion effect, and therefore my result should be divided by 1.08 for an actual PAR reading you would expect when the sensor is immersed in salt water. There are some other factors that make taking accurate PAR measurement underwater more difficult (such as water movement, sensor positioning in relation to the light source, etc) and so I decided a controlled, flat surface of my home studio would render more accurate test results. For further read on the topic of underwater PAR measurements, go to:
“Underwater PAR Measurements” from Apogee Instruments website
The PAR test I performed for this review covers an area of 36” x 48”, measured at three different distances from the surface of main LEDs’ lens: 12”, 18”, 24” and 30”. Each PAR reading was repeated for accuracy and the median from the two readings is represented on the PAR chart:
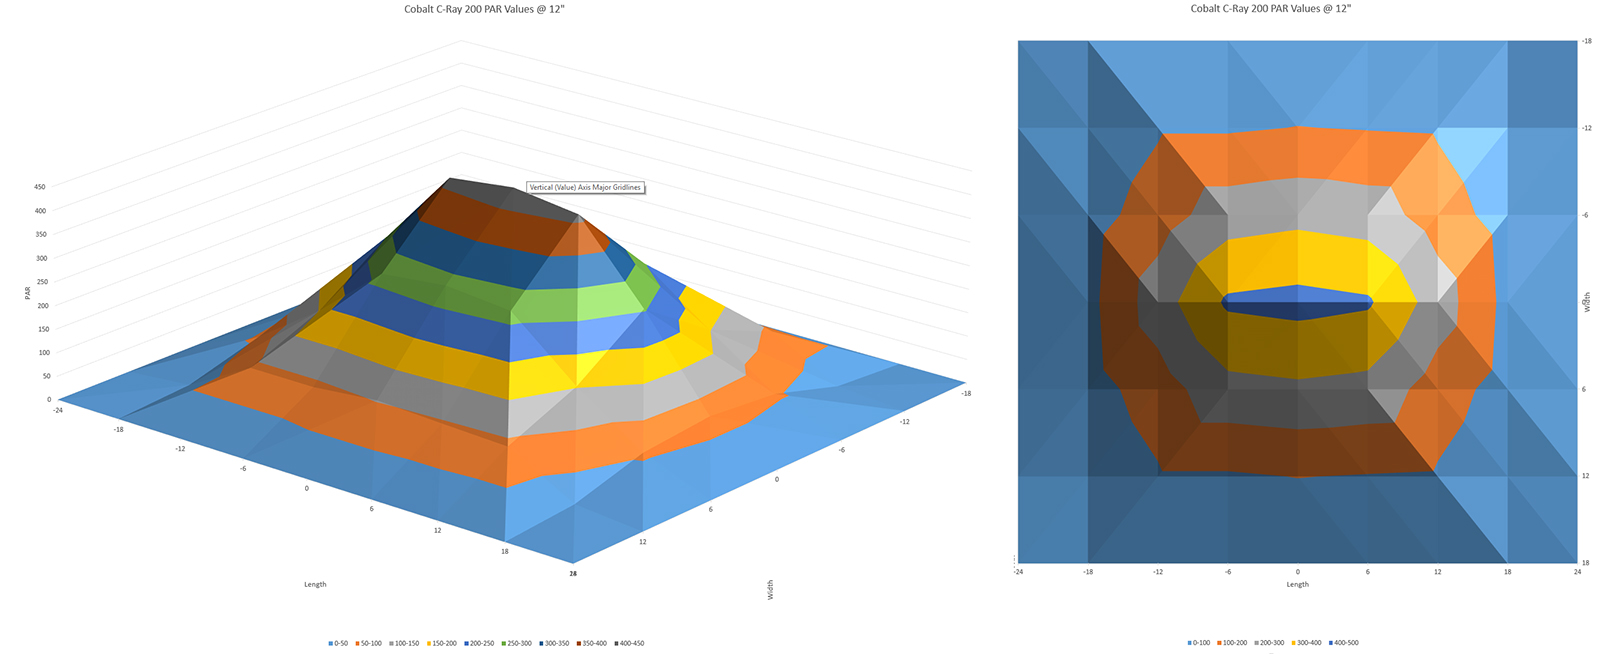
PAR readings @12” (30.5cm)from light source
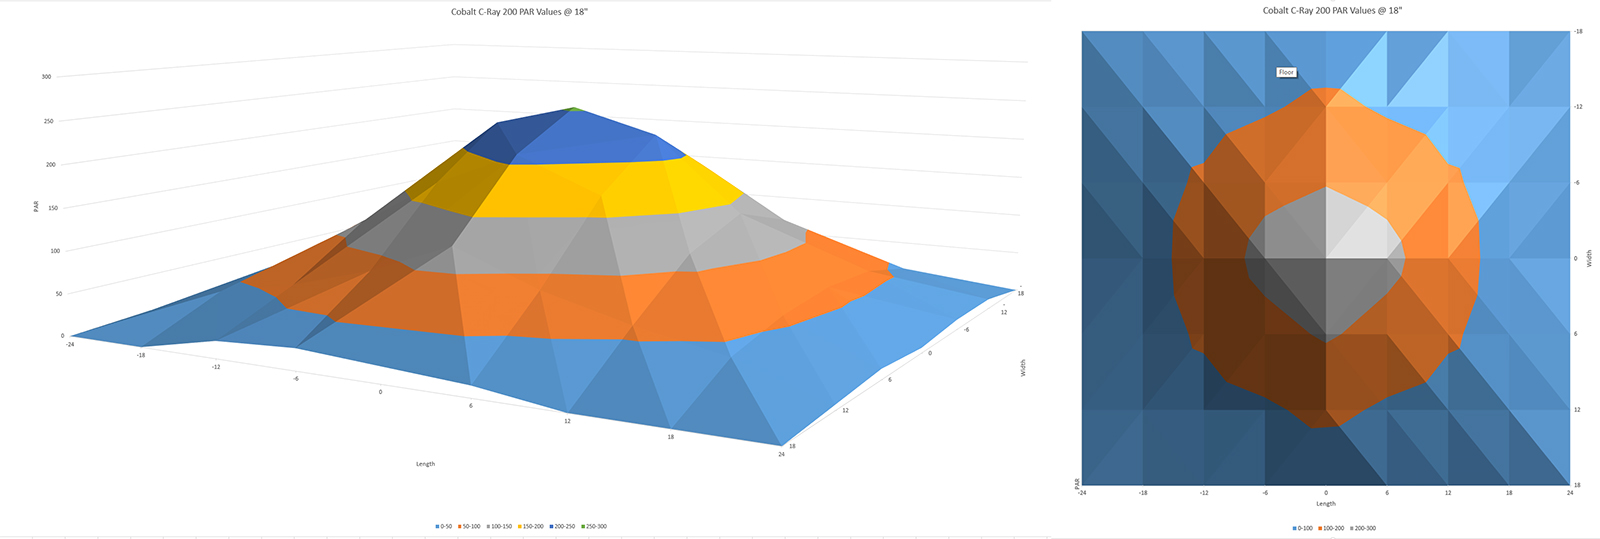
PAR readings @18” (46cm) from light source
PAR readings @24” (61cm) from light source

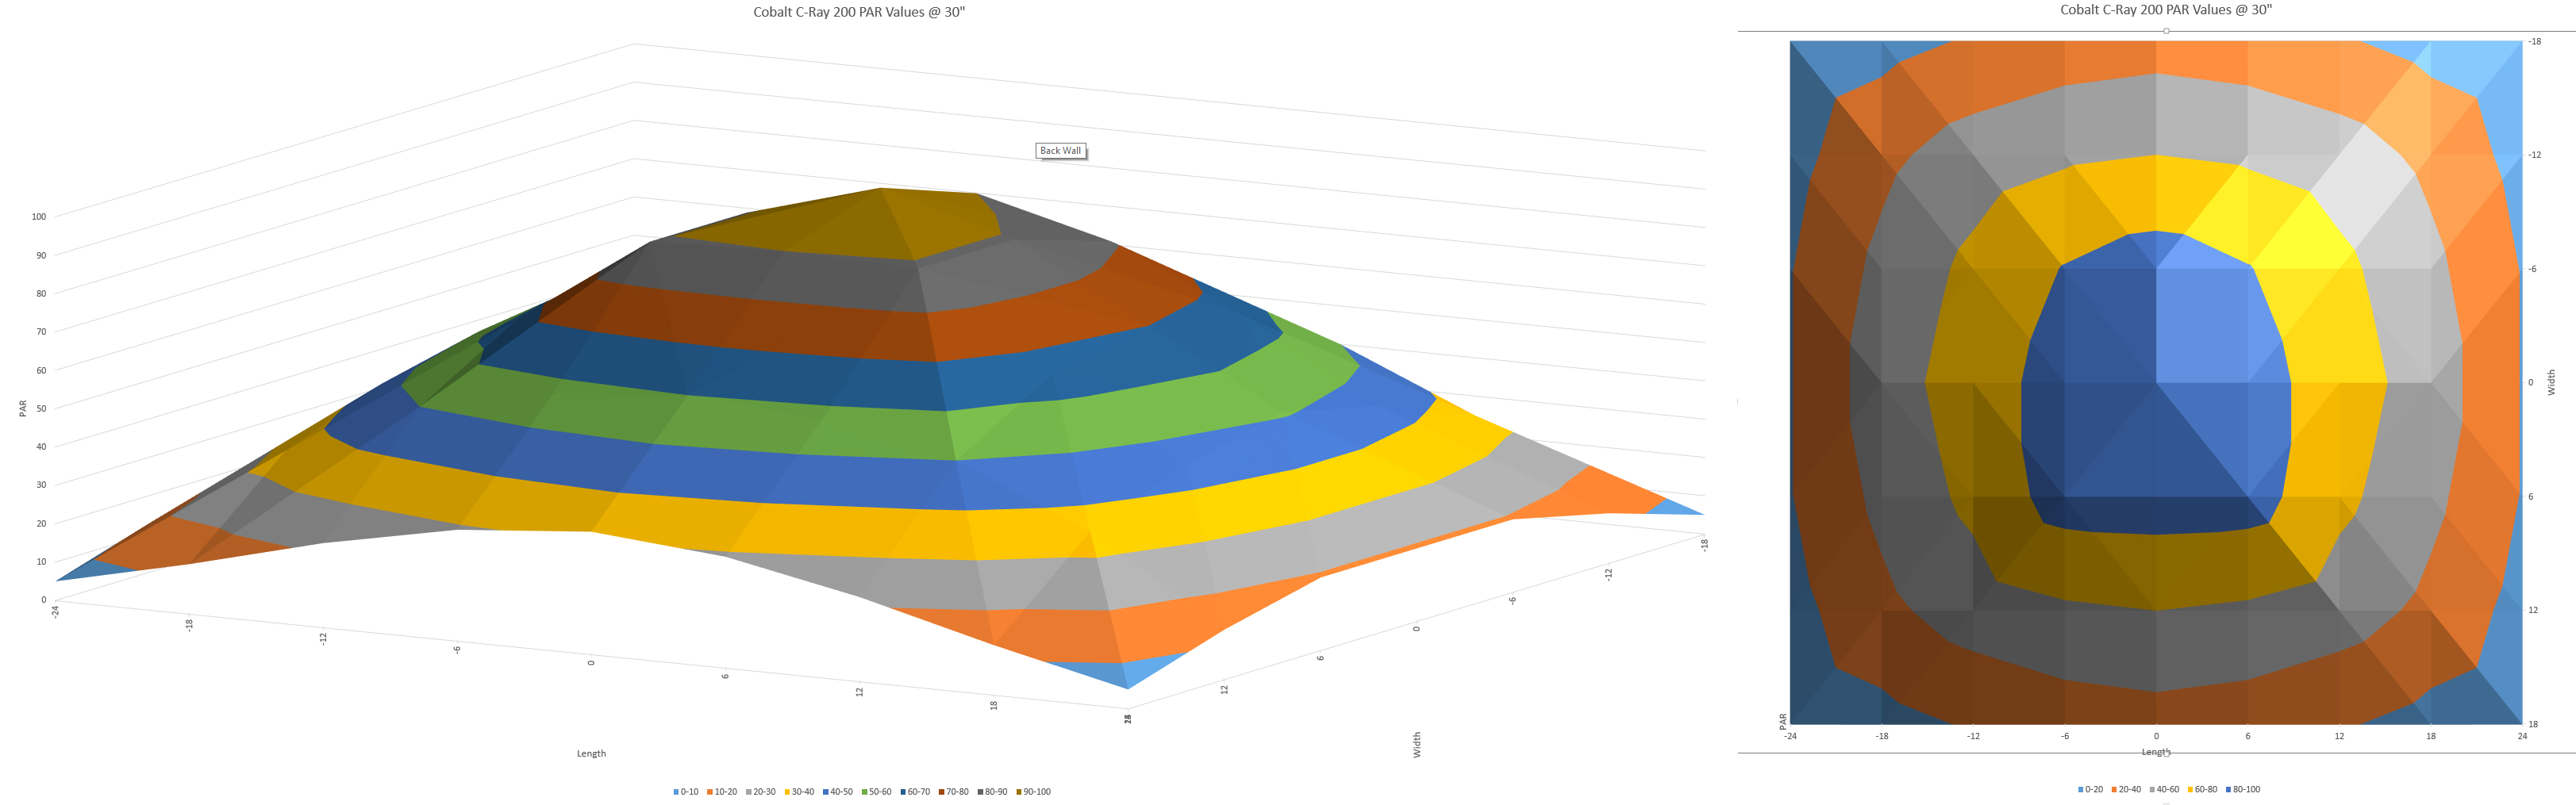
PAR readings @30” (76cm) from light source
Let’s analyze the data. At 12” from the light source, which in my opinion is the minimum LEDs should be tested for PAR, the light outputs a maximum of 432 µmol m-2 s-1 and maintained PAR above 400 in line with the light axis in a 12” distance. Looking at the overall PAR map, at 12” height, C-Ray-200 produces PAR between 150-430 in an area of 12”x24”. Moving on to 18” from the light source, the maximum PAR produced at dead center from the fixture averages at 254 and averages 200 in a 6” radius from the center. At 12” from the center of the light in each direction, PAR drops to around 100 and to 45-60 when you move the sensor to 18” from center. At 24” from the center in either direction, there is still detectable PAR, averaging around 20.
PAR measurements at 24” from the light source yield a maximum PAR of 149, with an average PAR of 124. PAR drops to an average around 80 in the 12” radius and 40 in 36” radius.
One final measurement, at a distance of 30″, tops at 99 in the center and averages 88 within 6” radius from the center. At 12” from center, we get PAR between 50-70 and at 18” from 35-51.
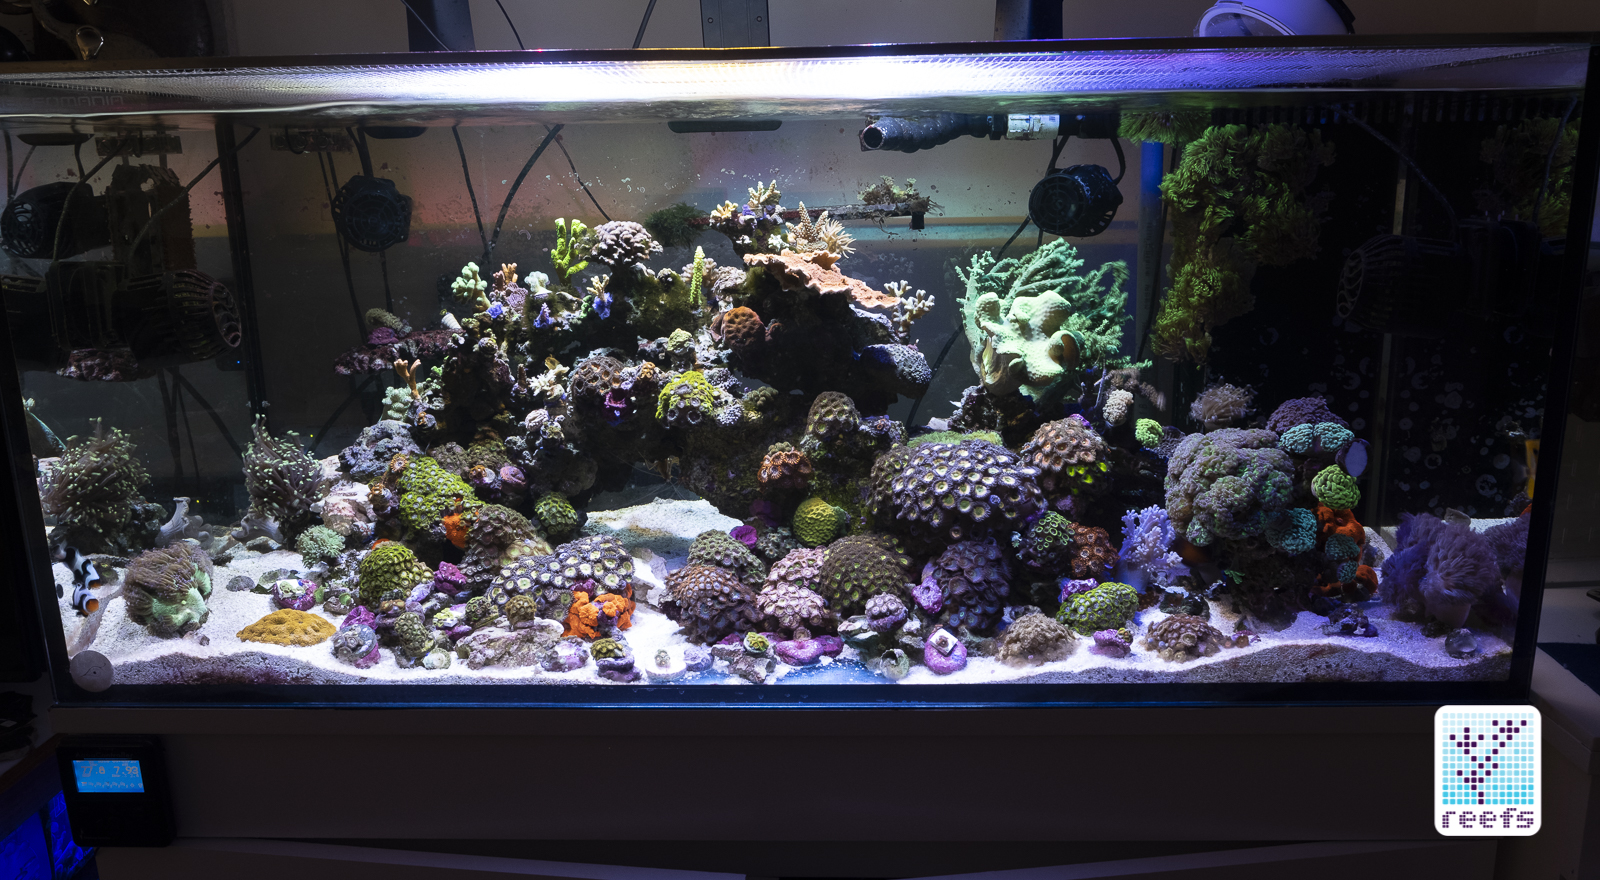
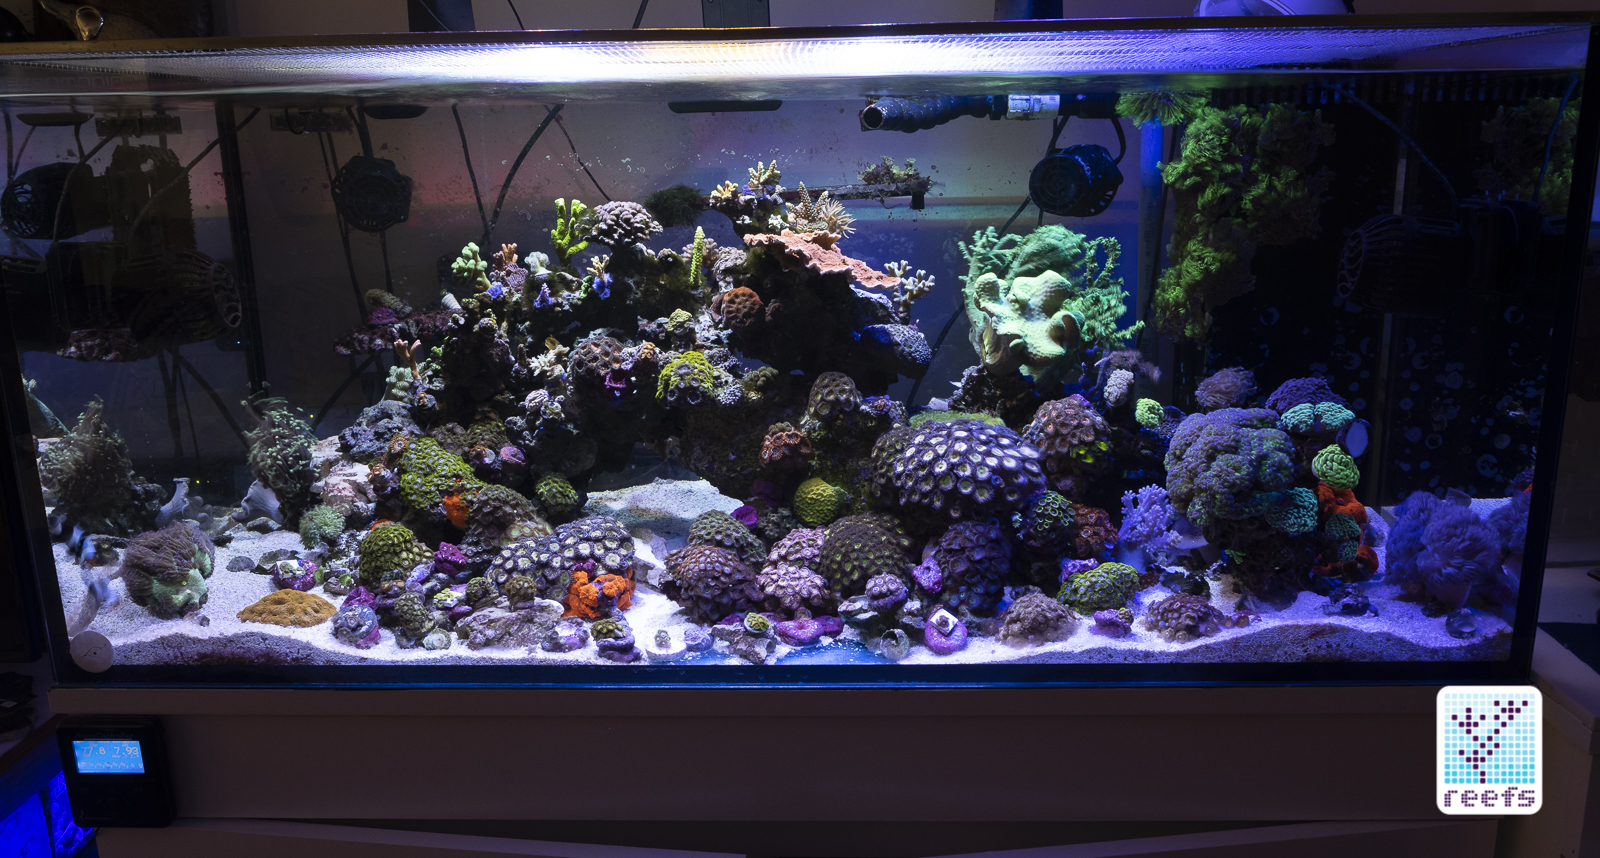
Analyzing the results of my home-made PAR readings, I can say that Cobalt is a serious performer, on par (no pun intended) with other leading LED lights and results are on the positive side, but they are not world-leading. C-Ray 200 outputs are the same as or slightly lower PAR as the leading LED lights in the market, such as Ecotech radion G4 PRO fixtures (which I am using regularly in my tank), however the PAR distribution of C-Ray 200 at 12” is narrower than the Ecotech light. That being said, PAR of between 200-450 is more than enough to grow even the most demanding SPS corals. At 18”, 24” and 30”, the PAR is again, satisfactory, but the the redistribution suffers as we move away from the fixture. From my own personal experience, I find that all multi-chip LED pucks suffer from this rather narrow PAR spread. Not to be confused with an overall light spread, which is quite good in C-Ray 200 (the light easily covers an area of 36×36”, reaching even far corners in a 48” long tank if usable PAR values are not required). The shimmer from the multi-chip emitters is much better than individual chip LEDs, but that sacrifices PAR. At least that’s what I found playing with different aquarium LED lights. Speaking of, shimmer produced by C-Ray 200 is absolutely mesmerizing (if you’re into that). The light reflected on the ceiling creates its own visual experience and looking at the tank, light waves bent by the movement of water provide a sense of greater depth of the scene. It’s really cool but again, if you are into it. If not, the shimmer is strong with this one, I warn you.
- Spectrum and light spread
Disclaimer: I don’t own an optical spectrometer, unfortunately. This shortcoming prevents me from giving you an accurate measurement of electromagnetic spectrum, therefore all my observations are purely visual. The light produced by Cobalt C-Ray 200 is very pleasing to the eye and it renders coral colors accurately, giving it the eye melting shimmer I’ve mentioned. I’ve tested C-Ray 200 in the “SPS”, “LPS” and “Standard” modes and I liked them all. It produces bright, penetrating light that can definitely be considered “high end”. In terms of growing corals, I can say that it definitely does help them get their daily dose of photons, but I cannot ultimately judge if it’s better or worst than the previously mentioned light I use daily. Coral husbandry is a complicated, multi-layered topic and light is only a part of the equation, therefore judging coral growth based only on the type of light used is incorrect, in my opinion. Like I stated before, C-Ray 200 is a serious contender in terms of PAR it produces, but it doesn’t give out the best numbers in the industry.
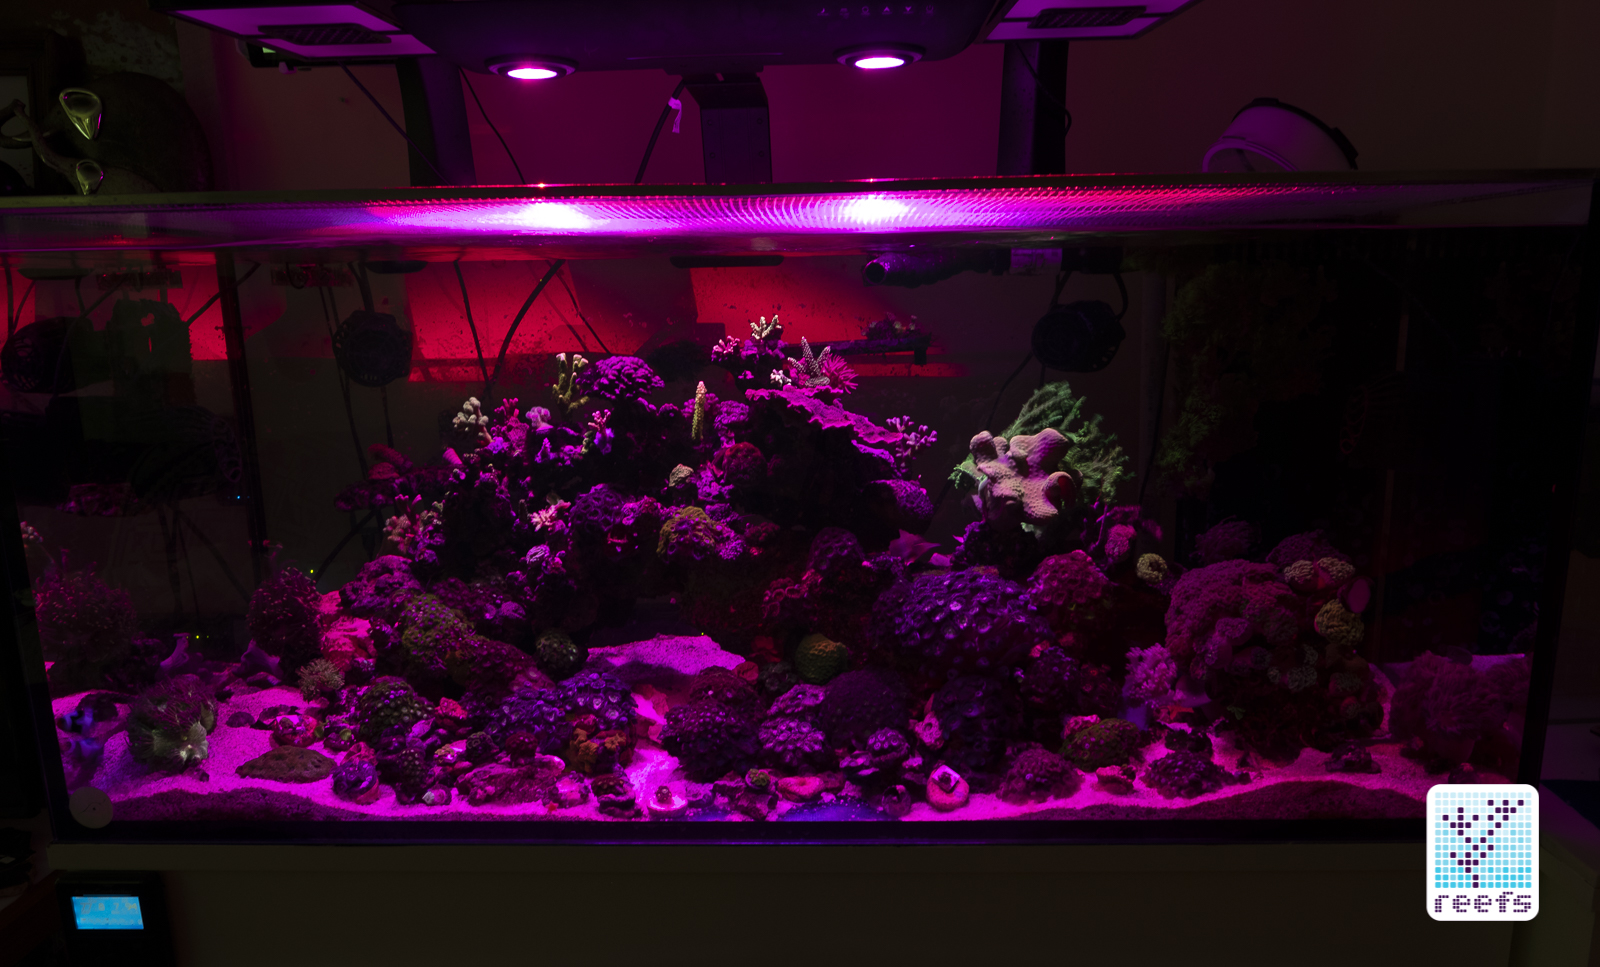
Red Channel Only

Deep blue +halo light
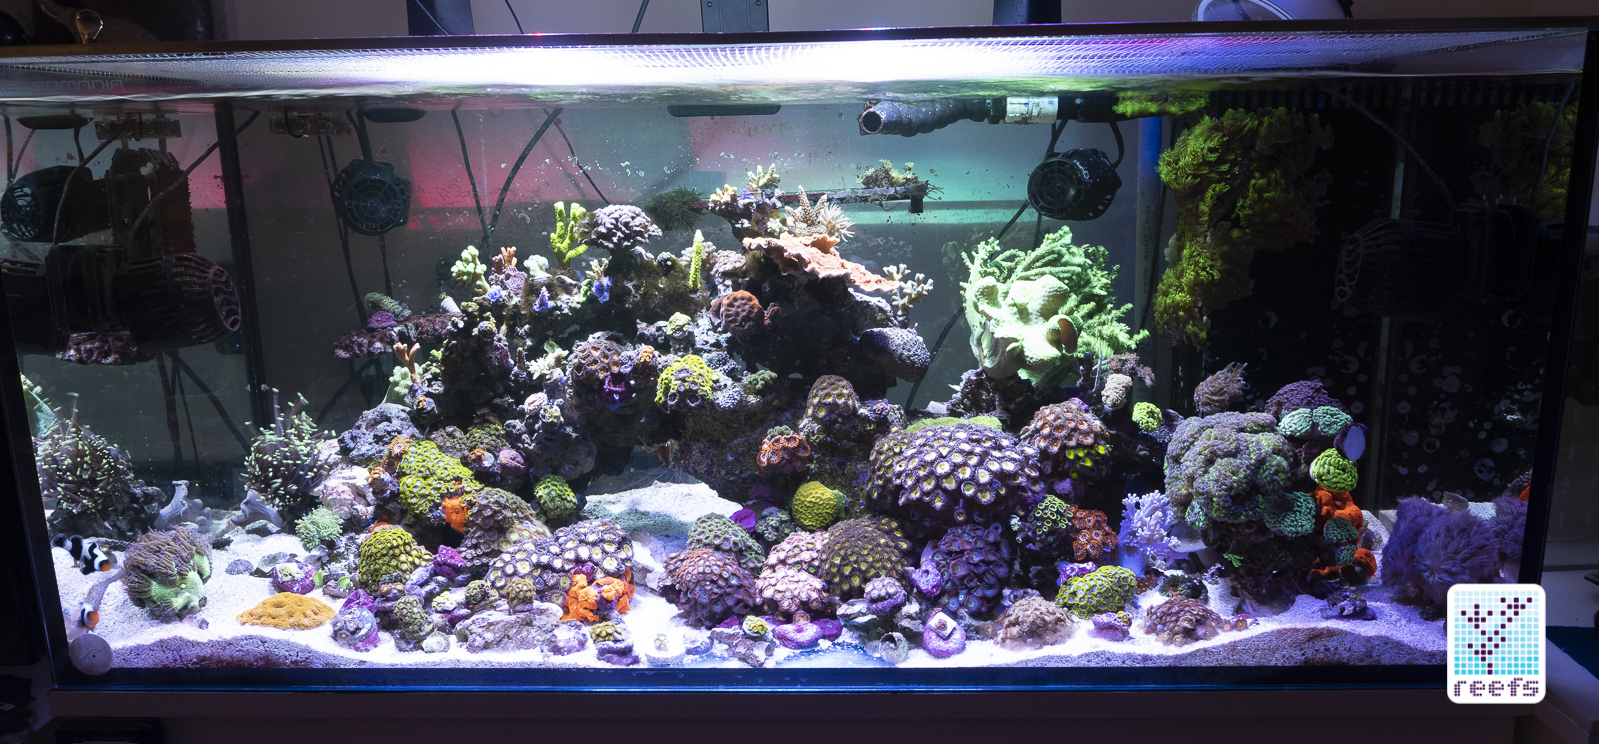
“Standard” mode
LPS mode
SPS mode, 40% intensity
Instead, I do want to talk a little about the two features built into Cobalt C-Ray 200- the halo light and the fill light.
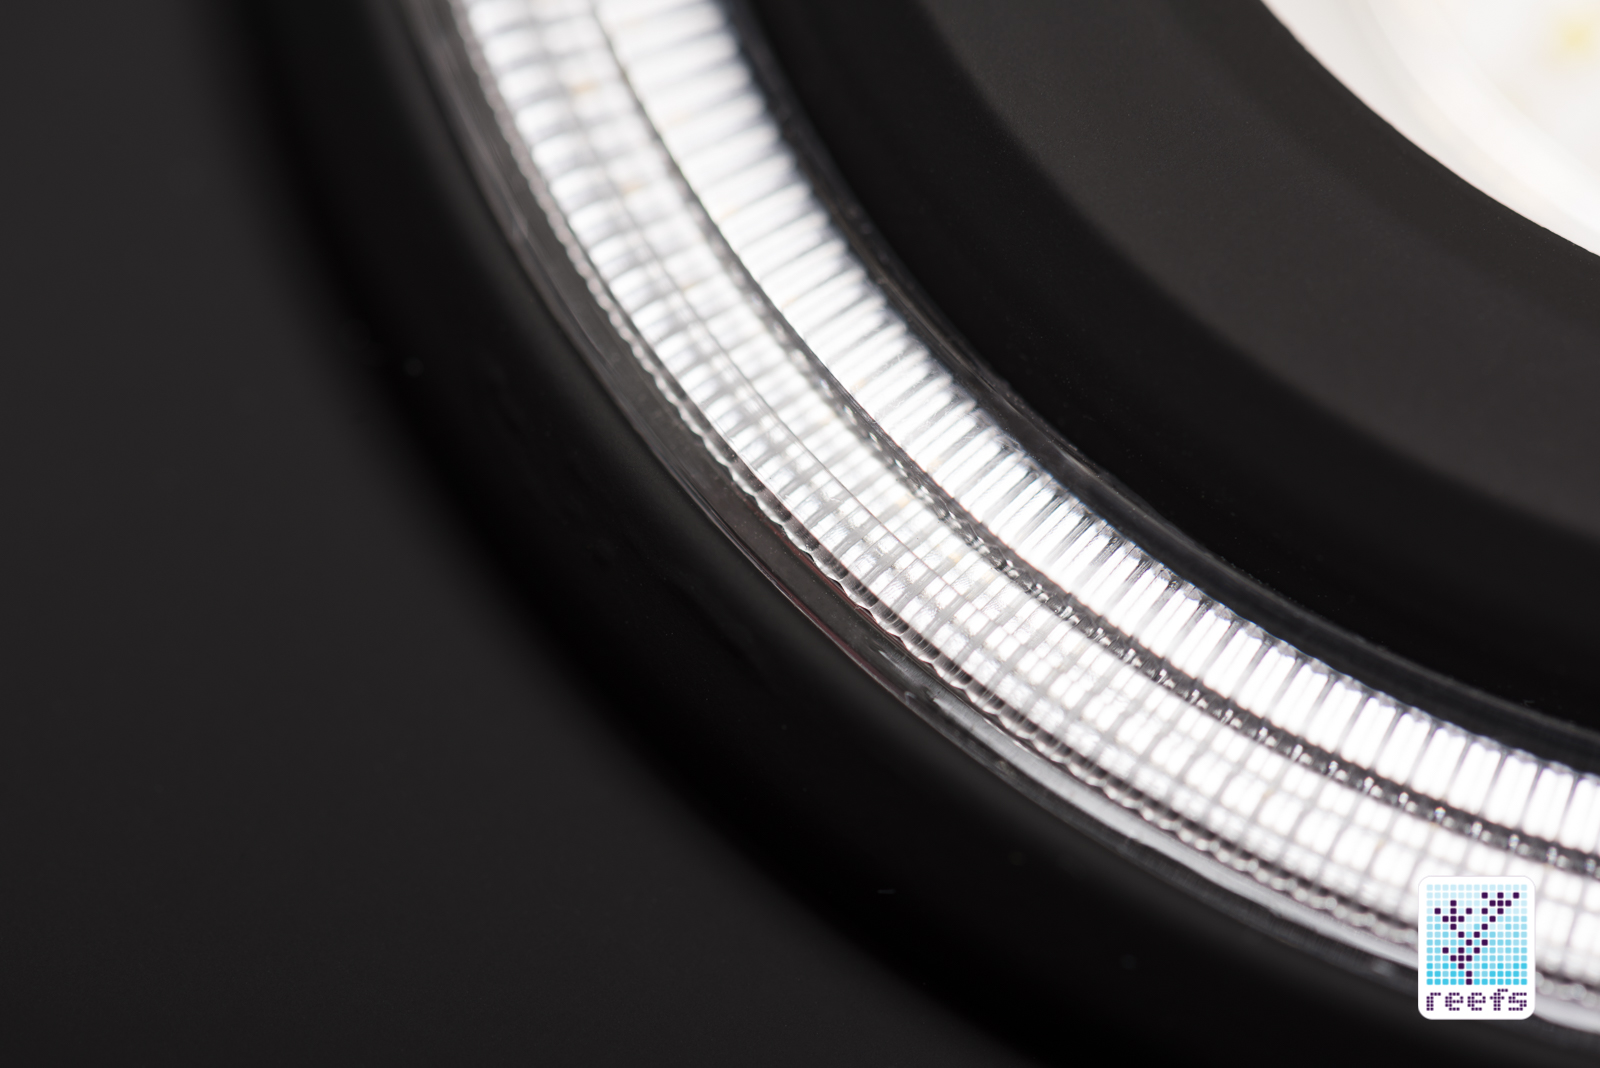
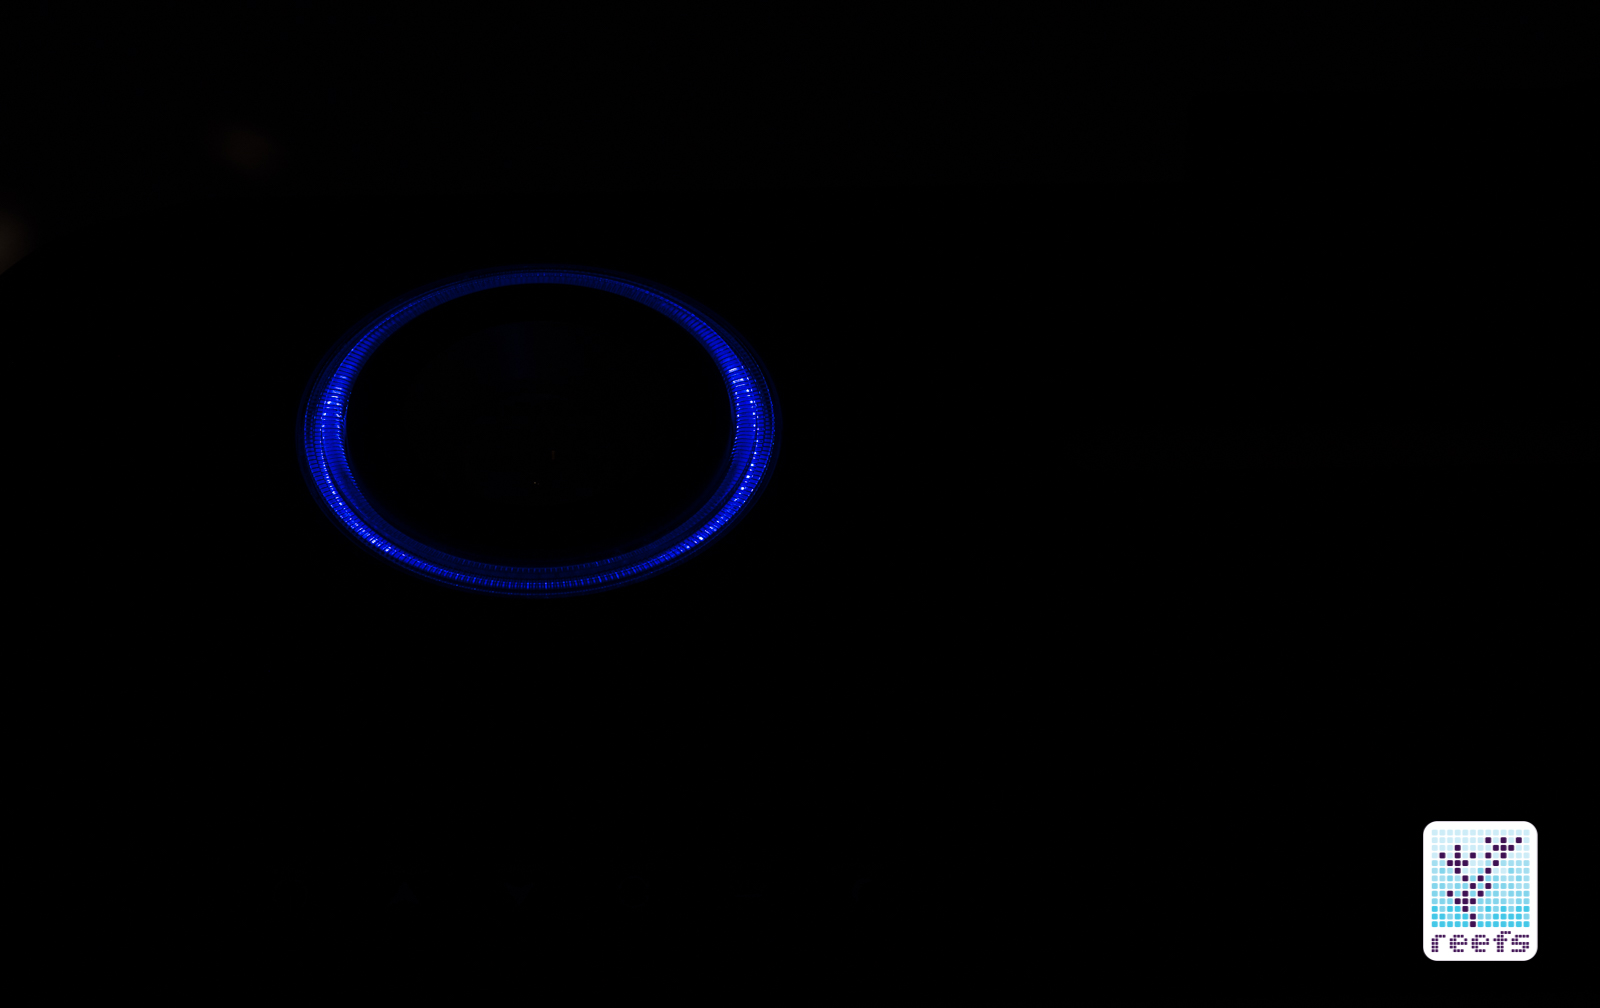
The circle shaped array of LEDs, mostly likely SMD style, that surrounds the main puck, is composed of deep blue emitters that produce some impressive moonlight effect in the tank. When I say impressive, I mean pleasing to the eye, subtle and quite dim. If you’re looking for a light that “squeezes” fluorescence out of corals, C-Ray’s 200 halo moonlight alone does not deliver (it does, though, when combined with the deep blue channel from the light’s main LED array), instead it produced that cool afterlight I usually set for the morning hours to enjoy my aquarium with a cup of coffee in hand before I leave for work. To me, it’s one of the highlights of C-Ray 200. Not that it cannot be reproduced with other lights, it’s just that Cobalt’s light has a separate channel just for that, which is very cool.
I personally view the warming bar, or fill light as it is officially called, as more of a gimmick than anything that really changes the light output. Visually, there is a difference in how the light renders colors in the aquarium with the fill light at its maximum brightness, but its value in improving the spectrum is debatable, meaning that it’s a matter of taste if one would like it better with or without the bar on. Its effectiveness in upping the PAR numbers is negligible.
In terms of “raw” light spread and penetration (without looking at PAR values), Cobalt C-Ray 200 covers an impressive area. One fixture can easily cover an area of 36” square and more- when I mounted it centered over the rim of my 48”x22” footprint reef tank, only the far left and right corners suffered from significant shadowing. Now that doesn’t mean you can effectively grow photosynthetic corals in that range, but from a purely visual perspective, C-Ray 200 handles a good portion of underwater real estate. Perfect for owners of large aquariums on a budget (contradictory statements alert) that don’t plan to grow stony corals everywhere in their tank(s) but need to fill a large area with a single LED panel.
CLOSING WORDS & VERDICT
I ended up writing these final words with mixed feelings. One one hand, Cobalt C-Ray 200 grew on me. I didn’t have high hopes when I first read about the light, but when I actually got a physical light for this review, it surprised me with its solid build, high end LED chips and optics, a sleek, uniform design and good quality, waterproof driver. On top of all that, my experience with the mobile app and light connectivity was nothing short of spectacular- my phone connects with the light’s Wi-Fi instantly plus the effects of changes made to the schedule are translated to the LEDs in an almost live fashion.
But then, there’s an elephant in the room and it’s C-Ray 200’s price tag. At a suggested retail price of $799 (plus another $99 if you opt for the tank rim arm), it doesn’t come cheap by any stretch of imagination. Being in the same price category as the Ecotech radion XR30w G4 Pro, Kessil AP700 or the Maxspect 24” Recurve LED, it faces a tough competition from well established players. It’s not a flawed light, by any means, plus it offers some unique features people may enjoy, such as halo moonlights, the beautiful shimmer, and the fill bar, but it suffers from unequal PAR distribution, a characteristic all multi-chip LED clusters share from what I have learned so far. The fill light and the good quality lens helps a little with the shadowing in between the two main LED pucks, however areas of high PAR levels at all distances I’ve tested are narrower than comparable multi-chip lights I’ve reviewed in the past. That being said, C-Ray 200 can certainly grow corals and render their colors in its own, unique way. My final word is this: C-Ray 200 debuts with a solid product in the highly competitive market of reef oriented LED lighting, I just wish it was a little cheaper to attract more early adopters. I might be wrong though and Cobalt may see the light flying off the shelves despite its bold pricing. If that proves to be true, good for them.
Cobalt C-Ray 200 comes with a 1-year limited warranty and is currently available online and in stores.
Thanks for the read and come back soon for another Definitive review, of Cobalt’s new C-Vue all in one aquarium line.
GALLERY


0 Comments