

By Dominick J. Cirigliano
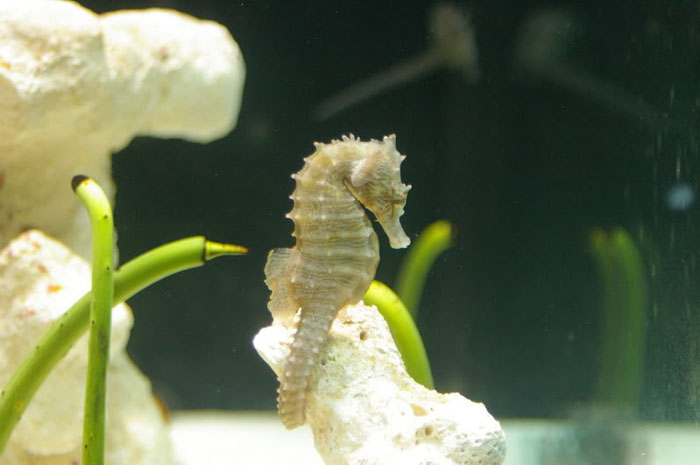
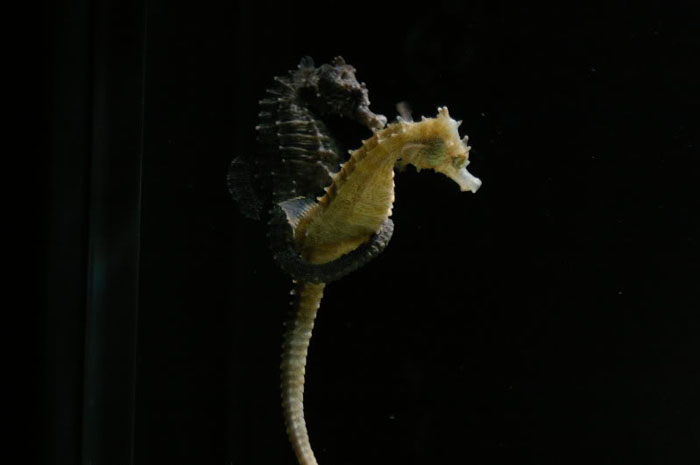
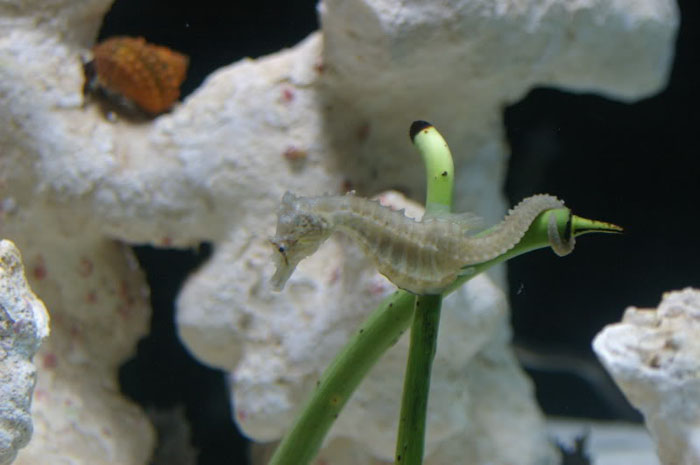
A female Northern Lined Seahorse (Hippocampus erectus).
In Part 1 of this two part series we discussed the aquarium setup and conditioning of adult seahorses. We are now going to focus on the system used for the collection, holding, and raising of seahorse fry.
The System
There are many methods used for raising seahorse fry. The first step in identifying which system to use is doing extensive research on the species you are working with. For example, the Northern Lined Seahorse (Hippocampus erectus) has a pelagic stage and thus requires a system that will keep the fry suspended in the water column. It is important to know that the H. erectus species found in the southern United States does not have a pelagic stage. Other species of seahorses do not have a pelagic stage as well, so a system with suitable hitching posts would suffice for these species. Other things to note are the water circulation needs and the size of the fry. Knowing the size better prepares you for feeding. The Northern Lined Seahorse (H. erectus), the focus of this two part series, has larger fry who can eat enriched baby brine shrimp (BBS) immediately. Other seahorses may have much smaller fry that will require foods as small as rotifers that are easy enough to culture if you are prepared in advance.
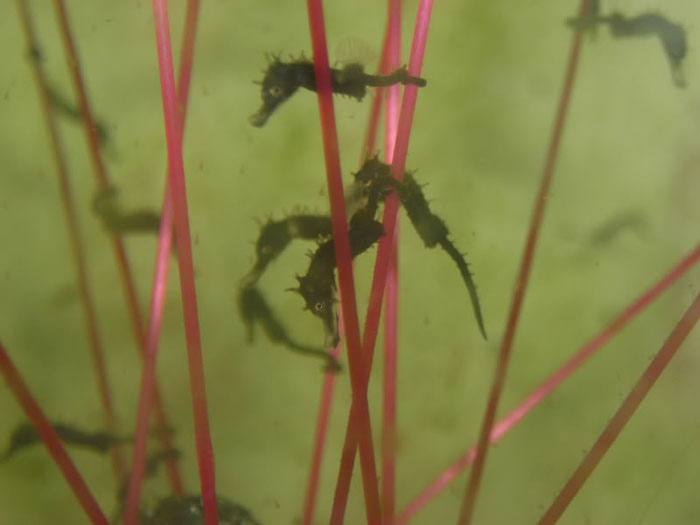
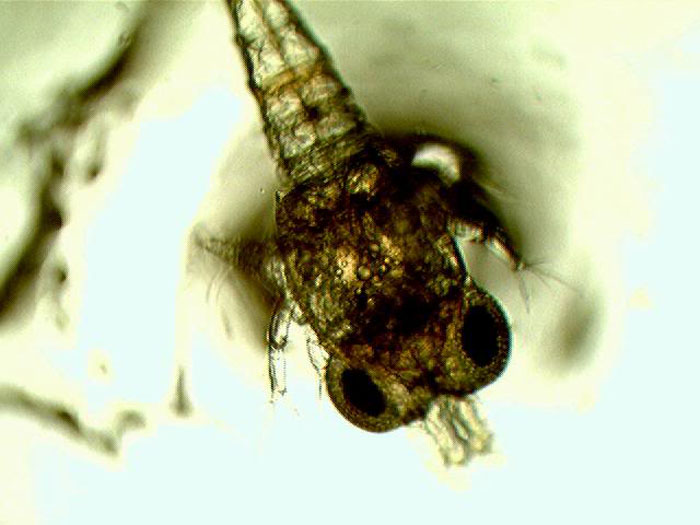
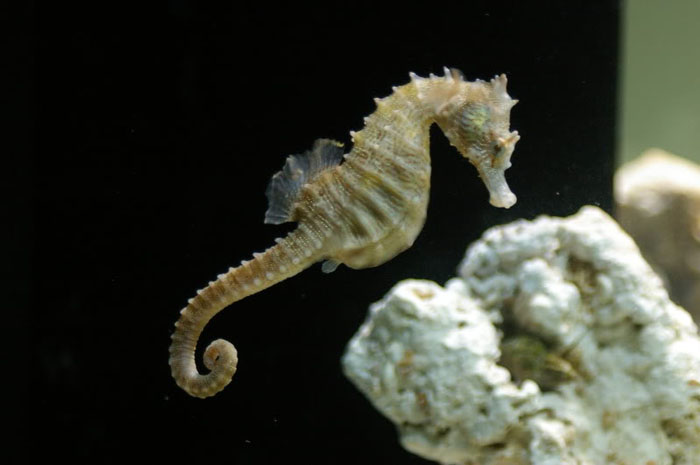
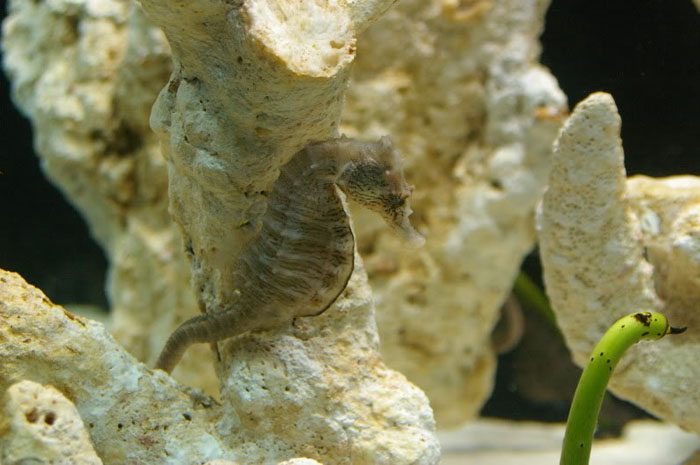
H. erectus fry that have surpassed the pelagic phase.
Since I know that the Northern Lined Seahorse fry have a pelagic stage, I have tried several systems I read about. The first was highly recommended, and is known as the Kriesel system. It is most popular for use in keeping captive Jellyfish, but they also work well for other creatures with special needs. There are several variations of the Kriesel system and I tried many of them. A lot of trial and error goes into raising seahorses because you have to find the system that you are most comfortable using and not only works for the seahorses, but fits your schedule as well. The first Kriesel method I used involved suspending the bowl into a tank. This seemed to work well in combination of the “green water method” but I kept losing my fry after a couple of weeks. What I realized was that I was having a very hard time keeping up with the water quality necessary to properly raise the fry. I started doing daily water changes that for me, were not easy to keep up with, and in some instances, changing the water led to death of some fry.
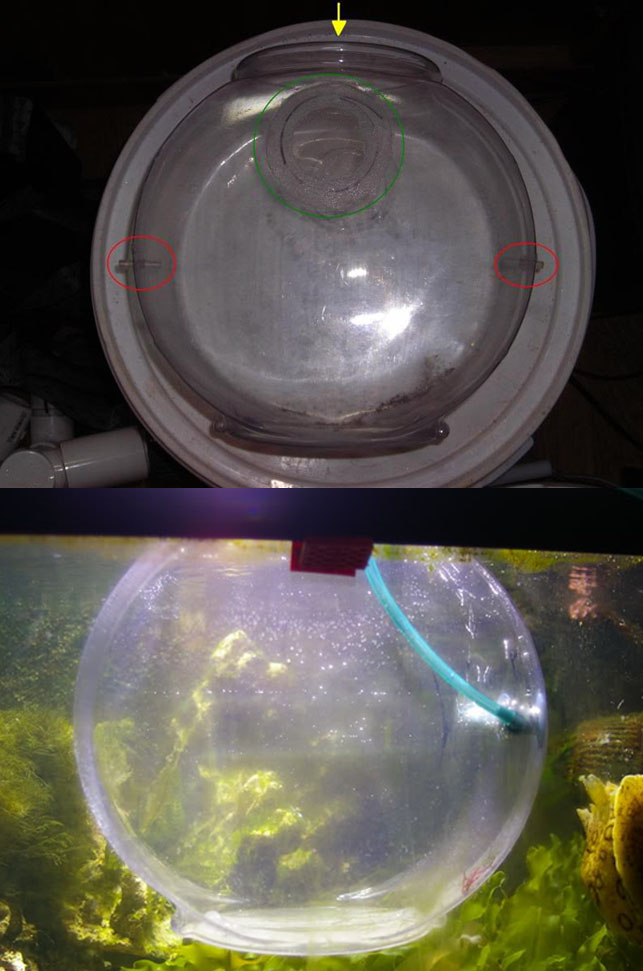
A commonly used Kreisel system.
Since some of the standard Kriesel systems were not working for me (you can read more about them on (www.seahorse.org) I started making adjustments to customize them to my system and schedule. One of the first adjustments I made was an above tank Kriesel Bowl. Instead of feeding the system with water and air, I used a Maxijet to pump water into the bottom of the bowl at an angle that created a nice current to keep the pelagic fry afloat. There were a few advantages to this system. One was that I was able to keep the fry on the same system in which they were born. I did not have to worry about acclimation and potential problems associated with different system parameters. The second was I was able to provide a “refugium” for the many pods that lived in the main system. Within a day of setting up the above tank Kriesel the whole lining of the bowl was coated with tiny small pods that were the perfect size for the H. erectus fry to eat.
I was very excited about this initial attempt, but after two days of the first batch of fry in this system I recognized a huge problem with the overflow. The fry were getting stuck against the netting of the overflow and dying. I tried many ways to adjust the overflow based on recommendations from other hobbyist and engineers, but I could not avoid the inevitable. Well, I thought I had created the perfect system, but in the end it failed (a common theme in seahorse system design).
Since the system seemed to get so close to what I wanted I decided to try another variant of it. I used the same idea and modified a 20-gallon tank that hung on the wall above the main seahorse system where the breeding pairs were located. I sectioned off the overflow so that the whole left side of the tank was where the water flowed through a fine net, and drained down into the display tank. I used curved acrylic on the bottom corners in the main part where the fry would be held to create the swirling action I wanted to keep them afloat. This seemed to solve the overflow problem I experienced with the other model.
Within a couple of days the tank was loaded with tiny pods from the main system and I was able to perfectly adjust the flow using ball valves. Once again I added another batch of fry to test out the system. It was working well for the first week or so and then I started losing fry again. What was happening was the netting for the overflow had to be so thin to not let the fry through, that it was catching the waste and food and restricting the flow of water through it This led to the tank overflowing. Fortunately, I had planned for this potential and had the traditional overflow cuts at the very top of the overflow. The floor was dry, but unfortunately the fry were able to get through the larger cuts and return down the drain into the main tank where there were plenty of hungry predators.
A modified Kreisel system that ultimately failed.
Since I liked this system so much I tried some natural methods to keep the netting clean such as adding Mud Snails (Potamopyrgus antipodarum) and Grass Shrimp (Palaemonetes pugio). The mud snails did an amazing job at keeping the net clean, but they also were proficient hunters of the fry. The grass shrimp did not add much value at all. The offspring of the grass shrimp were too large for the seahorse fry to eat (although they sure tried) and the grass shrimp showed no interest in cleaning the net. I had to remove the Mud snails and returned to the manual cleaning of the net. Now the fry were entering the 2-3 week mark and started hitching. I added Caulerpa prolifera from the main tank for them. Well, it didn’t take but two days for red hydroids to start growing that must have been hitching a ride on the C. prolifera and they killed all of the remaining fry within the first week or so. It is amazing how fast the hydroids grew! I couldn’t remove it fast enough. Chalk up another failure.
After the second disaster, I took some time off from the project to clear my mind. After a couple of weeks I started to think about the system again and spoke to a few friends about the main issues that I was having and how I could solve them. There were some tradeoffs I had to make, but in the end I decided to create a system that would stand alone, not connected to the display tank, and required its own filtration.
The system itself was not very different from the last one except there was no overflow. The sectioned off part was for pumps that fed a chiller and a few reactors containing carbon. I also used a hang-on-back protein skimmer, which later was removed, as the carbon reactors were sufficient for nutrient control. I used the return on the carbon reactors to break the surface on the compartment where the fry would be kept and an elongated tube to create the gentle swirling effect I needed for the pelagic fry. This system proved to be ideal after I added a float valve for auto top off.
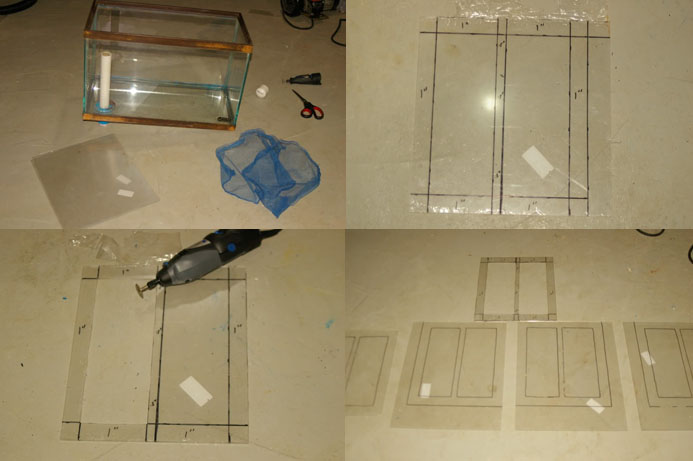
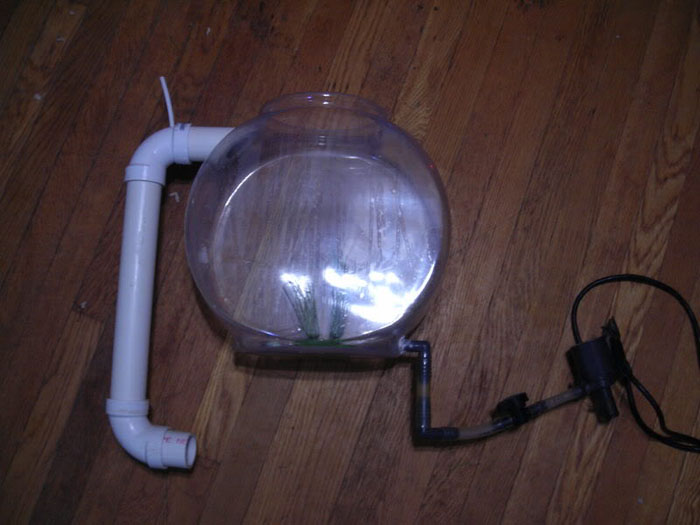
Materials and drawings of the rearing system I currently use.
In my opinion, lighting is also an important part of raising seahorses because I think it is beneficial to you and your seahorses to keep them on a schedule. I added some modest fluorescent lights that I set on a timer so that it goes on and off at the same time each day. You will quickly learn that the fry “sleep” and are active based on the light schedule. Learning from my past experiences intensity is not important, so I try to use a light that is not strong enough to promote growth of unwanted micro algae.
Collection of the Fry
Now that I felt I designed an ideal system for me to raise the fry, the next step was introducing the first batch. If you recall from Part I, I suggested keeping a log on how long it typically took your male seahorses to release the fry. This knowledge takes a lot of the guesswork out of the collection process. On several occasions I collected the released fry from the main display tank with a turkey baster or a specimen cup. Acclimating them to a new system wasn’t too traumatic, but there were losses for sure.
What I decided to do instead was to remove the pregnant male from the display tank when it was within two days of giving birth and put it in the fry system. During your logging process you will be surprised how accurately you can predict the release of the fry from a healthy system and breeding pair. This eliminated the problem of acclimation issues associated with the fry. On occasion the stress of moving the pregnant male made it release the fry almost immediately, but it never seemed to be a problem most likely because of the careful timing of the transfer.
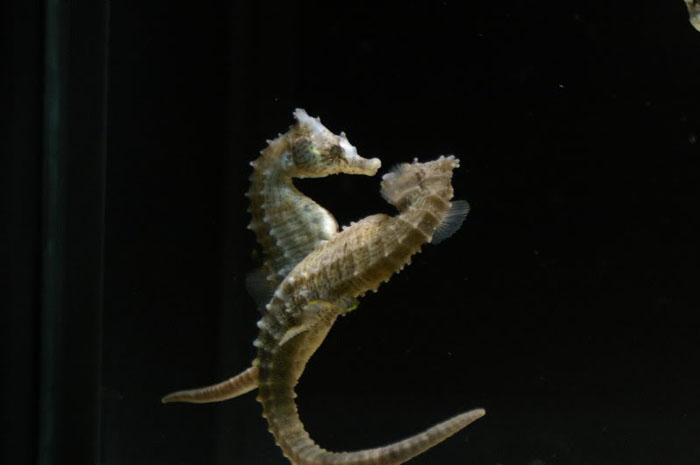
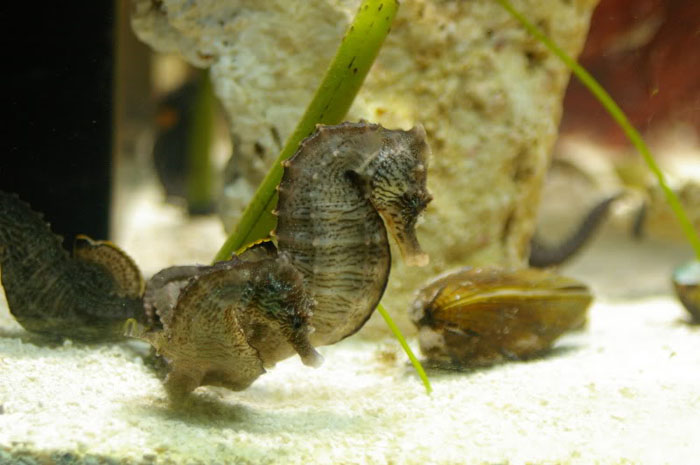
The female H. erectus (left) is depositing eggs in the pouch of the male (right).
After so much success with this method, I recommend this approach to anyone trying to raise seahorse fry. They are born directly in the system in which you want to raise them and you can quickly remove the male and place him back in the display tank. Many people have asked me if the larger seahorses will eat the fry. I’ve never witnessed this behavior, but better off safe than sorry.
Feeding the Fry
Feeding the fry can be a lengthy discussion with so many opinions and recommendations available. In order to keep this article from turning into a book, I am going to focus on my preferences. With any of my fish I try to feed the most diverse diet possible. I also try to feed natural live foods.
Using plankton nets, I locally collect several small copepods that I identify using a microscope. I introduce them to the system before any fry are added to allow them to populate. I also introduce tiny copepods from my display tank by collecting them at night when the lights are out and they are on the glass. It is beneficial in my opinion to have a natural supply of live foods already established in the fry system. As you probably have noted throughout this article, I do not use the “green water” method. If you are not familiar with the green water method you can search the Internet and find many references to it. Basically it is used to fortify any live foods added to the tank and help with filtration. With the system I created and use the green water is quickly filtered out. This means that I have to take measures to fortify any live foods I might be using as the staple diet– in this case baby brine shrimp (BBS).
There is a lot of debate about the nutritional value of BBS even after initial hatching. I’ve never relied strictly on them as a diet without feeding them first. I hatch the BBS in small hatcheries that can be purchased inexpensively from aquarium supply stores. After they hatch, I introduce them into a small holding container made of plastic with an airstone. The water is usually taken from the fry system. I feed the BBS a mixture of Reef Nutrition’s PhytoFeast and Florida Aqua Farms’ Roti-Rich. After the BBS is kept in the solution for 24 hours I start introducing them into the fry system using specially made strainers. For those of you with the time and space you could easily grow your own phytoplankton to use as food. I’ve done this in the past as well. You’ll have to do some research to be sure that the kinds of phytoplankton you are using are nutritional enough and are not too large for the BBS to eat.
Pictured is a Grass shrimp (Palaemonetes pugio) in the pelagic stage. I use these in the later stage of development for food
Once there is a steady supply of enriched BBS going, I add a good amount at least twice a day (three times is preferred). It is important not to feed as soon as the lights go on as you will notice the fry are “groggy” from resting overnight. If you have aggressive filtration like I do, the food will be sucked up before the fry are ready to eat. You can see the fry consuming the BBS from the first day they are born. This method has led me to the best results and highest survival rate. I do, on occasion, add rotifers to the mix, but haven’t seen much interest from my H.erectus fry, however, it doesn’t hurt to add them once in a while. It is important when feeding that you monitor any build up of wastes and remove it promptly without disturbing the fry.
It takes several weeks before the fry are large enough for you to start introducing frozen foods such as Cyclopeeze and/or frozen mysis. When you get to that point, it is even more important to monitor water quality and remove any left over waste.
Watching them Grow
Assuming you have mastered everything we discussed thus far you now get to enjoy watching the fry eat and grow. On average it takes about 2-3 weeks to start seeing the pelagic fry wanting to hitch. In many cases they will start grabbing each other. It is at this point I introduce hitching posts. I use red colored plastic bristles glued into a piece of marine rock. The bristles are thin enough for the fry to easily grip. It is at this point that they will start sleeping on the hitches at night as well.
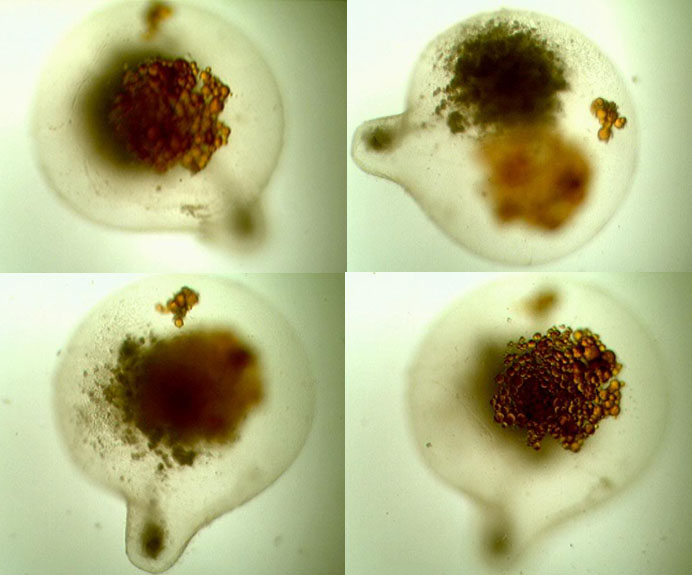
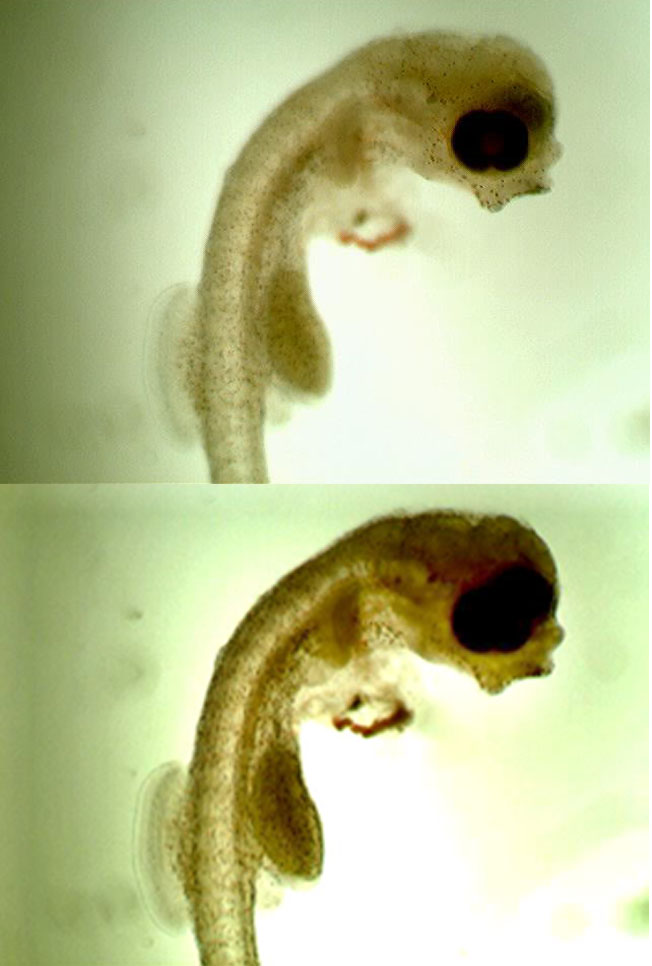
Eggs from H. erectus and a developing fry.
Throughout this process you should constantly monitor water quality The slightest change will result in losses. If everything is going well you will see significant growth from the seahorses week to week.
Hopefully this article was enough to get you started down the right path. The more we can learn about captive raising our livestock the better the environment and our hobby will be in the long run. If you have any additional questions please feel free to email me at [email protected].
Additional Photographs


Thank You Dominick. This is my instruction for the new 180 I’m going to do seahorse only in. 😉