Part 2 will cover:
- Computer/Camera Connections
- Battery Time Display
- Batteries
- Powering the Camera using AC
- Zoom Range
- Large Lenses
- Virtual Zooming
- Close-Up or Macro Photography
- Depth of Field
- Decreasing Apparent Depth of Field using Post Processing
- Back to Macro Photography
- Chromatic Aberrations and the Aquarium Glass Prism Effect
Editor’s Note: Here’s the Link to Part 1 of this article.
Computer/Camera Connections
Most cameras allow you to download your photographs to your computer by connecting the two using a USB or FireWire cable. A few cameras allow you to just place the camera in a docking station or cradle which recharges the battery and connects to the computer; others require that you plug various cables into the camera to achieve these ends. The docking station, or cradle, is much more convenient than all of those cables.
Battery Time Display
Look for a camera that provides a continuous display indicating how much battery time remains. Without this feature, your camera will suddenly roll over and die when the battery is depleted. An on screen battery indicator will prevent a lot of frustration.
Batteries
Some cameras use batteries that are specific to the camera, or to the manufacturer (like Sony’s InfoLithium). Custom batteries allow the camera to have special features (like Sony’s battery time display, which relies on the InfoLithium batteries to compute the time). Custom batteries can also be manufactured in custom shapes, which can help the camera be as compact as possible.
Other cameras let you use standard AA or AAA batteries. Use of standard batteries ensures that you are never out of battery power for long, since you can purchase batteries at any convenience store. Cameras that allow you to use standard batteries also allow you to use rechargeable batteries (NiCad or NiMh) and to have a spare set with you. Buying a spare non-standard battery is often much more expensive.
Powering the Camera using AC
Most cameras will function for an hour or two on a fully charged battery, which is more than enough time to take lots of tank photos. Some cameras allow you to connect the camera to AC power, which eliminates any time limit imposed by the battery (with the extra awkwardness of a trailing cable). This feature can be useful if you are using the camera to give a photo show (when connected to a TV, for example). It is also convenient to have the battery charged while still in the camera, rather than having to remove and then re-insert the battery every few days.
Zoom Range
Most cameras allow you to “zoom” in on your subject, with zoom ranges varying between 2:1 and 28:1. Be cautious when reading about zoom ranges, since most manufacturers brag about the “digital zoom” rating, not the “optical zoom” rating. The former is the optical range plus some digital enhancements of the image. Since you can’t get something from nothing, it should not surprise you that digital zooming is best ignored. You can always perform a digital zoom later, on your computer, so concentrate on optical zoom range when comparing cameras. You should disable digital zooming on your camera as soon as you get it.
Most cameras offer an optical zoom range of around 3:1. The larger the zoom range, the longer, wider, heavier, and more expensive the lens has to be in order to maintain image quality. Older cameras had very large zoom ranges (Sony Mavica 95 was 14:1; Sony Mavica CD-1000 was 10:1), but they were taking pictures that had much lower resolution than the newer cameras. As camera resolution has increased, the manufacturers had two choices: either maintain the large zoom ranges, even if it meant larger, heavier, and more expensive lenses and cameras; or reduce the zoom ranges in order to keep cameras small and relatively inexpensive. Even the best of the newer cameras tend to only have a 5:1 zoom range (Sony DSC-F707). Choose the largest zoom range that you can afford.
Large Lenses
Taking pictures in a fish tank is like taking pictures indoors: there is some light, but not a lot of light. You can get more light on the subject in three ways: actually buying more or brighter lights for the tank; using a flash; or buying a camera that can take photographs at lower light levels. We will discuss this more later, but cameras with larger diameter lenses are likely to collect more light, and are likely to take better pictures in lower light conditions. Larger diameter lenses mean more weight and increased cost, and, often, decreased zoom range. Look for cameras with the largest glass that you can afford. The Sony DSC-F707 is a good example of a large-glass camera.

As an example, here is a full frame image of a diamond goby. The original image was 2500 x 1900 pixels.
Virtual Zooming
Note that there is a “trick” you can use to increase the effective zoom range of your camera; I call it “virtual zooming.” This trick depends on the intended use of the image. If you want to make an 8×10 print, you may need all of the pixels the camera can provide, and no virtual zooming is possible. If you want to create “wallpaper” for your desktop, you may be able to get away with only half of the maximum camera height or width; this can provide a virtual zoom of 2x. And if you want to create a web image, you may well want the height and width to be halved again, to minimize image download times; this can result in a virtual zoom of 4x.
Let’s suppose that you want to create a wallpaper image, and that your computer screen runs at a 1024 x 768 resolution. Given a high-end camera, with maximum resolution of 2500 x 1800 or so, you will be using less than ¼ of the original image you shoot. Used this way, you get an effective additional 2x zoom when you crop the original image down to the wallpaper size.
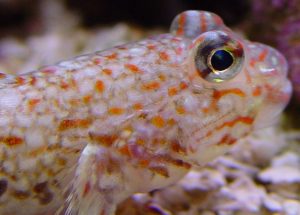
A full resolution image of the central 1/3 of the original image. The details are impressive, showing the full potential of virtual zooming.
So, even though the optical zoom ranges are getting smaller on the cameras, the increase in camera resolution means that images of the same pixel size result in the camera system having the same effective zoom range as they did in the past.
Close-Up or Macro Photography
Virtually all of the dramatic photographs in a fish tank use close-up or “macro” photography. The closer your camera can focus in macro mode, the more likely you are to be able to take dramatic pictures. Add-on close-up lenses can be used with some cameras, but they can be awkward to use. If you want to use add-on lenses, make sure that you buy a camera with a threaded lens so that you can properly mount the add-on lenses.
Most cameras have a macro mode, which is enabled by pressing a button; that button often has an icon like a flower near it, to remind you that you need macro mode to take close-ups of flowers. It may seem strange to you that you have to tell the camera that you want to take a close-up, but this is a feature, of sorts. It takes longer for the camera to auto-focus when it has to consider focusing on near objects as well as far objects. By only focusing on far objects most of the time, the camera can reduce the delay during auto- focusing most of the time.
The minimal focusing distance often gets larger (farther away) as you zoom in. Filling the image with the subject of interest can take some experimentation and some fiddling. As you zoom in, you may have to move the subject away from the camera to keep it in focus, and this will reduce the effective size of the subject in the image. Thus, trying to use maximum zoom can sometimes be a losing battle.
Depth of Field
The term “depth of field” refers to the fact that often the entire scene cannot be kept in perfect focus; if it were, we would not have to focus at all. When you focus on a subject, often the objects behind the subject, and in front of the subject, are out of focus. When only a small range of distances are in focus, this is termed narrow depth of field. Narrow depth of field results in dramatic pictures, where the subject jumps out at you, but it requires careful and correct focusing. With large depth of field, focusing is easier and focusing mistakes can often be ignored.
There are ways to increase or decrease depth of field. The larger the aperture used (the smaller the F stop), the narrower the depth of field. On some cameras, you can manually select the largest aperture, to ensure the smallest depth of field. To enhance depth of field, you can choose smaller apertures (larger F stops), but this requires either slower shutter speeds (which may lead to blur) or more light. Most tank lights are dim enough that narrow depth of field is forced upon you.
Depth of field is also decreased as you increase the telephoto (zoom in) or focus closer (macro). All of these factors contribute to the fact that many tank photos will have narrow depth of field, like it or not. Sometimes the best images can be acquired if you “un-zoom” (to go wide angle), which allows you to either move closer to the subject (or move the subject closer to you) and to obtain widest depth of field.
Shallow depth of field can make photographs dramatic, but it also can be frustrating when the subject you had in mind is out of focus. If your subject cannot all be in focus, decide which parts of the subject require the focus and which do not. Having a head-on shot of a fish where the lips and eyes are out of focus is usually more distracting than effective. When possible, re- orient your subject so that more of it can be in focus: a side shot of a fish might be nicer, since more of it can be in focus.
Decreasing Apparent Depth of Field using Post Processing
Minimizing depth of field can result in pictures which are dramatic, because all of the images in front of and behind the subject are out of focus. Many image processing programs (including Picture Window) offer you the ability to blur parts of the image manually. This might seem like a strange thing to want to do, but when used judiciously, you can achieve the effect of minimal depth of field by manually blurring the parts of the image that are not important to you.
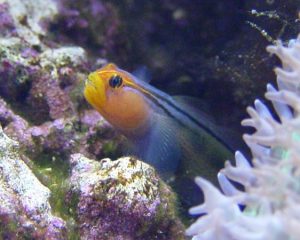
Here is a mediocre picture of a red headed goby. The focus is not perfect, and the colors are somewhat washed out.
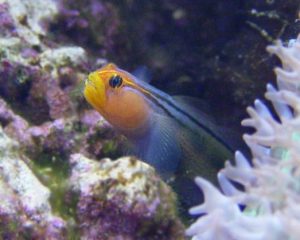
Here is the same picture after I manually blurred the objects in the background. Increasing the blur in the background makes it seem as if the focus on the fish is better.
Every good photograph should have some area that is black, and some area that is white. That is, the brightness range should use the full range of available values, for optimal contrast. Photographs that are taken with inadequate contrast seem washed out and foggy. One facility JLB Image offers is the ability to point to the darkest place in the image, and the brightest, and have the computer adjust the brightness so that there is a true black and a true white. This can rescue an otherwise boring photograph. I used the “Make black/white” feature in JLB Image to enhance contrast, to end up with a picture that is much more compelling.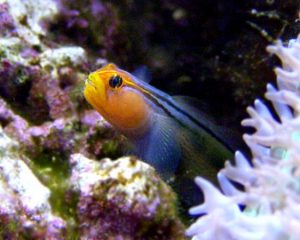
Back to Macro Photography
Here are two full frame photographs of the same specimen, taken at the same focused distance. The only difference is that one is fully wide angle (un- zoomed) and the other is zoomed as much as one can while still maintaining focus. Both show the full frame of the original picture, reduced to 1/16 the number of pixels (1/4 horizontally and vertically).
Chromatic Aberrations and the Aquarium Glass Prism Effect
The left side of the picture shows some chromatic aberration, or color fringing. Some of the polyps on the left side of the image clearly have a blue ghost to the left of the main image. This is due to the prismatic effect of the aquarium glass. The camera lens would prefer that the aquarium glass be shaped like a sphere, so that all light rays entering the lens come square through the aquarium glass. As the camera lens looks at the aquarium glass at an increasing angle, the glass acts more like a prism, separating out the different colors. A quick look back at the center image, above, shows no obvious chromatic aberrations.
How do we minimize this problem? One way is to try to use the center of your pictures, and discard the edges, which may have these colored fringes. Another way is to back away from the tank, to minimize the angle through which the light passes through the aquarium glass. Of course, this makes it difficult to get dramatic macro photographs.
Here are similar images from the zoomed picture. The narrow depth of field is clear in the first picture, and the color fringes are clear on the left-side picture, although they are less obvious because the background is not as dark. This is because the decreased depth of field has made the polyps at the top of the coral become out of focus, and this loss of focus has also diminished the impact of the chromatic aberration.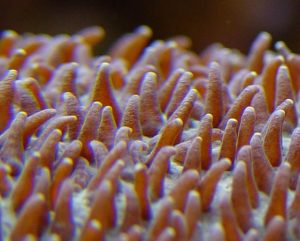
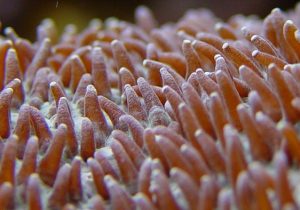
I hope this discussion has been useful to you. I’d be happy to answer questions by email should you have any ([email protected]).
We will continue to discuss the following topics in the third part of this article:
- Color Balance
- Color Balance Through Post Processing
- Lighting
- Adding Lights
- Flash Photographs
- Focusing
- Sample Images
Sample Images
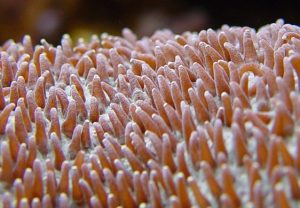
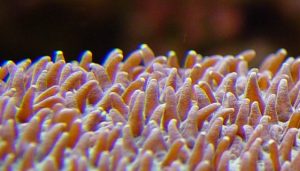
Here are some images I have taken over the years, for your enjoyment. Please visit my web site, http://www.sover.net/~jbondy, and click on the two Reef Tank links, near the top, to see more of my photographs.




0 Comments