
.
Preface: This Reef Mentoring article series is to document my recommendations to a hobbyist I have been mentoring. I am basically building a reef tank with his setup at my house and maintaining it for a year with weekly in person hands on sessions.
In the previous article, Reef Mentoring Series: A Slightly Different Approach I discussed mentoring a local hobbyist by setting up his tank at my house. I will go through each step based on my 35 years of experience in this hobby. The goal of a mentor is to guide a novice around all possible failure modes in the process. In this article I will discuss the very first step in the process, “Goals” and why it is important.
Goals
As always I emphasize the 6 P’s (Prior Proper Planning Prevents Poor Performance) in any project. Part of this planning is answering the question: “What is the goal for this system?”
Some of the inter-related variables to consider:
- Cost of Entry Budget
- Monthly Run Cost
- Maintenance Level- Low – High (Based on Lifestyle Schedule – What amount of time are you able to commit?)
- Desired livestock hardiness and care requirements
- Manual Labor vs. Automation
My hobbyist’s experience level and busy lifestyle resulted in focusing on simple, entry-level soft and LPS coral selections. The fish bioload will be his six existing nanofish. If the goals change, it may impact the equipment needed long term. The level of automation can be revisited as the system progresses. Personally I like to automate everything so I will pursue it with my own equipment that I have lying around. At minimum I may consider plumbing it into my main system and perform auto water changes between them. I will try to keep it a standalone system first to simulate an independent nanoreef system.
The goals were defined as the following:
- Low Maintenance
- pH Stable
- Minimum water changes via supplementation
- Soft to LPS coral primarily
- List desired corals and research their requirements
- Minimize fish bioload for ease of nutrient exporting
- Add automation to meet the hobbyist’s lifestyle schedule and to simplify vacation caretaker’s responsibilities
- Add redundancy and emergency solutions
Equipment
List all the equipment you will need to fulfill your goals. Make sure the equipment is sized appropriately to match the system. Gather all the equipment prior to setting the system up. Educate yourself on how each is set up and works, and what it takes to maintain them.
Listed below are the items available from the hobbyist’s current setup that I cleaned and repaired:
- Aquarium: Waterbox 30.2 AIO Rimless Tank and Stand (Pre-Enjoyed)
- Cover: Custom Screen Top by Ellery’s Reef Notes
- Lighting: 2x Aqua Illumination Prime 16HD
- Return Pumps: Sicce Syncra 2.0
- Flow Pumps: Red Sea Reef Wave 25
- Protein Skimmer: EShopps Nano Skimmer
- Filtration: 2x In-Tank Media Baskets
- Heater: Inkbird ITC 306A Smart Wifi Controller + 200 Watt Titanium Heater
- Supplementation: IceCap KM-120 Kalk Reactor
- Supplementation: Milwaukee MC-720 pH Controller / Dosing kit
- Evaporation Compensation: Jebao ATO & RO Reservoir
- Additional Filtration: 9W UV Sterilizer
- Basic Controls: Various Digital Timers / WIFI Outlets
- Test Kits & Equipment: Hanna Checkers & various titration test kits
My personal equipment contributions to this build to suit my requirements while under my care:
- Neptune Apex Jr + 2x EB4 +EB8+PM1+pH Probe
- Reef Kinetics Reefbot v1 to monitor Alkalinity, Calcium and Magnesium, Nitrates or Phosphates will be proposed.
- Eheim AutoFeeder
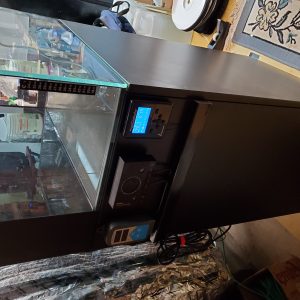
Hardware Setup
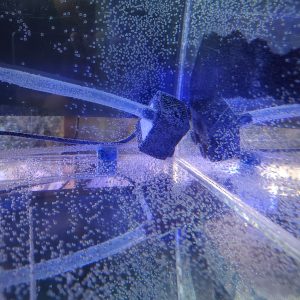
One of the most fun parts of this process is to set up the hardware you’ve collected. Make a plan of how you want it to look, based on viewing what others have done. Keep in mind serviceability should trump appearances. The health of the livestock is the priority and being able to easily maintain the equipment will promote this. With respect to used equipment, ensure all items are cleaned and operating correctly prior to installation. Some disassembly and creativity maybe required to ensure peak performance. Take your time to ensure a clean and serviceable layout. Label all wire connections and outlets. The harness cleanup will usually be the last thing to work on.
-
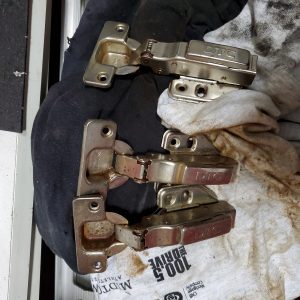
- Cleaned up the rusty hinges with a wire brush, clear coated to seal, and lubricated
-
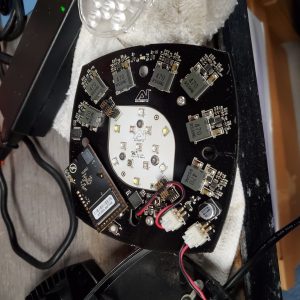
- One AI Prime HD was not coming on so I repaired it and cleaned all the dust bunnies out of the unit.
-
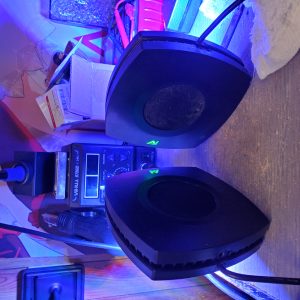
- Both AI Prime HDs cleaned and configured.
-
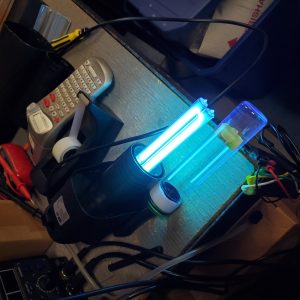
- UV Sterilizer was cleaned and repaired
-
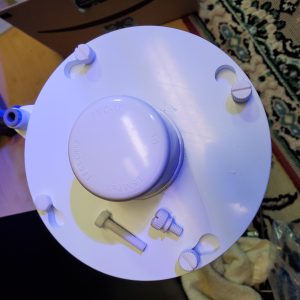
- 3D printed a replacement M6 screw for this Ice Cap KM-120 Kalkwasser Reactor
-
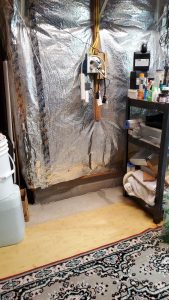
- Pick a sturdy location with access to power, water, and drainage.
-
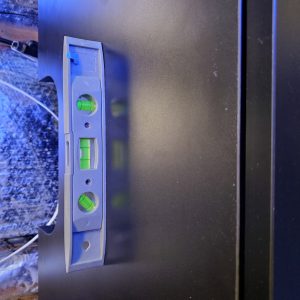
- Level the stand and position it with enough service space all around
-
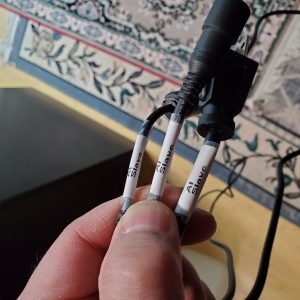
- Label all wire connection ends
-
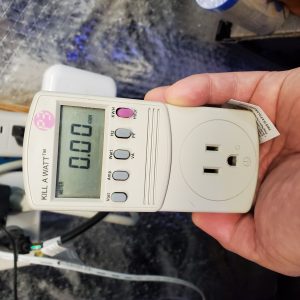
- Included a Kill-Watt meter to track power usage of the entire system
-
- Mounted Controller Displays externally for quick viewing and access with a custom wire channel
-
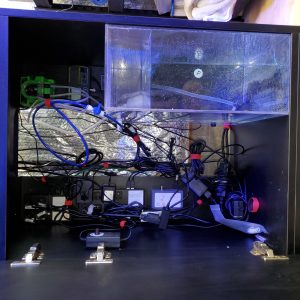
- Mounted all the controller, ATO, and Dosing equipment
-
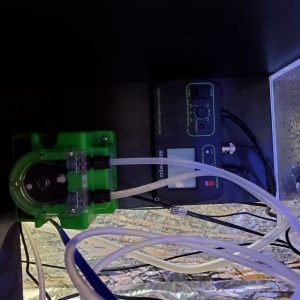
- pH Controller/ Doser for the Kalkwasser Reacter
-
- ATO Pump and Reservoir hard plumbed to my RO System
-

- 3D Printed a hose clip for ATO and Kalk Drip lines
-
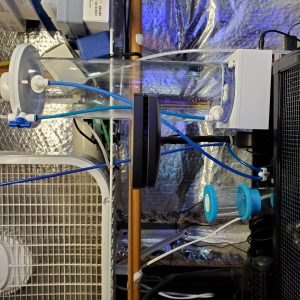
- Kalkwasser Reactor will be gravity dripping into the AIO Chamber
-
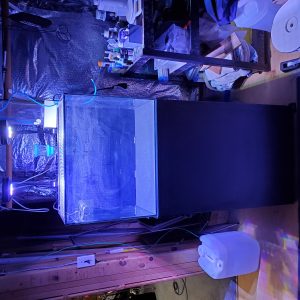
- System Hardware is set up and ready for next step
Documentation
This article series is a form of documentation for the hobbyist I am mentoring but a good practice is to document as you progress. Document how everything is connected and configured for future reference. If you ever have to train someone to care for your system they can have something simple to refer to.
Even a simple spread sheet table is very beneficial
| Outlet # | Function | Brand & Model | Module | H/W Controls |
| 1 | Return Pump | Sicce Syncra 2.0 | Apex Jr | |
| 2 | Heater | BRS InkBird ITC-306A + 200W Titanium | Y | |
| 3 | Light #1 | AI Prime 16HD | ||
| 4 | Light #2 | AI Prime 16HD | ||
| 5 | Circulation Pump | Red Sea Reef Wave 25 | EB8 | Y |
| 6 | Skimmer | Eshopps Nano Skimmer | ||
| 7 | KalkReactor | IceCap KM-120 | ||
| 8 | ATO | Jebao ATO | ||
| 9 | Cabinet Light | LED | ||
| 10 | pH Controller | Milwaukee MC-720 pH Controller / Dosing kit | ||
| 11 | ||||
| 12 | Dosing Pump | Milwaukee Doser |
Next Step:
The next step is to build the aquascape, fill the system with saltwater, and begin the cycling process. Stay tuned for Part #3 in this series.


0 Comments