
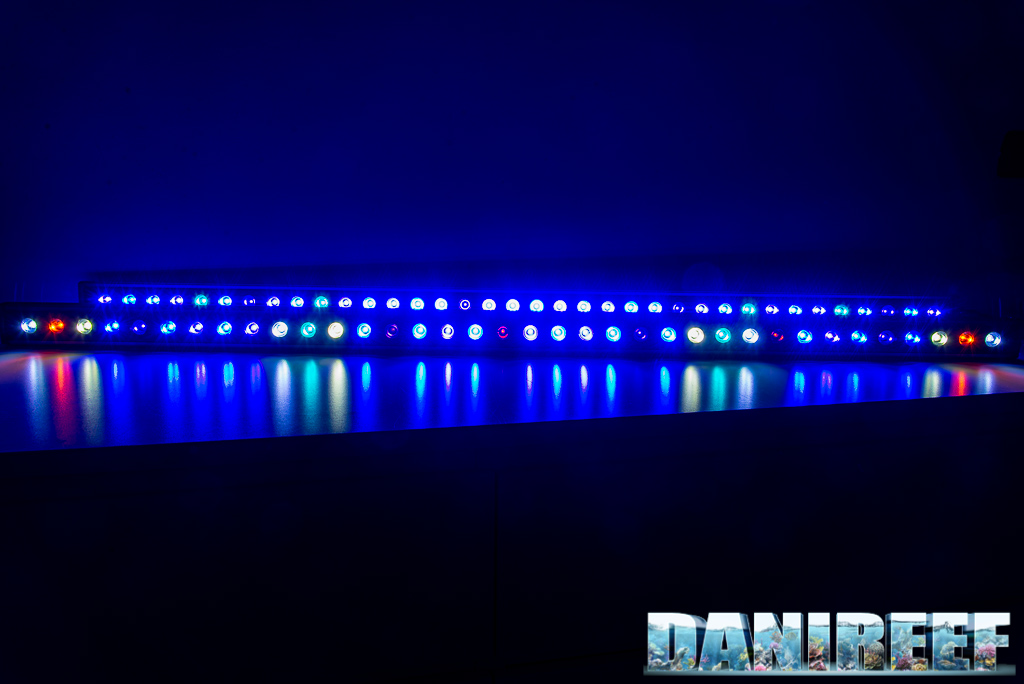
The first LED bar ever tested in our DaniReef LAB is the Orphek OR2 Reef Day Plus, which has been talked about a lot lately.
In some pictures, you’ll also see the Blue Plus, which we’re going to introduce in the next days. The two LED bars we tested are in a 120 cm configuration.
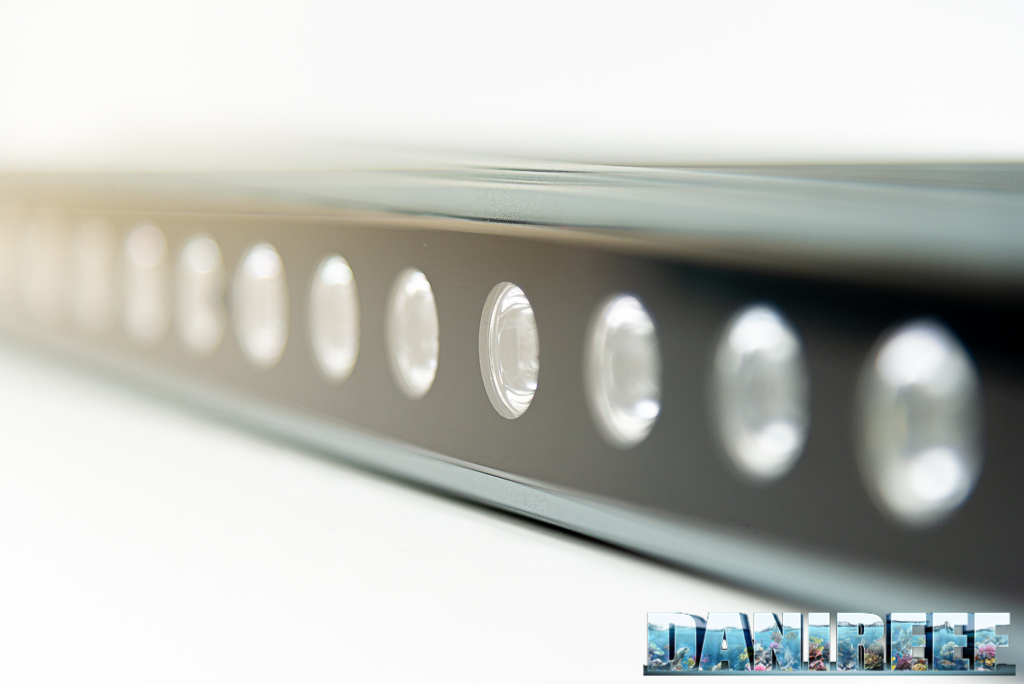
These bars are beautiful, solid, and very well built. They aren’t dimmable, but Orphek said that soon they’re going to release a dimmer that will allow adjustments. So, for now, the bars only have an on/off switch that can be timed.
Technical characteristics of the Orphek OR2 Reef Day Plus
- Driver: external;
- Input Voltage: 100-240VAC;
- Frequency: 50-60Hz;
- Consumption: 60 watts;
- Cos(phi) > 0.95;
- Input current (Amps) 0.55;
- Length: 123.5 cm;
- Width: 5 cm;
- Height: 3.6 cm;
- Weight: 2.3 kg;
- Used LED: 2x410nm, 2x420nm, 2x430nm, 4x440nm, 7x450nm, 4x470nm, 4x480nm, 2x590nm, 2x740nm, 5×5000°K e 8×20.000°K.
- Price for the public: 180 euro ($219 USD).
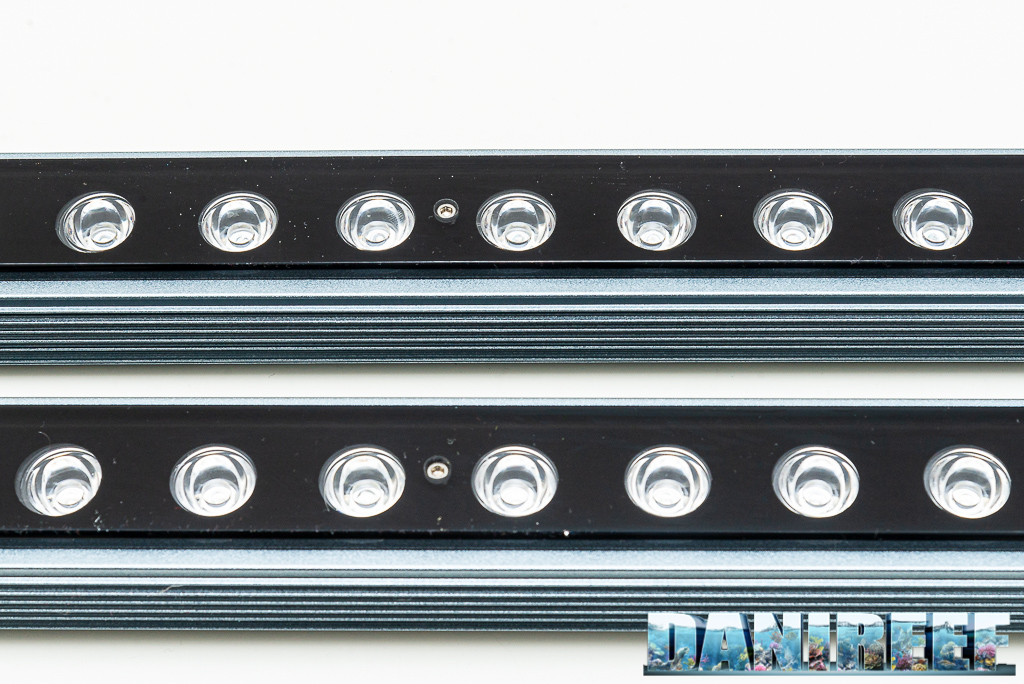
The bars are sold with a hanging kit. Also, there is a hooking system available on Orphek‘s website for attaching the light to the side of the tank. We’ve already said that the Orphek OR2 Reef Day Plus bars are excellently built. The external refinement, we believe in aluminum, works also as a heat-sink, and the assembly is simply flawless. 
The Programming
Usually LED bars can not be programmed, and the Orphek OR2 Reef Day Plus is no exception. For some brands, you can purchase a controller sold separately for dimming the input and output and for the total intensity. Orphek announced the release of their own dimmer, but it’s currently unavailable. 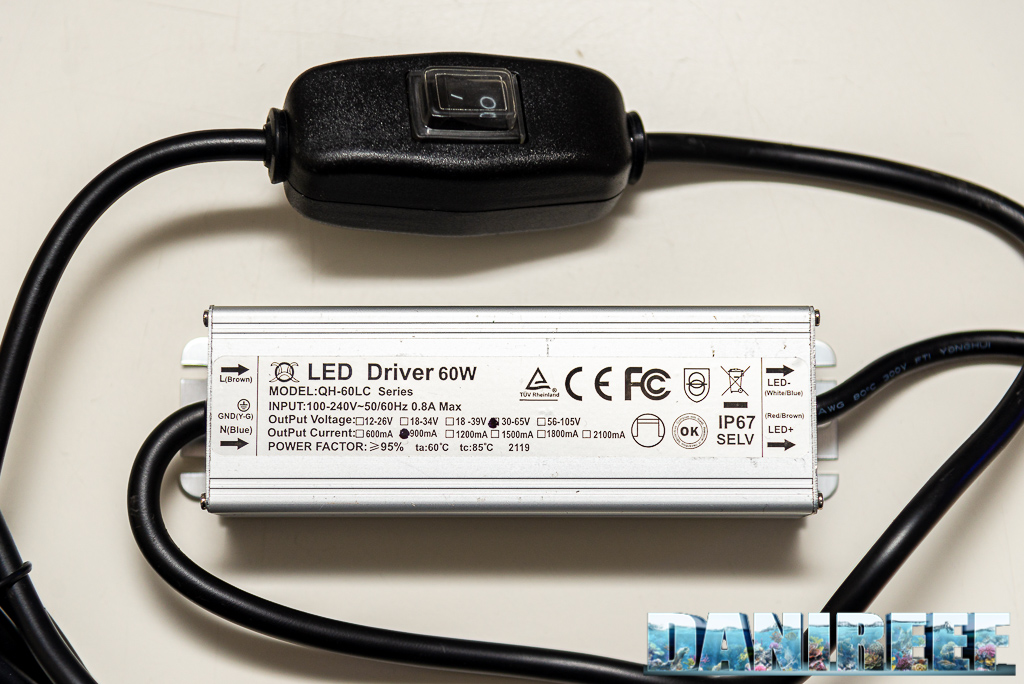
So, unfortunately, we can’t give you the consumption and the values of the LED channels, because the LEDs switch on all at the same time. 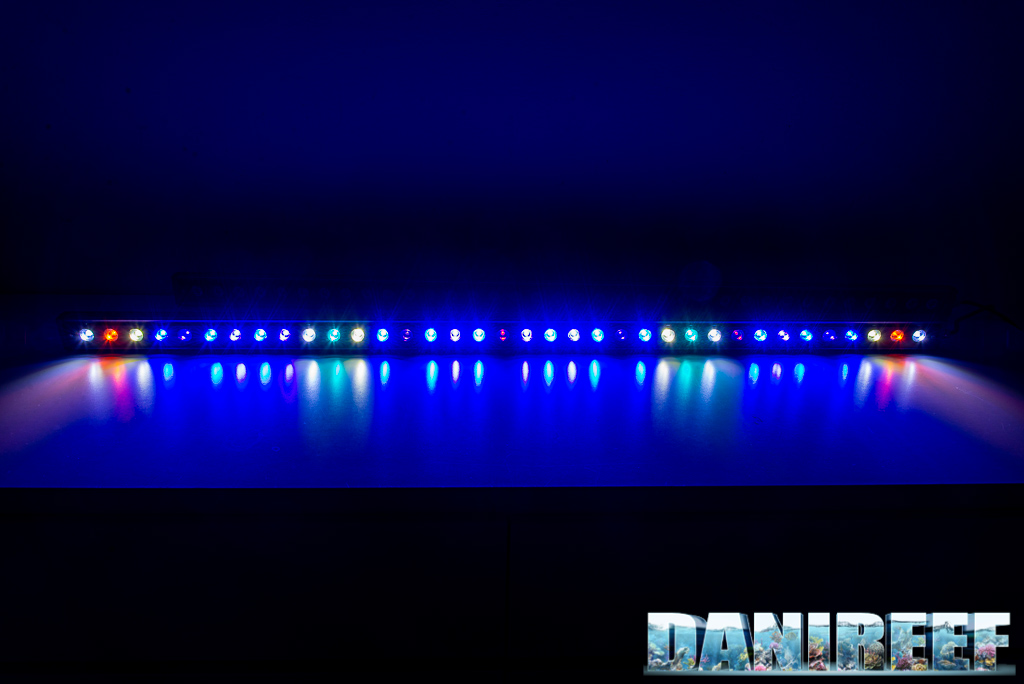
Our new method at DaniReef LAB for PAR measurement
During the long nights spent on our forum we always wondered how we could compare PAR from different ceiling lights. Even though we had the perfect device, the Quantum Meter MQ-510 di Apogee, we only measured the value at the center, and at at 20 cm of distance, more or less.
The Quantum Meter MQ-510 measures the PAR, expressed in PFFD, or photosynthetic photon flux density, in μmol m-2 s-1. This device is calibrated to work underwater, so if it’s in air, the measured value has to be divided by 1.32- the dive factor. We have to do the conversion. The values you’re going to see are correct. 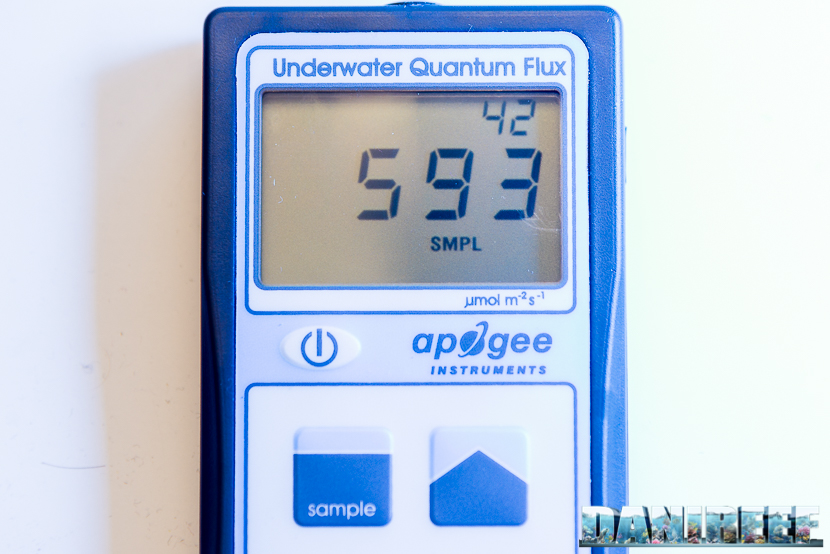
We decided to make a square base of 70×70 cm, we set 17 fiducial points where we placed the sensor Quantum Meter MQ-510, and we also made 3 lifts of 20, 40, and 60 cm for the ceiling light, in order to have the same distance from the sensor. This will allow us to create the curves which can be compared to other ceiling lights, all tested at the same distances. Note that this distance is measured between the base of the sensor and the ceiling light. In reality it should be decreased by 3.5 cm, which is the height of the measurement cylinder, and increased by 0.5 cm, which is dimension of the spacers that lift the ceiling light. 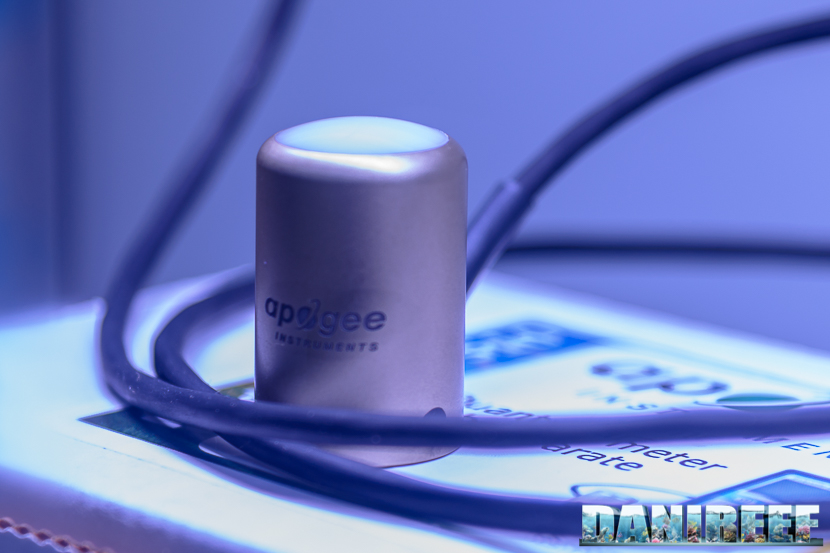
In total the three measurements are made at distances of 17, 37, and 57 cm. Because they’ve been done in air they will be corrected.
Actually, the testing of these LED bars gave us some problems, because we had to distance the spacers in order to correct for the light of the peripheral LED. Moreover, the bars were exactly in the middle.
PAR measurement at 17 cm of distance

This is the how the test is set up. The chart and the device on the bottom, and above them, the lights placed on the aluminum bars.
Here are the collected values: 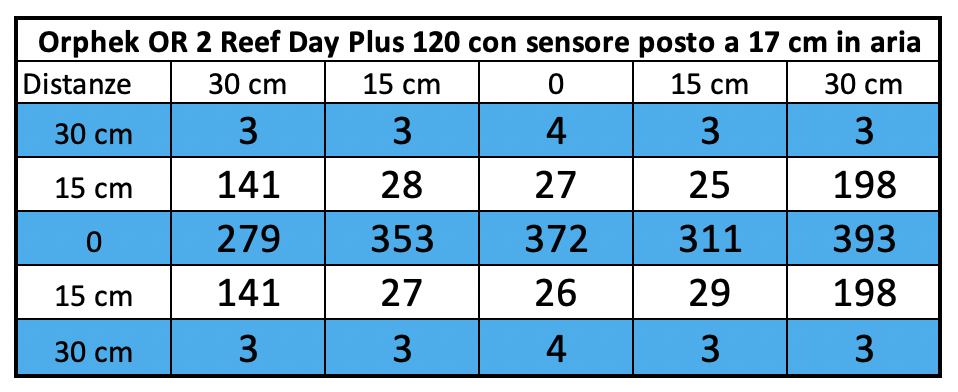
And here is the corresponding chart. We used the same scale for ceiling lights of similar power, in this case, speaking of bars, we decreased the value of the maximum scale. In the next test of bars we will use the same evaluation scale. 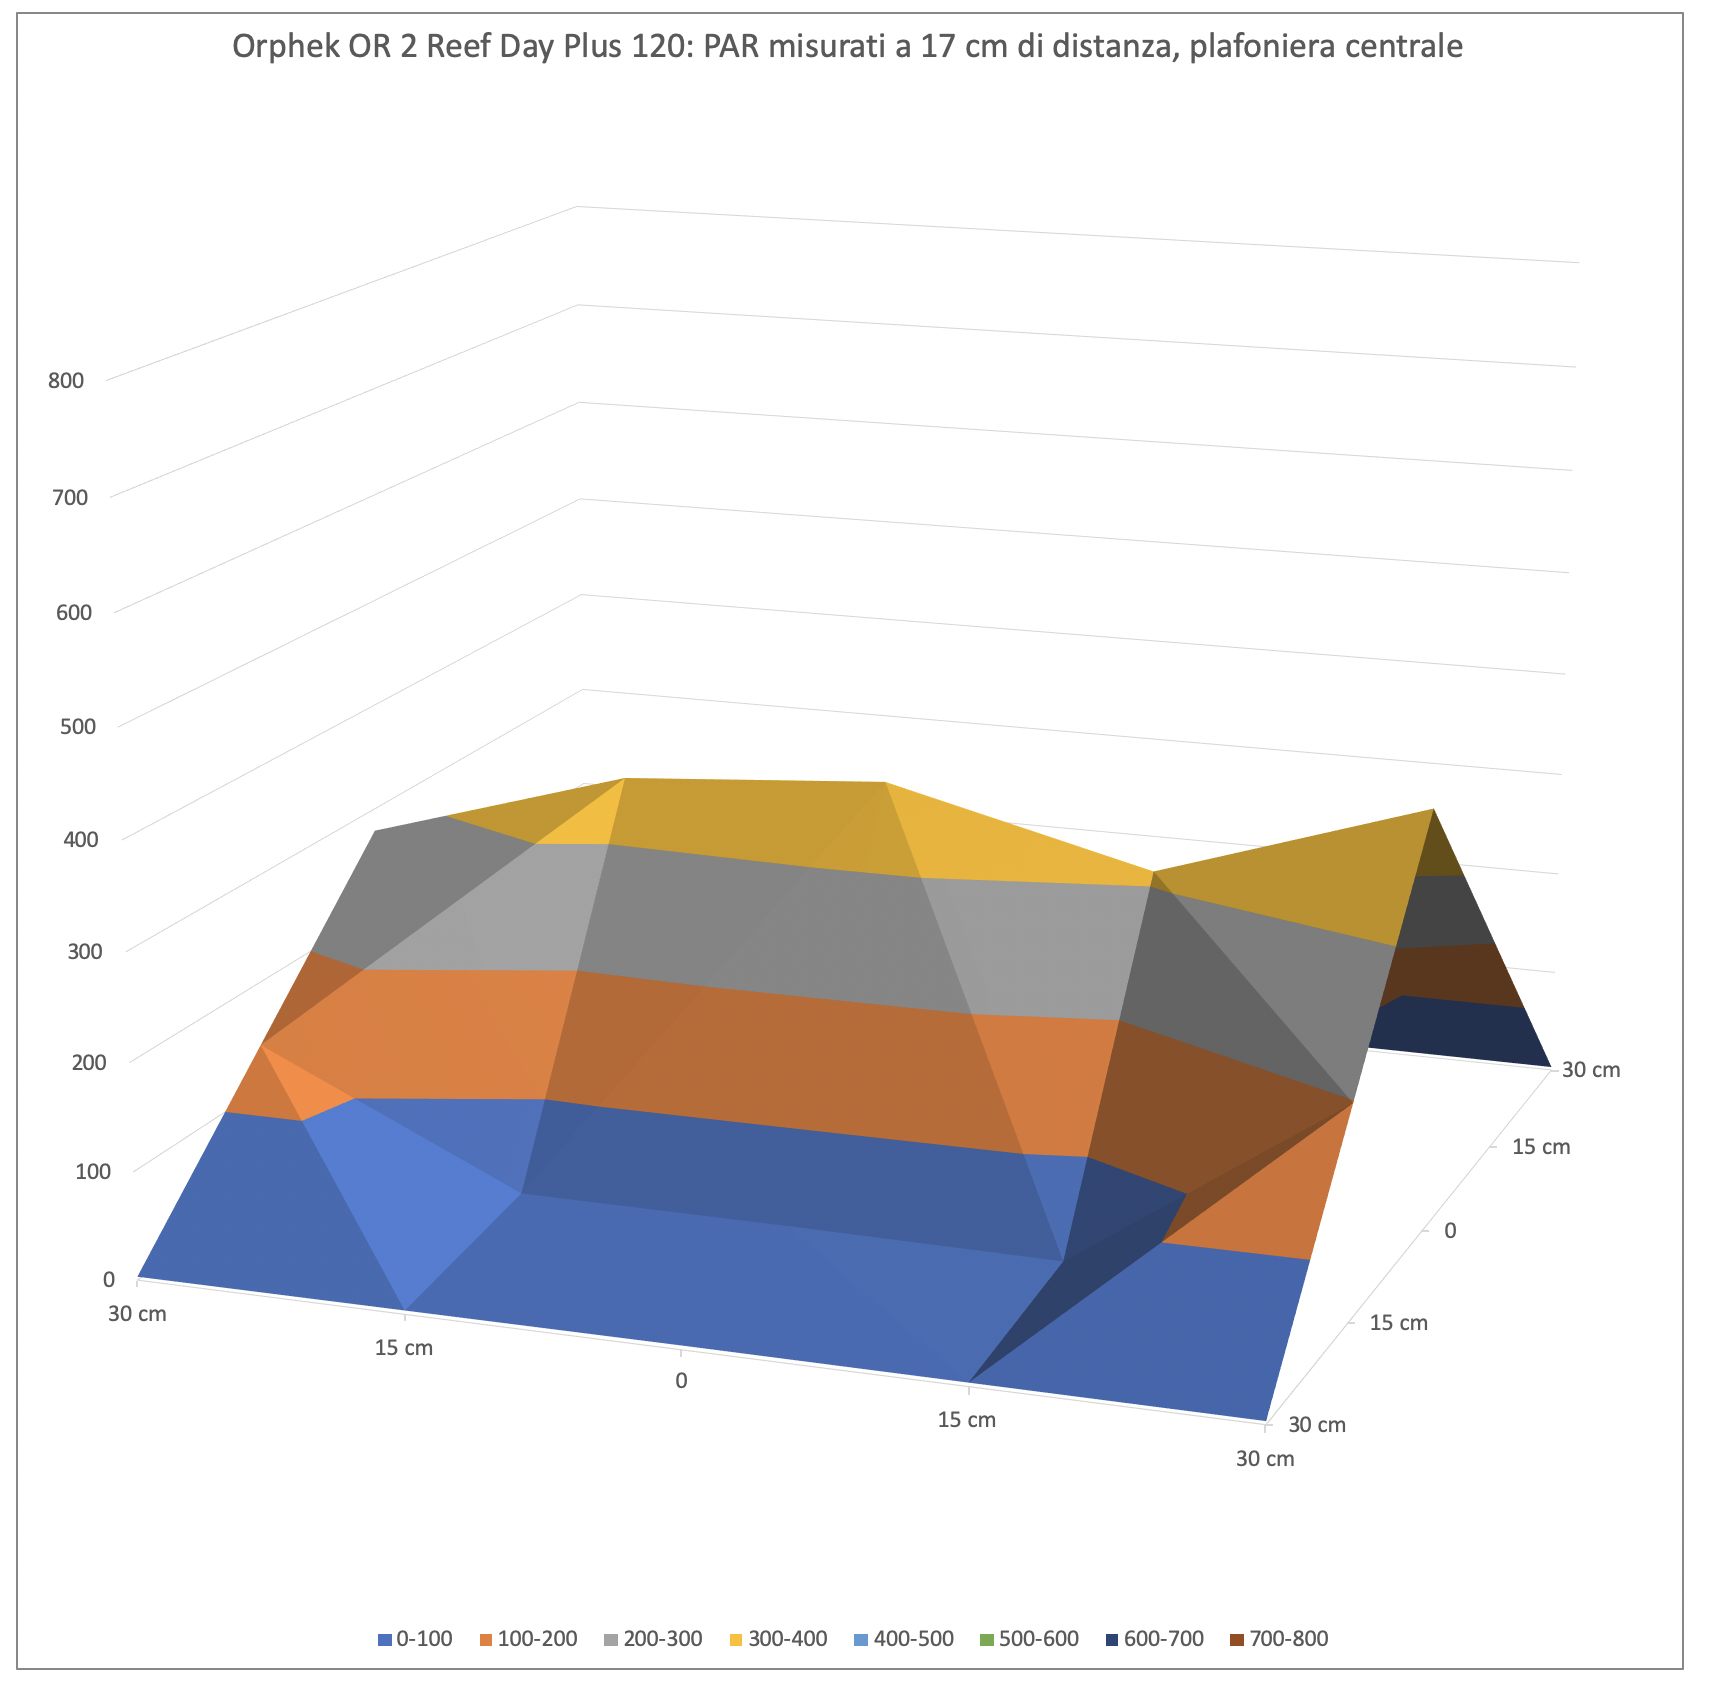
As you can see the bar creates a curve similar to a tent, with the spatial differences depending on the typology of the LED. Different from the classic ceiling lights, the decay is very linear at about 30 cm of distance from the light source.
PAR measurement at 37 cm

This is the how the test is set up. The chart and the device on the bottom, and above them, the lights placed on the aluminum bars.
Here are the collected values: 
And here is the corresponding chart. 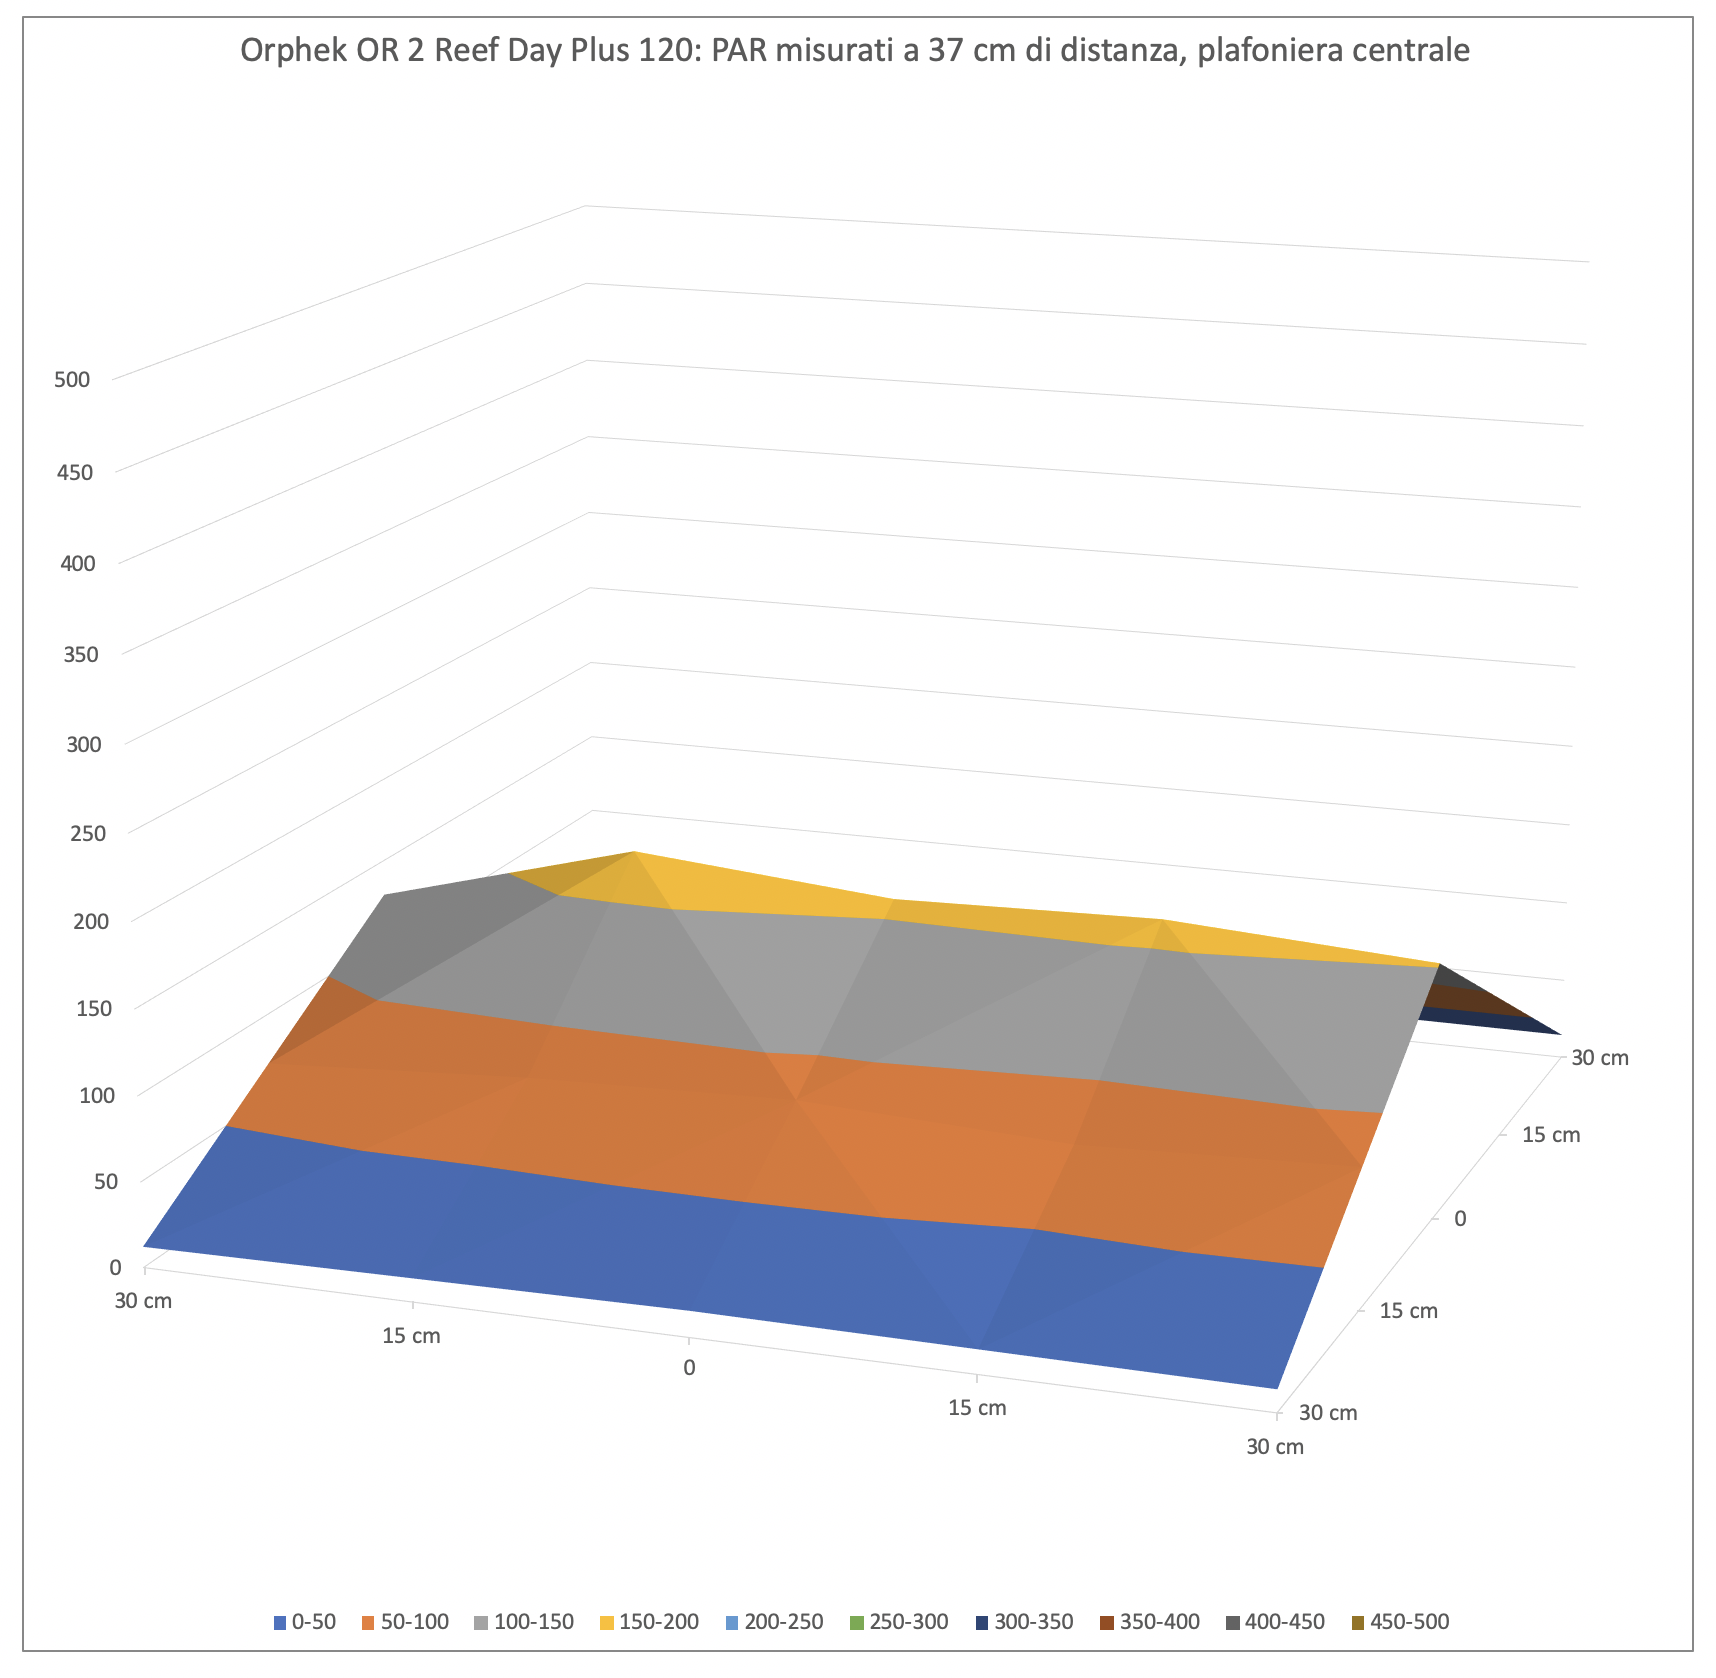
A bigger space between ceiling lights and sensor decreases the difference between PAR in the middle and on the sides. The light spreads, but the central value decreases from 393 to 171 μmol m-2 s-1, in the two brightest point.
It stands out that the coverage is very complete.
PAR measurement at 57 cm
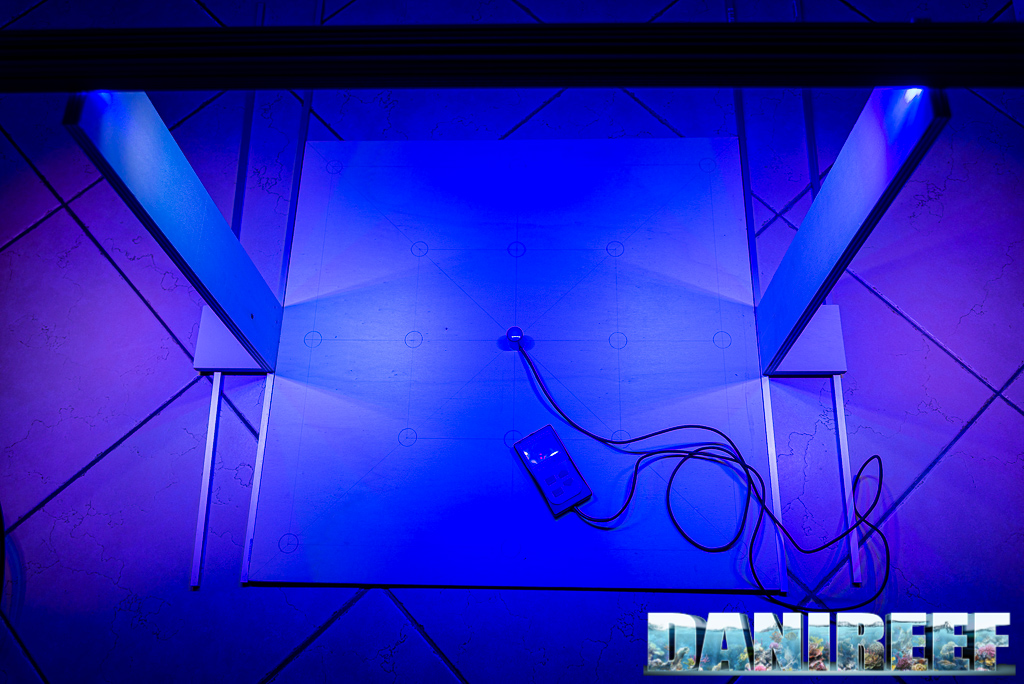
This is the how the test is set up. The chart and the device on the bottom, and above them, the lights placed on the aluminum bars. After the first measurements we realized that this configuration precluded the peripheral LED from contribuing to the PAR so we distanced the spacers more. Visually, the illuminated area is extremely wide, so the specific power per cm decreases.
These are the collected values: 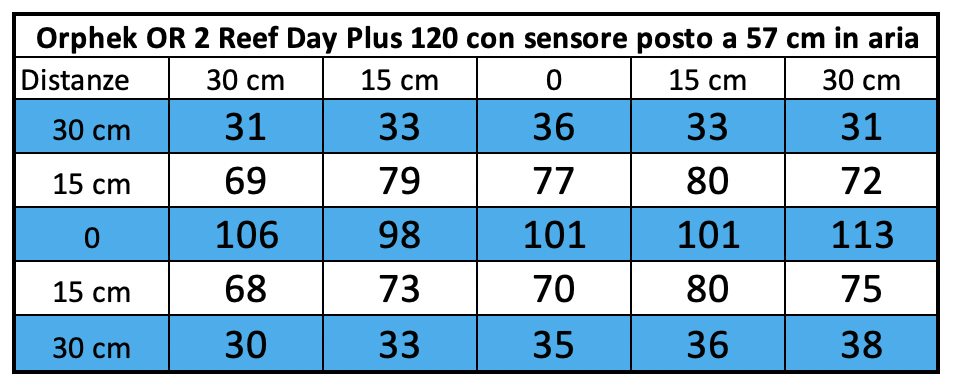
And here is the corresponding chart. 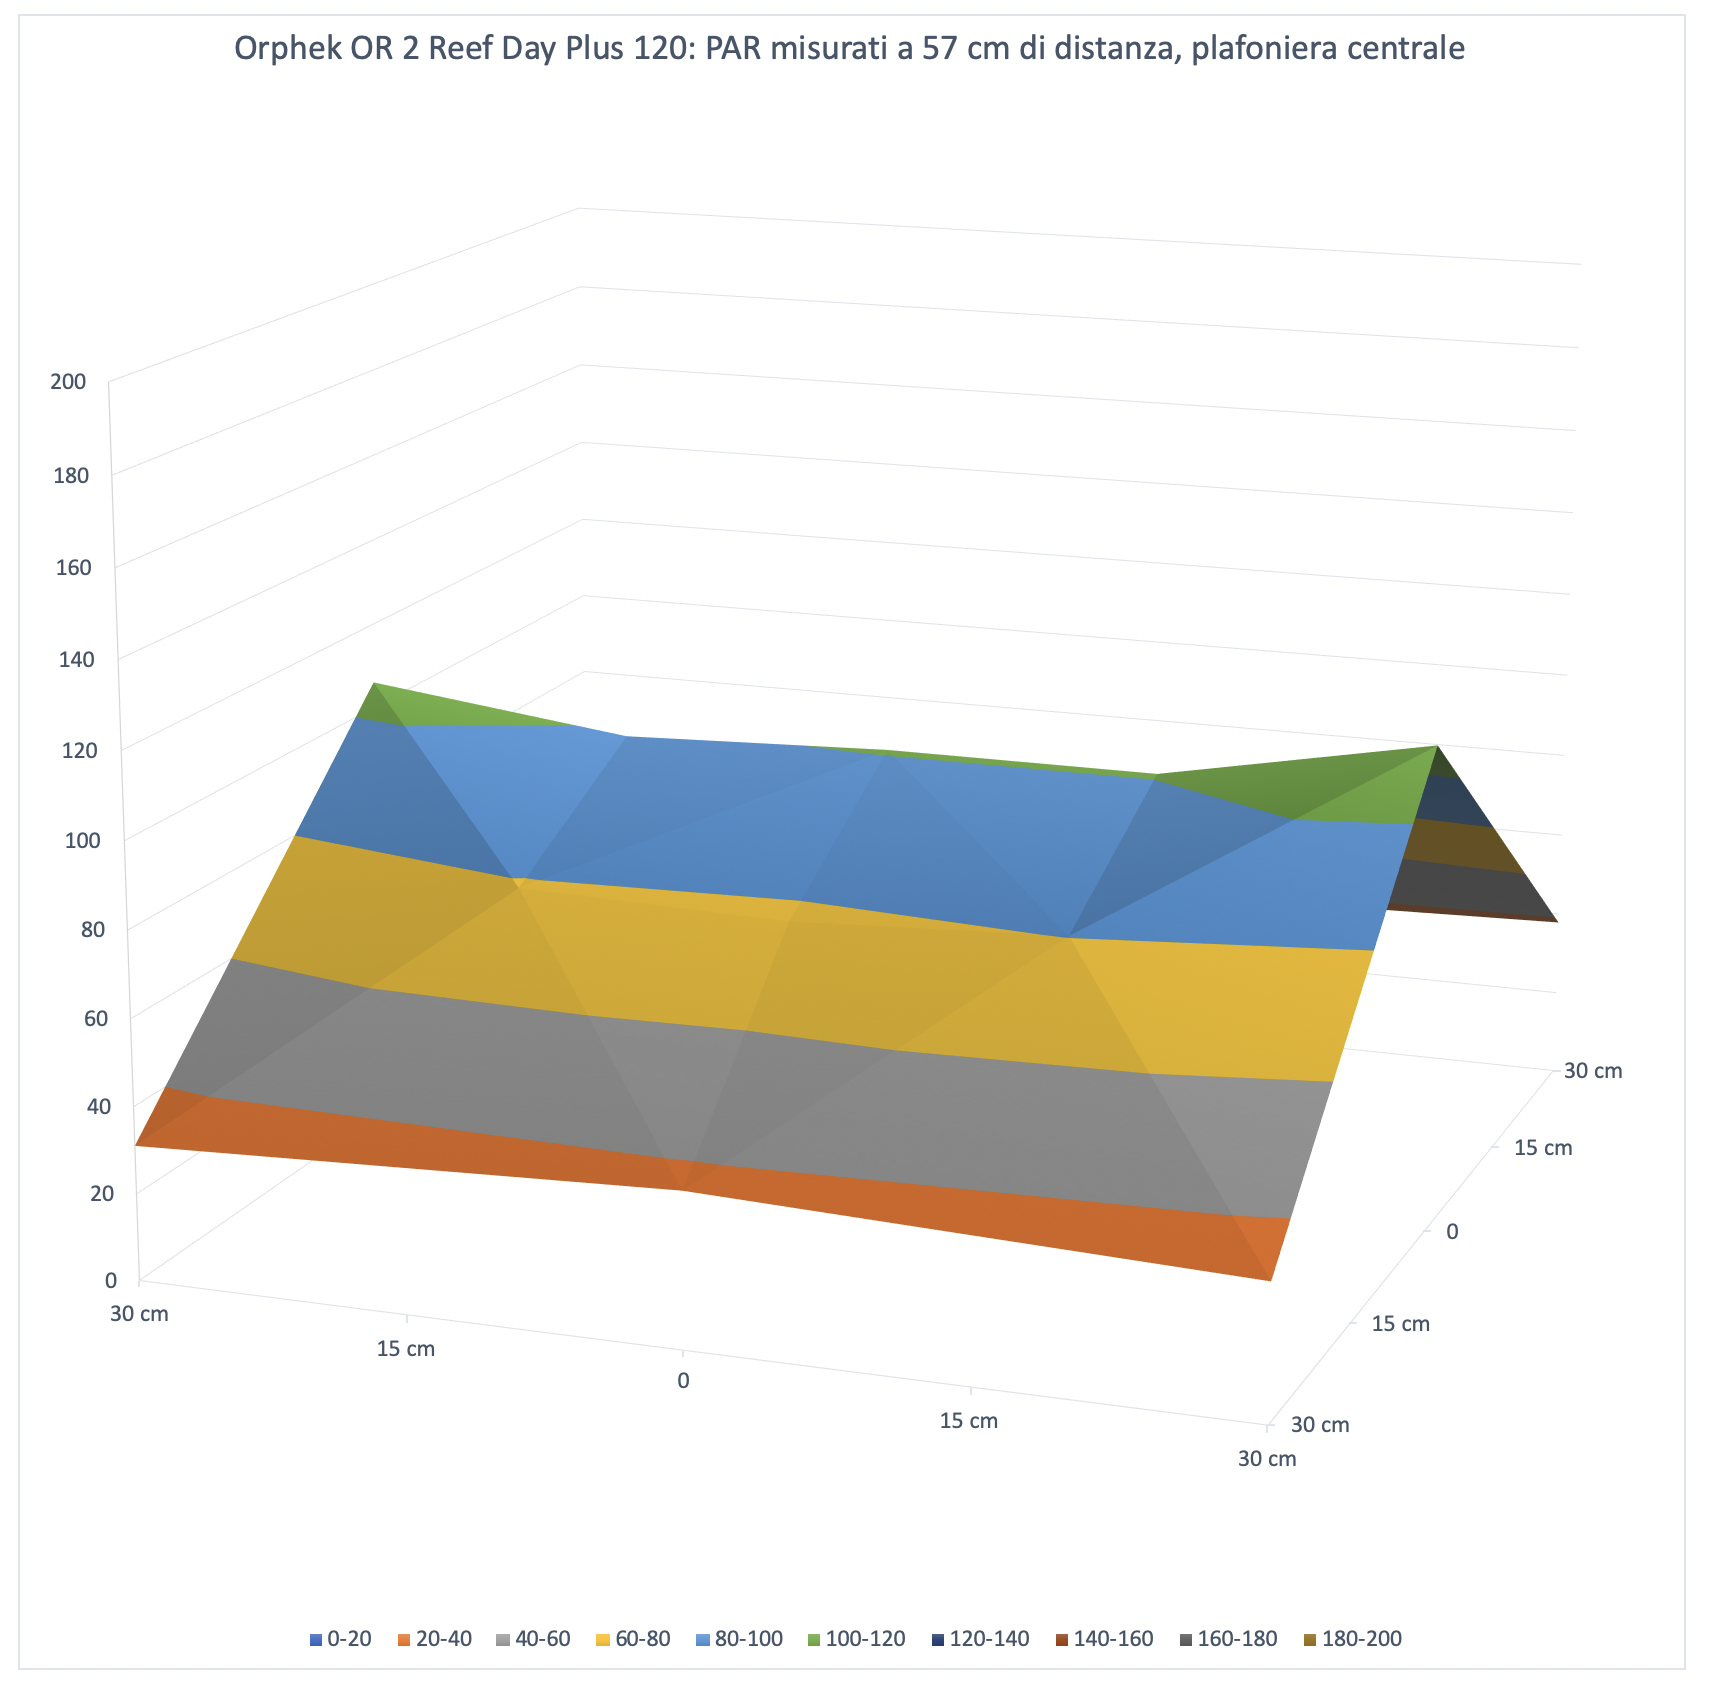
Increasing the space between the ceiling light and sensor even more, the difference between PAR in the middle and on the sides doesn’t decrease as we expected, but it increases instead. There’s a perfect uniformity. The value in the middle decreases from 393 to 171 to 113 μmol m-2 s-1.
The PAR in the middle in the different configurations
Let’s continue with our technical measurements. We can see how, in a chart, the PAR collected in the middle decreases in the three different distances of our tests. 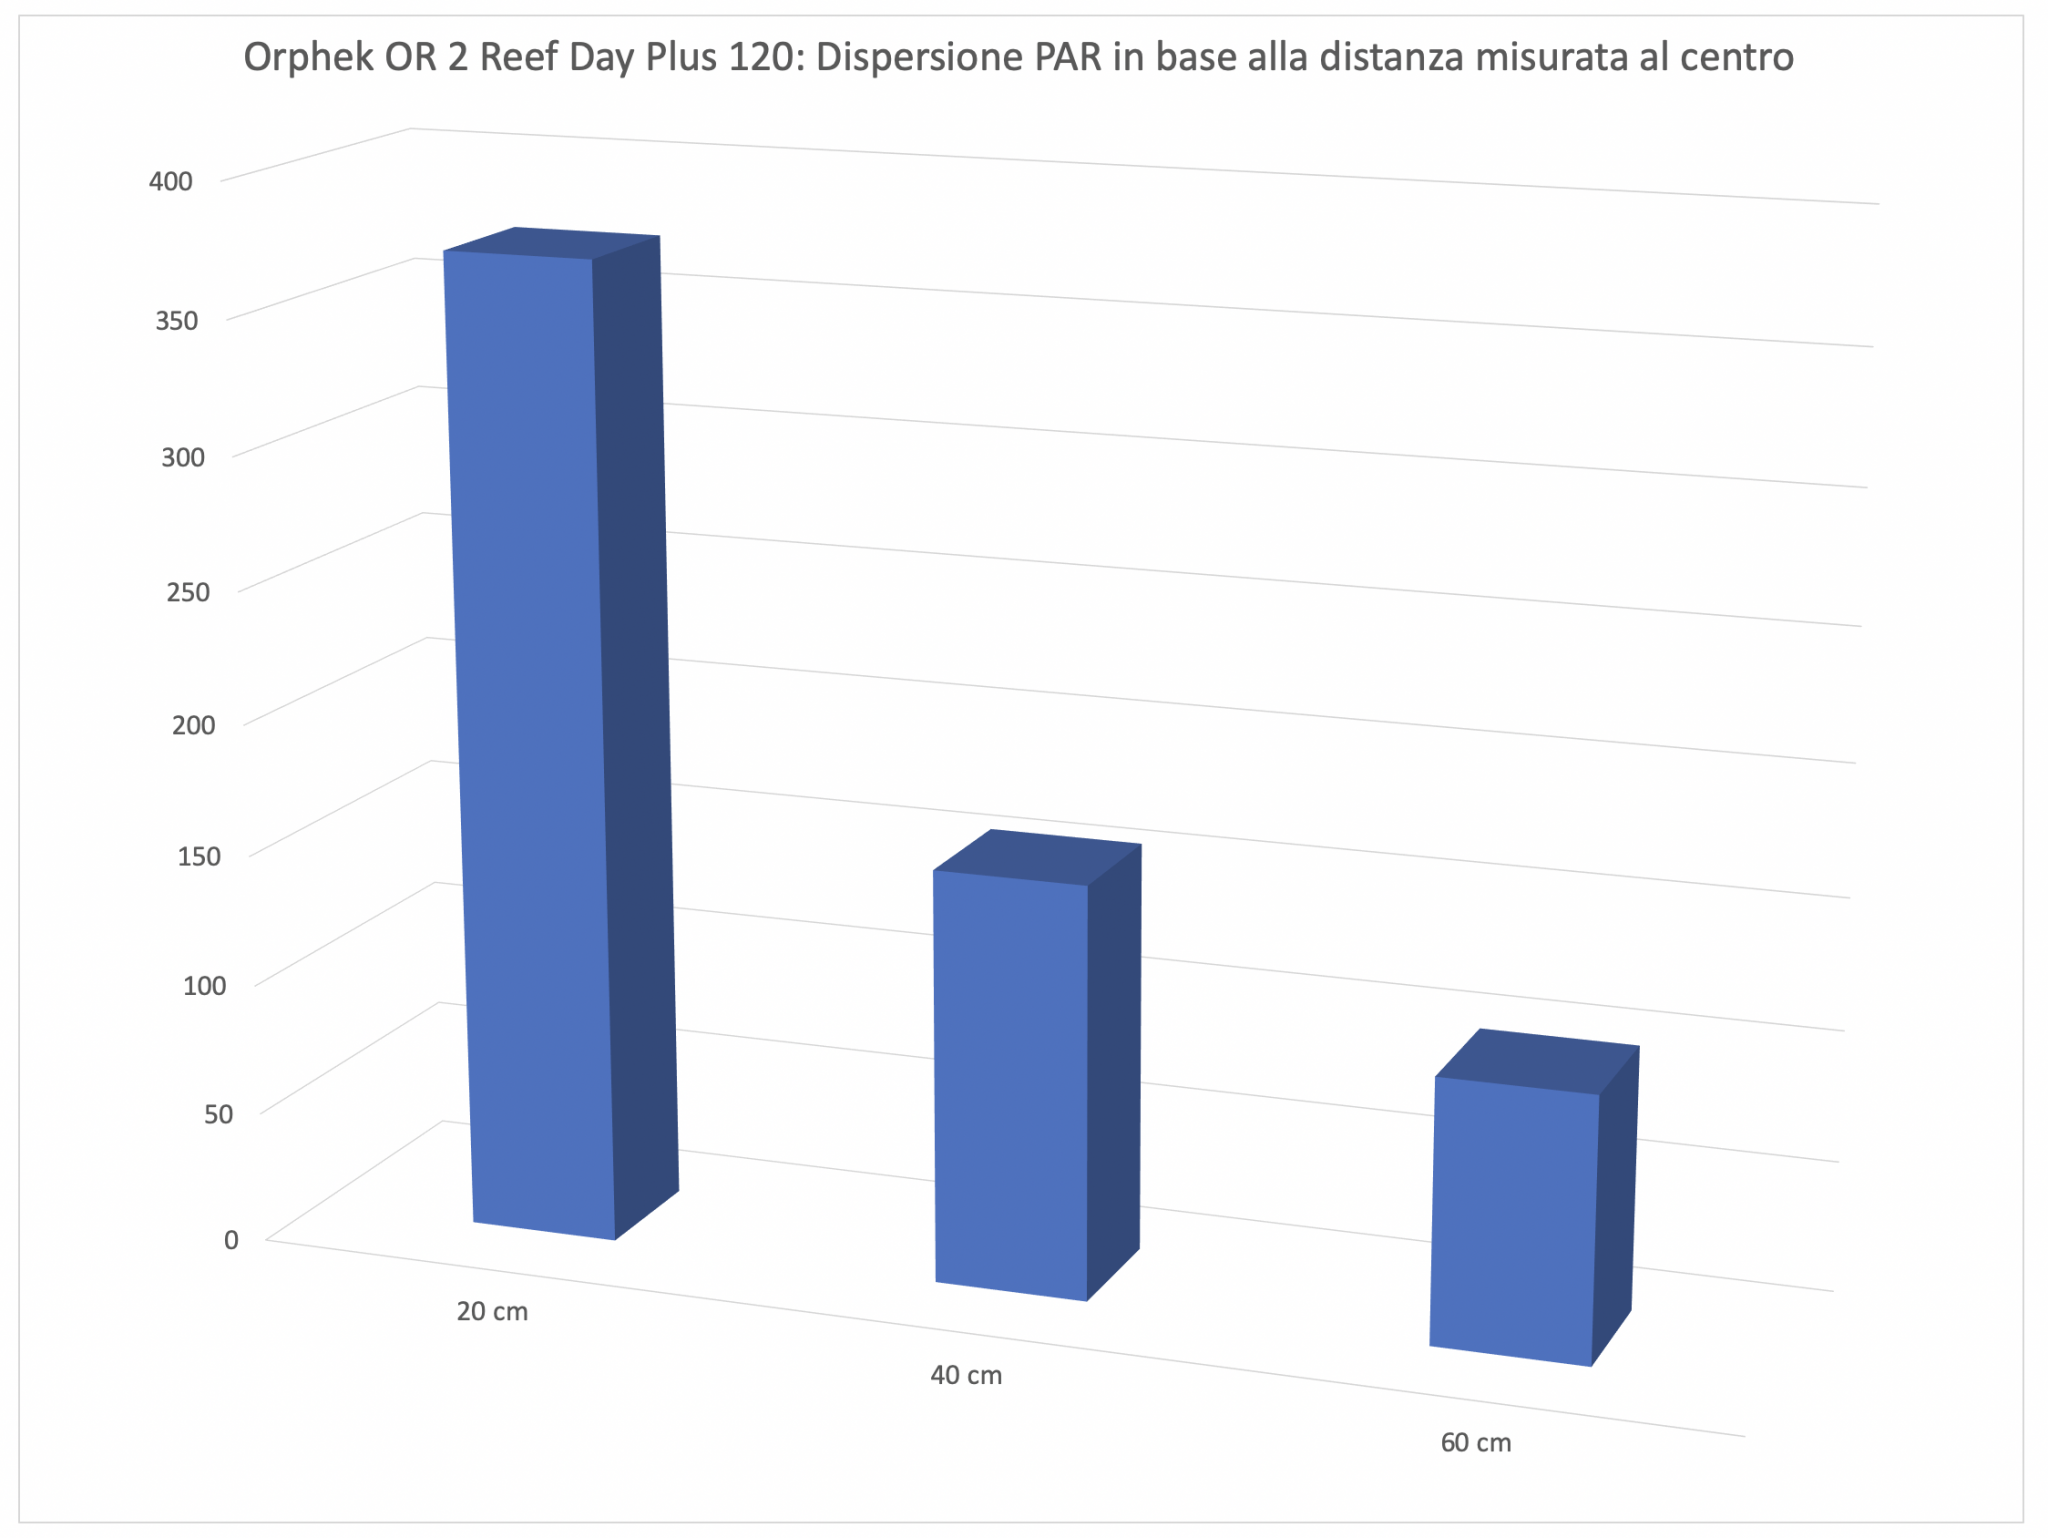
Energy variation of the Aqamai LRS depending on the distances
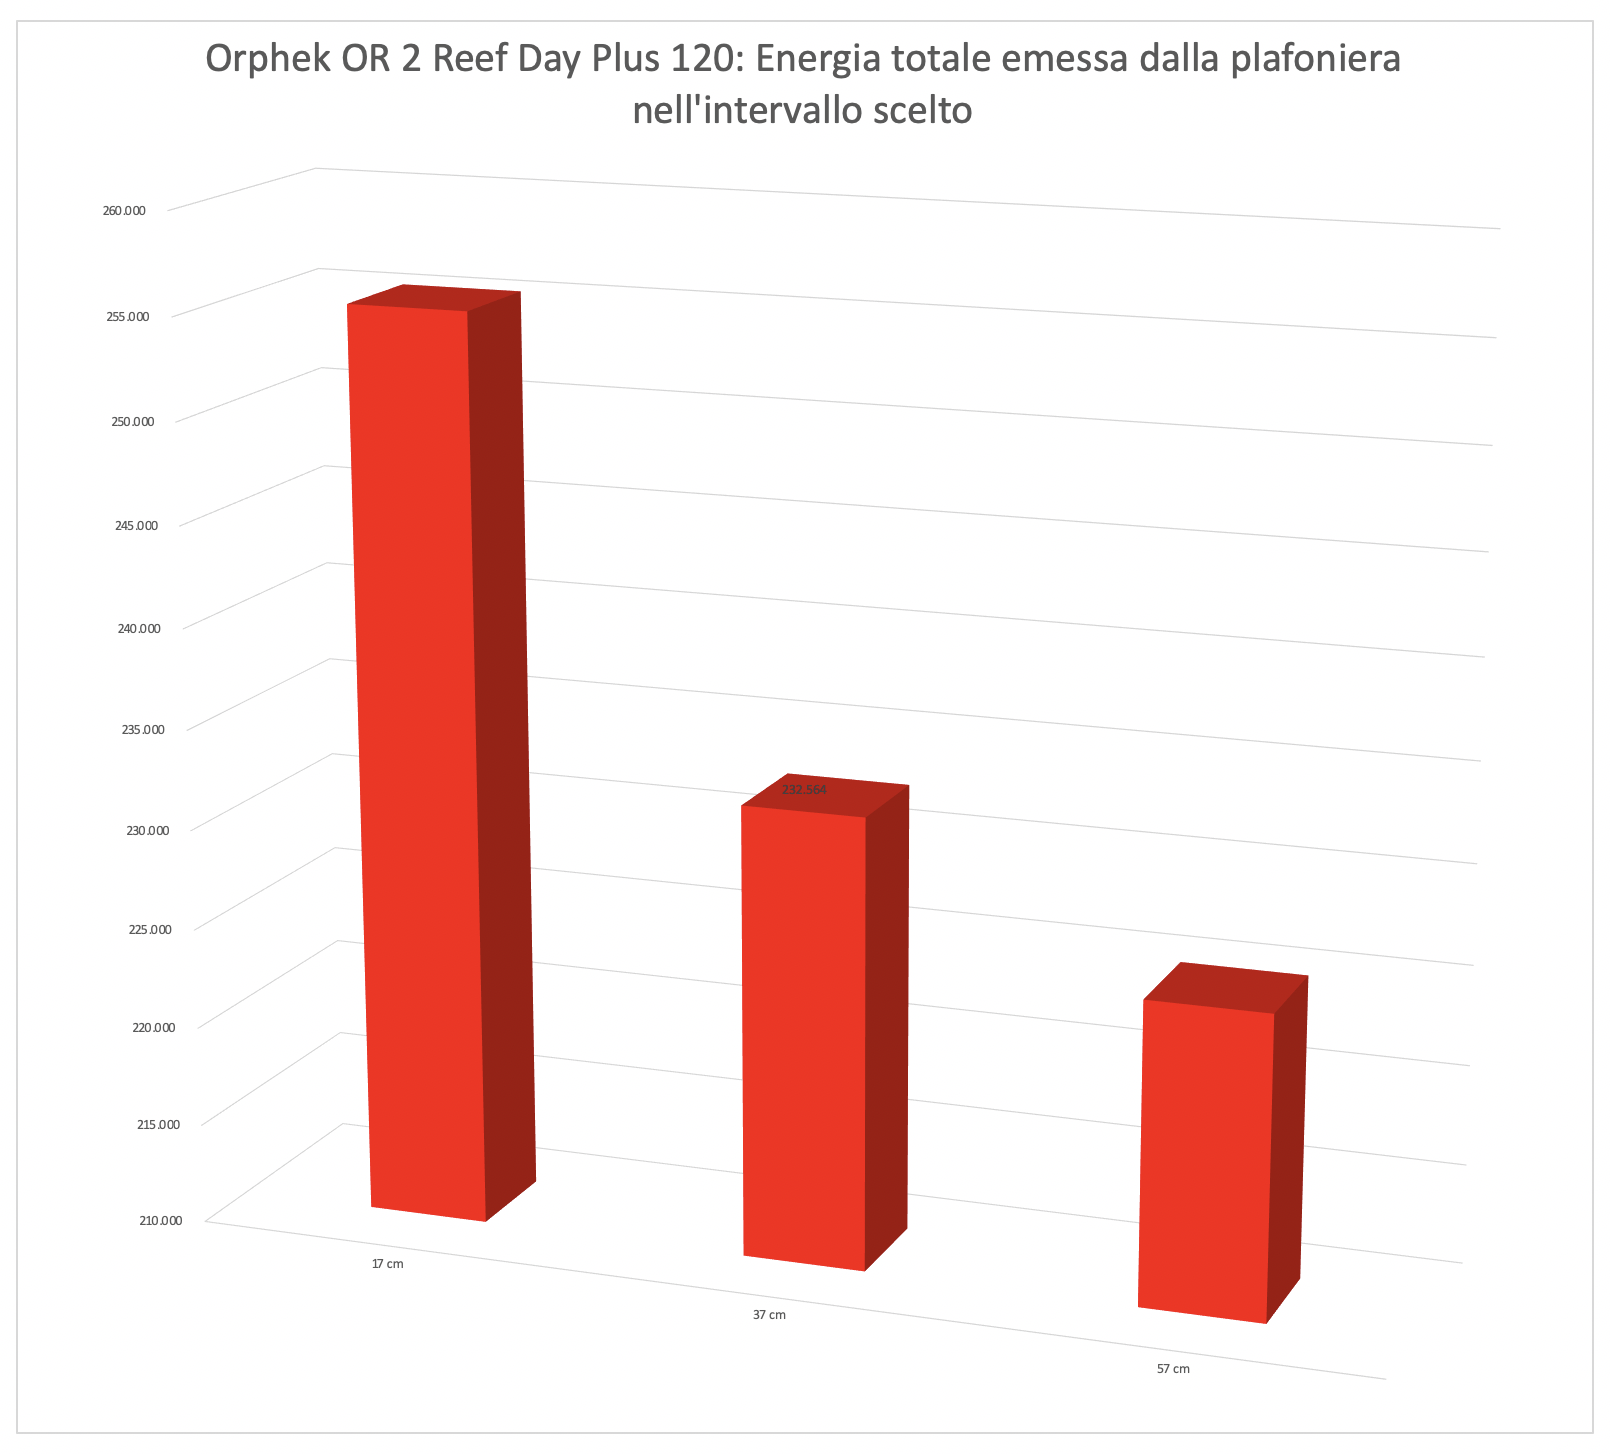
This is the most significant and most comparable data: the energy variation. We calculated the volumes of the three surfaces previously seen. It’s obvious that moving away from the ceiling light the PAR decrease, also because the light illuminates a wider space. In this way you can consider all the light energy contained in the 60×60 cm area subtended by the ceiling light. An it’s clear that the three values of 255.000, 233.000 and 225.000 assume a different connotation compared to the values in the middle. When the first ones decrease because of the increasing of the distances, the subtended area, that is the energy, decreases very slowly. The differences between the three areas is very low.
Looking at the values of the three curves it’s obvious that on the sides there’s more light at 57 cm than at 37. 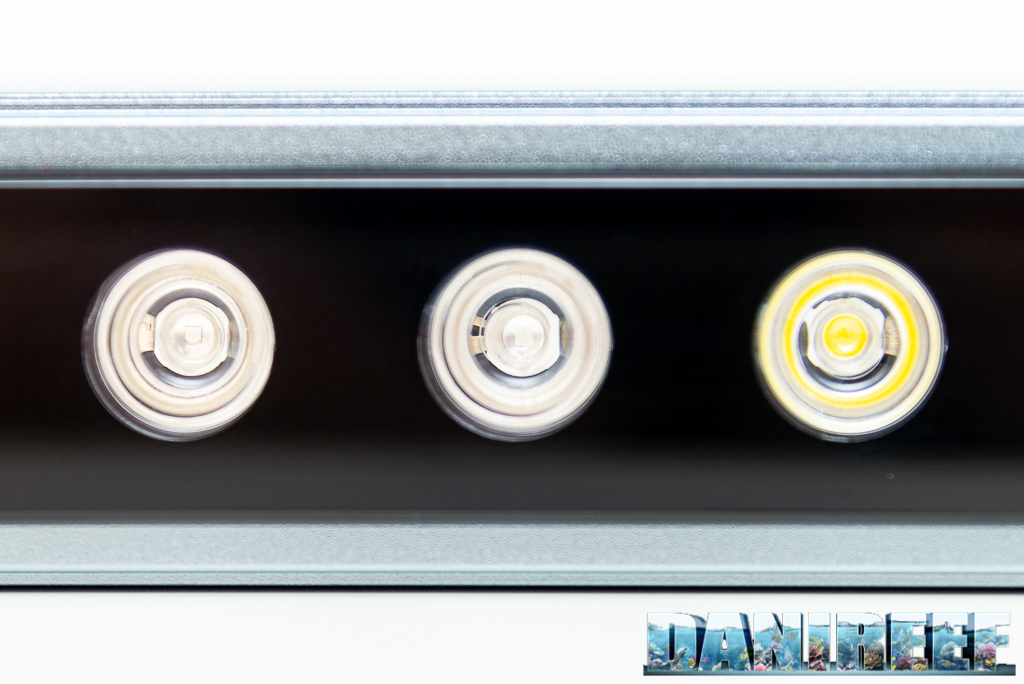
How to value these numbers in aquarium?
This is a good question. At first we thought that we could transport these values to the aquarium tout-court. Then we filled the aquarium, inserted the probe, and redid the measurements. Basically, while at 20 cm the result is practically the same, as we progressed, thanks to the glass and the water itself reflecting the light, we found almost the double of the values measured in air. Obviously this isn’t a detail that can be standardized, so we think that our method of calculation is the most correct, and the best for the comparison of coverages of different ceiling lights. 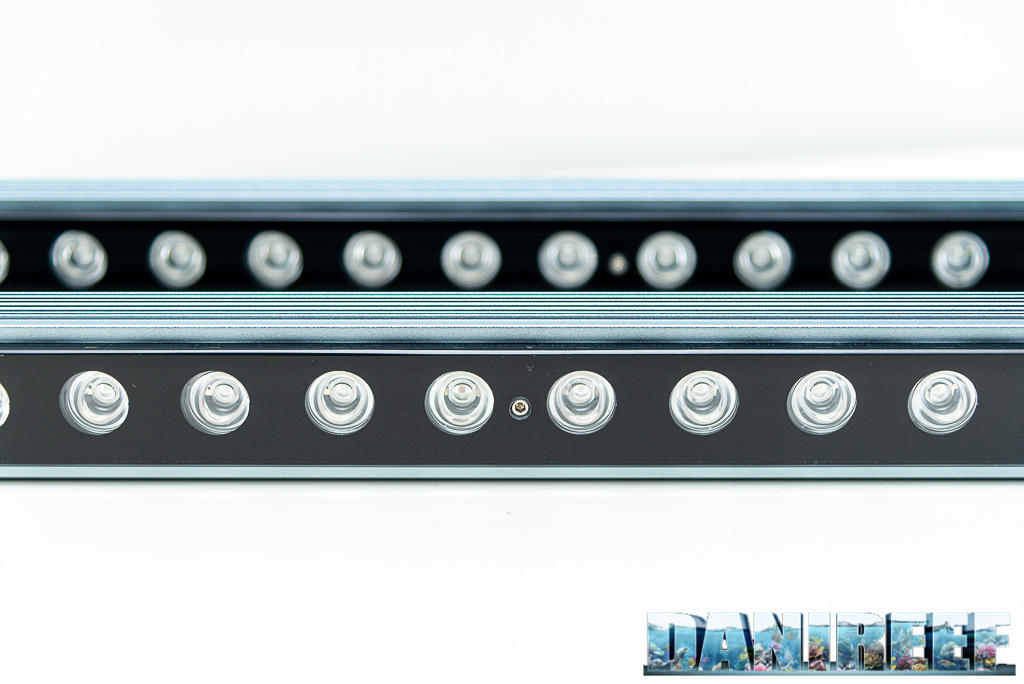
Consumption
The measurement of the consumption was made possible thanks to the useful RCE PM600 that can also measure the Cos(fi) (or power factor). The result is given in watts. 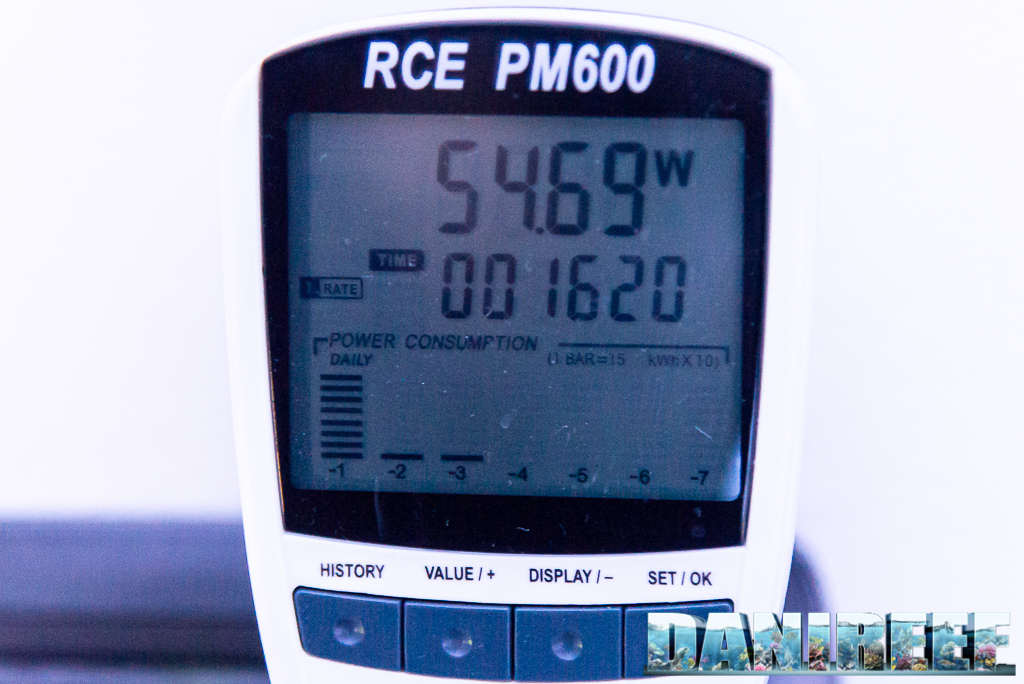
Pictured above is the maximum power, and below is the Cos(fi). 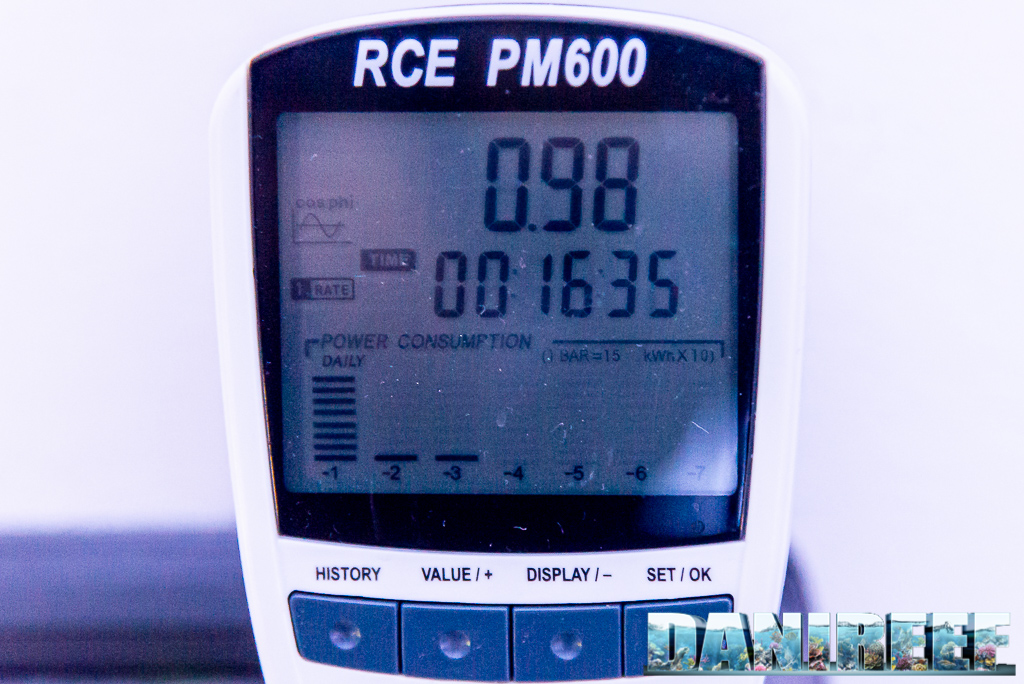
The calculation of the absorbed current, or power, is as follows:
Ceiling light Orphek OR2 Reef Day Plus: 54.69 watt. Considering that at 17 cm, the lights have, at the middle, 393 μmol m-2 s-1, let’s say, in perspective, that it will have a peak value of 7.18 μmol m-2 s-1 w-1 (PAR per watt). It’s hardly comparable with other ceiling lights because it remains constant over the entire length.
The consumption is slightly under the declared one, while the Cos(fi) is very close to 1, a perfect value.
The comparison with other ceiling lights on the market
Recently we started to use the new Apogee’s Quantum Meter MQ-510.
But considering the first ceiling lights we managed to test, we can do an interesting comparison about their produced energy:
| Energy | Cost | Consumption | Energy/€ | Energy/w | |
| AI Hydra 32 HD at 17 cm | 560.185 | 430 | 90,50 | 1.303 | 6.190 |
| AI Hydra 32 HD at 37 cm | 563.232 | 430 | 90,50 | 1.310 | 6.224 |
| AI Hydra 32 HD at 57 cm | 462.614 | 430 | 90,50 | 1.076 | 5.112 |
| Aqamai LRM at 17 cm | 642.649 | 465 | 90,88 | 1.382 | 7.071 |
| Aqamai LRM at 37 cm | 721.676 | 465 | 90,88 | 1.552 | 7.941 |
| Aqamai LRM at 57 cm | 616.470 | 465 | 90,88 | 1.326 | 6.783 |
| Aqamai LRS at 17 cm | 275.881 | 289 | 47,59 | 955 | 5.797 |
| Aqamai LRS at 37 cm | 311.548 | 289 | 47,59 | 1.078 | 6.547 |
| Aqamai LRS at 57 cm | 254.283 | 289 | 47,59 | 880 | 5.343 |
| Cetus 2 at 17 cm | 409.993 | 215 | 60,68 | 1.906 | 6.756 |
| Cetus 2 at 37 cm | 290.866 | 215 | 60,68 | 1.353 | 4.793 |
| Cetus 2 at 57 cm | 173.651 | 215 | 60,68 | 807 | 2.861 |
| Orphek OR2 Reef Day Plus 120 cm at 17 cm | 255.277 | 180 | 54,69 | 1.418 | 4.667 |
| Orphek OR2 Reef Day Plus 120 cm at 37 cm | 232.564 | 180 | 54.69 | 1.292 | 4.252 |
| Orphek OR2 Reef Day Plus 120 cm at 57 cm | 225.142 | 180 | 54.69 | 1.251 | 4.117 |
| Philips CoralCare at 17 cm | 1.858.572 | 749 | 190,50 | 2.481 | 9.756 |
| Philips CoralCare at 37 cm | 1.340.533 | 749 | 190,50 | 1.790 | 7.037 |
| Philips CoralCare at 57 cm | 933.246 | 749 | 190,50 | 1.246 | 4.899 |
The energy produced by each watt stays constant throughout the different distances for the Orphek OR2. A very good and linear behavior of these LED bars. Now we just need to measure the behavior of other LED bars in order to compare the results.
Mantaining costs
The Orphek OR2 Reef Day Plus LED bars cost 180 dollars, plus the taxes we have to pay because there still isn’t a distributor here, but we have to consider the change of currency so, more or less, it’s the same price: 180 euro. The shipping is included.
The absorbed power is 54.69 watts, so the relationship cost/watt is about 3.3 euro ($4) per watt. 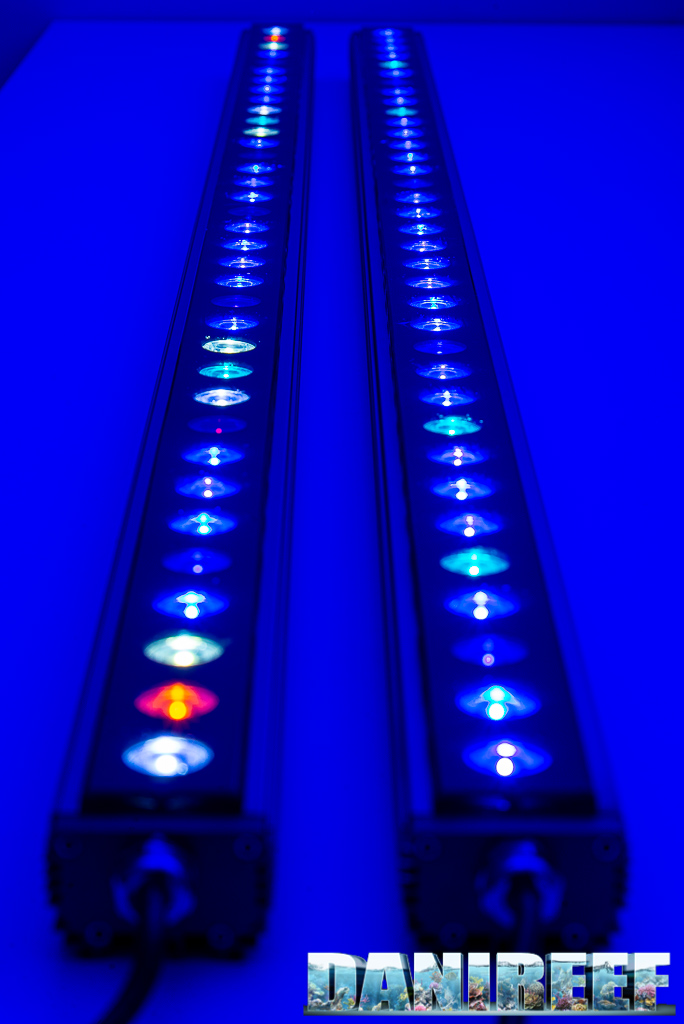
The ceiling light is excellently built, solid, and very well assembled. I really like extruded profiles as well as the refinement. It’s very easy to use and you can combine more bars in order to obtain the power you want. Considering that we’re talking about a LED bar, the comparison with other ceiling lights is difficult. But if you consider the total amount of energy you can get the full picture. The bars can work well for any coral, you just have to combine a higher number of models. Do you want to double the PAR? Use two bars. Or quadruple? Use four, and so on. The cost per watt is very low, the lowest we’ve ever recorded.
Questions and comments, as always, are very welcomed. [translated by Agnese Poggi]


0 Comments