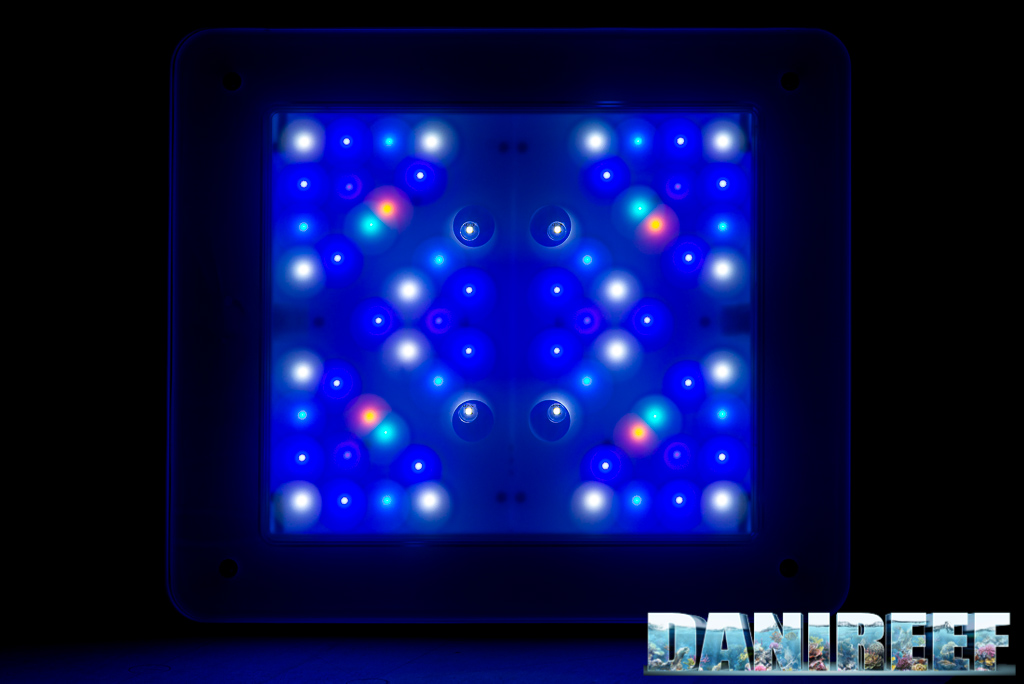
 We finally have the new Philips CoralCare Gen2, though it is just the prototype. We analyzed the PAR and observed the created curves. Let’s see how it went!
The Philips CoralCare Gen2 is the upgraded version of the Philips CoralCare from four years ago, which many people thought would only be a flash in the pan. But two years later, the company came out an improved version of the same CoralCare, and after four years there’s a new design that renovates all the aspects of this ceiling light. New LED, new shape, new controller. It’s completely new compared to the original unit. The ceiling light is much thinner than the previous CoralCare and it still takes advantage of the passive cooling. The power supply is inside the shell, so the installation is much easier. Looking forward for the second unit to place in our aquarium, meanwhile we have tested its behavior in our DaniReef Lab.
Technical characteristics of the Philips CoralCare Gen2
The ceiling light is rectangular, almost 6 cm high, with a base of 46×41 cm. The LED has 6 different colorations mixed in two different channels. There are no LEDs for a moonlight mode, which other ceiling lights have. Philips insists on the quality of their solution and guarantees a use of 25,000 hours before the LEDs lose 10% of their luminous efficiency, as long as the environment’s temperature doesn’t go over 35 degrees C.
| Maximum consumption | 170 w |
| Total weight | 7 kg |
| Dimensions | 460x410x57 mm |
| Maximum current for a singleLED | 750 mA |
| Luminous flux | 7.706 Lm |
| LED configuration | |
| Channel 1 | 4x Luxeon C PC-Amber |
| 4x Luxeon C Cyan 490nm | |
| 20x Luxeon V2 6500k | |
| 6x Luxeon C Royal Blue 450nm | |
| Channel 2 | 12x Luxeon C Blue 470nm |
| 6x Luxeon UV U1 415nm | |
| 16x Luxeon C Royal Blue 450nm |
Construction
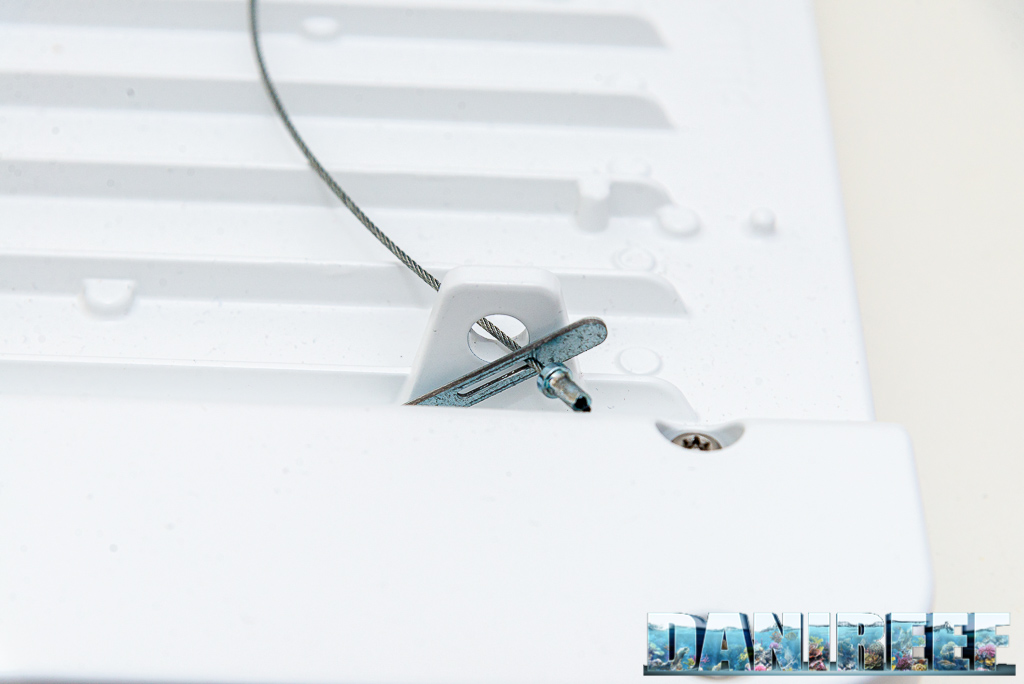
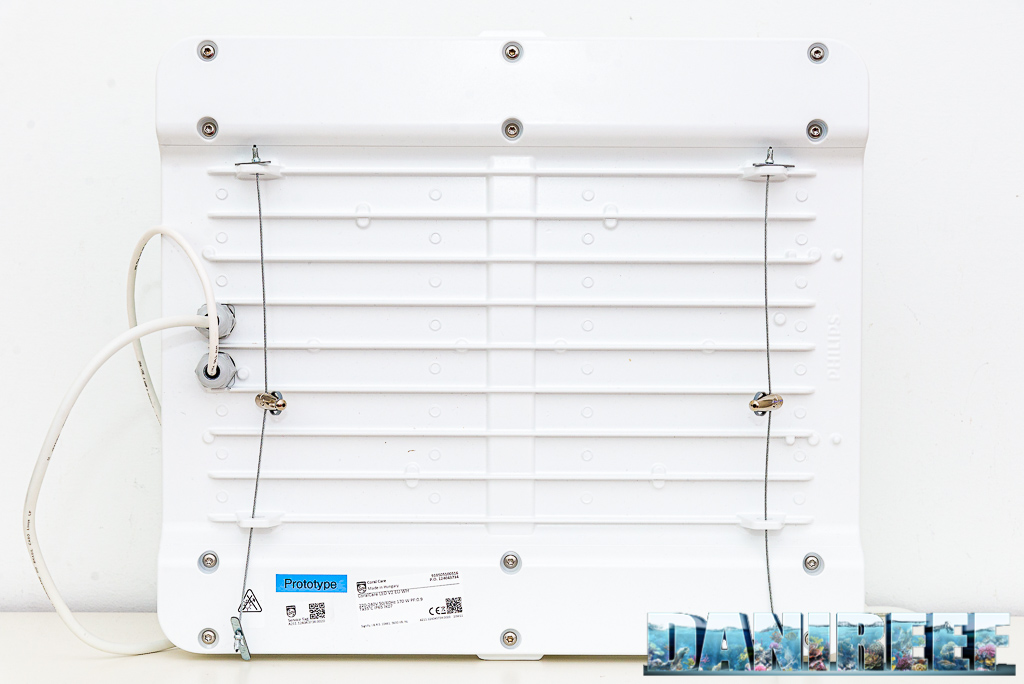
The construction of the ceiling light is flawless, as always, but this time the design is much better. Now it seems much less industrial, and we like it more. The hanging system is beautiful, as you can see in detail in the following pictures. The shell is presumably built from aluminum, and there aren’t any cracks. No buttons either. The ceiling light switches on when it connects to the electricity, then it can be configured by Bluetooth, a choice that is easier and more immediate than WiFi.
The Programming
The ceiling light is set and managed by an app that works through Bluetooth. This modality is very easy to use, because the app will find the ceiling lights; there’s also a USB cable for connecting the ceiling light to the pc. You can also activate the WiFi with the app, a feature that we didn’t try.
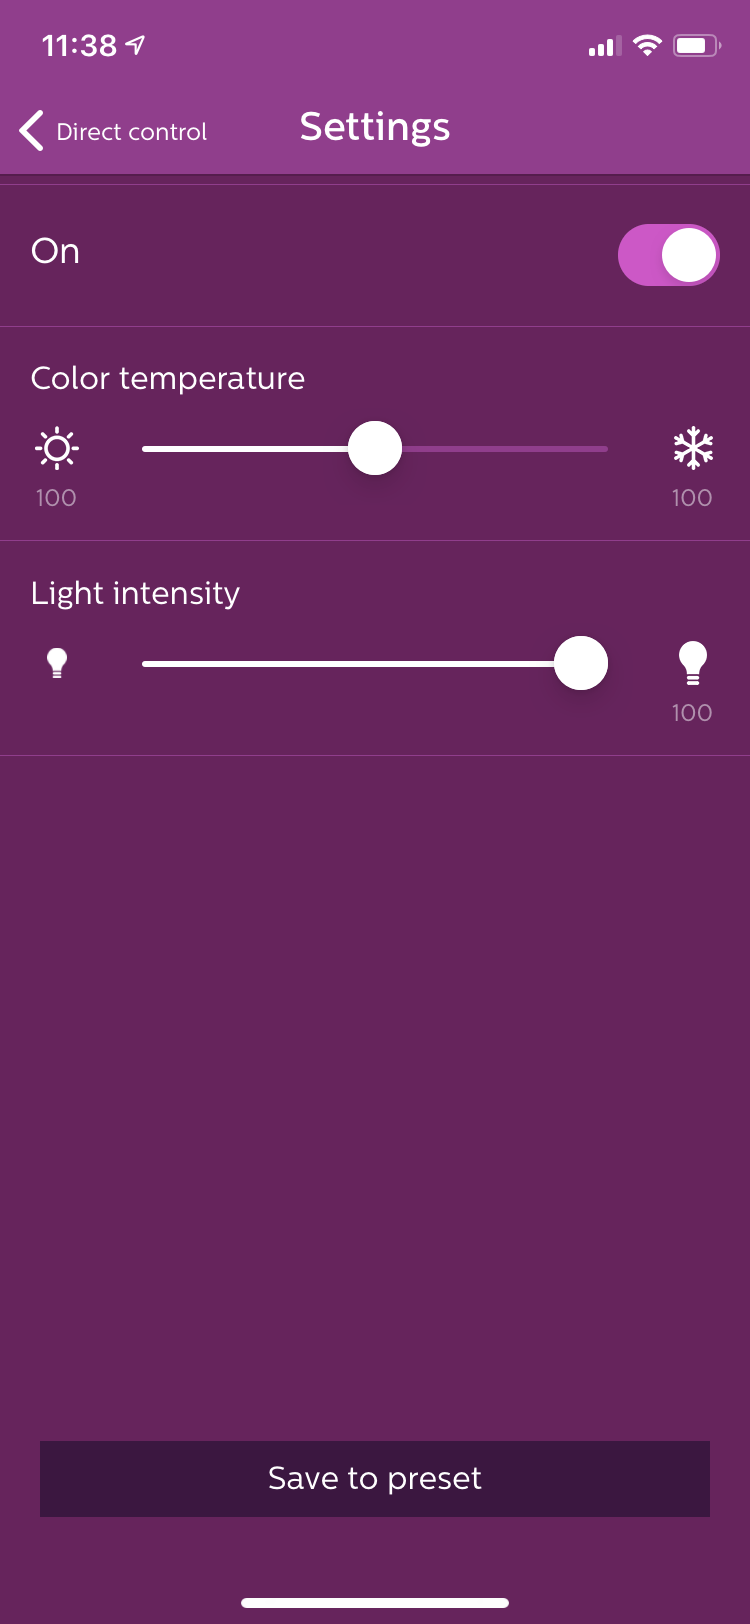
Once you’re connected, you select the ceiling light you want to set. Different from the past, there’re some presets that you can choose, that I always suggest for neophytes, but even the classic set mode, that comes with sliders, is extremely easy.
As you may already know the Philips CoralCare is organized in two channels, one is the blue colors while the other has the warm tones. With the slider you can easily choose the part of the spectrum you desire; the middle point is where the LEDs all have the same power. With another slide you choose the intensity of the curve. Very easy to use, but maybe a little to much for those who prefer to manage each channel selectively.
The Philips is compatible with an external control, similar to Apex. But even in this case you can dispose of the usual two channels, that both go from 0 to 100%. You can vary the spectrum by mixing the two channels.
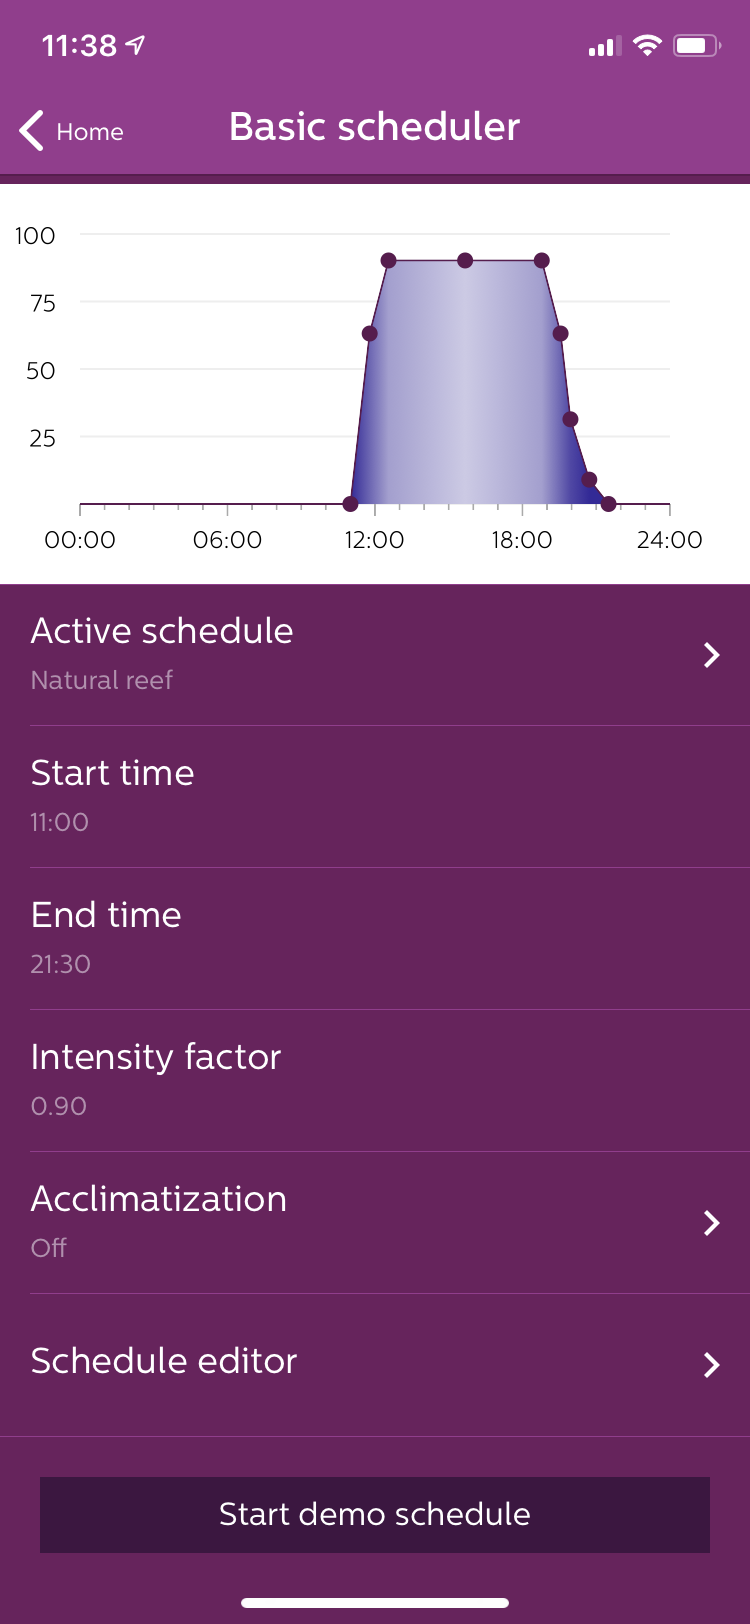
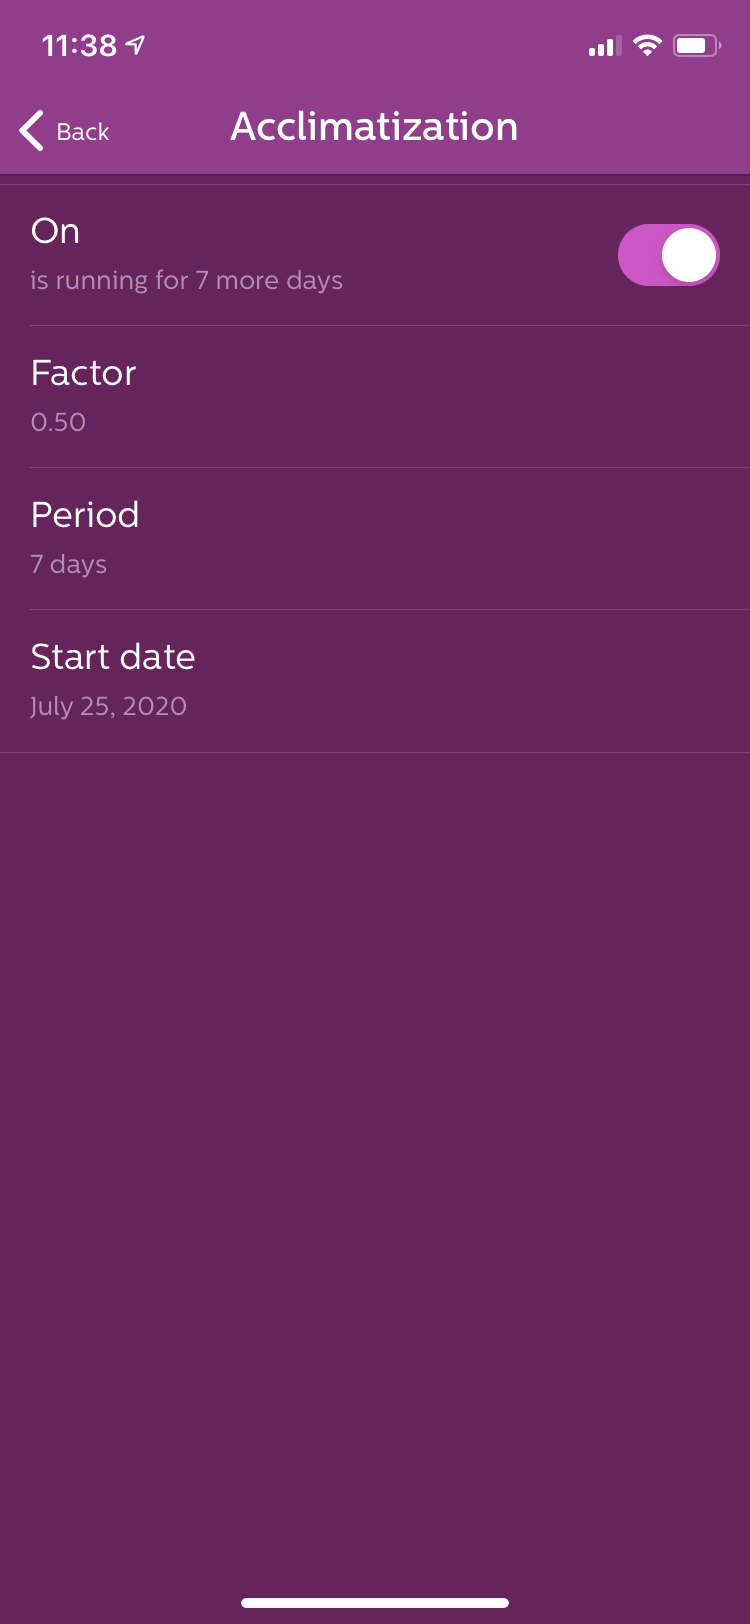
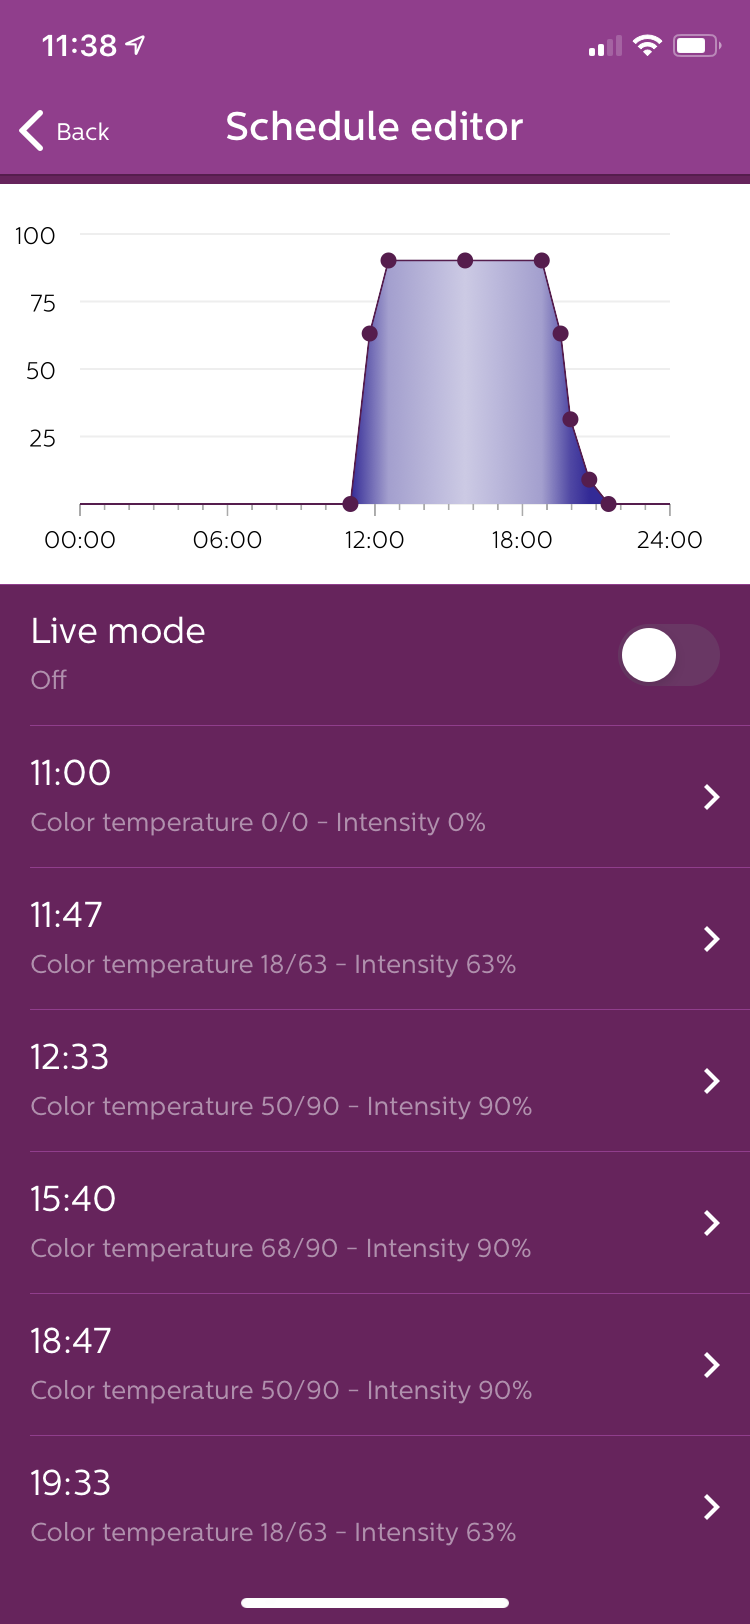
Above you can see the graph of your choices. In this case it’s on the blue tones because that’s the part we considered the most for this article. You can also choose the acclimatization of the ceiling light.
Above is the screen for the acclimatization, and below is the options for every hour. You can add or take off points, and for each point you can choose color and intensity. The logic of the ceiling light will do the rest. The Live Mode allows you to immediately see what is happening in the ceiling light.
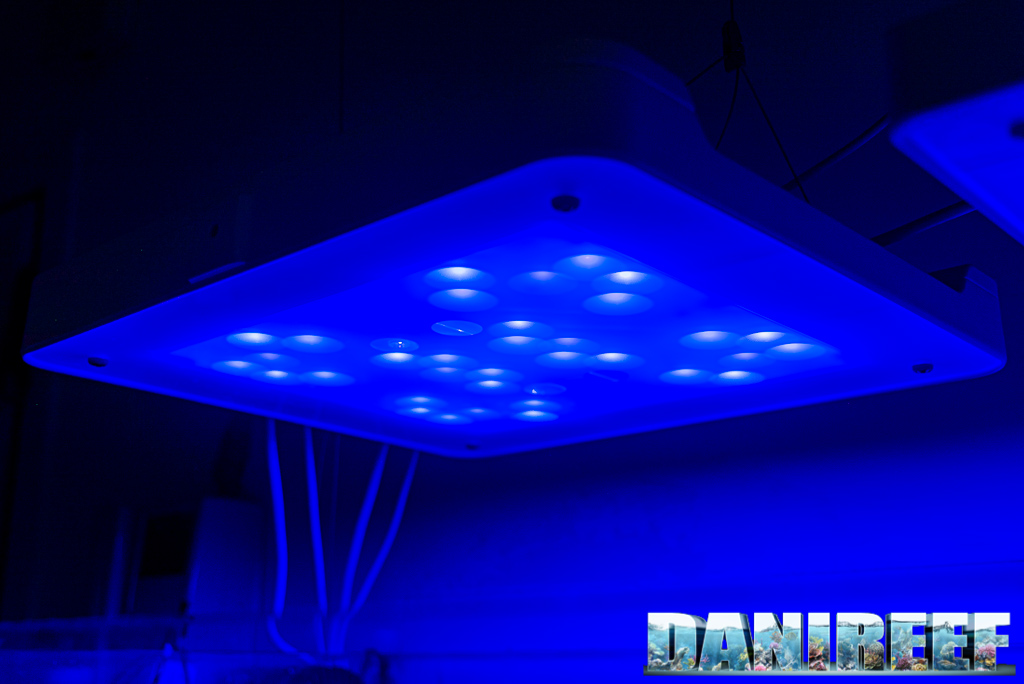
Channel 1: Blue
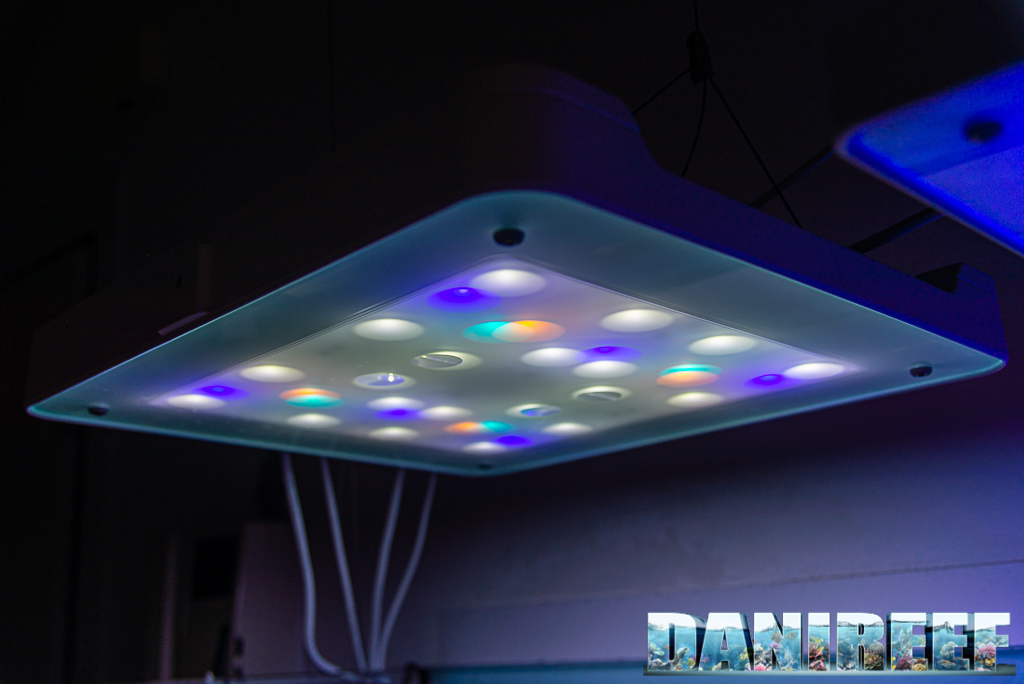
Channel 2: Warm colors
Final result
Our new method DaniReef LAB for PAR measurement of the Philips CoralCare
(this paragraph is the same for each ceiling light measured with our DaniReef Lab for explaining the working method) During the long nights spent on our forum we always wondered how could we compare PAR from different ceiling lights. Even though we had the perfect device, the Quantum Meter MQ-510 di Apogee, we always referred only to the value measured at the center at 20 cm of distance, more or less.
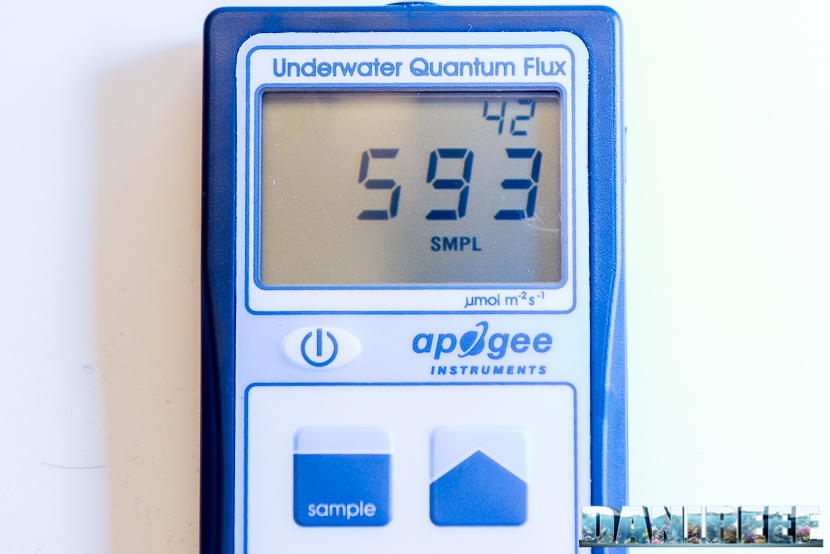
The Quantum Meter MQ-510 measures the PAR, expressed in PFFD that is photosynthetic photon flux density in μmol m-2 s-1. This device is calibrated to work underwater, so if it’s in air the measured value has to be divided by 1,32 – the dive factor. We have to do the conversion. The values you’re going to see are correct.
We decided to make a square base of 70×70 cm, we set 17 fiducial points where we placed the sensor Quantum Meter MQ-510 and we also made 3 lifts of 20, 40 and 60 cm for the ceiling light, in order to have the same distance from the sensor. This will allow us to create the curves which can be compared to other ceiling lights, all tested at the same distances. Notice that this distance is measured between the base of the sensor and the ceiling light. In reality it should be decreased by 3.5 cm, which is the height of the measurement cylinder and increased by 0.5 cm, which is the dimension of the spacers that lift the ceiling light.
In total the three measurements are made from 17, 37 and 57 cm of distance. Because they’ve been done in air they will be corrected.
PAR measurement from 17 cm of distance
The ceiling light has been placed at 17 cm away from the display. The points not indicated on the panel have been estimated in the following chart.
Here the collected values:
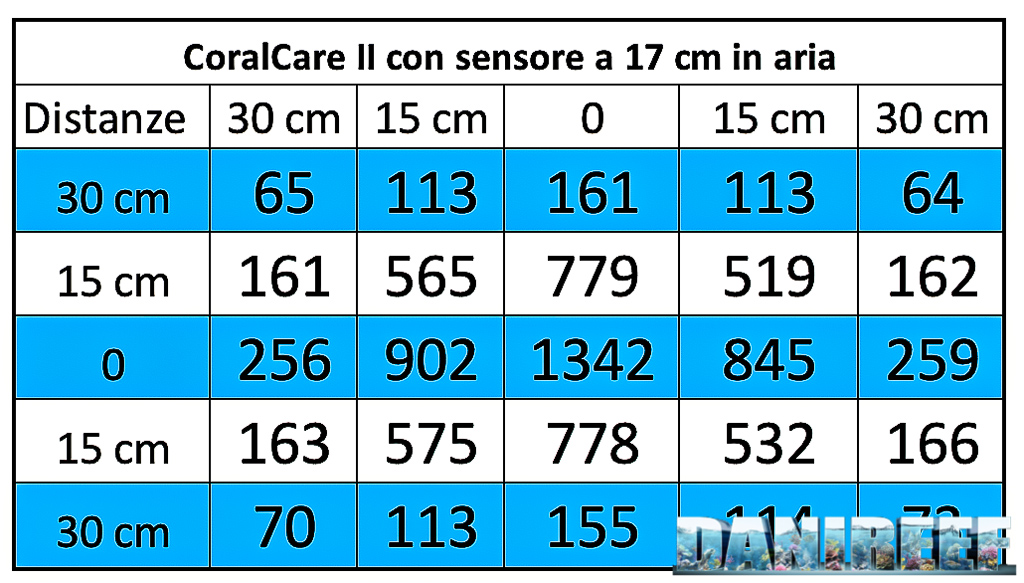 And this is the corresponding chart, we came back to the classic scale in order to compare similar ceiling lights.
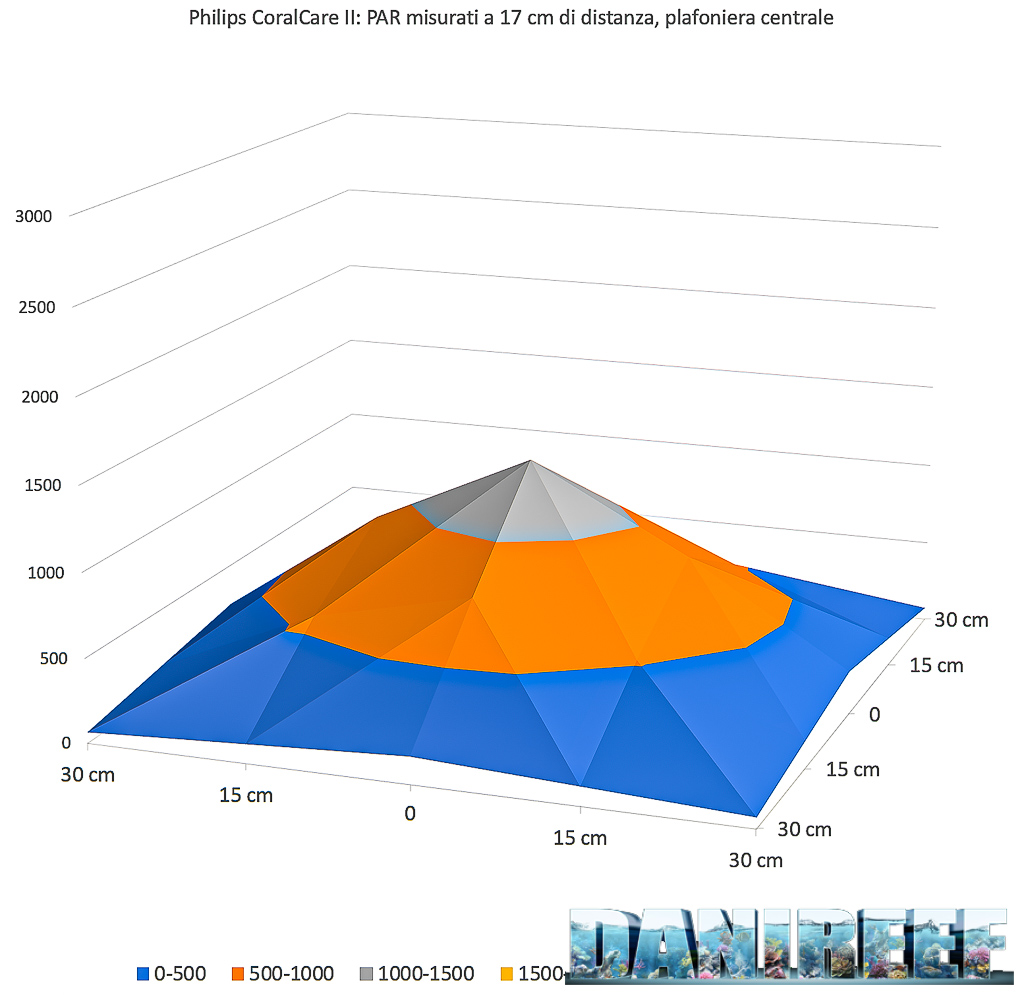 The first measure considers a small distance between the ceiling light and the sensor. For this ceiling light we can see that the difference in the middle and on the sides is very low. Small peak power, but great covering. In line with what we could imagine from the design of the ceiling light. Remember that the ceiling light measures 46×41 cm while our area is 60×60 cm.
PAR measurement from 37 cm of distance
In this step we adopted a distance of 37 cm. Here are the collected values:
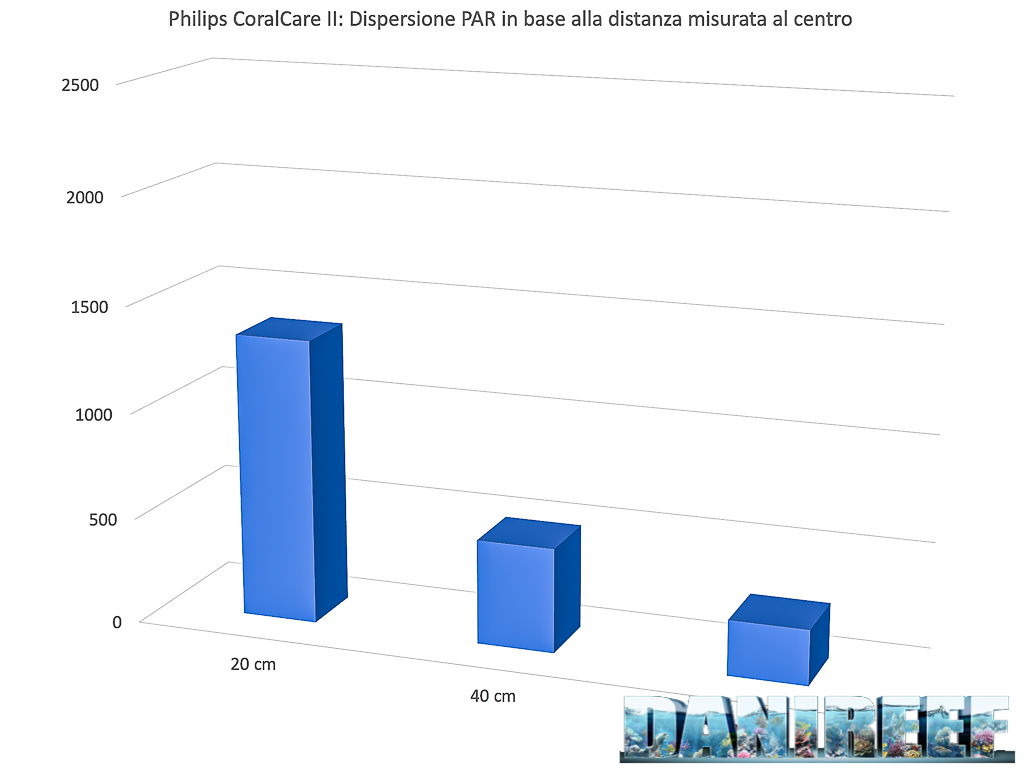
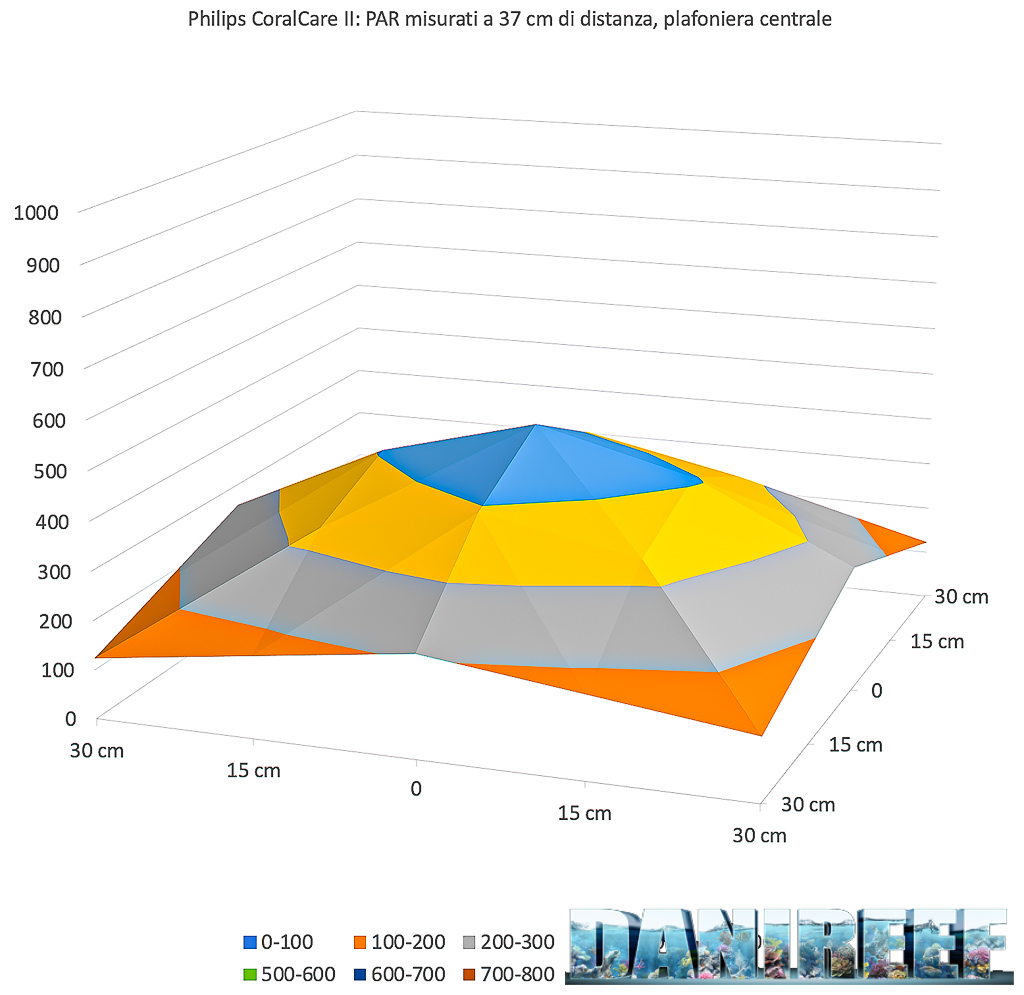 Increasing the space between sensor and ceiling light the curve is even more complete. The value in the middle decreases from 1342 to 491 μmol m-2 s-1.
PAR measurement from 57 cm of distance
At the end we adopted the distance of 57 cm.
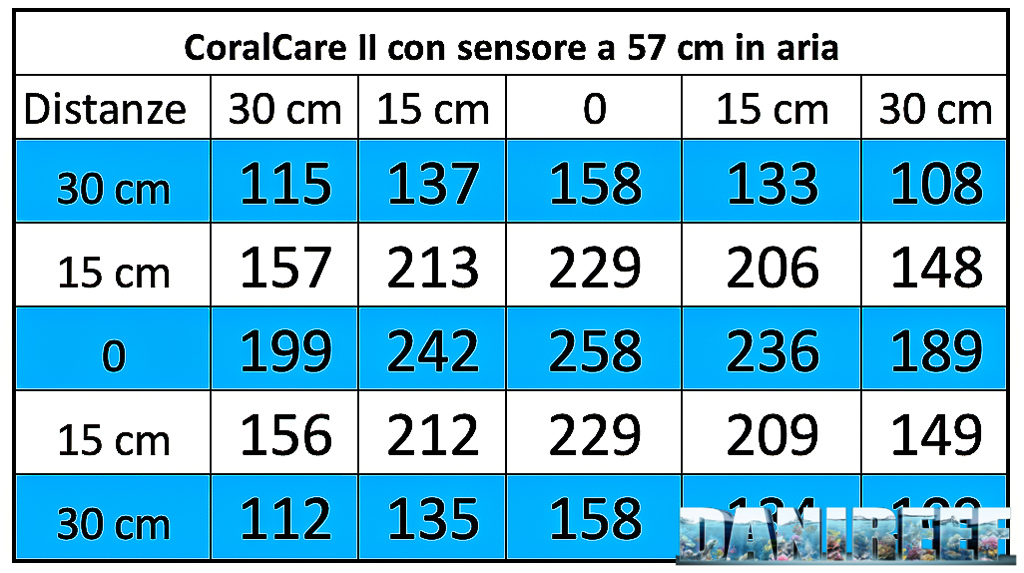
Here the collected values:
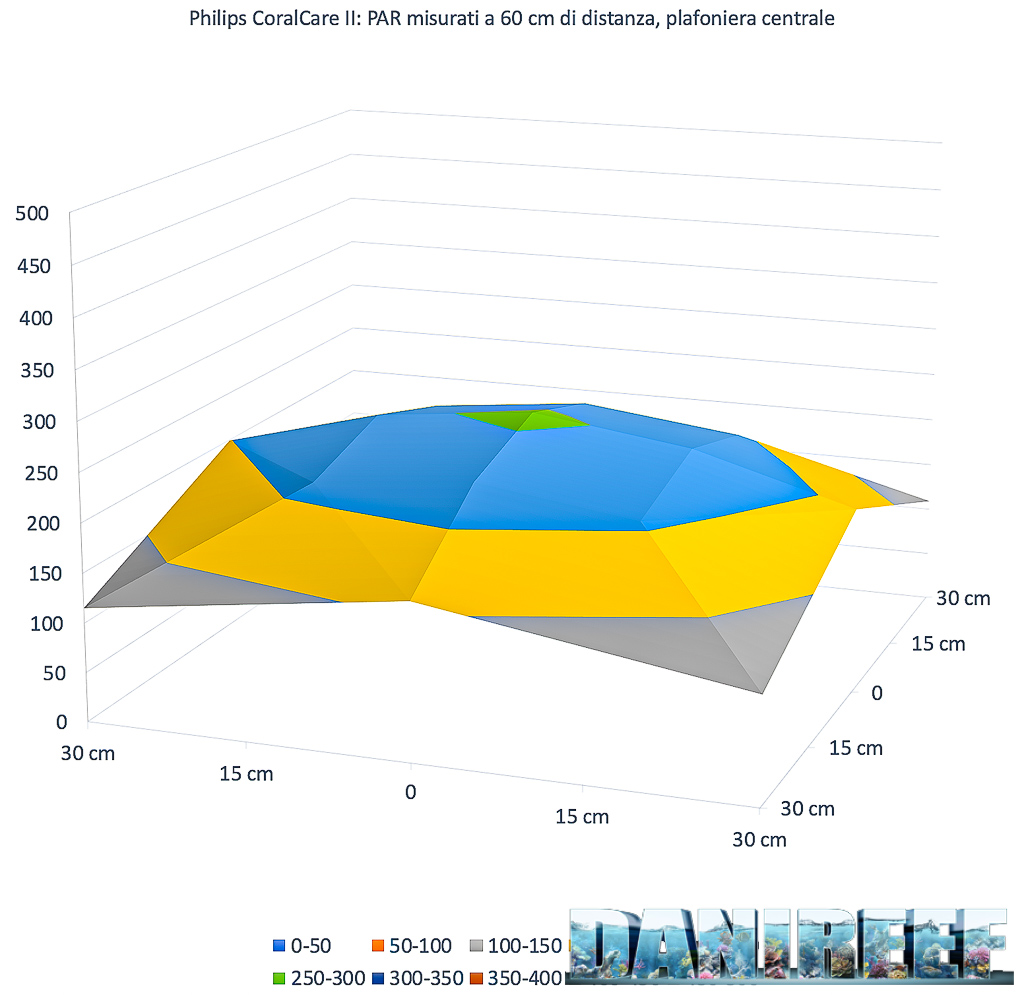 With a bigger space between ceiling lights and sensor, it decreases the difference between PAR in the middle and on the sides. The curve is almost flat. We have a higher uniformity but less power in total. The light spreads, but the central value decreases from 1342 to 491 to 258 μmol m-2 s-1. It stands out that the covering is completely uniform.
The PAR in the middle in the different configurations
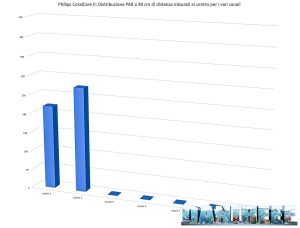
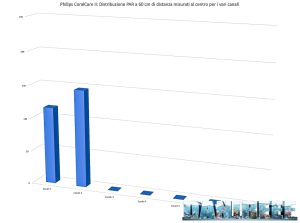
Let’s continue with our technical measurements. We can see how, in a chart, the PAR collected in the middle decreases in the three different distances of the tests.
Energy variation of the LED bars Philips CoralCare Gen2 depending on the distances
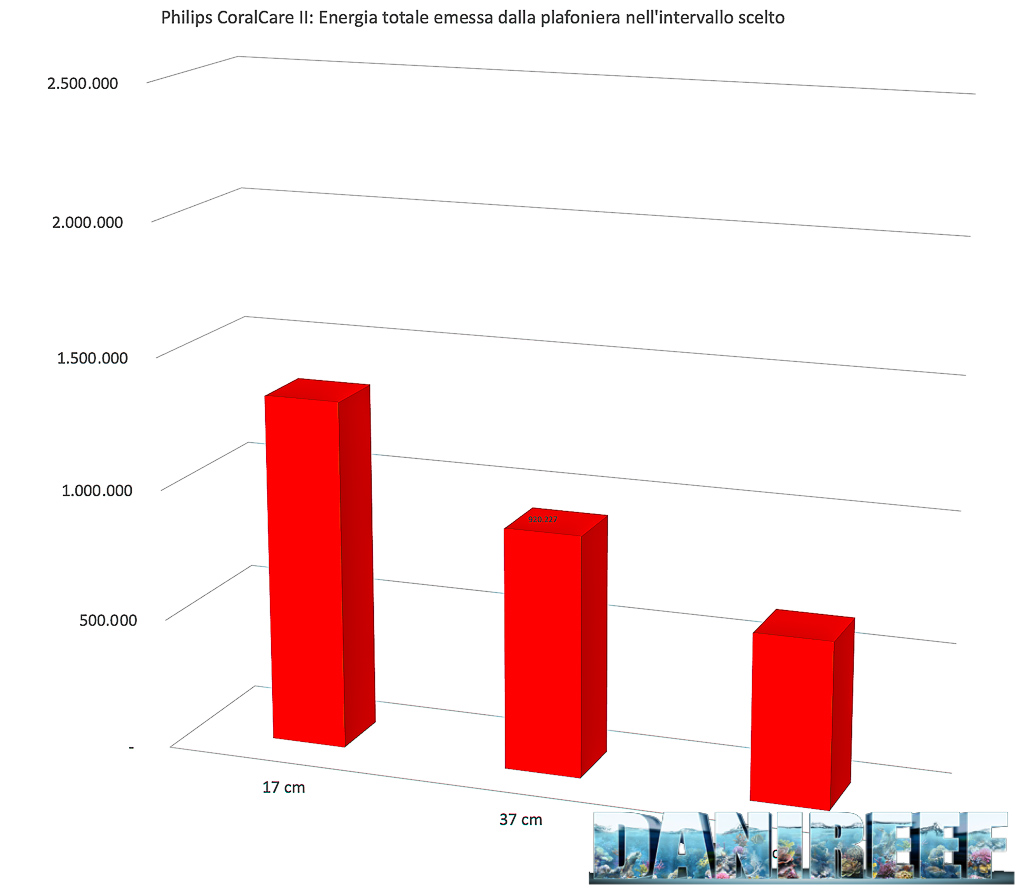 This is the most significant and most comparable data. The energy variation. We calculated the volumes of the three surfaces previously seen. It’s obvious that moving away from the ceiling light the PAR decreases, also because the light illuminates a wider space. We try to consider all the light energy in this square of 60 cm under the bar. And it’s clear that the three values of 1.333.430, 920.227 and 631.087 assume a different connotation compared to the values in the middle. When the first ones are low because the distance is high, the subtended area, that is the energy, decreases less, because the “main part” of the lighting is in the middle. This is the theory.
Looking at the values of the three curves it’s noticeable that on the sides there’s more light at 37 cm than at 57 cm or at 17 cm, which is, obviously, the distance with less power on the sides.
Value in the middle for each channel at three distances
We also measured the value in the middle of each channel in order to give you an idea of the contribution of each channel to the PAR.
 Here are the collected values:
| Distance = 17 cm | Distance = 37 cm | Distance = 57 cm | |
| Channel 1 Blue | 605 μmol m-2 s-1 | 220 μmol m-2 s-1 | 116 μmol m-2 s-1 |
| Channel 2 Warm | 741 μmol m-2 s-1 | 275 μmol m-2 s-1 | 146 μmol m-2 s-1 |
The two channels are almost equivalent, with a slight predomination of the warm one.
Consumption
The measurement of the consumption was made possible thanks to the useful device RCE PM600 that can also measure the Cos(fi) (or power factor). The result is already given in watt. 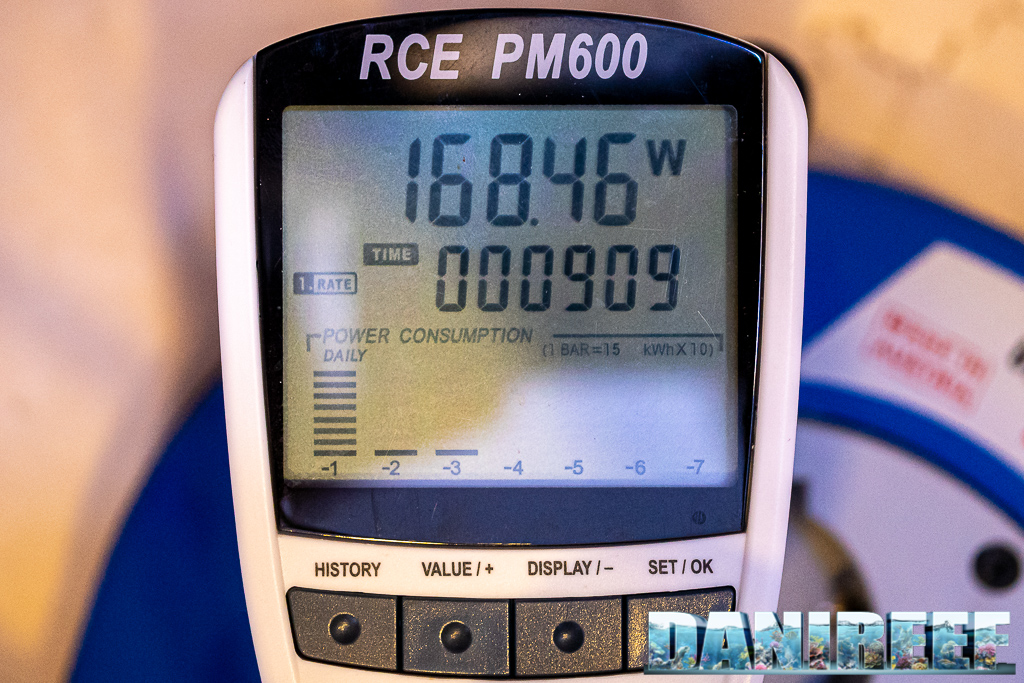 Here above there’s the maximum power and below the Cos(fi).
 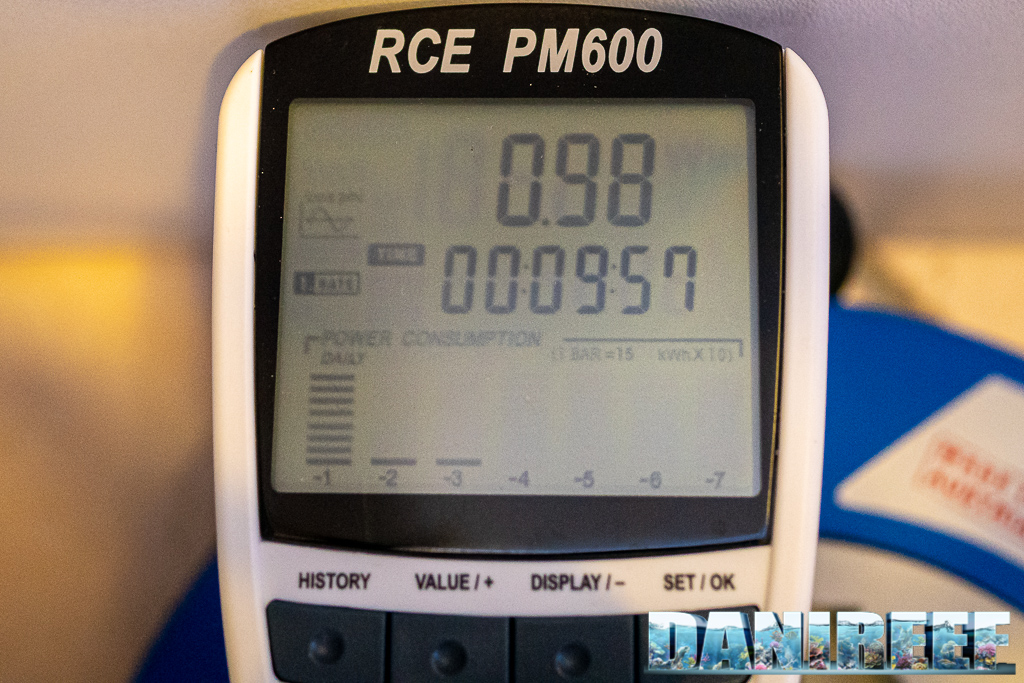 The Philips CoralCare Gen2 ceiling light consumes 168 watts. Considering that at 17 cm the ceiling light has 1342 μmol m-2 s-1 in the middle, we can say, in perspective, that it has a peak value of 7,99 μmol m-2 s-1 w-1 (PAR per watt).
The power consumption is practically the one declared on the technical data of the ceiling light. 168.5 watts against 170. The loss is less than 1%.
Philips CoralCare and the heat
Philips says that if the ceiling light is maintained in an environment of 35 degrees C the LED will last 25,000 hours before having a decay of 10%. 35 degrees with the channel at 100% will bring the temperature of the shell to 68 degrees, more or less. In case you exceed a temperature threshold, we don’t know the value, a system enters in action and it automatically switches off the ceiling light. There aren’t any dimmers and it never happened to me.
How to calculate these numbers in an aquarium?
This is a good question. At first we thought that we could transport these values to the aquarium tout-court. Then we filled the aquarium, inserted the probe and redid the measurements. We fazed but, as we have already said in elsewhere, we’re going to talk about this in another article. Basically, while at 20 cm the result is practically the same, as we progressed, thanks to the glass and the water itself reflecting the light, we found even the double of the values measured in air. Obviously this isn’t a detail that can be standardized, so we think that our method of calculation is the most correct, and the best for the comparison of coverages of different ceiling lights.
The comparison with other ceiling lights on the market
Recently we started to use the new Apogee’s Quantum Meter MQ-510. For this we can’t completely compare the data of other ceiling lights because before we used the probe Seneye.
| Energy | Cost | Consumption | Energy/€ | Energy/w | |
| AI Hydra 32 HD at 17 cm | 560.000 | 430 | 90,50 | 1.303 | 6.190 |
| AI Hydra 32 HD at 37 cm | 563.000 | 430 | 90,50 | 1.310 | 6.224 |
| AI Hydra 32 HD at 57 cm | 463.000 | 430 | 90,50 | 1.076 | 5.112 |
| Aqamai LRM at 17 cm | 643.000 | 465 | 90,88 | 1.382 | 7.071 |
| Aqamai LRM at 37 cm | 722.000 | 465 | 90,88 | 1.552 | 7.941 |
| Aqamai LRM at 57 cm | 616.000 | 465 | 90,88 | 1.326 | 6.783 |
| Aqamai LRS at 17 cm | 276.000 | 289 | 47,59 | 955 | 5.797 |
| Aqamai LRS at 37 cm | 312.000 | 289 | 47,59 | 1.078 | 6.547 |
| Aqamai LRS at 57 cm | 254.000 | 289 | 47,59 | 880 | 5.343 |
| ATI Straton at 17 cm | 2.018.232 | 890 | 211 | 2.268 | 9.565 |
| ATI Straton at 37 cm | 1.409.595 | 890 | 211 | 1.584 | 6.681 |
| ATI Straton at 57 cm | 957.209 | 890 | 211 | 1.076 | 4.537 |
| Cetus 2 at 17 cm | 410.000 | 215 | 60,68 | 1.906 | 6.756 |
| Cetus 2 at 37 cm | 291.000 | 215 | 60,68 | 1.353 | 4.793 |
| Cetus 2 at 57 cm | 174.000 | 215 | 60,68 | 807 | 2.861 |
| Orphek OR2 Blue Plus 120 cm at 17 cm | 323.000 | 180 | 54,69 | 1.794 | 5.906 |
| Orphek OR2 Blue Plus 120 cm at 37 cm | 291.000 | 180 | 54,69 | 1.616 | 5.321 |
| Orphek OR2 Blue Plus 120 cm at 57 cm | 259.000 | 180 | 54,69 | 1.438 | 4.736 |
| Orphek OR2 Reef Day Plus 120 cm at 17 cm | 255.000 | 180 | 54,69 | 1.418 | 4.667 |
| Orphek OR2 Reef Day Plus 120 cm at 37 cm | 233.000 | 180 | 54.69 | 1.292 | 4.252 |
| Orphek OR2 Reef Day Plus 120 cm at 57 cm | 225.000 | 180 | 54.69 | 1.251 | 4.117 |
| Philips CoralCare at 17 cm | 1.859.000 | 749 | 190,5 | 2.481 | 9.756 |
| Philips CoralCare at 37 cm | 1.341.000 | 749 | 190,5 | 1.790 | 7.037 |
| Philips CoralCare ta 57 cm | 933.000 | 749 | 190,5 | 1.246 | 4.899 |
| Philips CoralCare Gen2 at 17 cm | 1.330.430 | 749 | 168,5 | 1.780 | 7.914 |
| Philips CoralCare Gen2 at 37 cm | 920.277 | 749 | 168,5 | 1.229 | 5.461 |
| Philips CoralCare Gen2 at 57 cm | 631.087 | 749 | 168,5 | 843 | 3.745 |
Regarding the energy per watt, considering the PAR, and for the energy per euro, it’s lower than the old Philips Coralcare and the ATI Straton.
PAR yes PAR no
The PAR express the photosynthetically active radiation (PAR). It’s a measure of the energy of the solar radiation intercepted by the chlorophyll a and b in plants. It’s a measure of the actual available energy for the photosynthesis, that’s lower than the total energy coming from the Sun, because the absorption spectrum of the chlorophyll is not very wide. The PAR are about 41% of the total solar radiation. It’s concentrated in the red and blue bands, with peaks of 430 and 680 nm of wavelength corresponding to the visible radiation. At Philips they studied in depth this topic in order to improve their ceiling lights. They tried an unconventional, but very thought out way, to achieve their goal.
Old and new CoralCare: differences?
The new CoralCare Gen2 uses the new LED Lumileds and the spectrum is optimized for the growth and health of the corals. In fact, it has more LED at 470nm in order to improve even more the fluorescence. Some years ago the problem with this wavelength was that the 470 nm LED had a WPE (wall-plug efficiency) lower that the 450 nm LED, and it didn’t compensate that this was the best wavelength for corals. This new generation of LED lowered the difference of efficiency enough that now it’s more convenient for the corals (in terms of usability) and for the whole performance of the spectrum. From this derives also the decreasing of the power about 10%. This is due to the thinner design of the ceiling light that reduced the heatsink from 10 to 7 kg. Even with more efficient LEDs and a more efficient optical system, the maximum capacity of this design is calculated in 170 W. But given the fact that most customers never used the previous CoralCares at 100% of their power, they don’t think this power reduction is such a big problem. There are fewer LEDs, 68 instead of 114, because LED technologies are changing, as well as the possibilities of any single device. Today we can built any ceiling light using LEDs at low power, medium power, or high power, and in different types, multi-chip, flip-chip, double stack, etc., and every choice determines the specifics of its own LED. Last but not least, the WPE of the LED is extremely important. The higher this value, the more the energy that enters the LED is converted into light (and less into thermal heat). Today the CoralCare Gen2 can use the LED with a little higher current without penalizing the efficiency. The LED now are used at about 750mA while the previous CoralCare used 600mA. The consequence of all these considerations, combined with the optical system (color fusion and light distribution) led Philips to state that 68 LED were the best for the most efficient use by the corals. 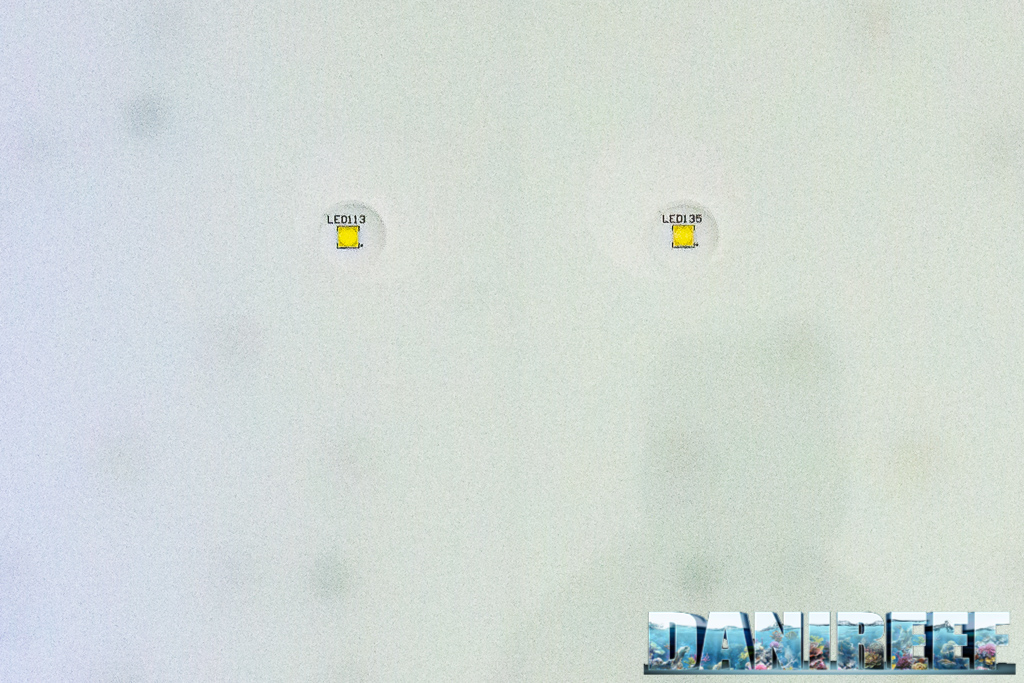
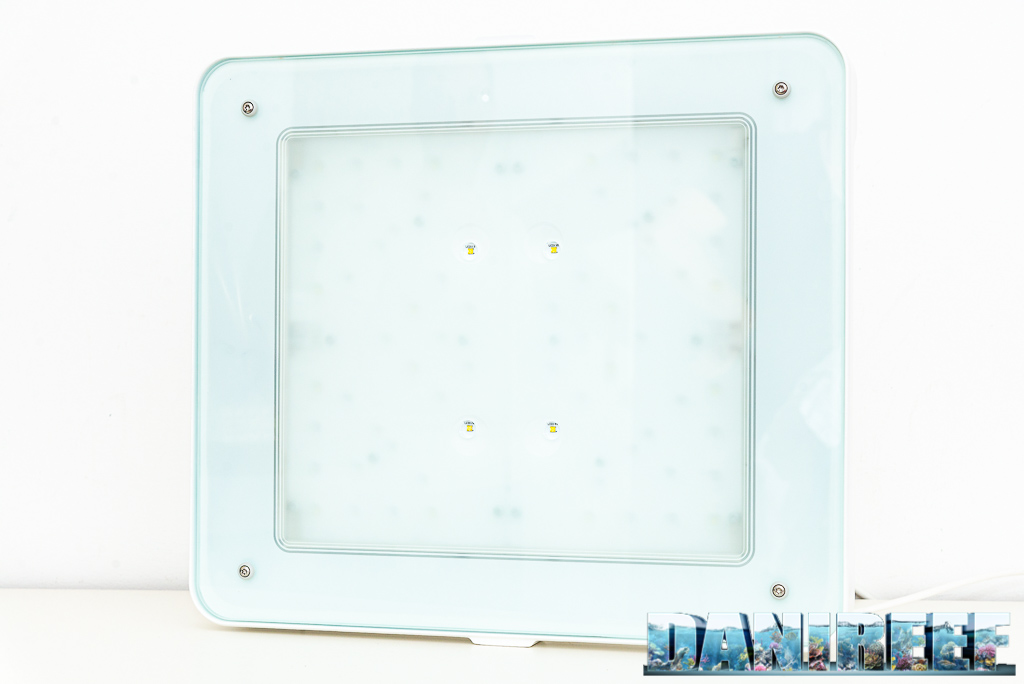
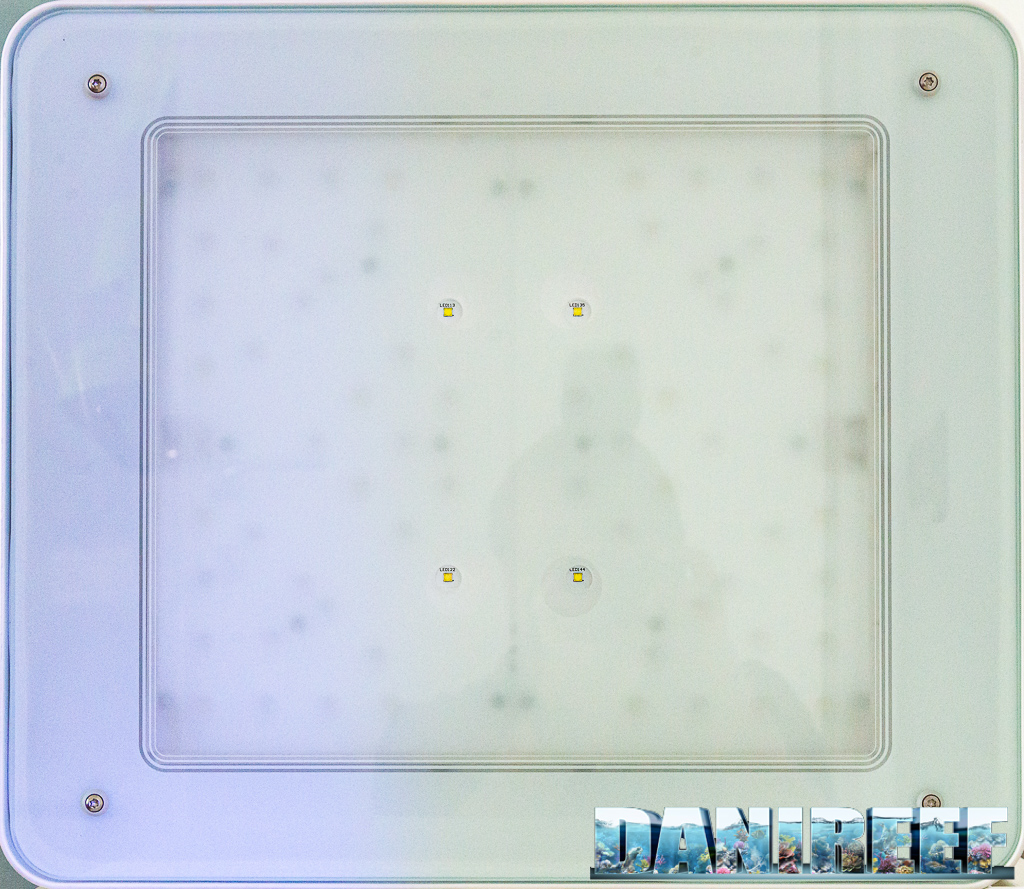
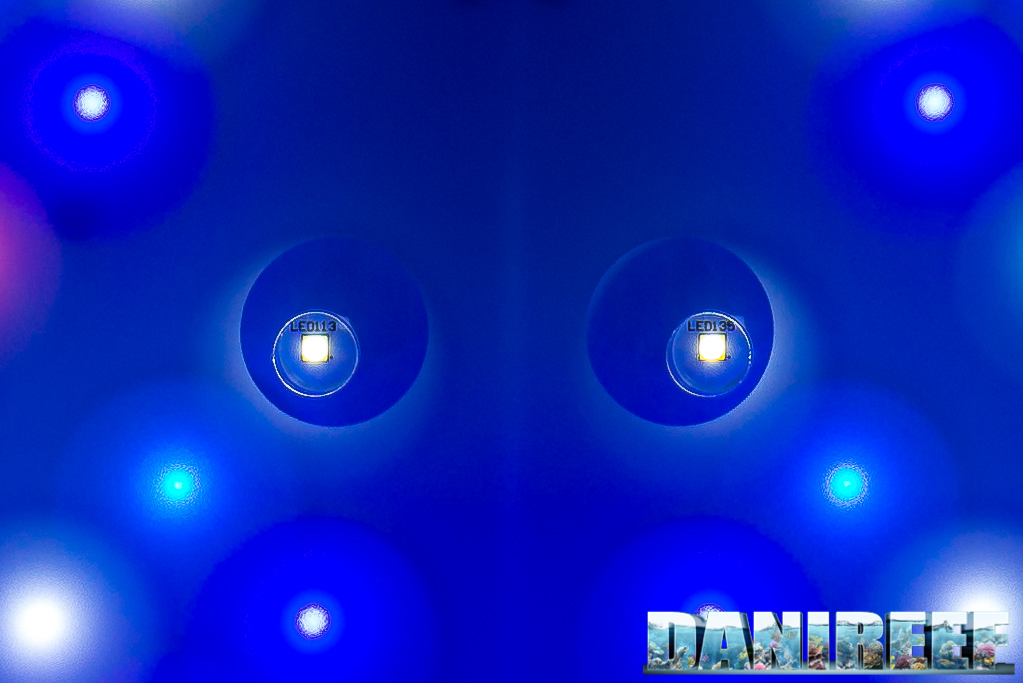 Close-up of the 4 “eyes” on the diffusing plate of the ceiling light, in this way you’ll have a sort of “direct rays” of white light on the corals, that creates reflection and warms the corals when the power is at 100%. This LED has a lower PAR value, as we have seen. Practically speaking, Philips says, the difference in PAR is almost insignificant because you can adopt a lower distance between ceiling light and water, because of its bigger active surface while the light is even more uniform, and using the 100% instead of lowering the channels like we were used to do. Moreover, the spectrum better suits the needs of the corals. We have to remember that the PAR value doesn’t refer to the usability for the coral, but to the covering of the aquarium. A higher or lower PAR doesn’t automatically mean that the coral will grow faster or slower. The PAR value should always follow step by step the analysis of the light spectrum in order to have a realistic comparison: in this way we can use the PAR value instead of very expensive measuring devices. Keeping this in mind, Philips assures that the performances on the corals have the same quality of the ones before, but use less electric power.
Maintenance costs
The Philips CoralCare GEN2 ceiling light costs 749 euro.
The absorbed power is 168.5 watts, so it has a relationship cost/watt of 4.44 euro per watt. In order to do a comparison with the other ceiling lights you can refer to the following chart. Note that the ceiling lights are sorted by decreasing efficiency, so the best are at the top.
| Ceiling light | Price | Consumption | Relationship euro per watt | References |
| Orphek OR2 Blue Plus | 180 USD | 54.7 w | 3,3 euro per watt | DaniReef LAB |
| Orphek OR2 Reef Day Plus | 180 USD | 54,7 w | 3,3 euro per watt | DaniReef LAB |
| Cetus 2 | 215 € | 60,7 w | 3,5 euro per watt | DaniReef LAB |
| Philips Coralcare 2019 | 749 € | 190 w | 3,9 euro per watt | DaniReef LAB |
| Maxspect Ethereal | 500 € | 126 w | 4,0 euro per watt | Italian test |
| ATI Straton | 890 € | 211 w | 4,22 euro per watt | DaniReef LAB |
| Philips CoralCare GEN2 2020 | 749 € | 168,5 w | 4,44 euro per watt | DaniReef LAB |
| Radion XR30w G2 PRO | 790 € | 170 w | 4,7 euro per watt | Italian review |
| AI Hydra 32 HD | 430 € | 90,5 w | 4,75 euro per watt | DaniReef LAB |
| Radion XR30w G4 PRO | 915 € | 190 w | 4,84 euro per watt | Italian article |
| OceanLed Sunrise 600 | 870 € | 180 w | 4,8 euro per watt | Italian test |
| Orphek Atlantik V4 | 1099 € | 226 w | 4,9 euro per watt | Test |
| Radion XR30w G2 | 690 € | 140 w | 4,9 euro per watt | Italian review |
| Radion XR30w G4 | 760 € | 150 w | 5,1 euro per watt | Italian article |
| Aqamai LRM | 465 € | 87,5 w | 5,1 euro per watt | DaniReef LAB |
| Zetlight UFO ZE-8000 | 500 € | 91,5 w | 5,5 euro per watt | Test |
| Aqamai LRS | 289 € | 47,6 w | 6,1 euro per watt | DaniReef LAB |
| CEAB Slide & Led | 2.700 € | 275 w | 9,8 euro per watt | Review |
| Sicce GNC 466 | 1.592 € | 120 w | 13,3 euro per watt | Review |
The ceiling light is very well built, heavy and solid, and even more pleasant than the previous model. It’s very easy to program and there is more attention to the LEDs type and the distribution of the light that Philips has from the experience in the lighting sector. The energy and economic efficiency is average but if we trust Philips this is only one side of the truth. The power supply is integrated in the shell and the app works with bluetooth. The values are great for a nanoreef but also for aquariums up to 70 cm per side, to breed SPS or anything else. Increasing the dimensions the covering decreases, because there isn’t glass to reflect the light, so I suggest 2 ceiling lights at 120 cm and 3 at 180 cm. The global expressed energy is good and linear on the water column. Questions and comments, as always, are welcomed.
[translated by Agnese Poggi]








0 Comments