• Why not take a moment to introduce yourself to our members?

loismustdie

chicks dig beckett men
Location
Brooklyn
Rating - 100%
31   0   0
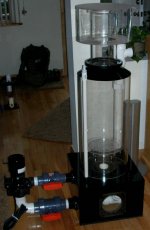
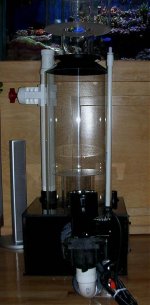
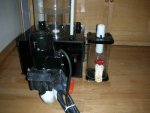
I'm at a stand still at the moment, waiting for a couple of parts to finish my skimmer, so I decided to start my build log as an informative thread for anyone thinking of trying this. This thing will not be holding water for a few days.
I would like to keep this thread as clean as possible. If you have any questions or comments, I would rather you PM me. I'll answer you right away and I will compile and post a FAQ list here on the thread as well as a pros and cons list. PLEASE AVOID UNNECESSARY POSTS. I will ask mods to delete any posts which don't help the thread. If we keep this clean, it will make it much easier for you to find it when I screw something up and the downward spiral begins.
I deserve NO CREDIT for this. It was not my idea. I copied a couple of guys from RC and they were also kind enough to tell me mistakes they wish they hadn't made. All I did was build it.
Okay, so here's what we got:
Sequence Dart mesh wheel skimmer.
Pump:Sequence Dart
Body: 12" diameter cast acrylic tube 25" high
Riser: 6" diameter cast acrylic tube 12"high
Base: 16"X18"X10" 1/2" black acrylic.
 

Attachments

  • fullshotR.jpg
    fullshotR.jpg
    47.1 KB · Views: 519
  • fullshotF.jpg
    fullshotF.jpg
    43.2 KB · Views: 519
Last edited:

loismustdie

chicks dig beckett men
Location
Brooklyn
Rating - 100%
31   0   0
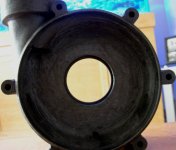
the impeller:
first, the volute was shaved down with a dremmel. I wish I had taken a before pic, but I forgot. There is a cone inside which brings water to the center, which would get in the way if I left it there.
 

Attachments

  • volute.jpg
    volute.jpg
    28.1 KB · Views: 526

loismustdie

chicks dig beckett men
Location
Brooklyn
Rating - 100%
31   0   0
you also have to cut up the impeller. First I cut the front face off. After that was gone, I decided to cut away as much of the impeller as possible to reduce weight. If I were to do it again, I would not have done this.
 

Attachments

  • impellercut.jpg
    impellercut.jpg
    47.3 KB · Views: 511

loismustdie

chicks dig beckett men
Location
Brooklyn
Rating - 100%
31   0   0
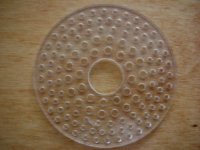
originally, this whole design came up and it was going to be a needle wheel. So I made this and I was going to tag on acrylic rod to make a needle wheel.
 

Attachments

  • acrtlicplate for nw.jpg
    acrtlicplate for nw.jpg
    26.4 KB · Views: 511

loismustdie

chicks dig beckett men
Location
Brooklyn
Rating - 100%
31   0   0
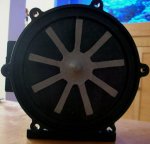
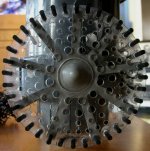
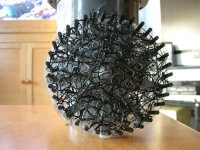
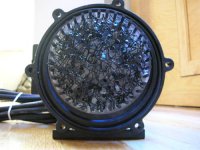
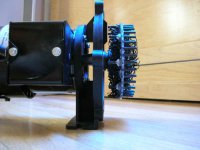
Turns out that there were problems with the acrylic needles not being able to handle the spin. They are too brittle. So we came up with carbon fiber rods. Also, since the new big thing was mesh wheels rather than needle wheels, I had to adjust . The problem with mesh wheels was they came apart and made problems in the wet end of the pump. I decided to put the outside ring of carbon fiber rod and put the mesh inside of that.
 

Attachments

  • needles.jpg
    needles.jpg
    47.4 KB · Views: 506
  • meshwheel.jpg
    meshwheel.jpg
    41.2 KB · Views: 499

loismustdie

chicks dig beckett men
Location
Brooklyn
Rating - 100%
31   0   0
Tools needed for the build:
Dremmel tool
ROUTER... I forgot the router.
Hack saw
Sand paper, sand paper and more sand paper.
speed squares
2 sided tape
chop saw
table saw
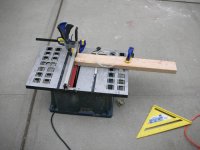
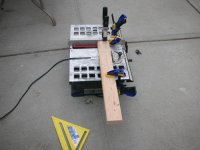
Here's what I had to go through just to cut acrylic tube:
Dave and I cut a few pieces this way:
 

Attachments

  • table saw2.jpg
    table saw2.jpg
    26.2 KB · Views: 499
  • table saw.jpg
    table saw.jpg
    23.7 KB · Views: 493
Last edited:

loismustdie

chicks dig beckett men
Location
Brooklyn
Rating - 100%
31   0   0
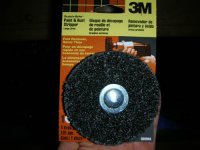
anyone wondering about different mesh, someone on RC did their own research and found what I have on the impeller to be best. I had actually bought this 3M stuff from HD. I was so mad it didn't work out, it was a perfect fit, but it is woven a little too tight:
 

Attachments

  • mesh.jpg
    mesh.jpg
    30.1 KB · Views: 647

loismustdie

chicks dig beckett men
Location
Brooklyn
Rating - 100%
31   0   0
I would like everyone to keep in mind that this project can fail miserably, but I do have a back-up. I flanged the body and neck, so if this doesn't work out, I can remove the body and replace it with a shorter/longer one. I built a side access panel into the base, so if something like my venturi doesn't work, I can get in there and change it. Also, if the Sequence just doesn't cut it, I can remove it (I have an extra impeller and volute, so the pump is still usable) and put in aquabees or sedras.
The nice thing about this project is it is custom to you and you can build to the specs you like.
chris
 
Last edited:
loismustdie

chicks dig beckett men
Location
Brooklyn
Rating - 100%
31   0   0
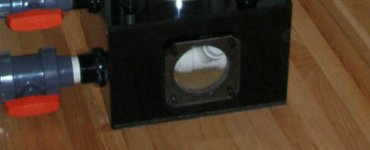
I was asked to show pics of the access panel and flanges. The flanges are cut, but they still need the insides routed, hole drilled, gaskets and nylon bolts. I'm still waiting on the nylon bolts and gasket material to be delivered. Here's an idea of what it looks like though.
 

Attachments

  • accessbox.jpg
    accessbox.jpg
    11.5 KB · Views: 452
  • flangebase.jpg
    flangebase.jpg
    27.4 KB · Views: 452
  • flange neck.jpg
    flange neck.jpg
    18.4 KB · Views: 450

loismustdie

chicks dig beckett men
Location
Brooklyn
Rating - 100%
31   0   0
Fred (fritz) sent me a PM where he was kidding around about me being a military guy and having a plan a, b, c, d, e, etc.
I guess to an extent he was right. I spent a lot of time and money on this build and I didn't want to rely on just 1 pump idea, which at the time had only been used for a month, on making or breaking this system. So as Fred joked around about, I had a PACE plan (the military is loaded with acronyms).
Primary: Sequence thread wheel
Alternate: Sequence needle wheel with possible air injection
Contingency: 3 Sedras or Aquabees mesh wheel style
Emergency: 3 Sedras or Aquabees needlewheels.
And when all else fails, I'll make the body and/or neck shorter or longer.
Again, this whole thing is experimental. The one guy I know of who is doing it had only had his running 2 months. I didn't want to spend all of that money on materials, just to throw it away if it doesn't work.
I'm at $700 right now. (another mistake I made was using 1/4" wall acrylic tube rather than 1/8" wall, which would have reduced my costs of acrylic tube by half) If I need to go to Sedras, increase my costs by $300. Aquabees, $600. It's still less money than I would have spent if I bought from reputable, field tested companies, but part of a DIY project is keeping costs down. I already spent more than necessary on the body and neck. I'd rather not have to buy more pumps. FWIW, if I got to Aquabees, this skimmer will cost me $1300. If I bought it, it would be $3800.
BTW, Scott from RC is the one who gave me the idea to flange the body.
 
Last edited:
loismustdie

chicks dig beckett men
Location
Brooklyn
Rating - 100%
31   0   0
I initially had a 24X24X10" base cut by the place I bought the black acrylic from. (BTW, the place I bought the black acryilc from is local and I got a good price, but they only sell 4'X8' full sheets)
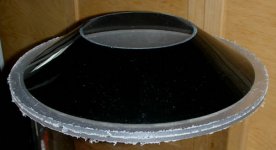
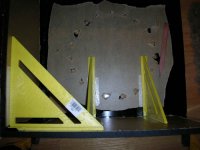
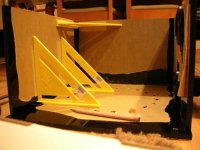
I realized this base was way too big. It would have been close to 25 gallons, just for the base. With a 36" tall, 12" diameter body, this skimmer would have been over 40 gallons big. I had to cut it down. Funny thing is, the guys on RC are calling mine a "small, efficiency skimmer". I took time and care, cutting down key pieces by hand, and then clamped those pieces to others needing to be cut and used a tracer bit on a router. It made perfectly equal sized pieces. I used squares to make sure all were right angles. I hold them in place with 2 sided tape. IMO, much easier than trying to tape them in place.
My base had to keep the 10 inch height in order to fit the Dart.
Since I cut the base and body down, I am now at a more manageable 24 gallons for the skimmer. There is some fear though that the 25 inch body will not be enough to support the Dart (PACE).
 

Attachments

  • basebuild1.jpg
    basebuild1.jpg
    24.8 KB · Views: 295
  • basebuild.jpg
    basebuild.jpg
    31.5 KB · Views: 295
Last edited:

loismustdie

chicks dig beckett men
Location
Brooklyn
Rating - 100%
31   0   0
FAQ... Will be updated

So far, these are questions that have been asked more than once.
1) Who's Lois?
You wish you knew. Just be glad you're not Lois.
2) What is the mesh?
PF5 from Aquatic Eco. You can only buy this in very large sheets. 39" X 2 yards. Aquatic Eco may not have the best prices around, but they are a vault of DIY stuff.
3) Where did you get the acrylic tube?
US Plastics. Be advised, they only sell 6 foot lengths. They will cut the sizes you need, but you still buy the 6 foot length. $$$
4) It's taller than your stand. Where are you going to put it?
In my basement with my sump, chiller and the rest of my equipment. I'll take pics when all is said and done.
5) How many gallons do you think this will be good enough for?
I haven't the slightest clue. An equally sized skimmer from a very reputable company is rated to 1600 gallons. My skimmer may crash and burn.
6) Where did you get the black acrylic sheet?
E&T Plastics. Again, this is not a company for hobbyists. They only sell their acrylic in full 4 foot X 8 foot sheets.
7) What's next?
I've got enough material left over to build 2 to 3 more skimmers. 1 will be built and then I will build a sump around it and it will fit a 120 gallon stand. I'm interested in a 3 foot cube tank, so I'd like to build a sump/skimmer with the remaining materials. FWIW, the remaining skimmers will be in sump models. Accessibility is still key. A clean skimmer works best.
 
Last edited:

loismustdie

chicks dig beckett men
Location
Brooklyn
Rating - 100%
31   0   0
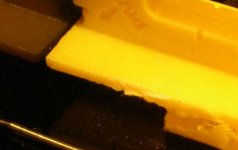
Yes, cut away the corners of the speed squares. Sorry, I should have magnified this in my other pics.
 

Attachments

  • tipsandneedles.jpg
    tipsandneedles.jpg
    15.4 KB · Views: 282
Last edited:

loismustdie

chicks dig beckett men
Location
Brooklyn
Rating - 100%
31   0   0
BTW, I've gotten a few PM's with ?'s and comments.
Yes, ? #1 is "who is Lois?"
Either way, these ?'s and comments have been very helpful.
There is a big concern that the 25" body will not be enough to handle the Sequence Dart. I was worried about this, but Rich (jackson6745) said that since I flanged everything anyway, I can use an excess piece of 12" diameter acrylic tube, flange it and tag it into the skimmer. That would now be my Alternate (PACE) if what I have doesn't work.
Listen, I'm not that good with this stuff. I'm good with my hands and I have a moderate case of OCD, so I do my best to make it all look good. If you've got something, trust me, you will get all credit and I will post it here.
Thank you Brett (bad coffee) for pointing out the cut corners on the speed squares. That really is big when you are gluing.
Fred (fritz), who gets on me to post pics of the things I talk about. If you like this thread, thank him. He made it better.
Thanks guys.
chris
 
Last edited:

loismustdie

chicks dig beckett men
Location
Brooklyn
Rating - 100%
31   0   0
PROS and CONS (and problems)

This post will be updated regularly.
I will only focus on the build portion at the moment. When all is up and running, I can focus on more pros and cons.
Pros:
1) So far, the build has been significantly cheaper than a purchase.
2) Gaining more experience and knowledge in this project.
3) You can make a plan to make it as easy and maintainable as possible. Skimmers function better when they are properly cleaned. ETSS suggests that you replace the pumps and bioballs for their skimmers every year.
4) Put it together and DON'T glue it. See where you can reach and where you can't and make adjustments. You want access EVERYWHERE.
CONS:
1) Soooo time consuming. Me and my dremmel are tight. Me and sandpaper are tighter. I hate diffuser plates.
2) The build has been cheaper, but materials, especially cast acrylic tube are very expensive. Things like twist fit necks and cones are also expensive. Although I do feel there are overpriced skimmers on the market, I do have a new respect for the materials, machines used to make some parts and overall craftsmanship of these products.
3) Myself, not being equipped with such machines, I had to buy some parts (increased costs) and get very creative with other parts (see time consuming).
4) If you screw up, you get seriously pissed when you think of what materials cost you. The purpose of DIY projects is to keep costs as low as possible.
5) Cutting circles is hard. I'm getting better and better as I go though.
6) The build may be cheaper than purchase, but when you buy, it's up and running out of the box. This has taken a long time.
7) Everyone, and I mean EVERYONE, will have something to say about what can be done to make it "better". (including the guys who post "I just got this skimmer out of the box, now what?" threads) I took everything that was said into account, put it in my plan and planned 8 moves ahead. If it got in the way, it was gone. If it helped, consider it. If Murphy can crush it... it's out. Murphy is an a$$hole... and a grunt. Yes, military mind at work.
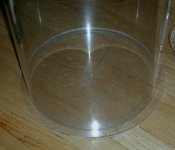
8) Inexperience = errors. If you look at the first post, you'll notice the collection cup base and top are gray. They aren't gray. I had a hard time gluing. The collection cup was the first thing of this project I built. There are imperfections in the base and top. I "scuffed" them with extremely fine sand paper to maintain the smooth feel (for ease of cleaning) yet camouflage the imperfections of my glue job.
9) Carbon fiber rod SUCKS to work with. Easy to cut, but do not breath it in. Please buy a respirator before messing with this stuff. It's no joke.
 
Last edited:

loismustdie

chicks dig beckett men
Location
Brooklyn
Rating - 100%
31   0   0
Rich came by today to check out the skimmer. He no longer feels I need a bigger skimmer. Anyway, he said in the pictures, you can't tell how big it actually is, so I hope this pic helps. This is body of my old ETSS skimmer that I converted into a waste collection cup. The body itself is 10 inches tall, 6 inch diameter tube.
I can follow the MR standard of size scale by sticking my cat it it, but first, I have to go catch her and second, I'd have to glue more of it up so she doesn't knock anything over trying to get out.
 

Attachments

  • scale.jpg
    scale.jpg
    44 KB · Views: 259

loismustdie

chicks dig beckett men
Location
Brooklyn
Rating - 100%
31   0   0
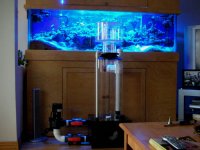
Maybe this is a better scale for size. My tank is a 6 foot long 180 gallon. With stand, hood and all, it's 78 inches tall. Here's a full shot of the skimmer in front of it. I think it's big, but the RC guys still call it a small efficiency and the sad part is, they aren't kidding. They are building amazing stuff.
 

Attachments

  • scale1.jpg
    scale1.jpg
    35 KB · Views: 250
Last edited:

Sponsor Reefs

We're a FREE website, and we exist because of hobbyists like YOU who help us run this community.

Click here to sponsor $10:


Top