A
You are using an out of date browser. It may not display this or other websites correctly.
You should upgrade or use an alternative browser.
You should upgrade or use an alternative browser.
A
Anonymous
Guest
A
Anonymous
Guest
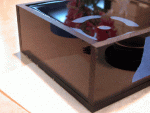
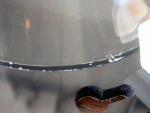
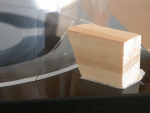
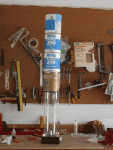
You can see in the above photo that I had stuck the pin in to far. I forget it wasn't supposed to extend past the tube edge. Will thois joint be ok, or do i need to do something to fix it?
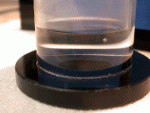
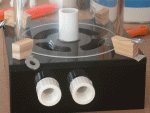
I did the "money seam", between the tube and the base this morning. I aced it. No bubbles whatsoever. I'll post a photo after it is fully cured.
Louey
I did the "money seam", between the tube and the base this morning. I aced it. No bubbles whatsoever. I'll post a photo after it is fully cured.
Louey
Wow, great work Louey!
Too bad I missed that MACO class. I'm in the process of building a DIY acrylic sump and the seams are really bubbly not to mention all the drip marks from the glue.
If you can post some tips on how to work with acrylic that would sure help a lot of us unacrylically-inclined out. (I made that word up )
)
You used pins? I'm using Weldon #16 and that stuff is really runny.. any suggestions?
Jonovan
Too bad I missed that MACO class. I'm in the process of building a DIY acrylic sump and the seams are really bubbly not to mention all the drip marks from the glue.
If you can post some tips on how to work with acrylic that would sure help a lot of us unacrylically-inclined out. (I made that word up
You used pins? I'm using Weldon #16 and that stuff is really runny.. any suggestions?
Jonovan
If you can post some tips on how to work with acrylic that would sure help a lot of us unacrylically-inclined out. (I made that word up )
You used pins? I'm using Weldon #16 and that stuff is really runny.. any suggestions?
I use pins and weldon #4. Make sure you are using cast acrylic. Spartech or Acrolite GP are the best. For a sump, you should glue the sides to the front first. Leave a little of the front panel overlapped and flush trim latter. Once the side have cured, flip it over and glue the sides to the back panel. Glue the baffles in place. And lastly, glue the whole thing to the bottom. Overlap and flush trim every chance you get. Make sure the pins do not extend all the way past the other side of the acrylic. Use clamps to hold things in place for glueing. Use weights to help force bubbles out. Pull the pins before the glue begins to set-up (within 30 seconds of glueing the seam.)
I haven't built a sump yet myself, but if memory serves the above is generally to sequence you should follow.
Anyone else have any input?
Louey
Great advice!
So you're supposed to stick pins between the seams? How far apart? Then you insert the glue between the seams (and pins) with the fine point applicator, correct? Then remove the pins and apply pressure/weight. Maybe I should have used that pin methood. I spent over $70 on 1/4" acrylic for my sump and seriously considering doing it over.
Anyone interested in buying a bubbly seamed acrylic sump? LOL :lol:
Jonovan
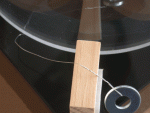
The applicator actually has a needle coming out of the top of a bottle. The pins that were provided in the MACO course are actually small wires tied to washers. The washer gives you something to grip when you go to pull the wires (pins) out. The wire provided by MACO was steel spring wire. It is available at McMaster-Carr. It is about the same diameter as a bread wire with the paper or plastic ripped off.
Oh, and one more thing. Make sure your seams are clean before your glue them. Clean them with a clean cloth and let them dry. Blow any dust out but don't used canned air as this can have a chemical residue. Also bend the wire so that they are not touching the exposed surface outside the seam. Glue would run along the wire and mare the finish. Of course that really doesn't matter if your just making stuff for yourself.
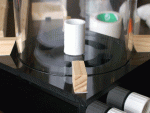
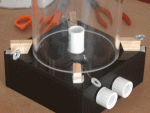
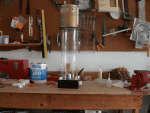
I'll try and remember to take some pics of a "pinned up" reactor that I'm currently buiding. It'll give some more ideas how the Pros do it. lol
Louey
Louey":5a6u8k25 said:BTW, does your "bubble seam sump" hold water? I'm just curious how "bubble free" the seams really have to be.
Louey
I did a 24 hour water test. It seems to be holding up so far... I think I'll just goop on extra Weldon across all the seams just in case... or maybe I'll just try it again.
Thanks for all the tips. I'll post again when I need some more "Pro" advice. :wink: Hmmm.. what to do, what to do.
J
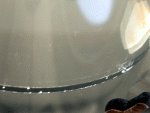
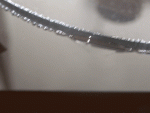
One final shot. This is the seam immediatley after I shot it. The pic is not in very good focus. There is one area where you can see two bubbles. They were the only bubbles in this seam and by the time it cured, with the weights on to, it was down to a single, very tiny size bubble, bearly visible at all. This seam will be fine.
Attachments
Great work!
I have finally decided to try my sump again. This time I'll try your pin/needle technique (I believe it's called capillary joining?? Did some research ). I already bought a can of Weldon#4 (instead of #16) and have that little applicator thingy. Just need to get the acrylic. Thank you so much for the great tips!
Jonovan
I have finally decided to try my sump again. This time I'll try your pin/needle technique (I believe it's called capillary joining?? Did some research
Jonovan


