• Why not take a moment to introduce yourself to our members?

A

Anonymous

Guest
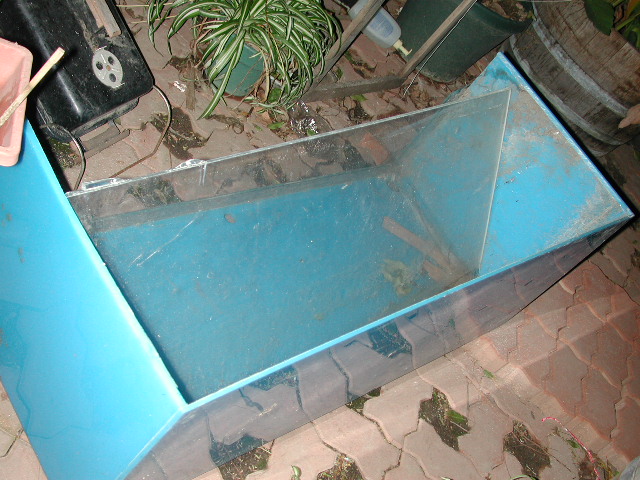
Got a crappy tank for a price I am too embrassed to say in public, but that was the most convenience thing for me to get at that time. Lesson is, don't buy thing in a hurry.

Anyway, got this home, and found a few issues with it. The top brack looks like it was raped, and the seller knew I have issue with it. The material is undersized, and he knew that too. I guess I must be on drug or something when I hand over the cash.

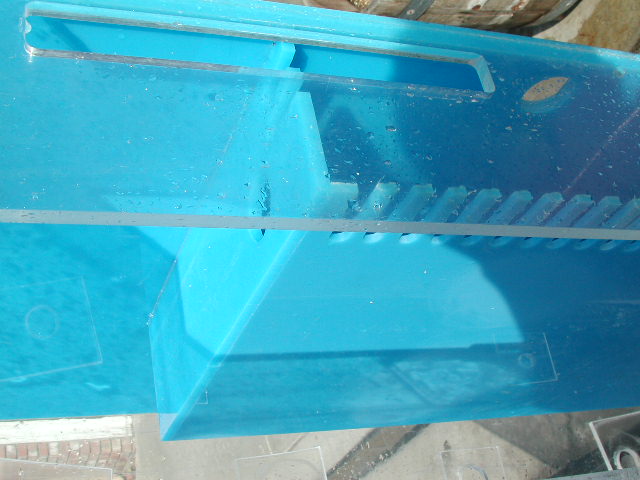
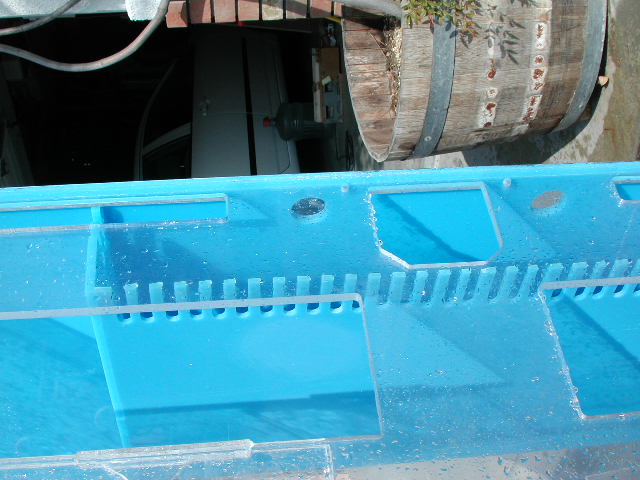
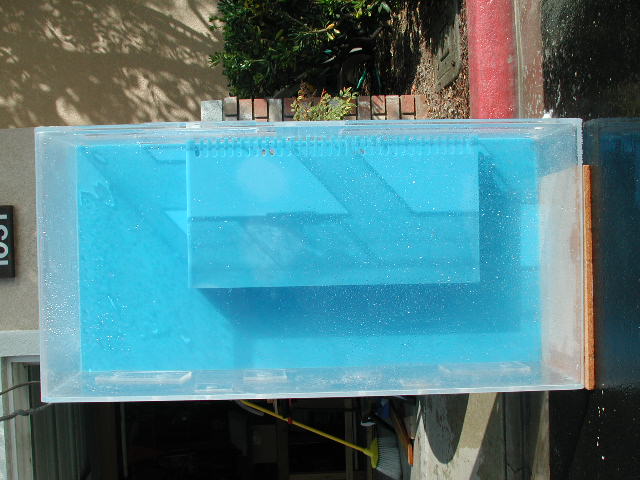
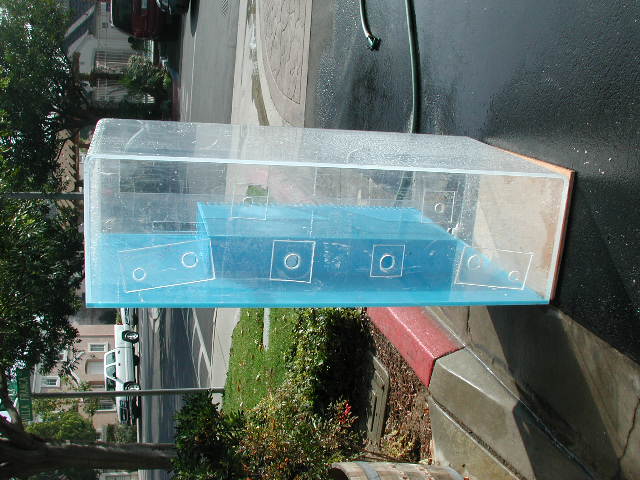
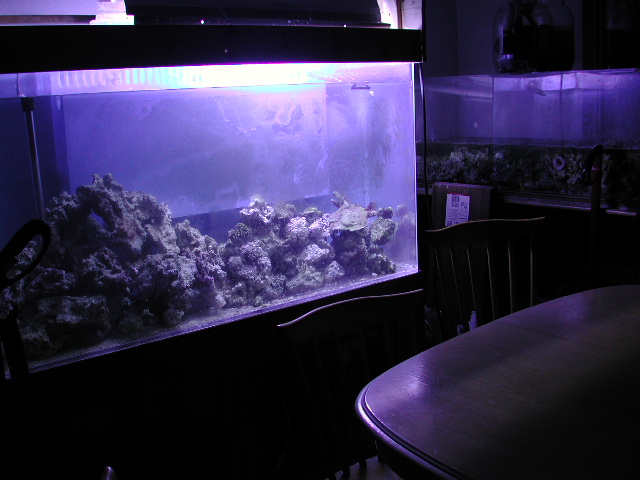
So I decided to do something about these issues. First, is the holes on the bottom. I don't want it like that. Solution: patch it with scrap acrylic, which I have prenty. Another issue is the holes on the back. Patch that out too. Third issue is the lack of overflow. Got one installed after I patch the holes on the back. Fourth is the top bracket. Router it out more smooth so that it does not look that ugly. Fifth issue is the scratches on the front. Well, got it all polished out with MicroMesh that I got laying around.

Here are the pics. I will add more details if you want me to be more specific, but the captions should be suffice for most of you.
 

Attachments

  • DSCN8665.JPG
    DSCN8665.JPG
    49.5 KB · Views: 1,593
  • DSCN8642.JPG
    DSCN8642.JPG
    48.4 KB · Views: 1,593
  • DSCN8641.JPG
    DSCN8641.JPG
    53 KB · Views: 1,597
A

Anonymous

Guest
more pic, sorry for the out-of-order sequence.
 

Attachments

  • DSCN8640.JPG
    DSCN8640.JPG
    51.8 KB · Views: 1,588
  • DSCN8613.JPG
    DSCN8613.JPG
    108.9 KB · Views: 1,586
  • DSCN8613.JPG
    DSCN8613.JPG
    108.9 KB · Views: 1,588
A

Anonymous

Guest
Oh, notice the missing middle front leg in the pic with tank on stand. Not to make FragMaster worry, but that I need to have it removed so that I can slide a sump in later.

The overflow teeth is done by a router. It is a 3/4 inch diameter cutter one inch apart, two inch long. Come to think of it, I should use a narrower cutter, but it is too later now. The cut is longer than most (two inches) because I want the water level in the tank to be slightly lower. The tank is 30 inches tall.

The hardest part about the overflow is that the cut must be very well done. The fact that I take apart an old 90 gal for the overflow make it more challenging to cut and design. I should use virgin blue acrylic, but I really want to make use of the 90 gal in my yard.

The tank that the overflow was installed is pretty old (7 yrs old or more), so the back panel is not flat. It take quite a bit of work to make sure the edge of the overflow mate well with the back panel before I appled the solvent cement. It would be a lot easier if I use the two smaller overflows as initially planned.

I filled the overflow with water to test for leak, and it does hold it well. Not bad consider the fact that the cuts are done free-hand by router. (Remember that I ruined two overflow already.)
 

Attachments

  • DSCN8587.JPG
    DSCN8587.JPG
    115.1 KB · Views: 1,585
  • DSCN8643.JPG
    DSCN8643.JPG
    59.3 KB · Views: 1,585

minibowmatt

Advanced Reefer
Rating - 0%
0   0   0
Looking great! How big is that tank anyway? The OF looks good. I am going to be making one this week. What cement did you use?
 
A

Anonymous

Guest
Rating - 0%
0   0   0
Looks like a job well done to me.


Wanna come play over at my house? I have some projects...
 
A

Anonymous

Guest
Rating - 0%
0   0   0
I use the thin cement for most work (#2?), but often go over with the thicker one if there is wide (0.5mm or so) gap.

The tank is only 150. I wife does not want me to get anything more than 5 feet wide, so that's pretty much the best I can do for now. Still got a 600 gal in the yard that I want to modify... maybe a summer project :?

The patch takes almost no time at all. Probably 30 minutes to find the scraps (I am very disorganized in the garage), 20 minutes to cut the rectangles by a hack saw, and 10 minute each for patch work.

I wasted a whole day of work on the two overflows that I did not use at the end. I think of them as practice pieces I guess.
 
A

Anonymous

Guest
Rating - 0%
0   0   0
Tank with light on. The tank on the right is currently "cooking" live rock in saltwater bath. Before this, they were in freshwater bath for about 4 years, so the entire "cooking" process took pretty long. Obviously did not do this on purpose, but that's how it going to work out.

When done, I will move the tank on the right below the main tank, and use it as sump.
 

Attachments

  • DSCN8686.JPG
    DSCN8686.JPG
    86 KB · Views: 1,444
A

Anonymous

Guest
Rating - 0%
0   0   0
I would like to take this chance to reiterate...


Schweeet!
 
A

Anonymous

Guest
Rating - 0%
0   0   0
Guess what? I think the combs on my overflow maybe a bit too coarse, and small fish/invert maybe able to get thru... I may need to add some plastic screen behind it to help this issue. The slots are 3/4 inch wide, 1 inch apart if I remember correctly. Well, it will be better the second time around :(
 
A

Anonymous

Guest
Rating - 0%
0   0   0
Why can't you just cut another comb out of some extra stuff, put the right sized slots on it and put it behind the other one. you could even fasten it with some of those plastic wing bolts.

you could even make one that was perpindicular to the slots as they are now.
 
A

Anonymous

Guest
Rating - 0%
0   0   0
I was thinking about that, but it will be much more professional if I got it right the first time. Actually, I was debating about using a 1/2 or smaller router bit, but decided to use the thicker one since I don't want the comb to break during handling. I guess that was a learning lesson for me.
 
A

Anonymous

Guest
Rating - 0%
0   0   0
I got it....


Make another comb exactly the same as this one.

Make it a bit shorter so it can slide from side to side

Then cut long slots in it for the plastic bolts and wingnuts to hold it.


Then you can slide it back back and forth sideways to get the gap you want, and you can tell people it was a new "fully adjustable" design....


:lol:
 
A

Anonymous

Guest
Rating - 0%
0   0   0
You know, if I every need a marketing person, you will be the first one in my mind. How is $195K to start, and 25% commisson on sales?
 

trido

Advanced Reefer
Rating - 0%
0   0   0
That really is an excellent idea knucklehead! :wink: Can you give me the link for the stainless,rust proof wing nuts though? :lol:
 
A

Anonymous

Guest
Rating - 0%
0   0   0
I have several hundred of these nylon nuts and bolts in my garage. They can be ordered, and some local hardware store even carries it.
 

Sponsor Reefs

We're a FREE website, and we exist because of hobbyists like YOU who help us run this community.

Click here to sponsor $10:


Top