• Why not take a moment to introduce yourself to our members?

Location
westchester, ny
Rating - 100%
2   0   0
Hey all, since I'm building this anyway,figured I might as well share it! I'm moving by June 14th (there will soon be a thread on the terror of moving my tanks...), so I need a stand for my reef tank. Its currently on a shelf in the wall and the new apartment has no similar feature.
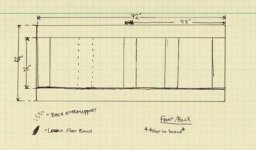
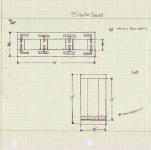
It's a standard 55 gallon aga tank (13x48 footprint) - but the stand is going to be 72" to allow for extra storage space plus a shelf next to the tank to keep daily supplies on. I'm thinking about eventually adding on to it and using the extra section as a base point for a bookshelf or something like that.
Blueprints attached...
 

Attachments

  • Stand Blueprints 001.jpg
    Stand Blueprints 001.jpg
    14.7 KB · Views: 179
  • Stand Blueprints 002.jpg
    Stand Blueprints 002.jpg
    23.8 KB · Views: 180
Location
westchester, ny
Rating - 100%
2   0   0
Materials and Supplies

Materials:
(9) 96" Premium KD 2x4 Studs (cut these down at home or try to get your home depot to do it).
This gives us:
-(4) 72" boards
-(15) 25" boards
-(8) 6" boards
(1) roll cork or similar density foam
(2) 2'x4' Lauan Panels (~1/4" thickness)
This gives us:
-(1) 48"x13" panel
-(1) 24"x13" panel

Hardware:
(4) 3" L-brackets
(4) 3" T-brackets
(1) box of 100 #8-1.5" woods screws (I've found that the heads of these strip real easy, might wanna get two just in case!)
(1) 1lb box #10-3.5" deck screws (these have a special star shaped bit-the deckmate brand screws come with a free one-make sure its in the box!)

Tools:
Aluminum Angle
Level
Tape Measure
10" Circular Saw (smaller one works too)
-Plywood blade (for the Lauan)
-All purpose blade (for the studs)
1/4 Sheet Finish Sander
-60 grit & 120 grit sheets
Screwdriver or Power Drill
-Special star shaped bit for deck screws (all the deck screws at my home depot used this bit, you may not need them)
-5/32" drill bit (or similar, just make sure its at least 2.5-3" long)
Wood Glue
Polyurethane/Stain of your choice (I'm going to use "Classic Oak satin")

I forgot to get the camera out right away so the pictures of yesterdays work are a little sparse, I'll take more when it stops raining and I can keep working.
 

Attachments

  • Wood.JPG
    Wood.JPG
    52.5 KB · Views: 175
  • Materials.JPG
    Materials.JPG
    55.4 KB · Views: 168
Last edited:
Location
westchester, ny
Rating - 100%
2   0   0
The First Steps

If you didn't get your wood cut at home depot, for whatever reason (i.e. not trusting the guy on his cellphone to cut it all perfectly...like me), it has to be cut into our 72", 25" and 6" pieces

Step One:
Using your square to ensure straight lines, measure and cut the 2x4s down to size.
Measure Twice.JPG
Sasha's supervising the work.
Sasha Supervising.JPG
Step Two:
Using your square and another long straightedge, measure and cut the lauan panel using the plywood blade on the circular saw.

Step Three:
Get out the Sander! Using 60-grit, get all the rough edges off your now properly sized 2x4s.

Step Four:
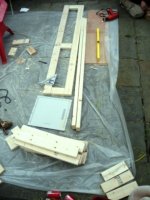
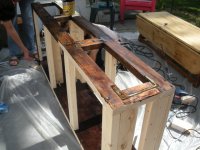
Start building the top of the frame, following the blueprints - when placing the brackets keep in mind that you'll be coming in with the drill from the other side so try to keep them away from the edges.
Getting started.JPG

Step Five:
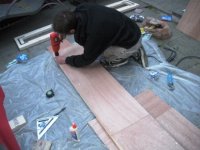
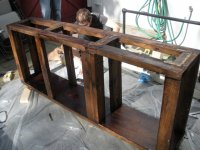
Build the bottom of the frame, using the wood screws to secure the lauan panel to your frame.
Lauan floor.JPG

And that's all that got done before I ran out of daylight last night, more to come after the rain...
 
Location
westchester, ny
Rating - 100%
2   0   0
The Delayed Finishing

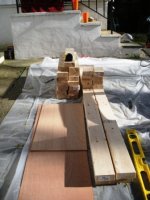
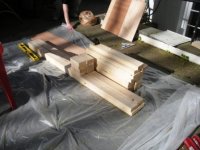
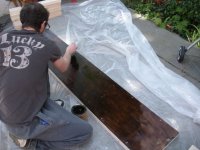
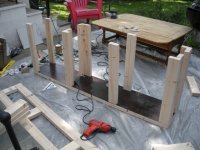
What with the move and everything I haven't had any time to think about sitting down and posting. Two weeks ago we moved my tanks from Port Chester to Hartsdale, took about 8.5 hours total, and no losses! Ill post a thread about the move soon. But back to business: I finished the stand....the tanks been on it for two weeks and holding fine, so I guess I did a decent job. Here are some pictures of the rest of the construction.
DSCN1418.JPG

DSCN1423.JPG

DSCN1425.JPG

DSCN1430.JPG

I still haven't gotten the doors on just because I havent had enough time...hopefully this weekend. I also put a 1x4 border of oak around the top of the stand that covers the black bottom frame of the tank. More pictures to follow.
 

Cadiz.Jonathan

Advanced Reefer
Location
Bronx
Rating - 0%
0   0   0
Looks kinda big for a 55 gal. I'm turning my stand to a 55 gal cabinet out of the steel frame stand I curently have and ideas?


Sent from my iPhone using Reefs
 

Sponsor Reefs

We're a FREE website, and we exist because of hobbyists like YOU who help us run this community.

Click here to sponsor $10:


Top