• Why not take a moment to introduce yourself to our members?

A

Anonymous

Guest
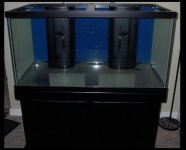
Well, Laura and I have decided to take down our old 155 gal. and replace it with a shorter, more cube-shaped 120. We are doing this for two main reasons... the first is that the room we have our tank in is over-powered by a six-foot long tank, and we weren't able to set the room up so that we had a comfortable seating arrangement around the tank. The second reason is that we are sick of the bow-front... the novelty has worn off after the six years we have had it, and now it just seems to be a tank with a front glass panel that is a PITA to clean, and a top that makes building a new canopy that looks good another PITA.

I decided that since this is the first time in a long time that I can design a tank from scratch I will document its progress in its own thread. This is that thread.

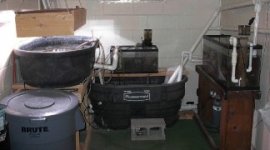
I am planning on setting this up as a softy-dominated mixed tank. My goal for this tank is NO POWERHEADS in the tank. The tank will use the same remote basement sump that fed the 155 (and is where all our livestock is hanging out waiting for their new home). It consists of a combination of glass tanks and stock tanks plumbed together that total around 300 gal.

The tank is empty and on the stand. I built the stand-pipes yesterday, and today I'm going to work on plumbing the return lines to the sump. The tank will be fed by an Dolphin AmpMaster 3000 which is on order from PA, and the tank itself will have two closed-loops fed by Mak4s (not my first choice, but I already have a bunch of them, so I'll use them until they fail). One of the closed loops will run through an OceanMotion's Squirt, and the other one will split into two outputs, each of them will be on the bottom of the tank. It will be a bare-bottom tank, and hopefully I can have enough flow across the bottom to keep all of the crap suspended until it gets into the sump where it can be removed. We have ordered black PVC pipe to plumb the closed loops, and I am hoping it will look pretty sharp.

I will update this thread with pics as I move along this project.
 

Attachments

  • empty tank.JPG
    empty tank.JPG
    30.7 KB · Views: 6,294

garagebrian

Advanced Reefer
Rating - 0%
0   0   0
Looking forward to seeing this tank take shape. If I could do things over I would have the 120 as well, great looking tank.

B.
 
A

Anonymous

Guest
Rating - 0%
0   0   0
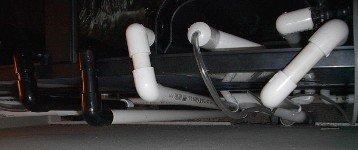
I have spent the last week working on plumbing.
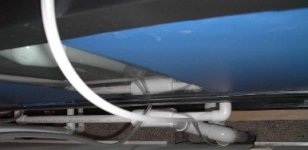
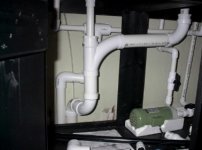
I have run the return lines and the drain lines, and one of the closed loops. The return is 1-1/2" pvc which Ts into two 3/4 outlets, and the drain is 2"pvc. The closed loop that I have plumbed just Ts into two returns on the bottom of the tank. The closed-loop that will run the squirt still needs to be made, and room behind the tank is cramped. I haven't gotten the AMP3K I ordered, but it hasn't slowed me down any... there is plenty of work to be done before I need it.

I have gotten the black pvc I ordered, and used it for the plumbing inside the tank. It looks great, but seems kinda cheap. I had one elbow break in my hand just from dry fitting some pipes, and I wasn't pushing very hard. I'll post a pic of the plumbing inside the tank once it fills up, it is about 45% full now. Hopefully by this time tomorrow.

I have decided to go open top on this tank, and I will suspend the lights over the tank. I'm tired of trying to make the tanks look like furniture, this is cooler than furniture. I also want to be able to get to everything easily.
 

Attachments

  • behind the tank.JPG
    behind the tank.JPG
    17.1 KB · Views: 6,198
  • under da tank.JPG
    under da tank.JPG
    23.9 KB · Views: 6,194
A

Anonymous

Guest
Rating - 0%
0   0   0
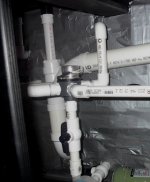
Today I finished plumbing the second closed-loop. I decided to mount the squirt underneath the tank so everything would be easier to get to. The first closed-loop is running now and doesn't leak, hopefully this one won't either.

I have hit the phase of the project where I begin to question myself. I think, "what if I didn't make the plumbing complicated enough?", or "what if I made this tank too easy to take down when we move?"...
 

Attachments

  • both closed loops.JPG
    both closed loops.JPG
    42.7 KB · Views: 6,228
A

Anonymous

Guest
Rating - 0%
0   0   0
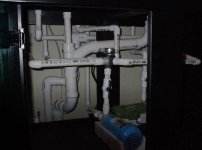
Well, both closed-loops are up and running, and neither one of them leak! There is a harmonic hum to the plumbing which will get old soon, but I think I can insulate the stand enough that it won't be untolerable.

Once the tank is up to the correct temp/sg I'm going to start moving in some live rock, and I will probably order some new live rock and cure it in the tank. In the mean-time here is an updated picture of the back of the left side of the tank.
 

Attachments

  • behind the tank2.JPG
    behind the tank2.JPG
    14.2 KB · Views: 6,196
A

Anonymous

Guest
Rating - 0%
0   0   0
The tank is now full of water at the proper SG/temp and has a bunch of live rock in it. I am going to order some new live rock tonight, and hopefully by the end of next week I can move some fish into it.

I am very pleased with how much circulation the two closed-loops create in the tank... plus the squirt ROCKS! Many thanks to Righty for recommending it. I got my Amp3k a couple of days ago, and this weekend I am going to build an intake pre-filter and finish running the return line to the tank. Once that is done I am finished with the hardware side of the tank, with the exception of the canopy and lighting.

The 2 Mak4s were pretty loud when I set them up, but I put pieces of rubber matting between every place where two pipes touched, or a pipe touched the stand or tank, and that made a huge difference in the amount of sound the tank made. Then I insulated the stand with cardboard scraps and duct tape, and now the tank is quiet enough for my purposes. The pumps make less noise than my old canopy fans, and they never bothered me too much.

Here is a pic of my super DIY stand insulation.
 

Attachments

  • stand insulation.JPG
    stand insulation.JPG
    30.7 KB · Views: 6,173
A

Anonymous

Guest
Rating - 0%
0   0   0
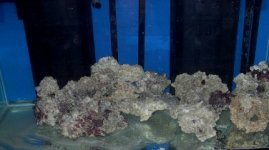
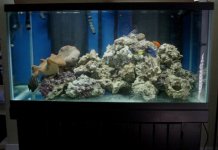
Here is a pic of the inside of the tank. Not much to look at, right now this is just liverock that has been in my sump under no light and will be baserock. Despite looking like a big pile of rocks, very little of the rockwork is actually touching the bottom.

You can see the returns for the closed-loops that blow across the bottom. One of them runs along the far right-side of the tank, and the other returns through that arch in the back of the rock work in the center. The other two pipes are drilled with a bunch of holes and serve to feed the closed-loops. I didn't have the tank drilled to run the closed-loops, I just ran the inputs up and over the side.

I like the way the black PVC looks. But best of all I like that I only have a single electric wire running into the tank, and that is for the heater that is between the two pipes on the right-side of the tank, and isn't really noticable in this pic.

Next I am going to order some new live rock, probably this Monday, and leave that in this tank for a few days, then I'll do a major waterchange on this tank and then start up the main pump. Once that is running I can move all the livestock back upstairs.

This is a crappy shot, but it gives some idea of what the tank is looking like. The 155 is still in my living room right behind where I am standing, so I have to be really close to the tank and kinda looking down, so it gives the shots an awkward perspective and makes it look smaller than it does in person.
 

Attachments

  • baserock.JPG
    baserock.JPG
    24.4 KB · Views: 6,153
A

Anonymous

Guest
Rating - 0%
0   0   0
We have gotten the new live rock we ordered from Premium Aquatics. We had it shipped ground, which we had never done before, but we live pretty close to them. The rock arrived safe and sound, very well packaged and smelling as sweet as (some sweet smelling metaphor).
I'll post pics of the new rock-work once I get home. It has been in the tank about a week. Currently the tank only houses a pair of cardinals.

The Dolphin pump I had ordered couldn't hold water. I spent a long time polishing up the plumbing, and when it came time to fire up the main pump I primed the pump by pouring water through the returns on the tank, and when I went back down stairs the water was pouring out onto the floor. Apparently the pump was missing a seal... or had a seal that was badly damaged. Anyway, we contacted PA who told us that they had contacted Dolphin, and Dolphin would be sending us a new pump. I have no idea how long this will take, I am hoping it will arrive soon.

That is all for now, no pic this time.
 
A

Anonymous

Guest
Rating - 0%
0   0   0
The pump situation has finally been resolved and we received our replacement from Dolphin a couple of days ago. I got everything hooked up and running, and everything works! There were about three of the solvent welds in the plumbing that seeped a little bit of water. I re-covered the outside of the connections last night with heavy globs of PVC cement, and when I started up the pump again this morning none of the connections seem to be leaking... we will see how long this lasts.

I'm in the process of moving the livestock back upstairs, and hopefully this weekend I will get a good shot of the tank.

Here is a pic of the sump:
 

Attachments

  • The Sump.JPG
    The Sump.JPG
    17.1 KB · Views: 6,074
A

Anonymous

Guest
Rating - 0%
0   0   0
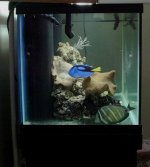
I finally got some pictures of the tank itself. I didn't clean off the glass and I have a crappy camera... resulting in low quality pics. However it still gives an idea of what the rockwork looks like.

So far I have put in a couple of toadstool leathers and a gorgonian. They were just put into the tank, and they look like leathers who were just put into a tank. They will need a little time to come to terms with the fact that they have a new home. The lighting on the tank currently (in these pictures) is not the lighting that will stay on the tank. Currently there is just two 96 watt PCs on it... it will soon have MH, but I haven't made up my mind what type. The most cost effective way would be to build a canopy for the set of 175 watt MHs that I have... but what I really want is to buy double-ended 250s for it. So I will make this decision soon...
 

Attachments

  • First Corals.JPG
    First Corals.JPG
    42.7 KB · Views: 6,076
  • First Corals - Side.JPG
    First Corals - Side.JPG
    27.9 KB · Views: 6,073
A

Anonymous

Guest
Rating - 0%
0   0   0
I have finally decided what to do about the lighting and, of course, it wasn't any of the options I had previously considered. I decided to go ahead and order a complete canopy system that sits on the edges of the tank. I went with the 48" USA Current Outer Orbit set-up. It has 2 x 150 watt DE halide and 2 x 130watt PC actinic, plus 6 LED moonlights. More than anything I chose this hood because it was the easiest. No canopy to build and no messing around trying to suspend lights. I think it should look really good with the over-all look of the tank. I ordered it earlier this week and it should be here on Monday. This is it if anyone is interested:
http://www.marinedepot.com/md_viewItem. ... ct=CU01042


I have added one more finger leather to the tank... it was given to me as a Nepthia, but I don't know if that is what it actually is. Everything else coral-wise is still in the sump.

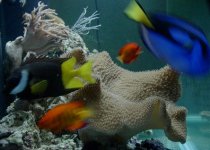
All of the fish that will be going into this tank are already in this tank, and they are:

A Sailfin Tang
A Hippo Tang
A Foxface Rabbitfish
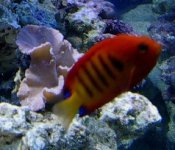
A Pair of Flame Angels
and a Banggai Cardinal (although he may get a mate in the future)

That is all for fish. I tried to design the tank so the tangs had maximum swimming room, and they seem to be very comfortable. My Hippo tang finally took a piece of Nori out of my hand for the first time ever the other day... I have been hand feeding those tangs for years and the Sailfin eats right out of my hand, but the Hippo has always been more leary. I feel like we have made a breakthrough and are surely going to begin long emotional talks about our feelings.

As soon as I stop throwing all of my money at this tank I will buy a nicer digital camera. Anyway, here is a pic of some of the new residents. The flames are really tough to get into the same frame so I take what I can get.
 

Attachments

  • Flames and Foxface.JPG
    Flames and Foxface.JPG
    45.1 KB · Views: 6,044
A

Anonymous

Guest
Rating - 0%
0   0   0
Yeah it really is Chris.
There is an amazing amount of flow in the tank. Nothing settles out in the display and the detritus is easily collected in the sump. And I really like the way the bare-bottom/open-top combo looks, and it is just plain sexy to say.
I'm really itching to get these new lights though. I took off of work on Monday so I can be here when they arrive and I can start moving everything up. I hope they ship ok, I have never ordered anything so expensive online before.
 
A

Anonymous

Guest
Rating - 0%
0   0   0
Thanks Wazzel.
Having a basement sump is really nice, especially when I dump 10 gallons or so of water on the ground because I was doing something stupid (which I'm prone to do).

I got the lights yesterday and I love them. The cooling fan is almost silent, which was a relief because that seemed to be the one complaint a lot of people had about the Current USA stuff. The lights look great, I love the color. I was really impressed with how much blue light the 2 x 130watt PCs put out, and to be honest I didn't know that there were 130 watt PCs prior to looking into getting this hood. The corals are very relieved to finally be under some real light. Tonight when I get home from work I will try to get a good picture of the full tank under the new lights.

Oh... and I love the moonlights. I have never used moonlights before and I didn't know what I was missing.
 
A

Anonymous

Guest
Rating - 0%
0   0   0
wait a minute here

are all three/no four of those tanks in the basement your sump?

how much water is there in the entire sump system?

Nice looking tank by the way
 
A

Anonymous

Guest
Rating - 0%
0   0   0
Yeah thats all sump baby.
The tank on the right also doubles as a quarantine tank... it disconnects from the rest of the system quite easily. I don't know what the total volume is. I think all of the tanks and equipment (including large CA reactor not shown in that pic) total about 250 gallons. But none of those tanks are filled up all of the way, so the actual amount is probably a good deal less. Maybe 180-200 gallons? I don't know.

I have been trying to get a good pic of the entire tank and have had no luck. All of the pics have looked terrible and all washed out. I'll try again tomorrow. I did get a decent pic of a little cabage leather frag. I am moving the corals up slowly from the sump to insure there are no pest anemones and so I can spend a lot of time planning the aquascaping as I go.
 

Attachments

  • cabbage frag.JPG
    cabbage frag.JPG
    20.6 KB · Views: 5,990

Sponsor Reefs

We're a FREE website, and we exist because of hobbyists like YOU who help us run this community.

Click here to sponsor $10:


Top