
Aquarium keeping as an industry has been growing steadily for the past decade and we are witnessing new inventions, as well as updates to well-known products being unveiled on a regular basis. What we tend to forget is that a lot of the gear we now take for granted in our home aquariums started off as elements of much larger commercial systems. The equipment found in facilities such as public aquariums, fish hatcheries, or even water treatment plants may seem alien to the average hobbyist, but it is often in these applications where new ideas are born, and later tested for their usefulness at the hobby level.
neptune Systems flirted with the idea of a flow monitoring device as far back as 2015, when they unveiled early prototypes of the module and sensors. Once a feature found only in public aquaria and commercial systems, the manufacturer promised to bring flow monitoring to the masses. Fast forward to 2017 and it’s finally here- the FMK, or Flow Monitoring Kit, the latest major addition to the apex controller family of products and a device that’s currently in a category of its own, as no other manufacturer has anything even remotely resembling what Neptune Systems has come out with. Let’s take a closer look and find out if flow monitoring is something this hobby can benefit from.
KNOW YOUR FLOW
When I first learned about neptune Systems’ plan to release a flow monitoring device, I initially labeled it “pump manufacturers’ worst nightmare”, not without a reason. The magical three letters GPH (gallons per hour or LPH, liters per hour, for anyone outside US) were, at that time, nearly impossible to verify. Aquarists were choosing pumps for their systems based completely on a number printed on the box, believing blindly that they get the flow rating advertised by the manufacturer, or alternatively, ignoring that value altogether knowing it doesn’t mean anything if it’s untestable.
At the heart of the flow monitoring device lays an inline (plumbed into the piping through which the fluid moves) flow measuring sensor, which presents a way to check a parameter that used to be largely unknown to the average hobbyist. An immediate conclusion drawn from a quick look at the daily flow value graph is that the actual flow any given pump produces is generally way under the advertised gph number. Yes, these arbitrary values that aquarium pump makers present are a bit misleading, but I find it hard to blame those manufacturers for “selling dreams”, unless they seriously under perform at their marketed ability to push water. The reason those pump models are tested for flow in laboratory settings and pushed to their limits to produce maximum flow before they fry is that the end results equal sales. The higher the gph value for a given pump versus the competition, the more likely it is to sell. It’s kind of like when car manufacturers advertise their cars using the horsepower value- nobody ever uses the full extent of power the engine can output, yet everyone wants the car with the highest possible horsepower that they can afford to buy. In reality, flow value drops significantly with the introduction of any possible obstacles in its way from the pump’s outlet to its intake. Head, or the vertical distance between the pump and the tank it’s pumping water to, kills a great amount of GPH. The pump now must fight gravity and the parasitic drag of the plumbing, and it gets worse as the head distance increases. Then we have the piping itself, more precisely how it is designed and assembled. Any turns, elbows, manifolds, and valves incorporated into the aquarium plumbing grid restricts flow by pressurizing the system and making it harder for the pump’s impeller to move water through it.
In conclusion, while adequate flow is an essential part of any successful reef tank, there was no physical way for a hobbyist to determine the actual volume of water that went through his/her aquarium plumbing, short of a bucket test and a stopwatch. Until now.
THE NEW PARAMETER
There is one question almost everybody in the hobby asks when confronted with new aquarium specific technology- “Why do I need this?” It’s no different with neptune Systems FMK and the shortest answer, as with most new equipment coming to the market is “You don’t…” (just as it is possible that a person can live a long and healthy life without ever checking their blood pressure); there usually is a “but”, and in case of FMK, it’s a convincing one. Sure, any aquarist who is successful in the hobby and had a thriving reef tank before such technology was available can do without it and continue to maintain a beautiful reef aquarium, but that’s not the point. New aquarium technologies bring changes that, among other things, automate maintenance and monitoring, so hobbyists can spend less time working on a tank and more at enjoying what’s inside of it. So, the real question is “What are the benefits of monitoring flow in the tank and how can I use them to improve my tank”
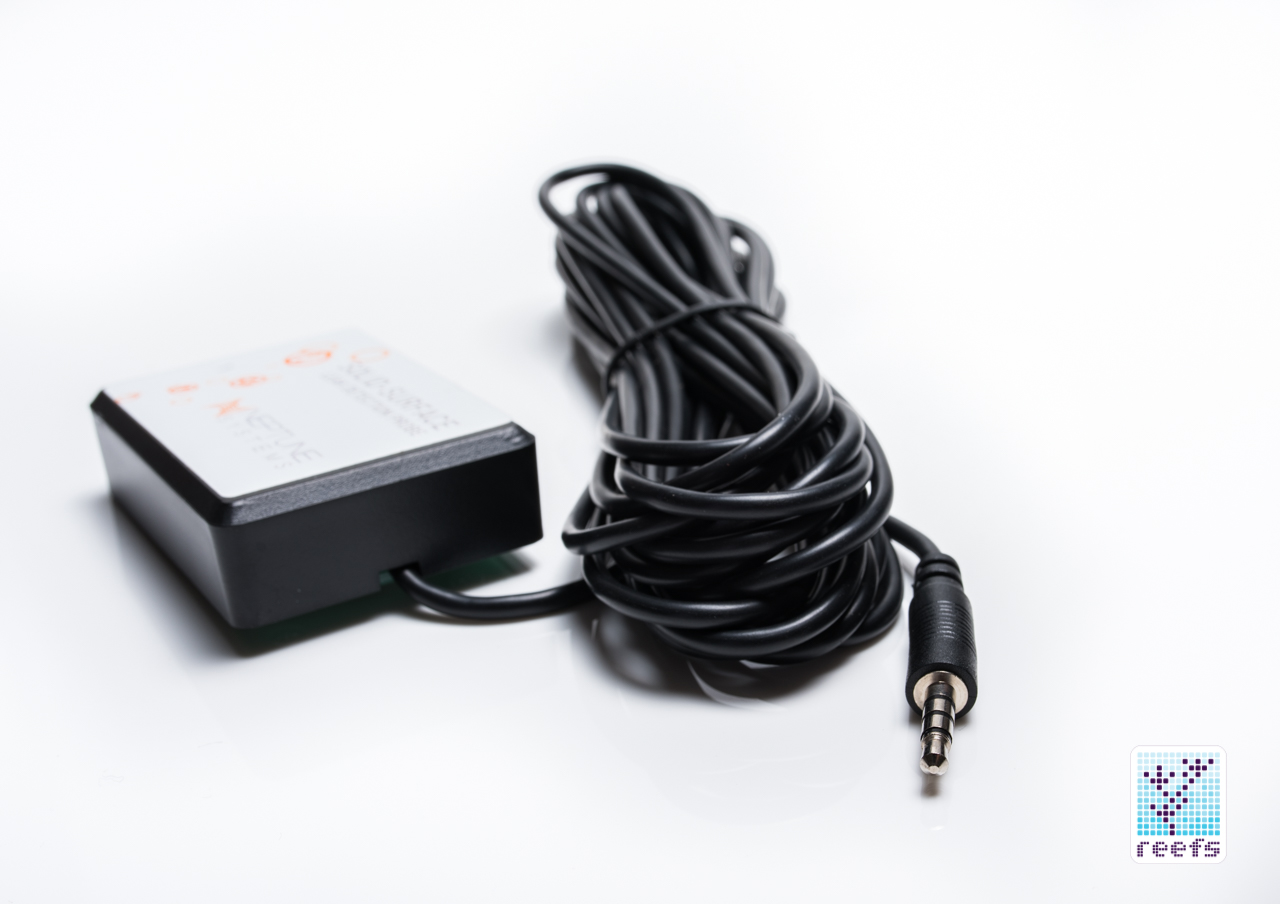
FS-50 Flow Sensor
The list is long, but let’s start with the obvious- this piece of equipment gives us more control over our aquariums. Just imagine a future where instead of reading on the label on, for example, GFO media container “Put media in areas of medium flow”, we will be informed that this type of GFO works best in flow range between 10-150 gph. It’s much easier to follow the manufacturer’s recommendation than engage in a frustrating game of guessing and blindly adjusting the water movement through the media. In addition to that, the longtime benefit of having a flow monitoring device is the knowledge, based on saved records, of exactly when the media gets clogged and needs to be checked and/or changed. But most of all, it’s cool, and it’s human nature to follow the latest trends in technological advancements, which FMK surely represents.
Flow monitors serve one more important role in the home aquarium- it can act as an early warning system, especially if the live time readings can be accessed remotely. A sudden drop in flow may indicate a major leak in the system or a return pump failure, and with a connection to an external controller, like the apex in case of FMK, these conditions can be addressed much quicker and possibly save the aquarist from a total disaster.
MONITORING FLOW WITH APEX

Fluid Monitoring Kit is a part of the apex Controller family of products and like most of what Neptune Systems makes these days, it cannot work without its central hub. If you happen to be unaware of what Apex is, I’d like to redirect you to my Neptune Systems WAV Kit review, where I dedicated an entire paragraph explaining the Apex Aquacontroller platform. Just like every other device in the family, FMK connects with the apex and becomes part of its “hive mind”, enjoying the full potential of the controller’s interface and its programming language. It works with all versions of the apex Aquacontroller- the Classic, Junior and the newest, 2016 model.
I’ve seen early prototypes of FMK at the neptune Systems booth at MACNA shows, and I thought I had a general idea of how this thing would look and what it would do. What surprised me when I received the information package from the manufacturer and then the actual device, was that FMK is much more than what I was expecting. To explain, I have to talk in detail about the kit’s central module, but let’s focus on the basics first and do some unboxing.
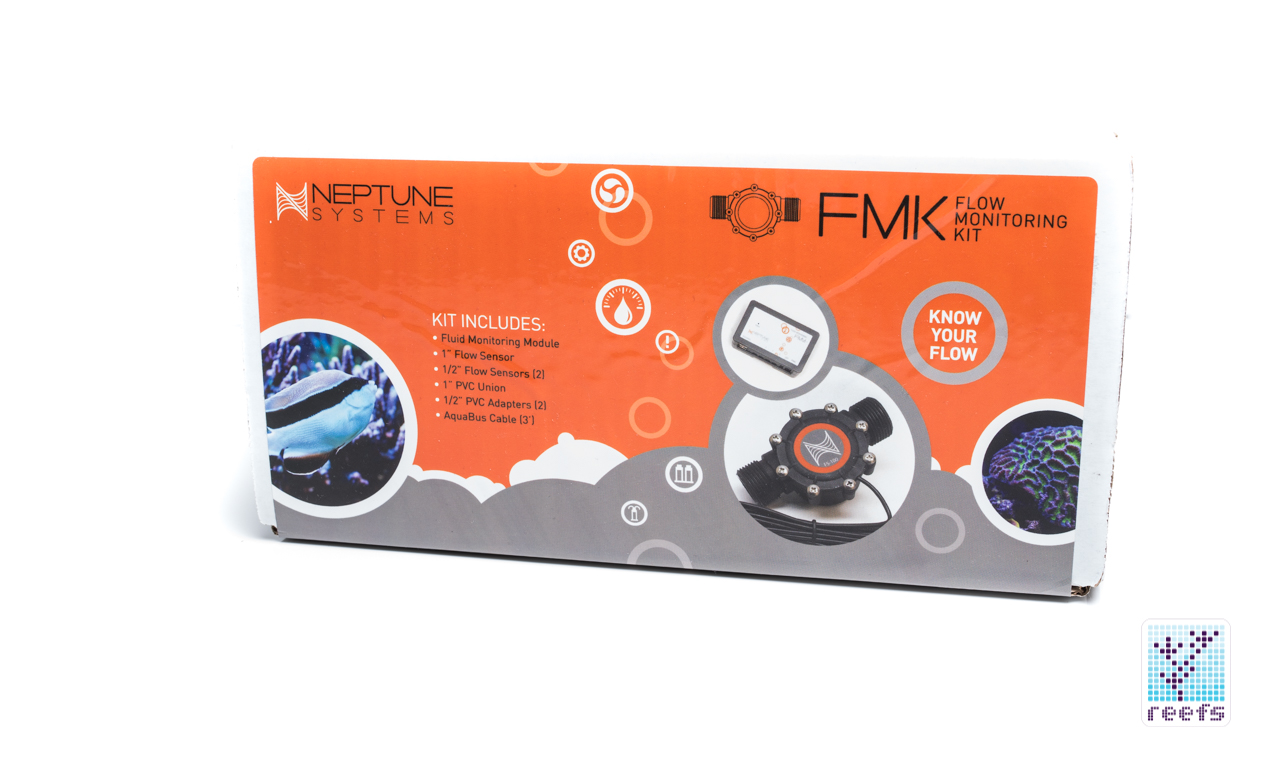
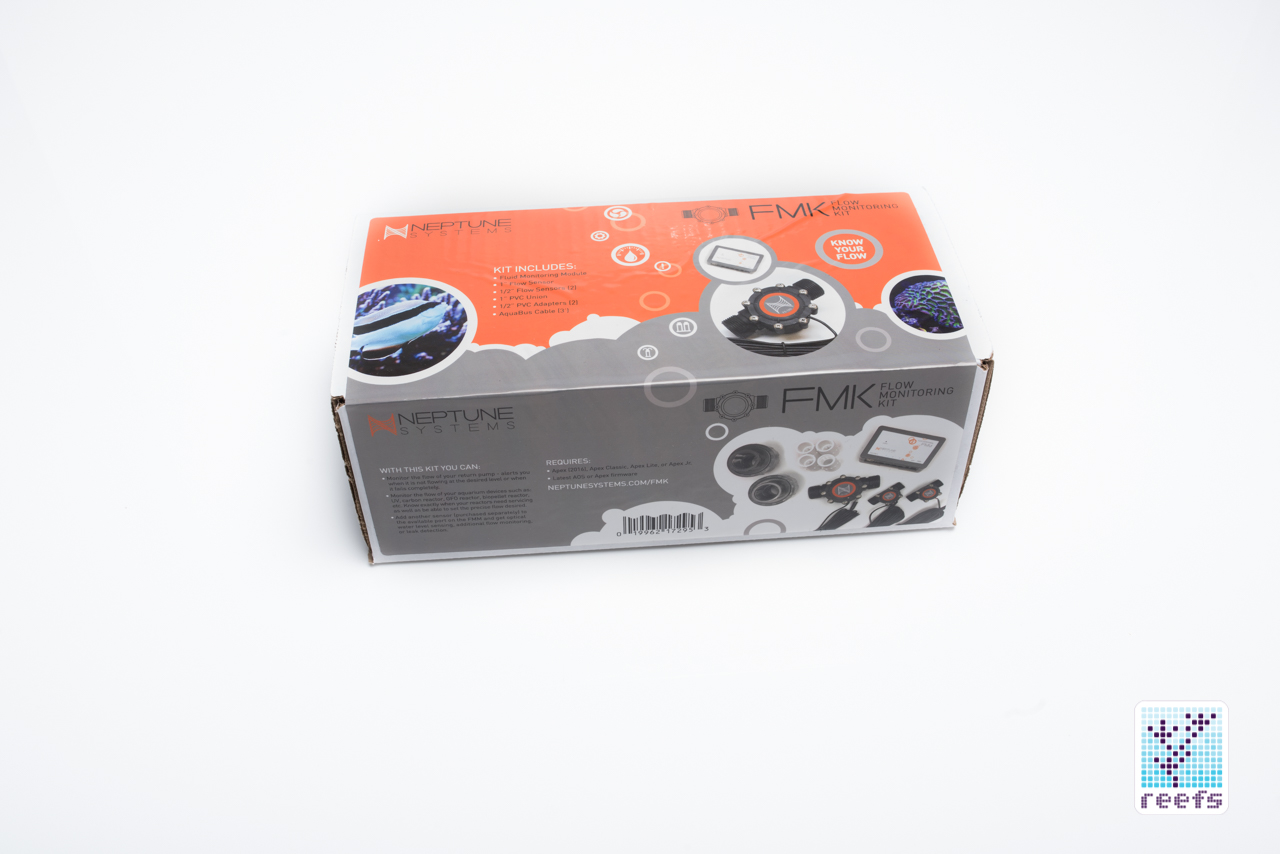
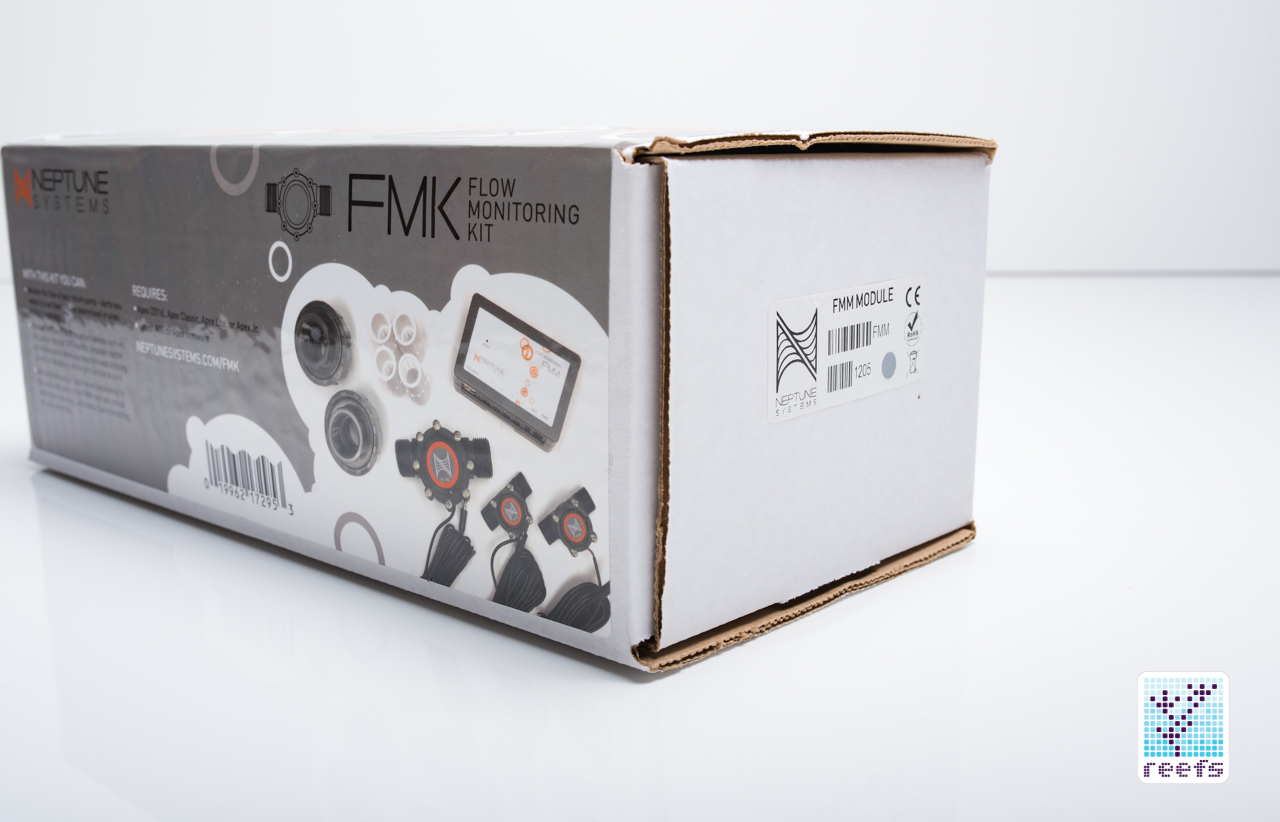
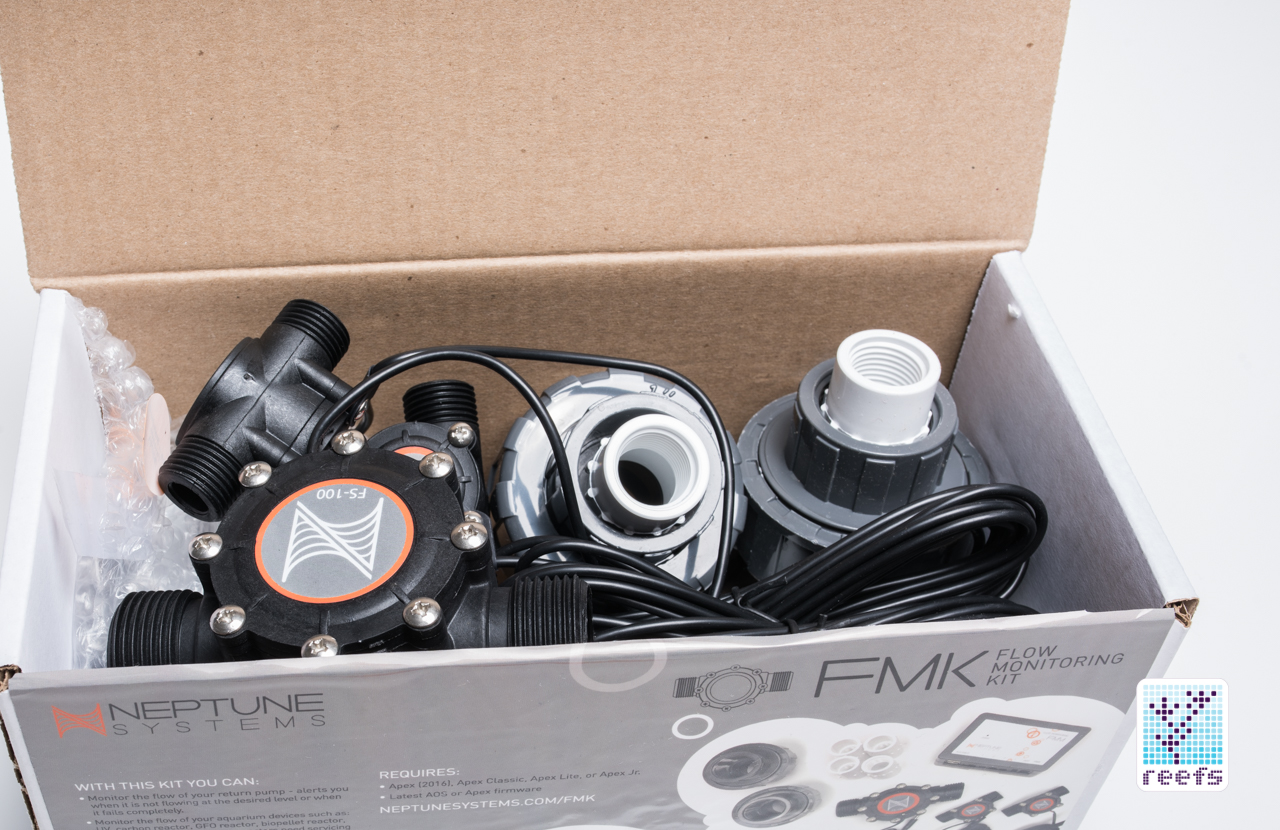
WHAT’S IN THE BOX
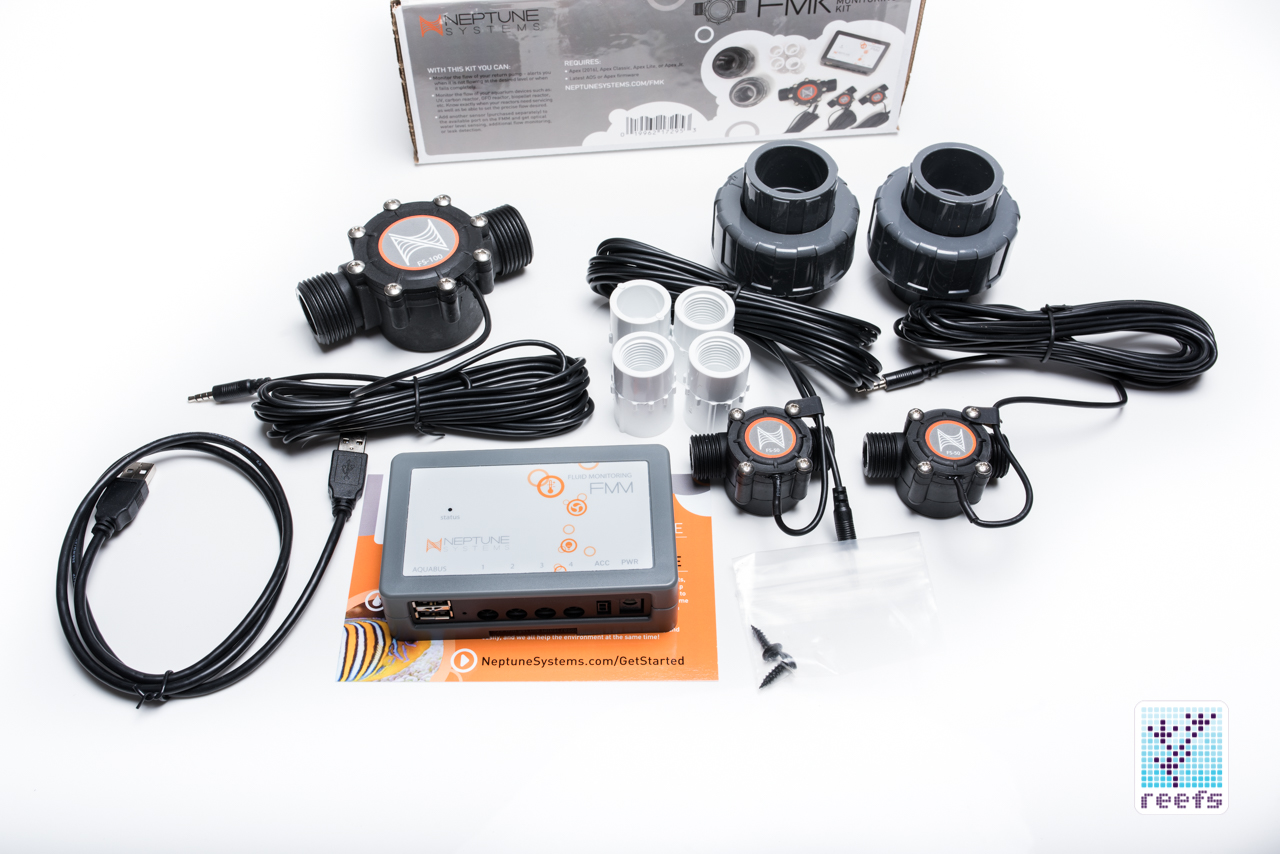
FMK Kit comes with:
- FMM Module with Aquabus Cable
- 1” diameter Flow Sensor with two schedule 80 PVC union couplings
- Two ½” diameter flow sensors with threaded/slip couplings
- Mounting screws
- Information card
FLOW SENSORS
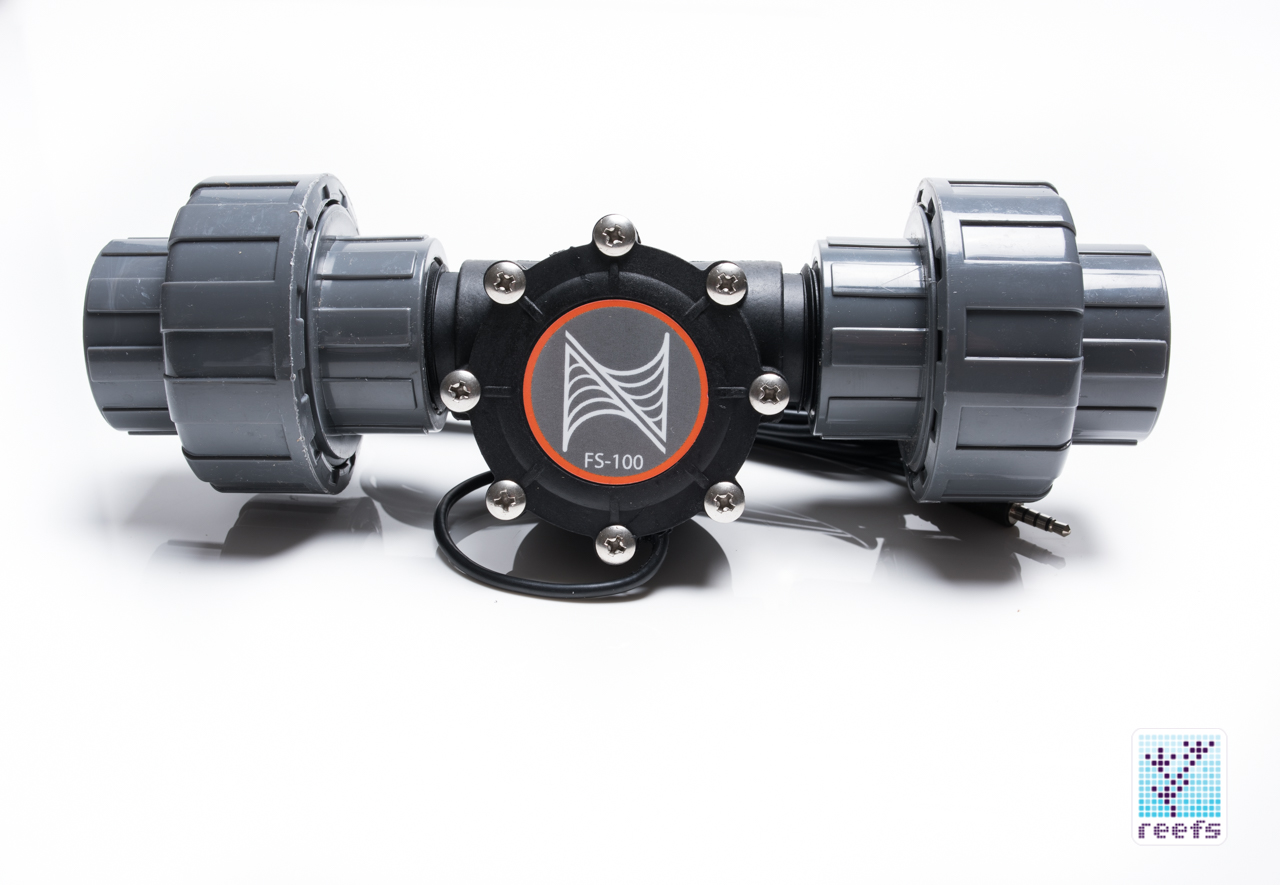
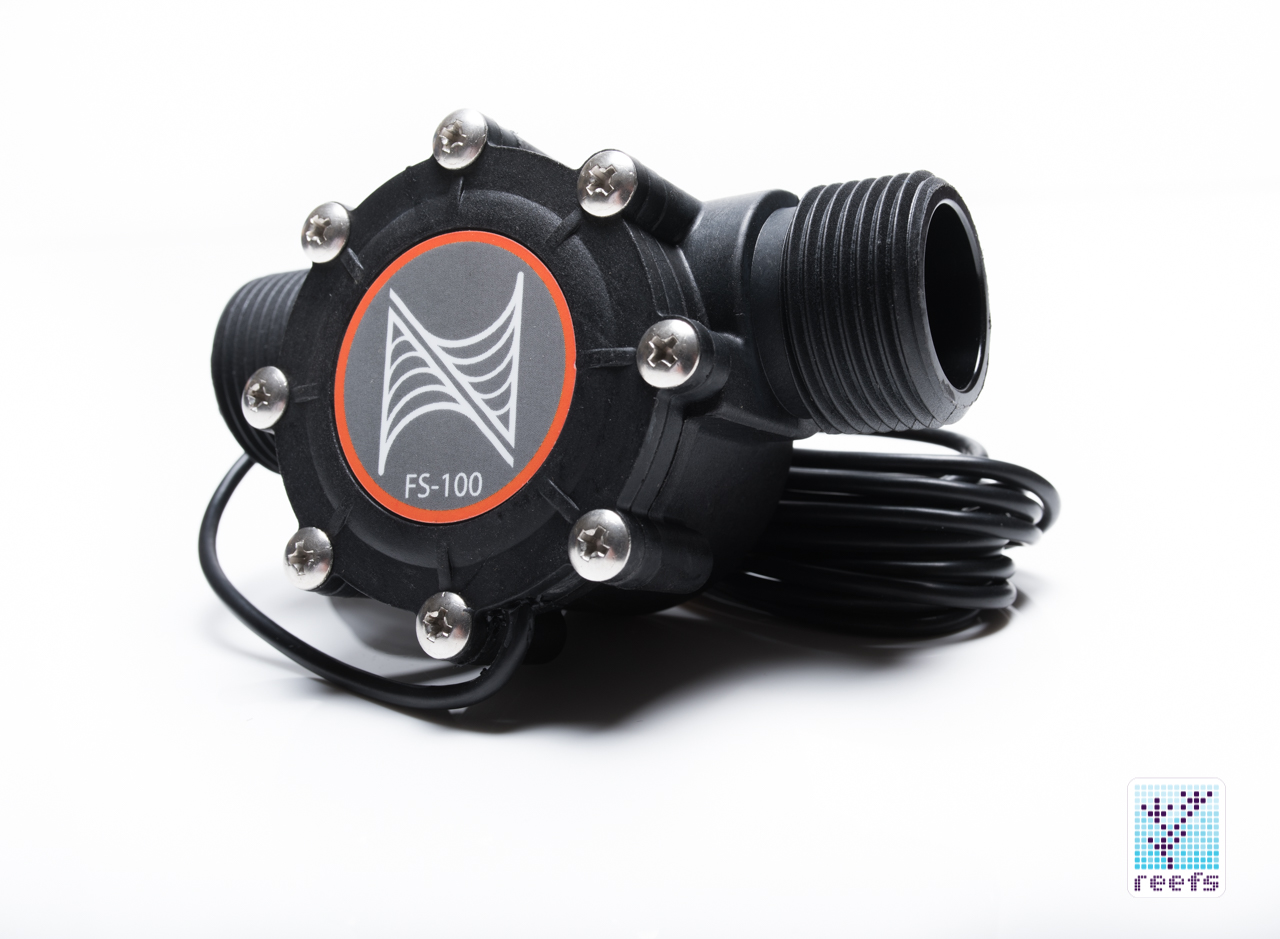
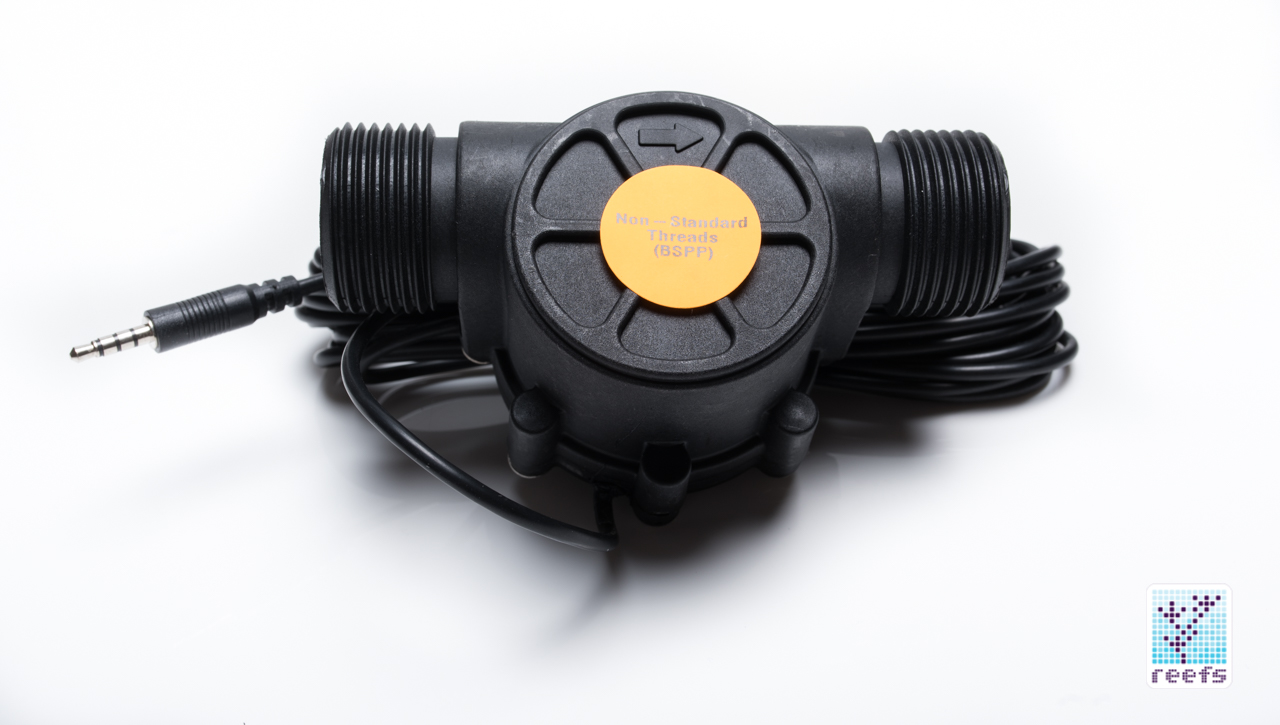
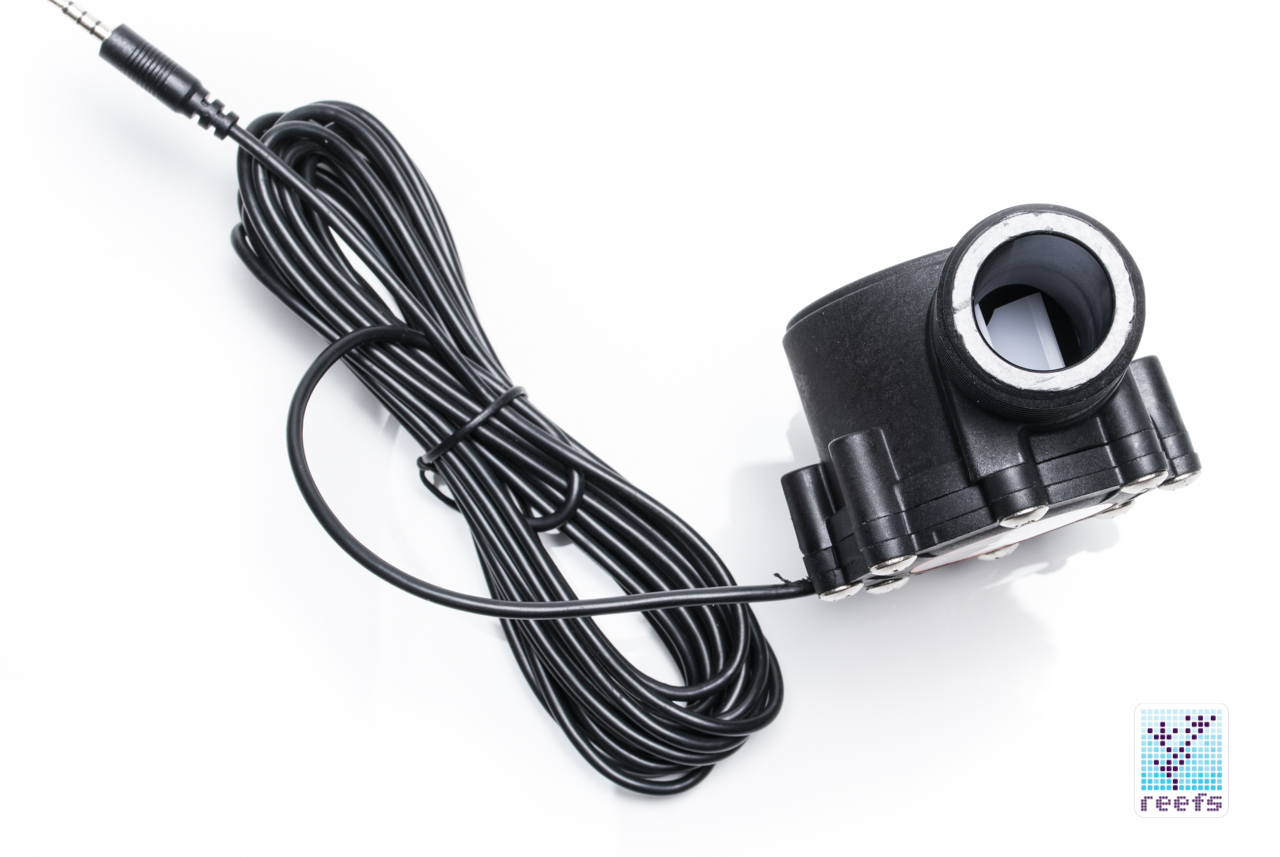
FS-100 Flow Sensor
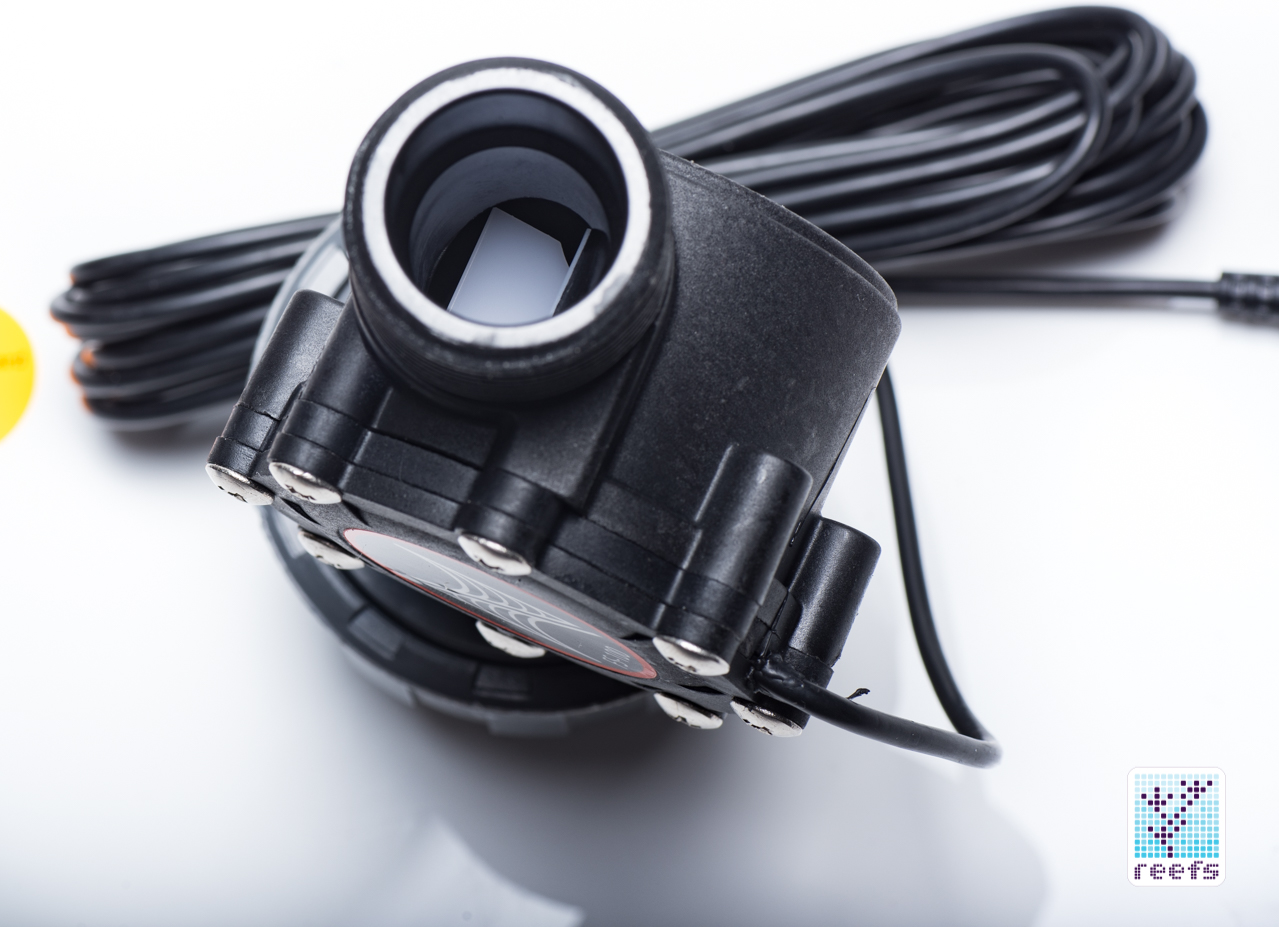
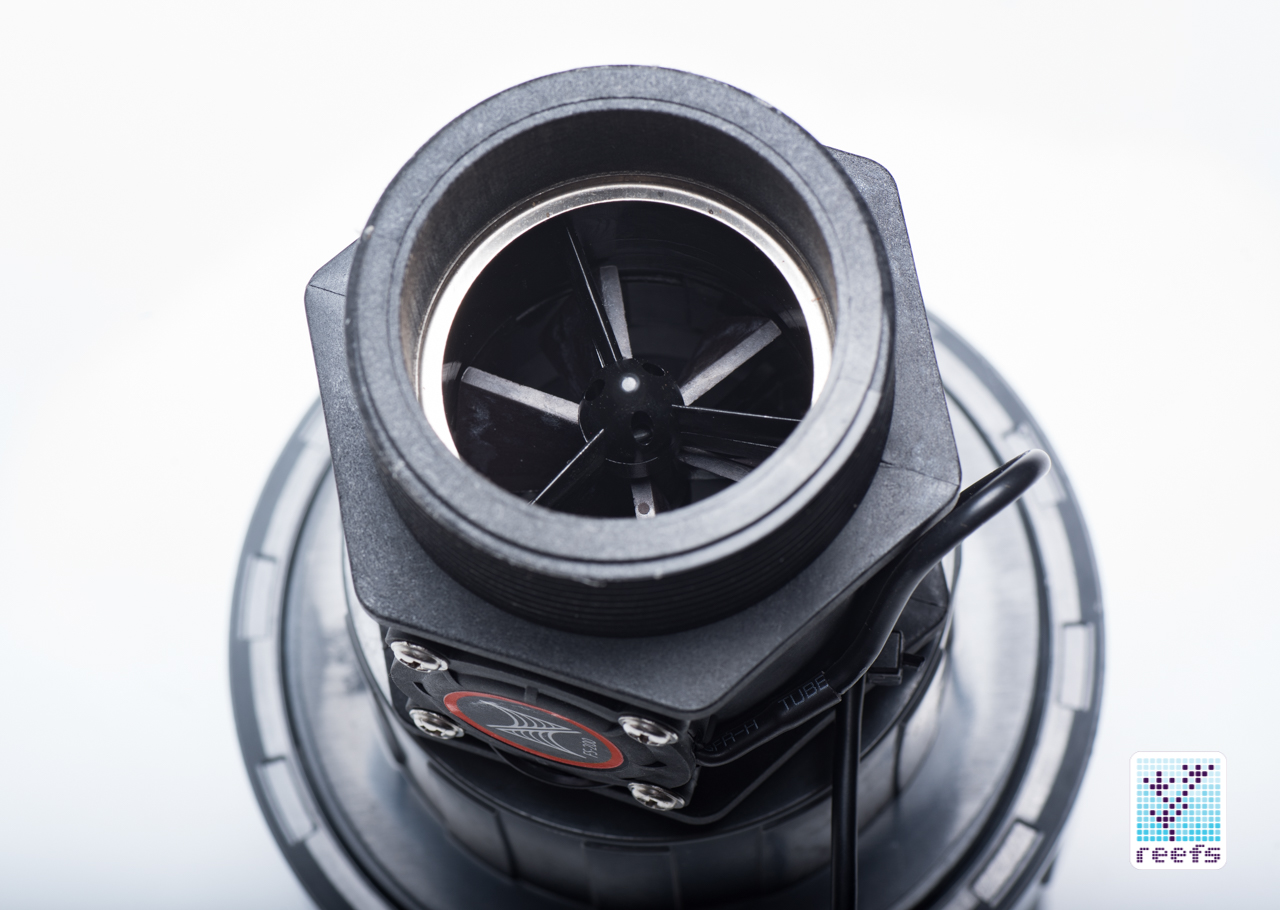
Flow sensors that come with FMK Kit are turbine flow meters; they are built around a small rotor (turbine) that uses the kinetic energy of a flowing fluid to spin the rotor. A built- in electronic chip counts the rotor’s revolutions and transfers the data to a tethered computer (the FMM module) to save it. The rotor’s blades are angled towards the direction of the flow to minimize the back pressure and therefore they are one-directional and must be plumbed correctly to work. There is a small arrow embedded on each sensor’s body that shows the direction that it needs to be installed. neptune Systems uses the industrial grade, heavy duty sensors found in commercial applications. They are completely sealed and water resistant (although you cannot use them underwater) and each comes with a whopping 16ft (5 meter) long cable with 2.5mm jack type plug. Four different size sensors are available, two of which come with FMK Kit (1” and ½”) and two that can be purchased separately (2” and ¼”). All these sensors except the ¼” one have British Standard Parallel Pipe (BSPP) threads on them, a worldwide standard when it comes to pipe threading, thus neptune Systems includes the earlier-mentioned adapters for each sensor that allow for use in NPT (US standard) piping.
The 1” sensor (pictured above) that comes standard in FMK model number FS-100 is the most versatile size that can be used on most home aquaria plumbing systems as a main flow sensor. It can be easily converted to ¾” pipe by using a 1” to ¾” PVC reducers available in most plumbing supply stores. The two schedule 80 PVC union couplings have a BSPP thread on the sensor side and 1” slip socket on the other. Fortunately, the union nut has identical thread to a standard 1” union fitting, so it can be reused on a different size piping without the need to purchase new union valves. FS-100 works on a 150-1500 gph flow range (570-5700 lph).
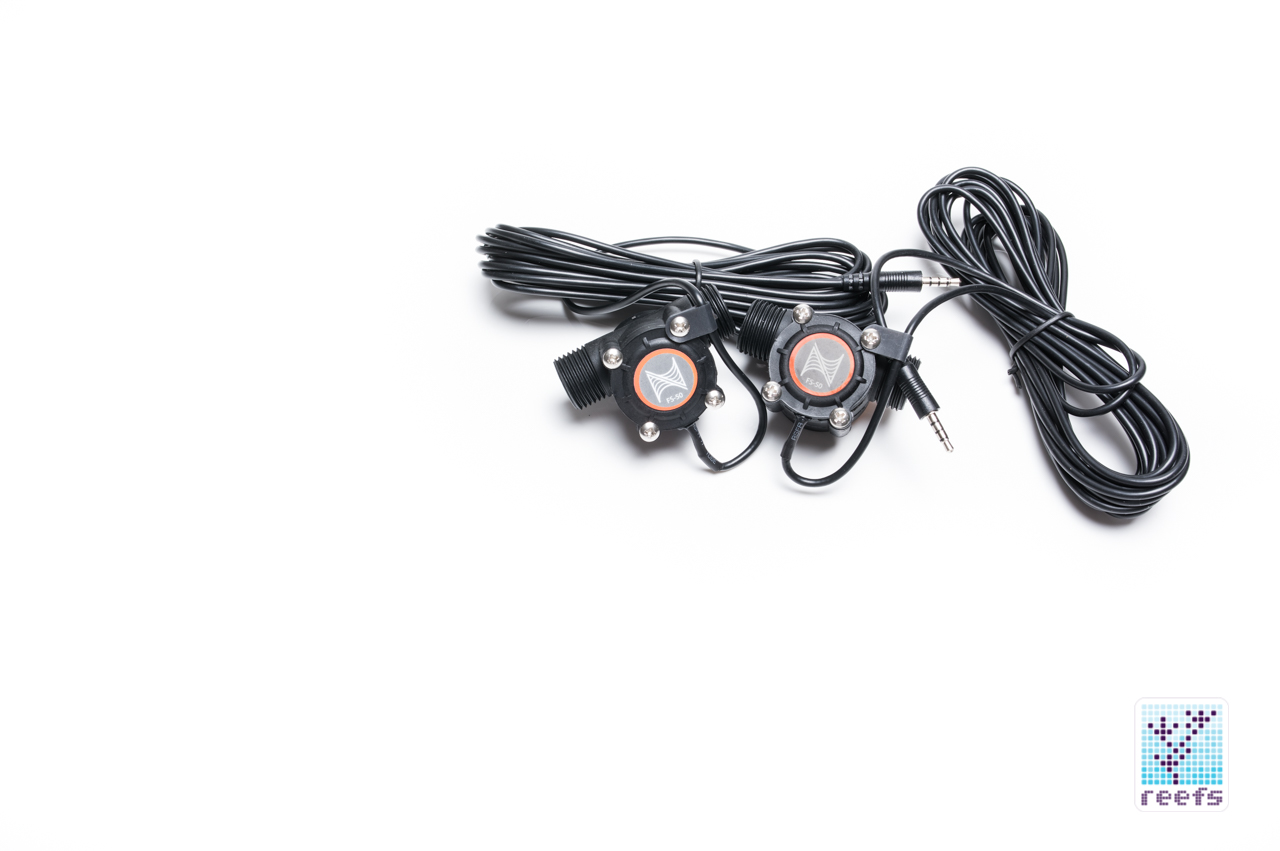
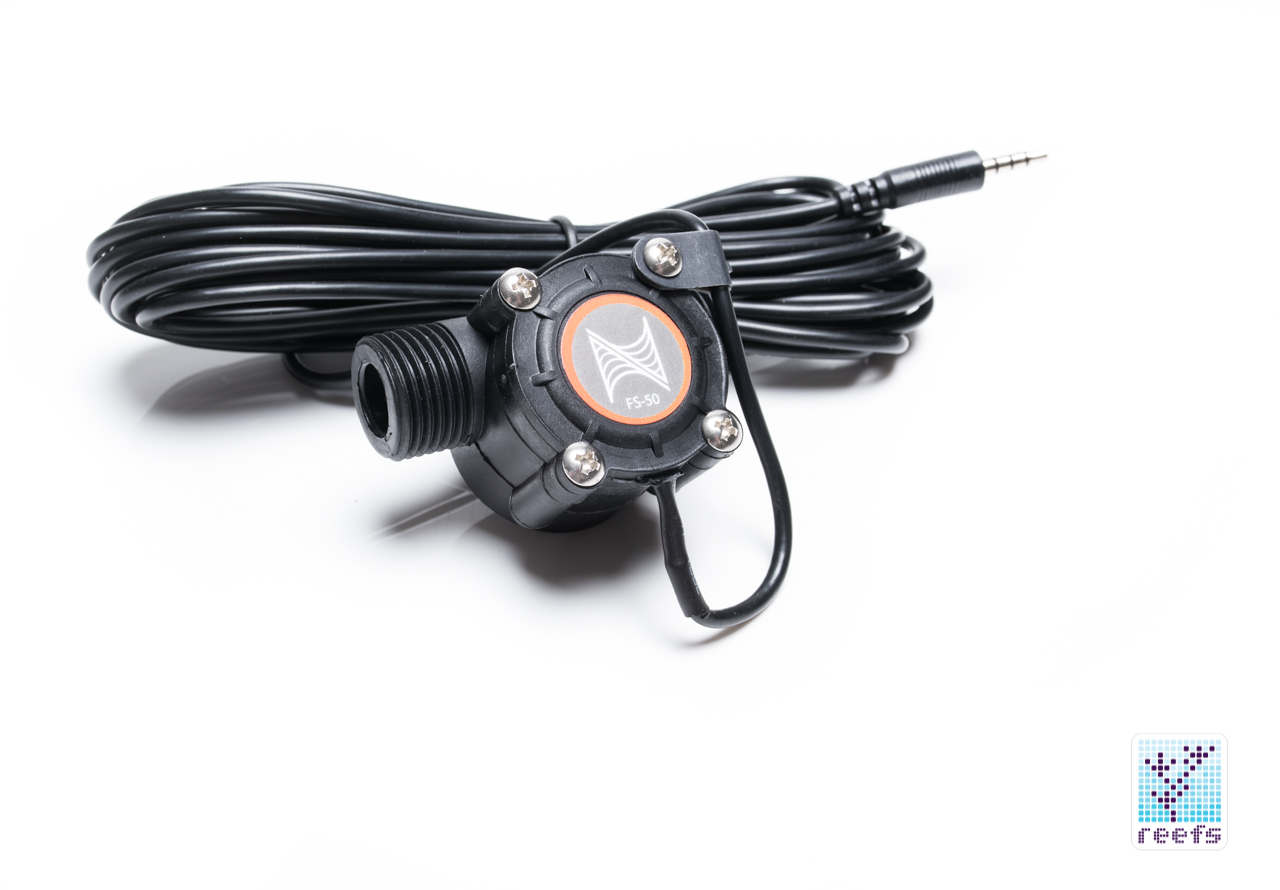
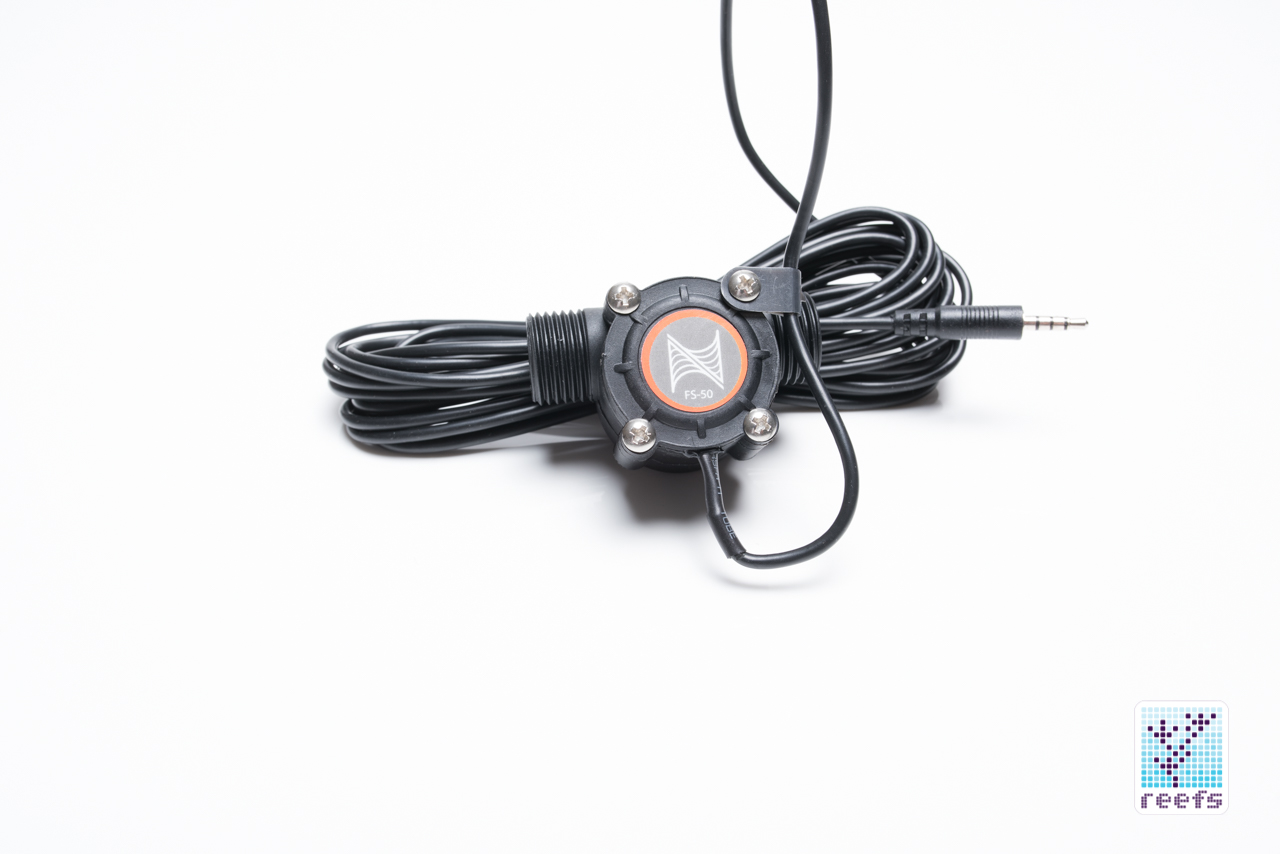
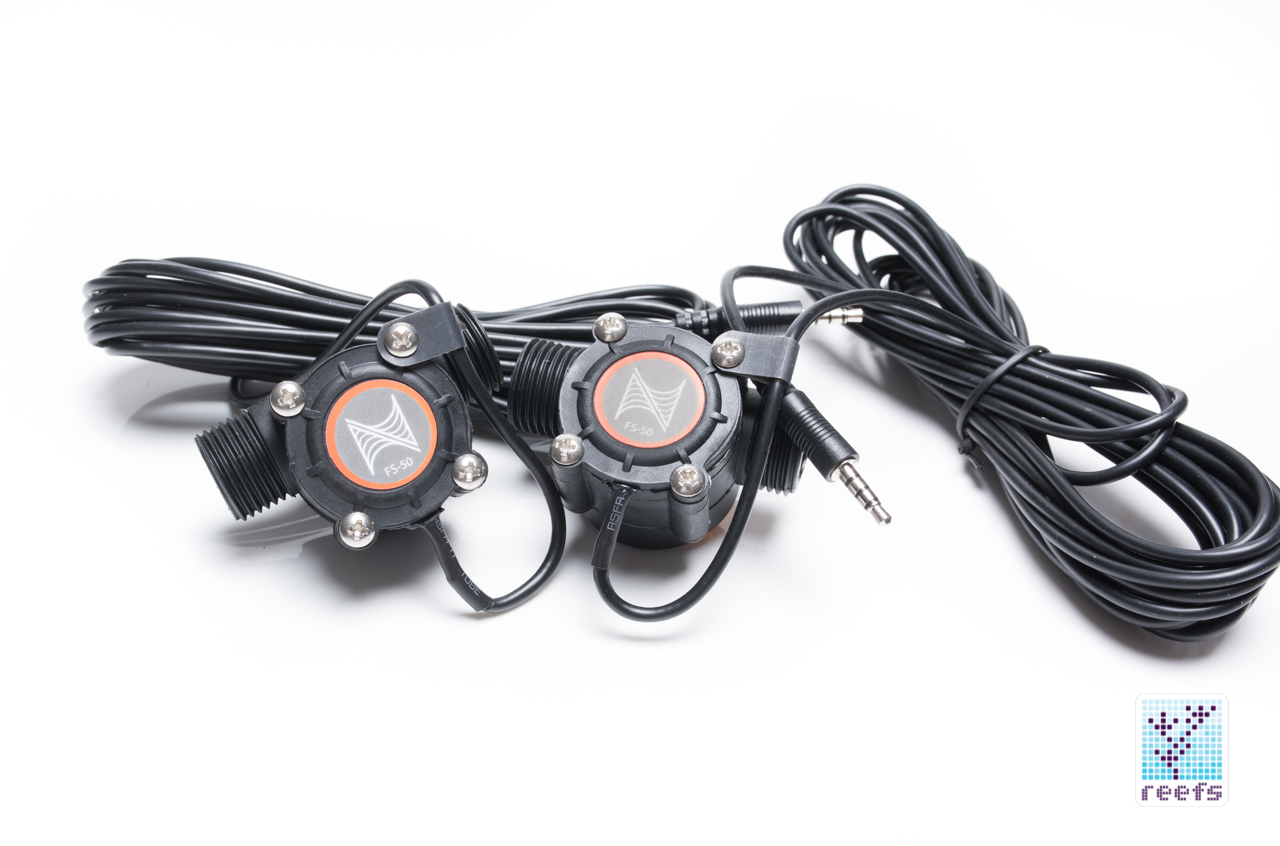
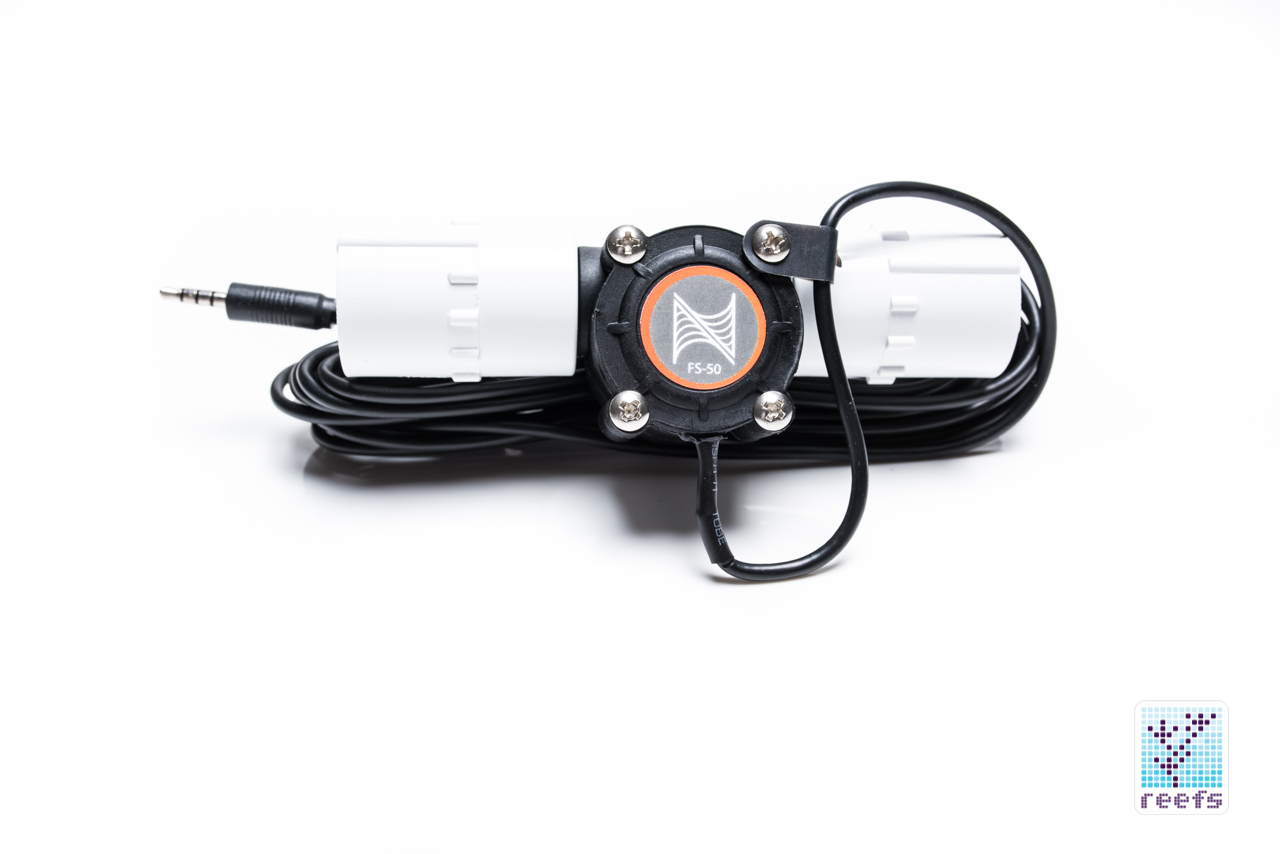
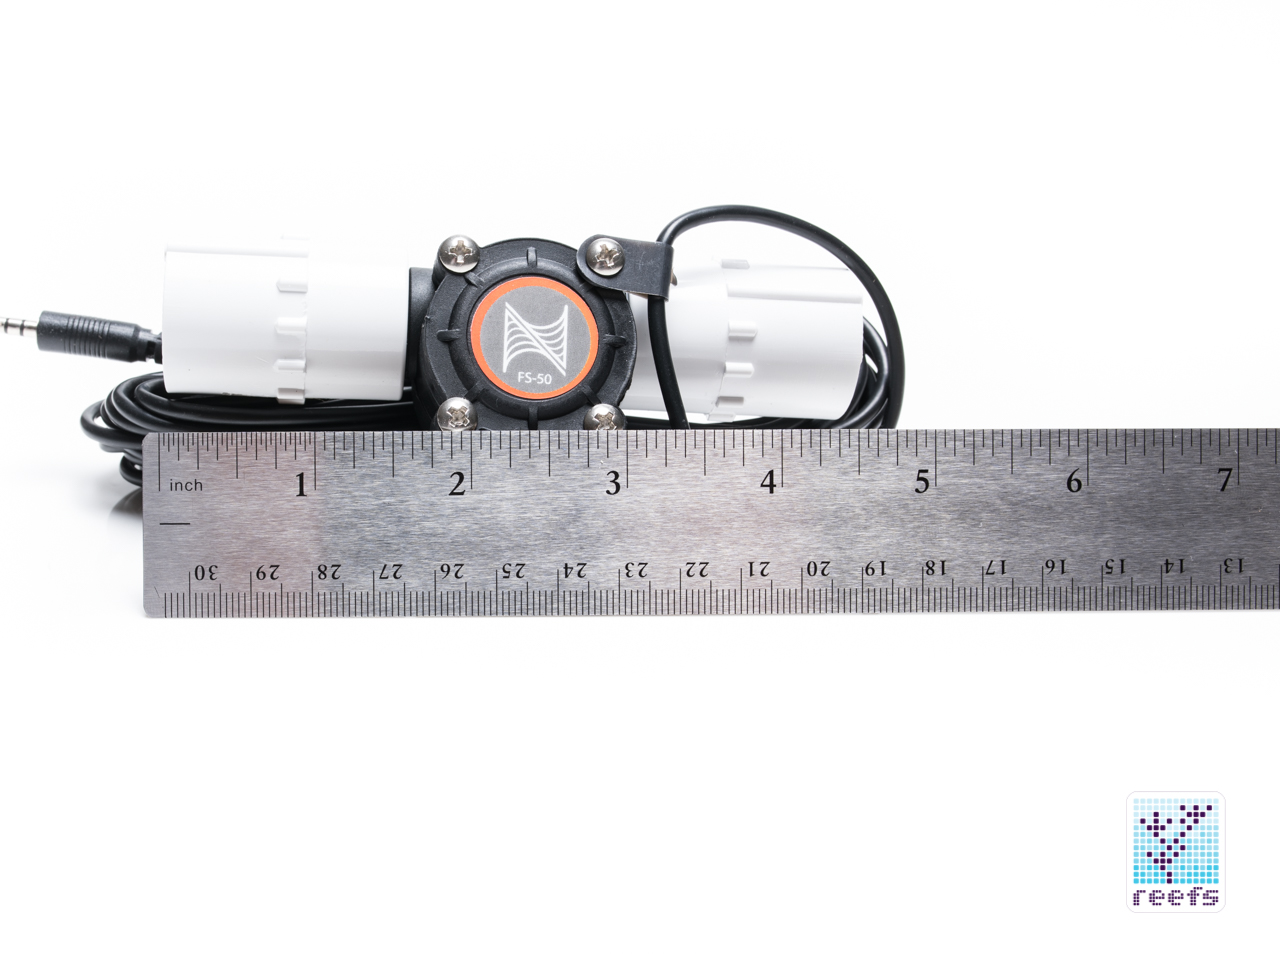
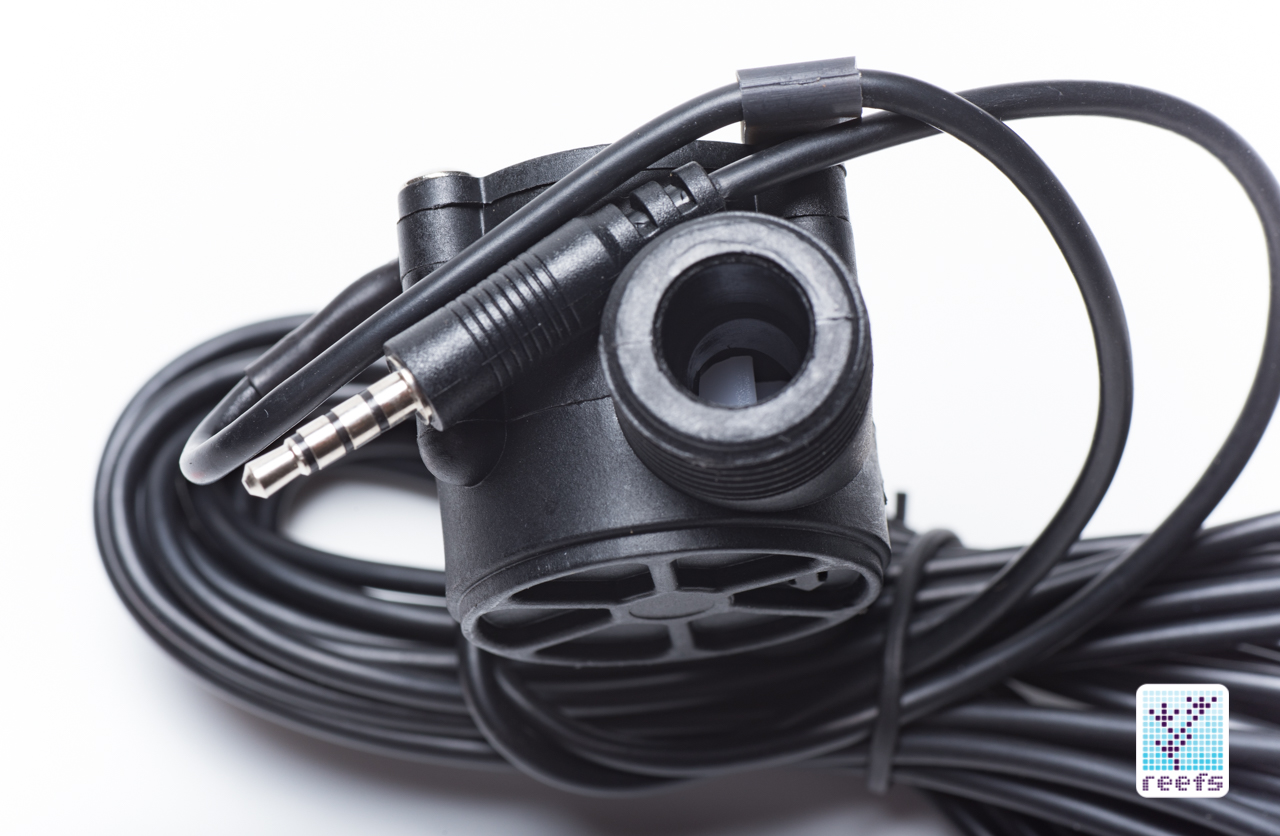
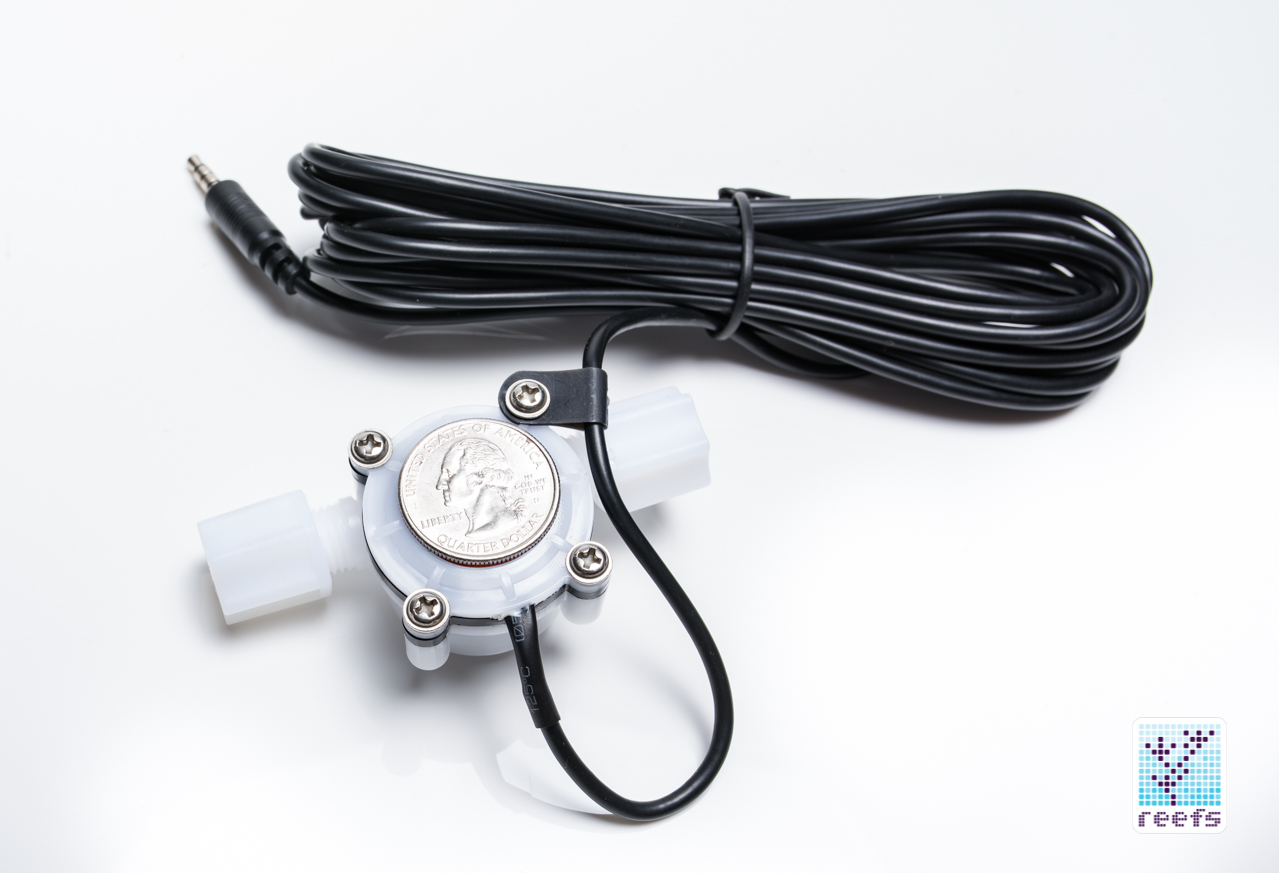
FS-50 Flow sensors
FS-50, neptune Systems ½” flow sensor, comes with two Schedule 40 BSPP x ½” slip adapters and is a perfect match for monitoring flow through media reactors and other equipment that uses ½” size plumbing. It can also be converted to be plumbed into ½” or 5/8” tubing; I’ll show how to do it later in the review. FS-50 works in a 30-250gph (110-950lph) range of flow.
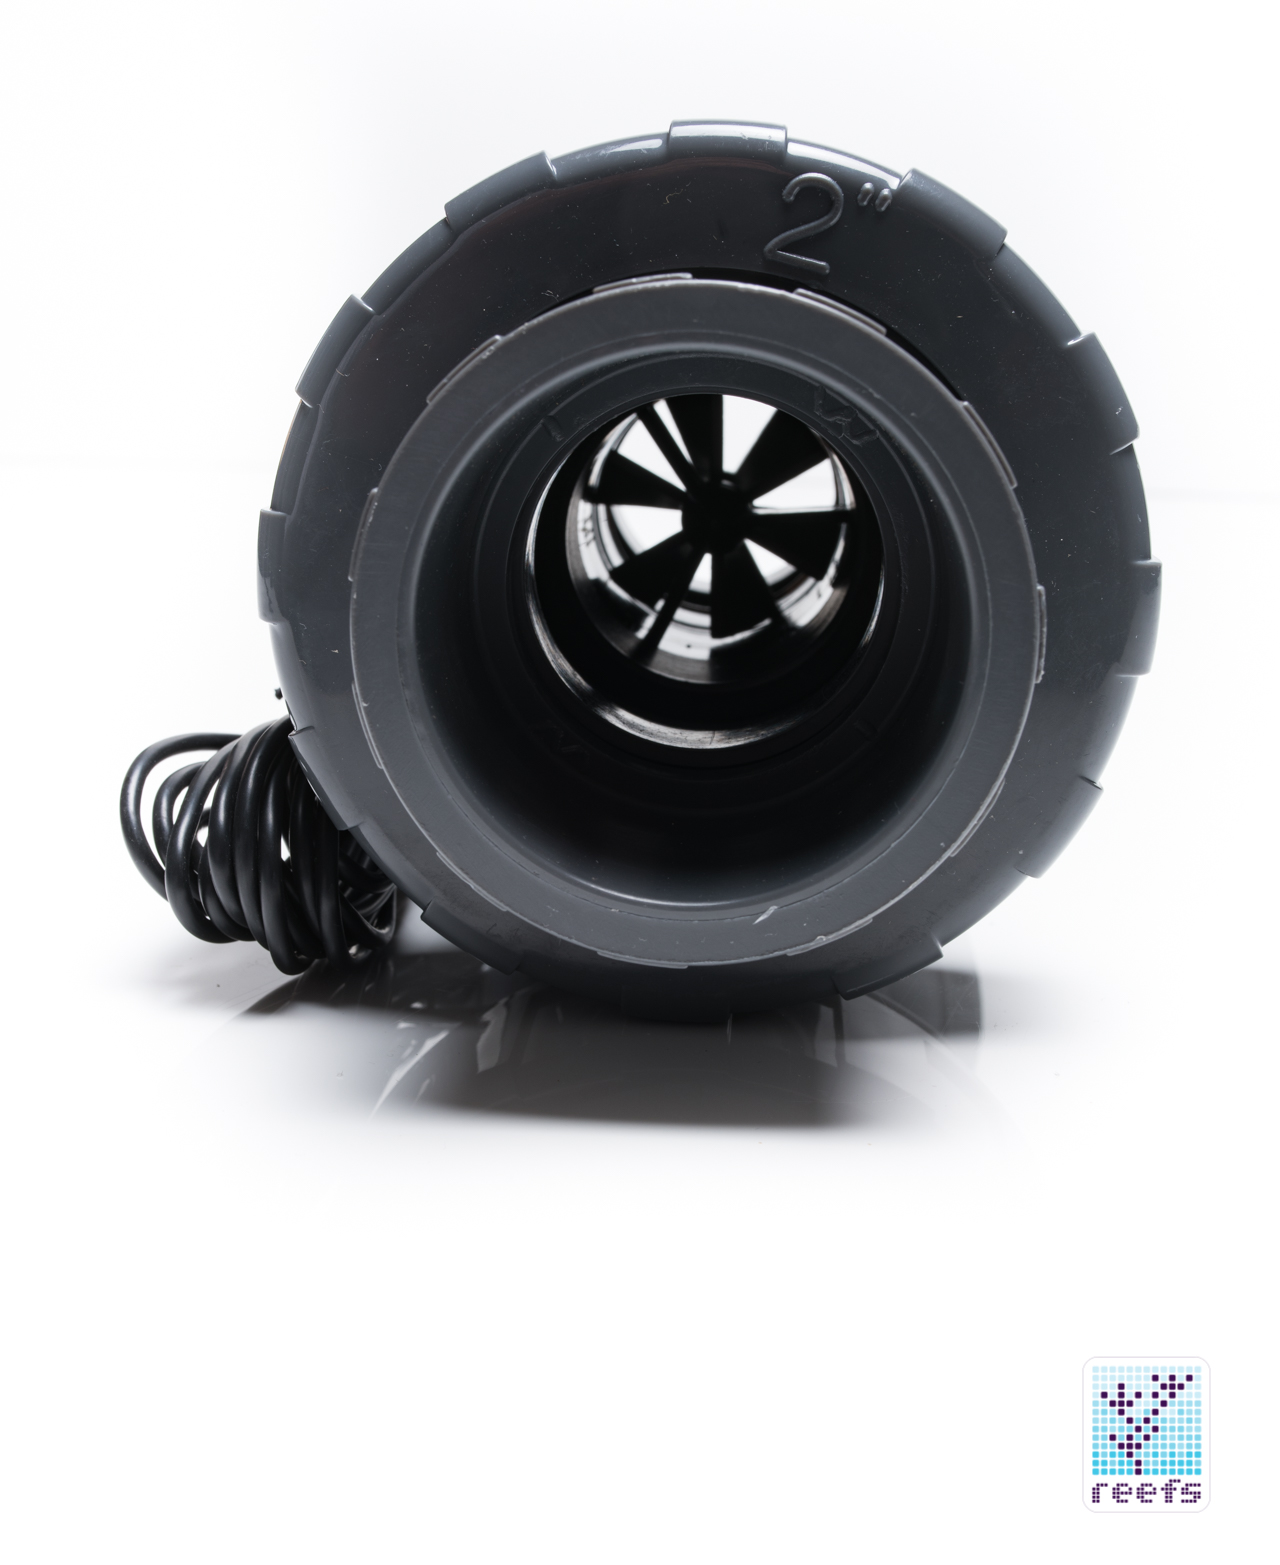
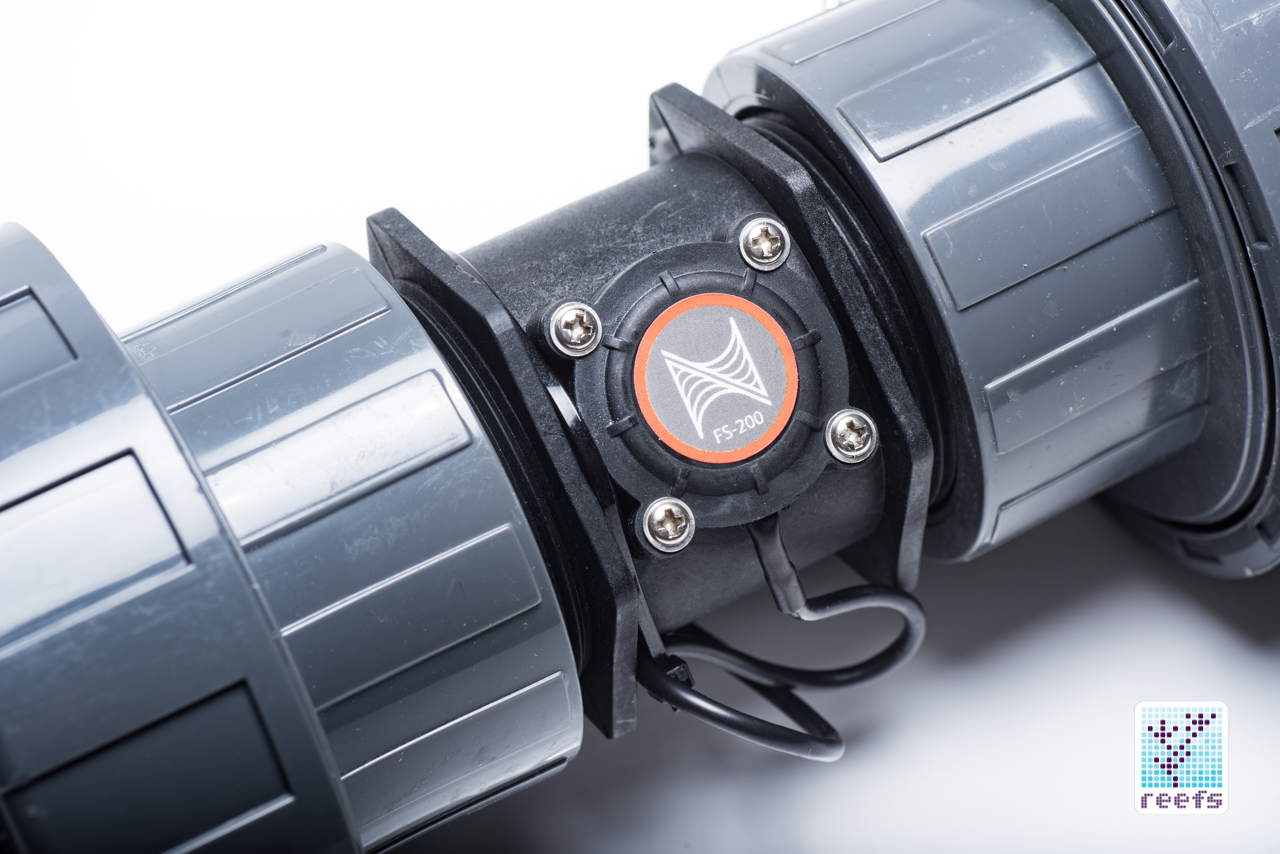
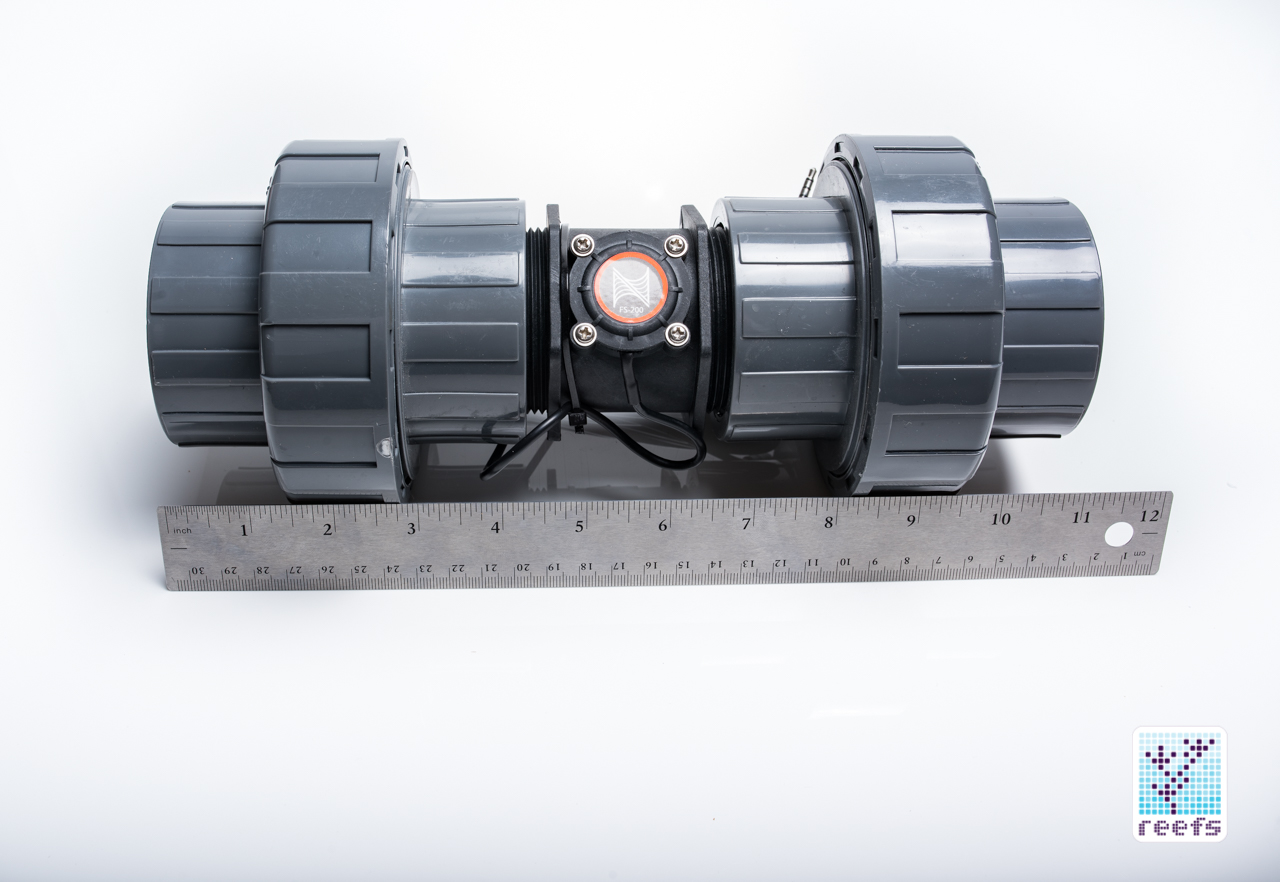
FS-200 is the largest flow sensor in the neptune Systems catalog and it works on a standard 2” PVC piping. It comes, just like FS-100, with two BSPP to slip union couplings and can be used in a 300-3000gph flow range (1100-11300lph). FS-200 is a sold-separately flow sensor that is meant for the largest of home fish tanks.
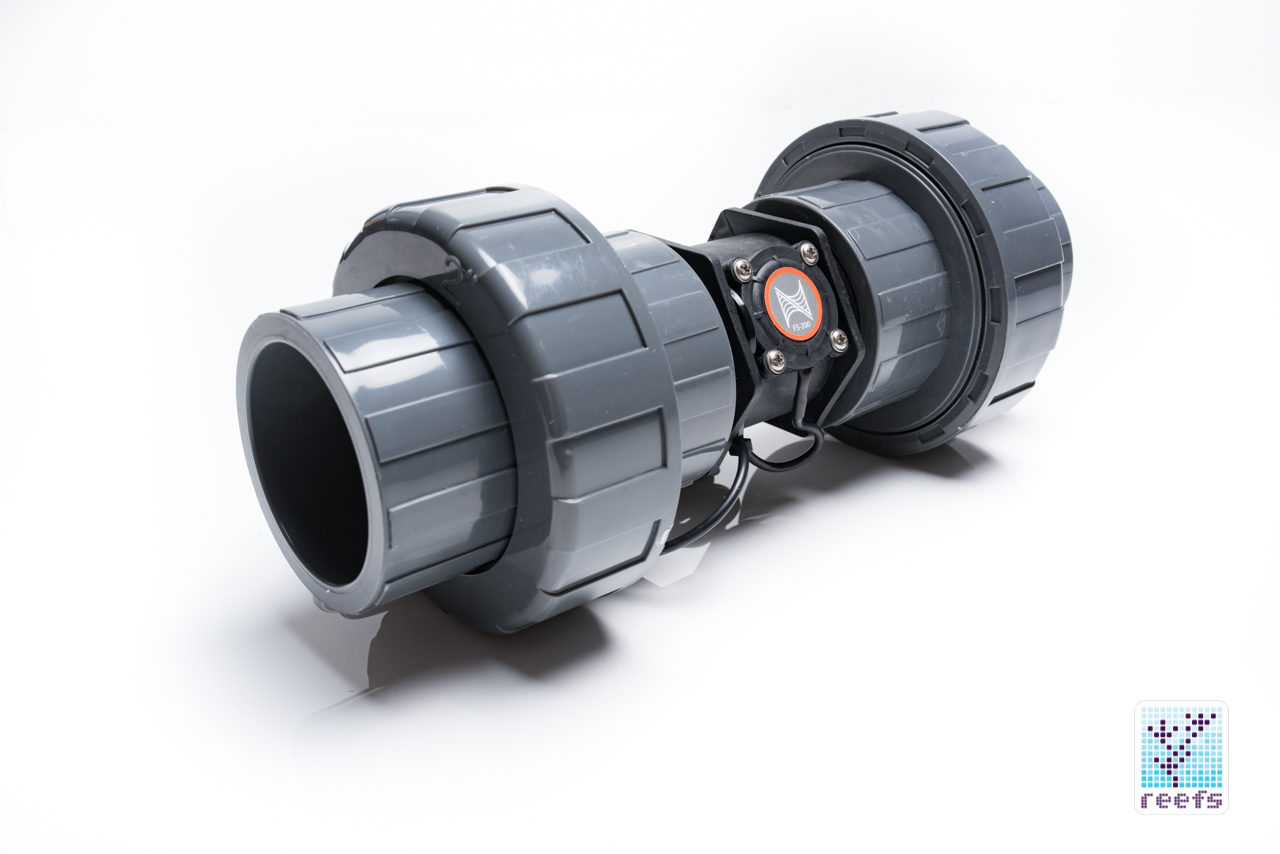
Fs-200 Flow Sensor
The smallest of the bunch, FS-25 has a ¼” compression nut fitting for use with standard ¼” RODI type tubing. It can also be easily converted to work with airline tubing with a ¼” Tube x ¼” hose stem adapter and used on a variety of applications like dosing lines, RODI output line, etc. It works in a 3-12gph (11-45lph) range. FS-25 is sold separately.
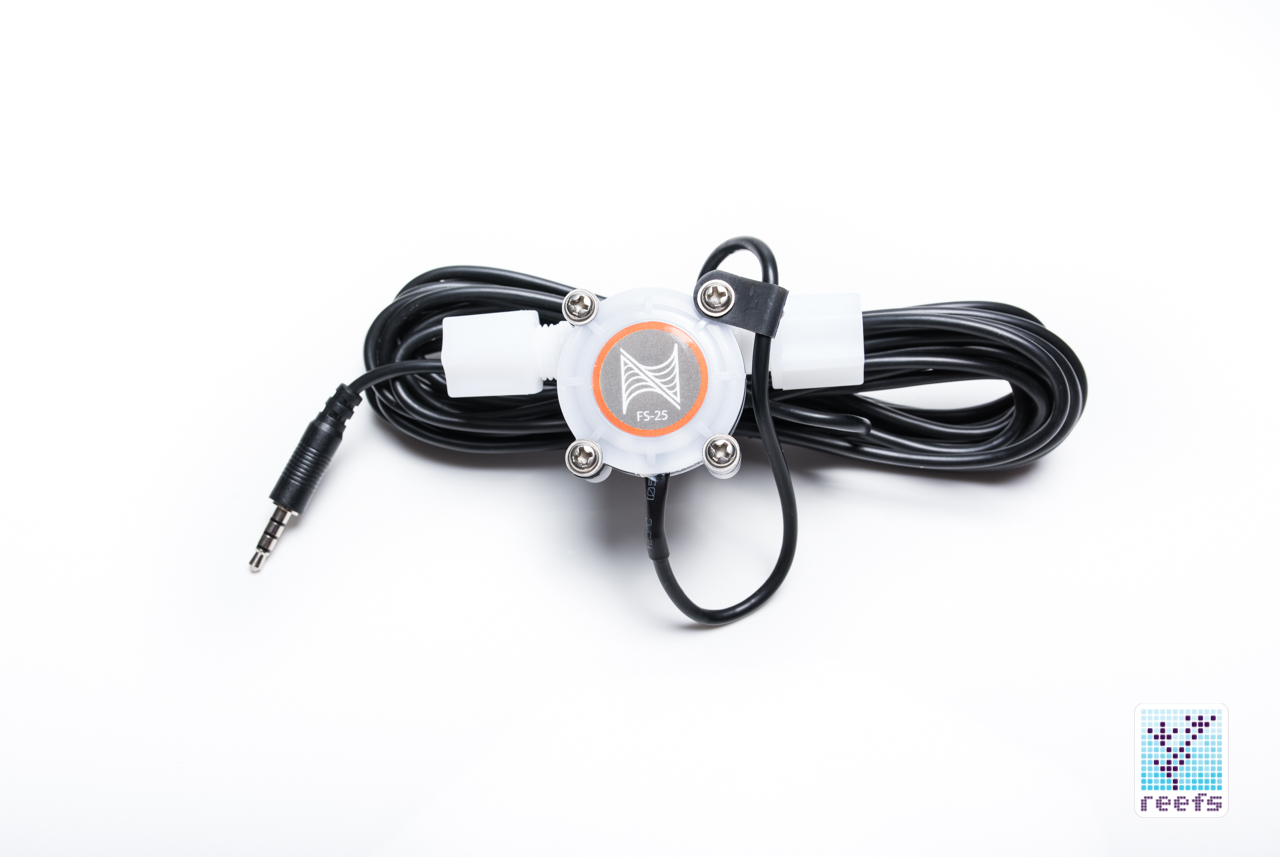
FS-25 Sensor
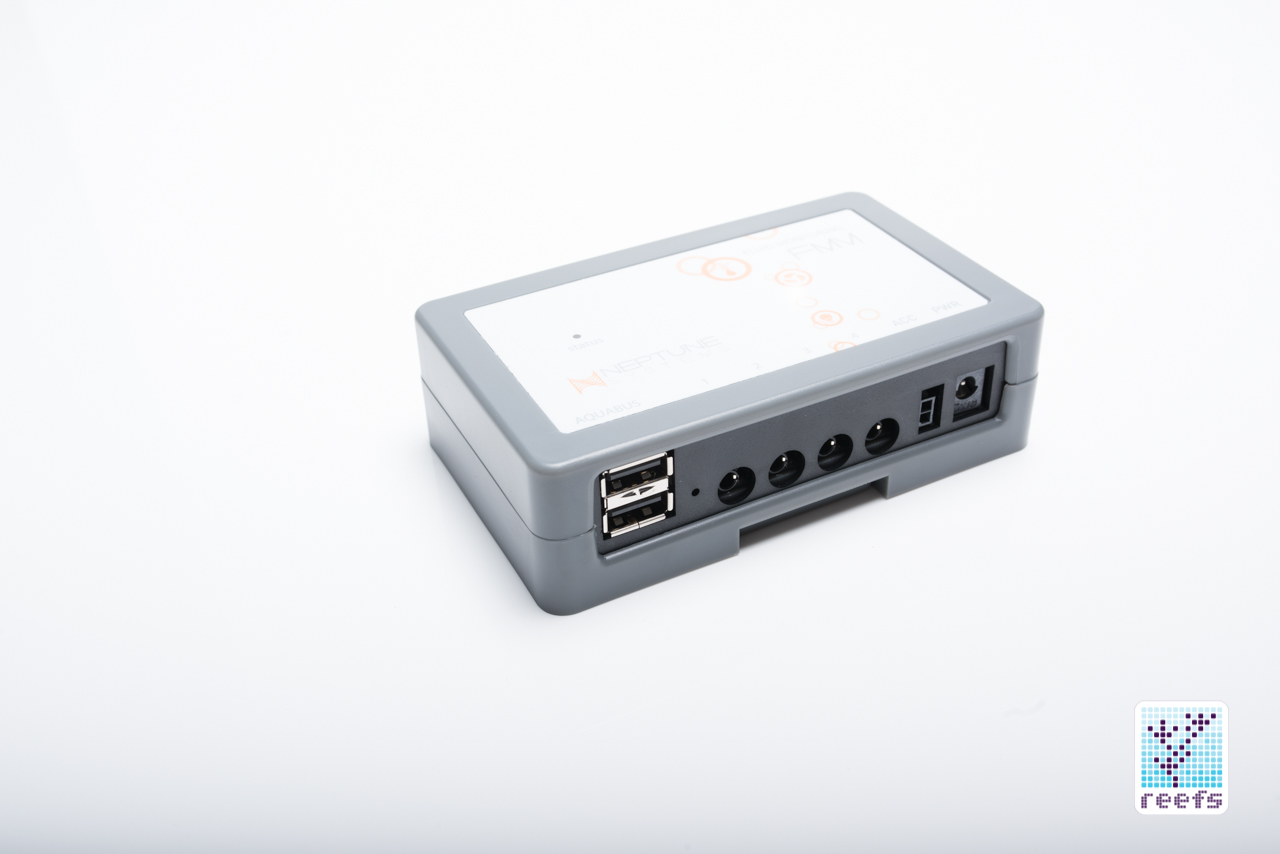
FLUID MONITORING MODULE
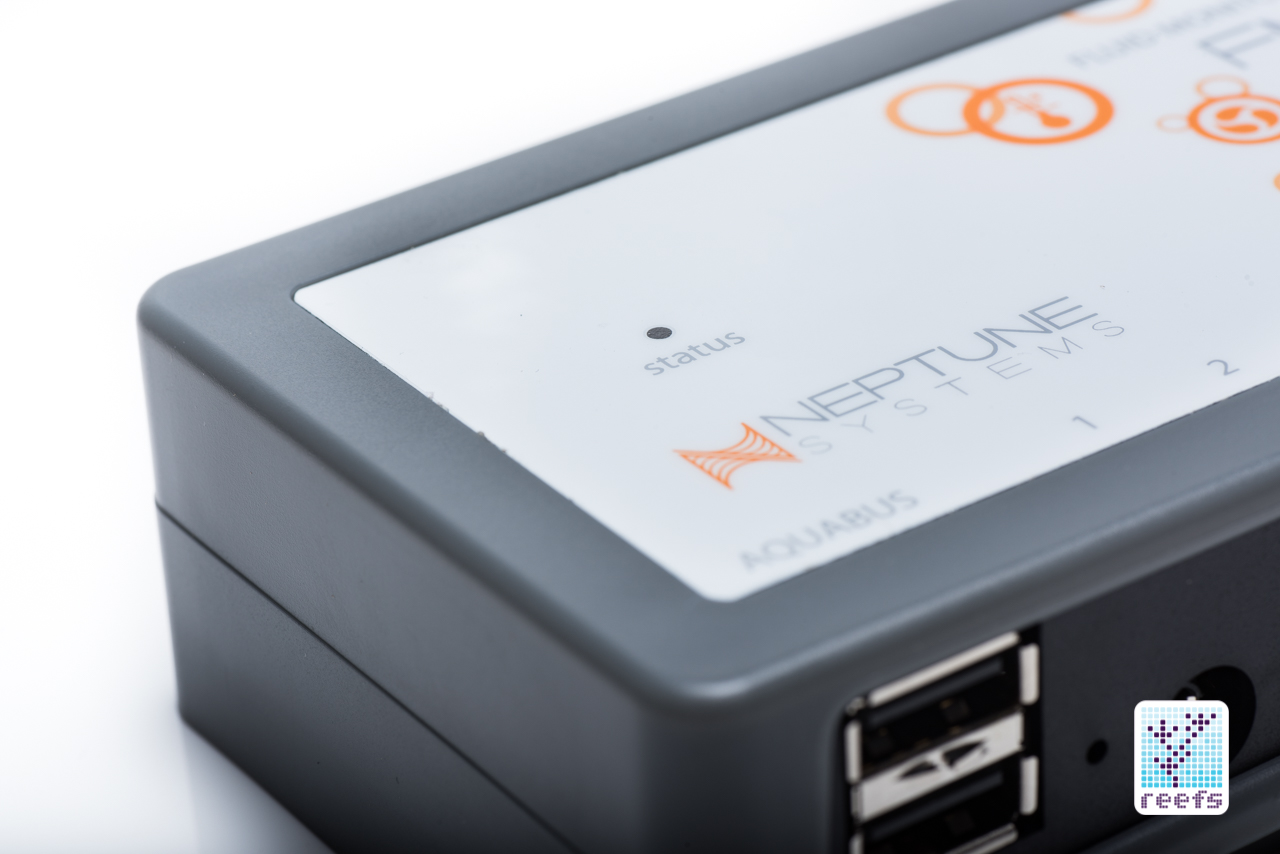
Fluid Monitoring Module
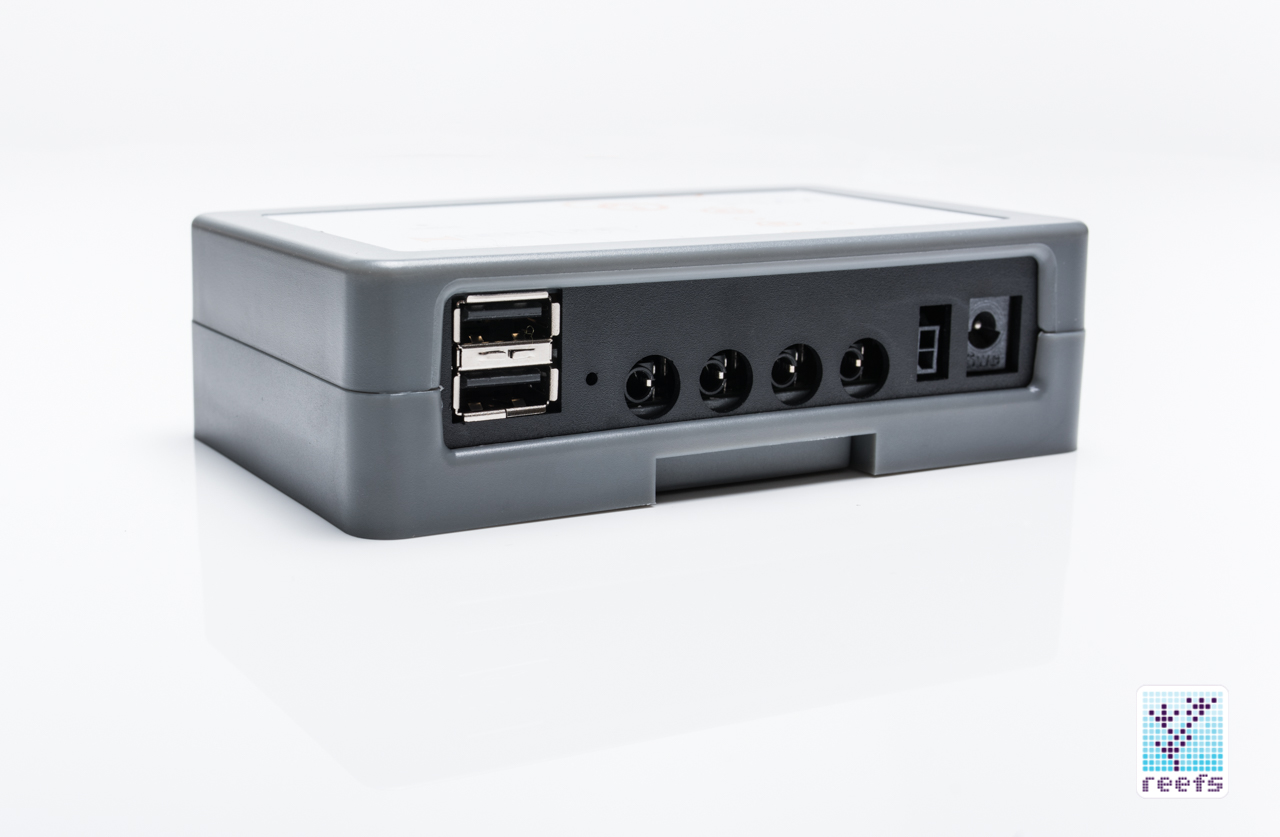
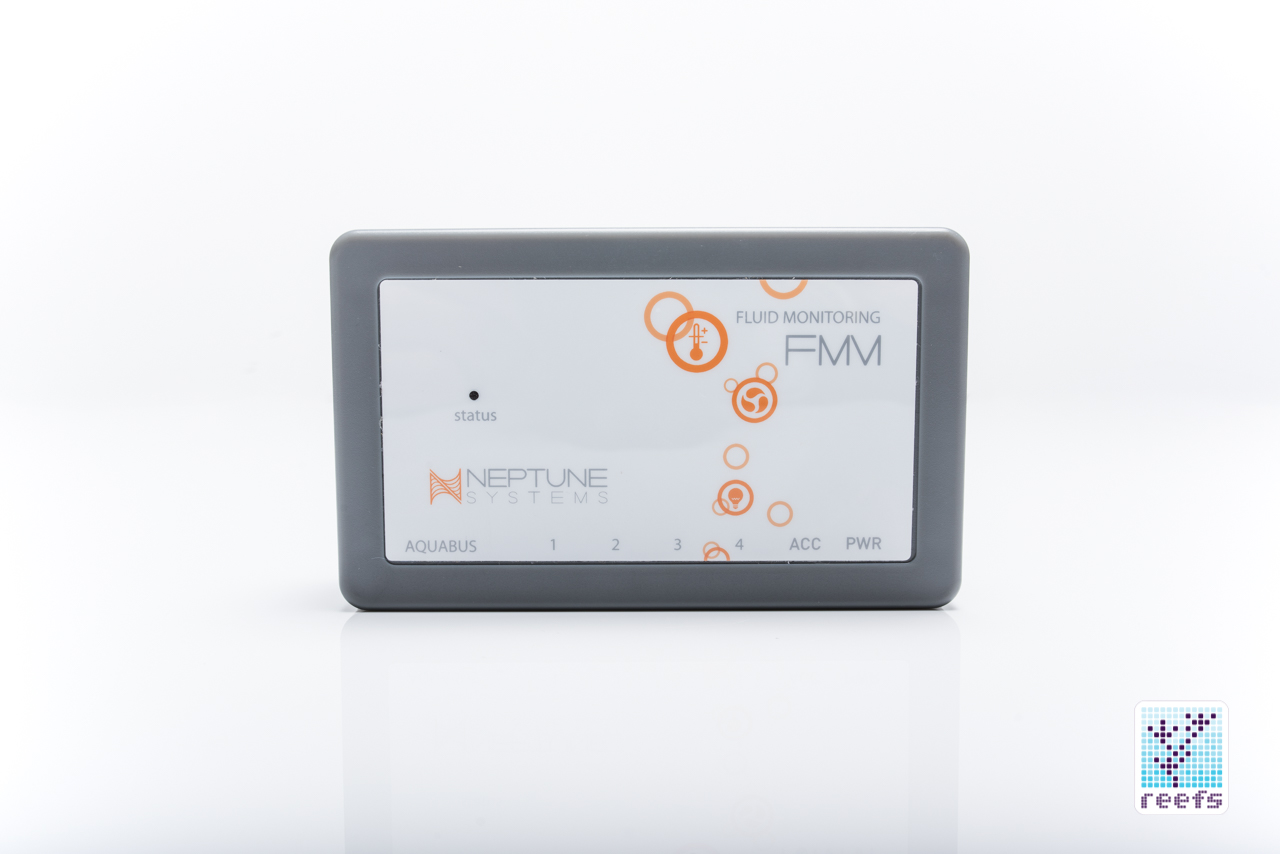
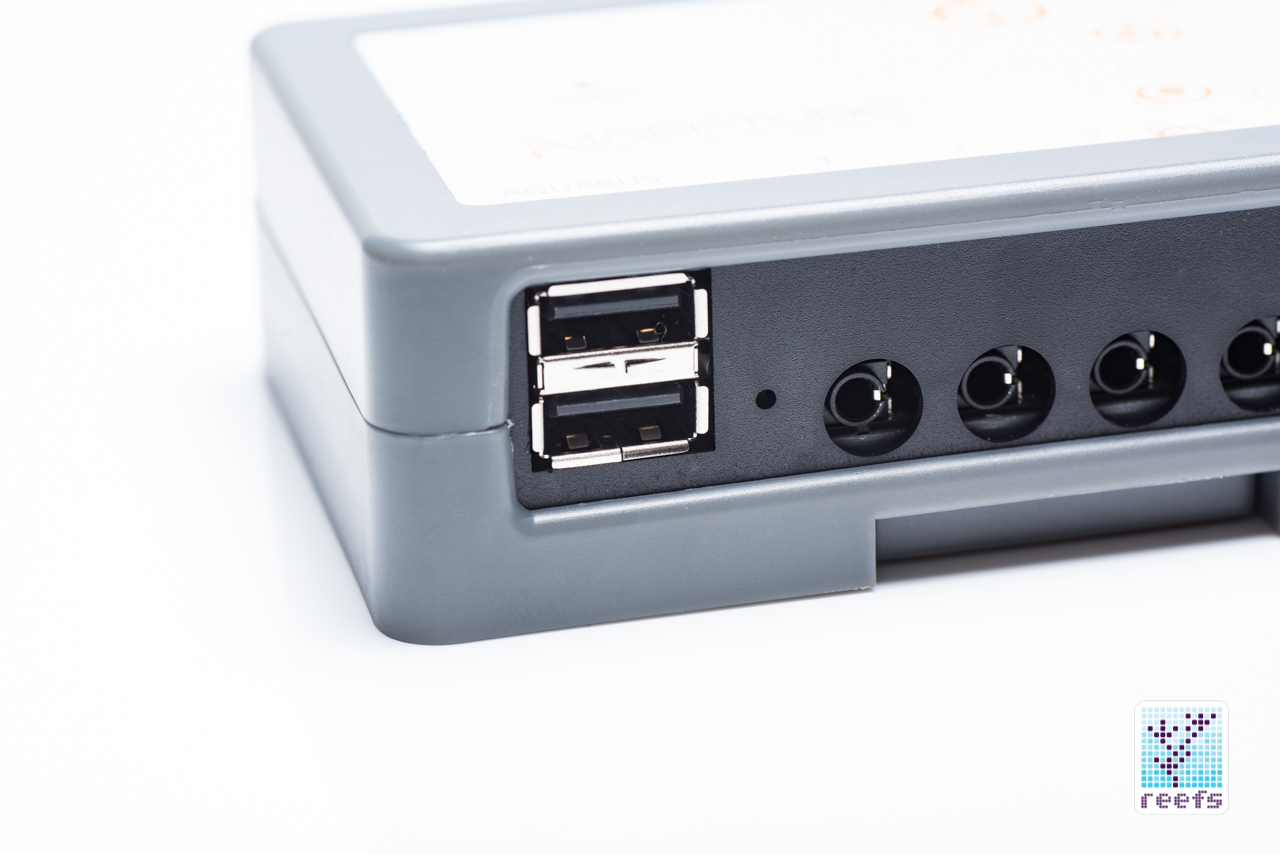
With the introduction of FMK, neptune Systems developed a new type of module, called FMM (Fluid Monitoring Module). It is the heart and brain of the FMK and, in my opinion, one of the most versatile modules ever produced by neptune Systems. Pictured above is a close-up of the I/O ports FMM includes.
Starting from the left, we have:
- 2 x USB ports for Aquabus cables
- 4 x 2.5mm ports for flow sensors and/or other FMM accessories (more on that in next paragraph)
- ACC port for DC24 accessories
- PWR port to supply 24V DC power to ACC port
There’s a new physical attribute to the FMM module that has been adopted by all newly-produced modules that neptune Systems sells – a removable plate that can be attached to the aquarium stand or a wall (mounting screws included) onto which the module slides. This welcome change fixes the problem of connecting new probes in the spider web of cables most aquarists are struggling with on their systems. Now you can simply remove the module from its bracket, connect what’s needed, and slide it back.
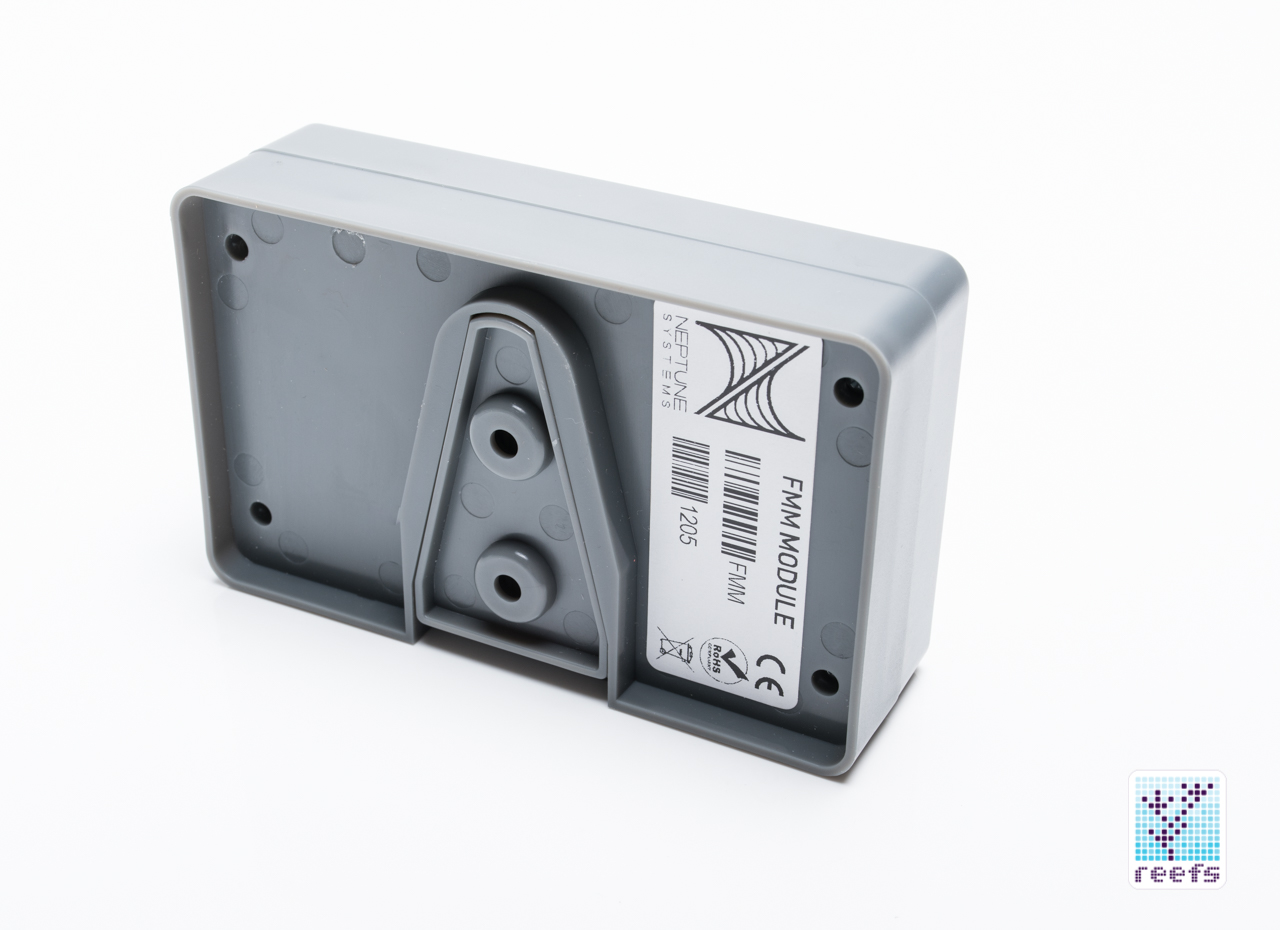
FMM module with integrated bracket
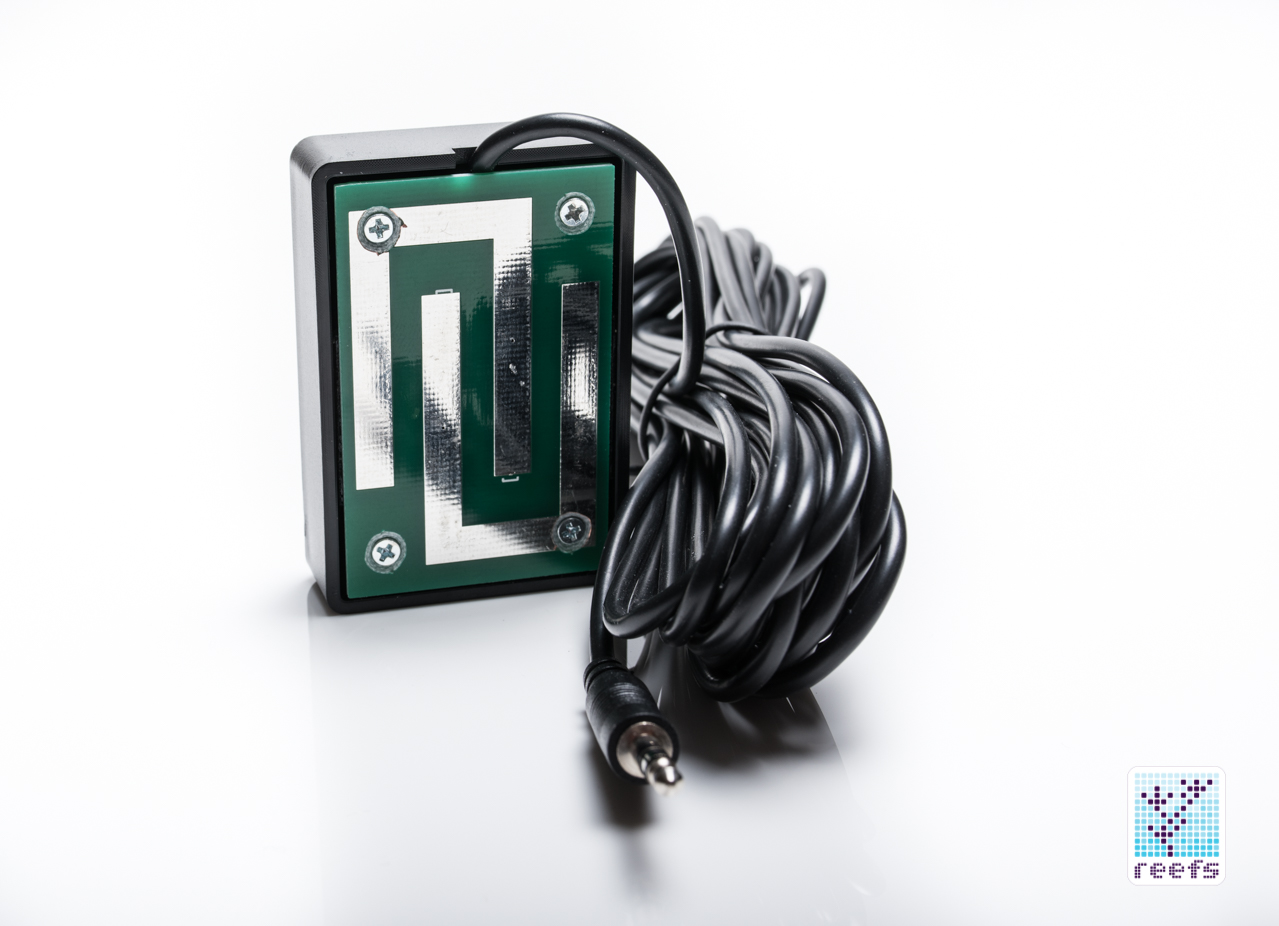
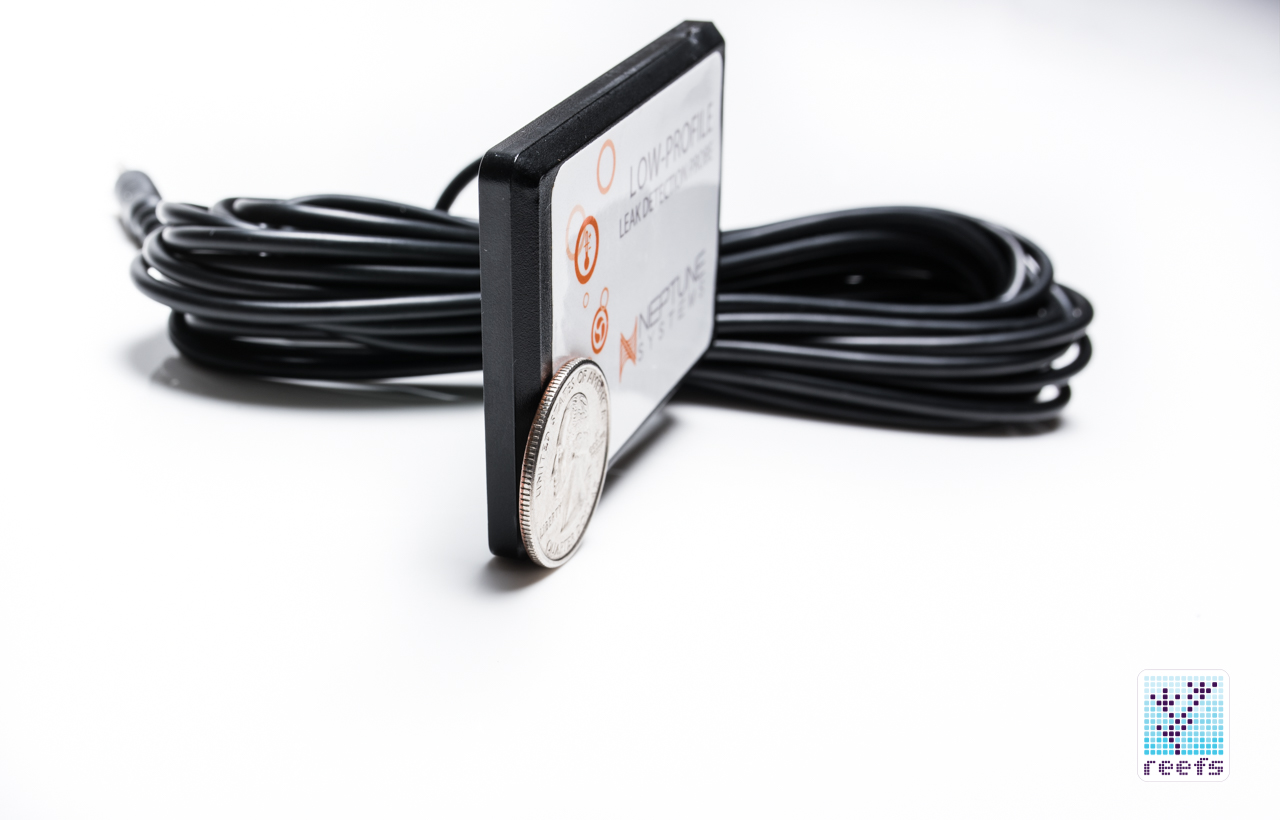
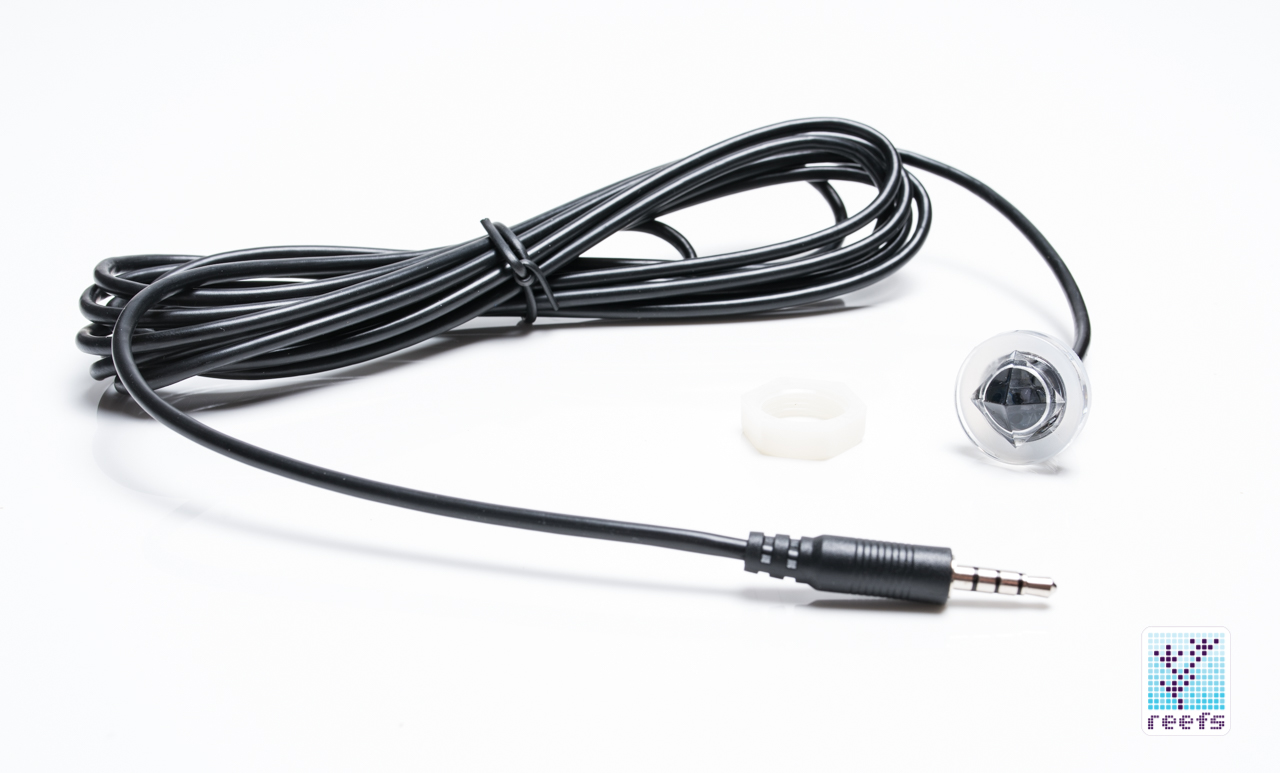
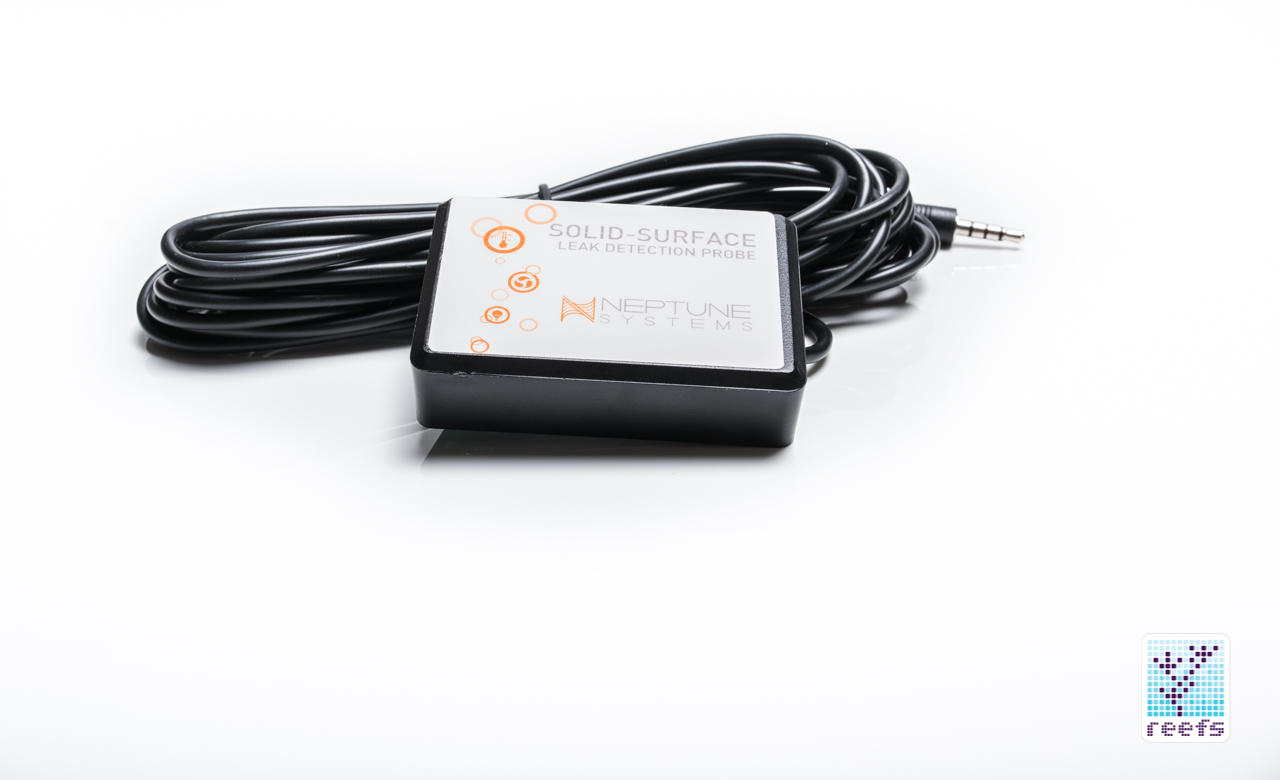
It seems like Fluid Monitoring Module represents the path forward, to how future apex accessories will connect with Apex. In conjunction with FMM, neptune Systems also released a bunch of new equipment that uses ports available on the module. Beside the earlier mentioned ¼” and 2” flow meters, there are three additional sensors that use the 2.5mm jack plug. First, there are two new Leak Detection Probes, the LD-1 and LD-2. They are identical to the ones offered with ALD module, LD-1 being the low profile probe and LD-2 the standard size one, but they come with the 2.5mm jack compatible with FMM.
Leak Detection Probes
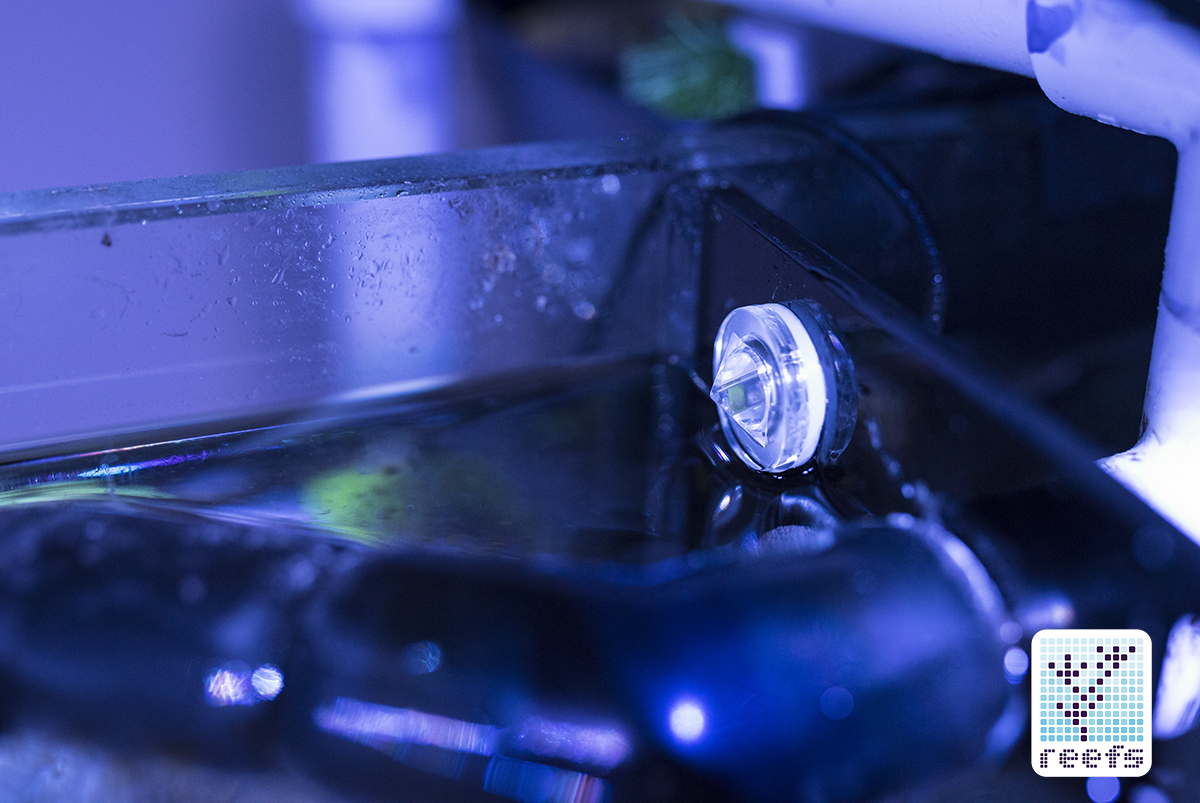
Another great new addition to FMM is the Optical Level Sensor OS-1. This is the same sensor used in high-end Auto Top Off units and it uses infrared light to control fluid level as opposed to kinetic energy of the mechanical float switch that’s popular in the hobby. It has an accuracy of 1mm and can be mounted horizontally on a side panel of the tank or vertically, pointing up for low level fluid detection. It comes with a 10 foot (3 meter) long cable, a locking nut, and a washer. All you need to do to use it on a tank is to drill a 9/16” or 5/8” hole in the container of your choice; neptune Systems also offers an optical sensor with an included magnetic mount.
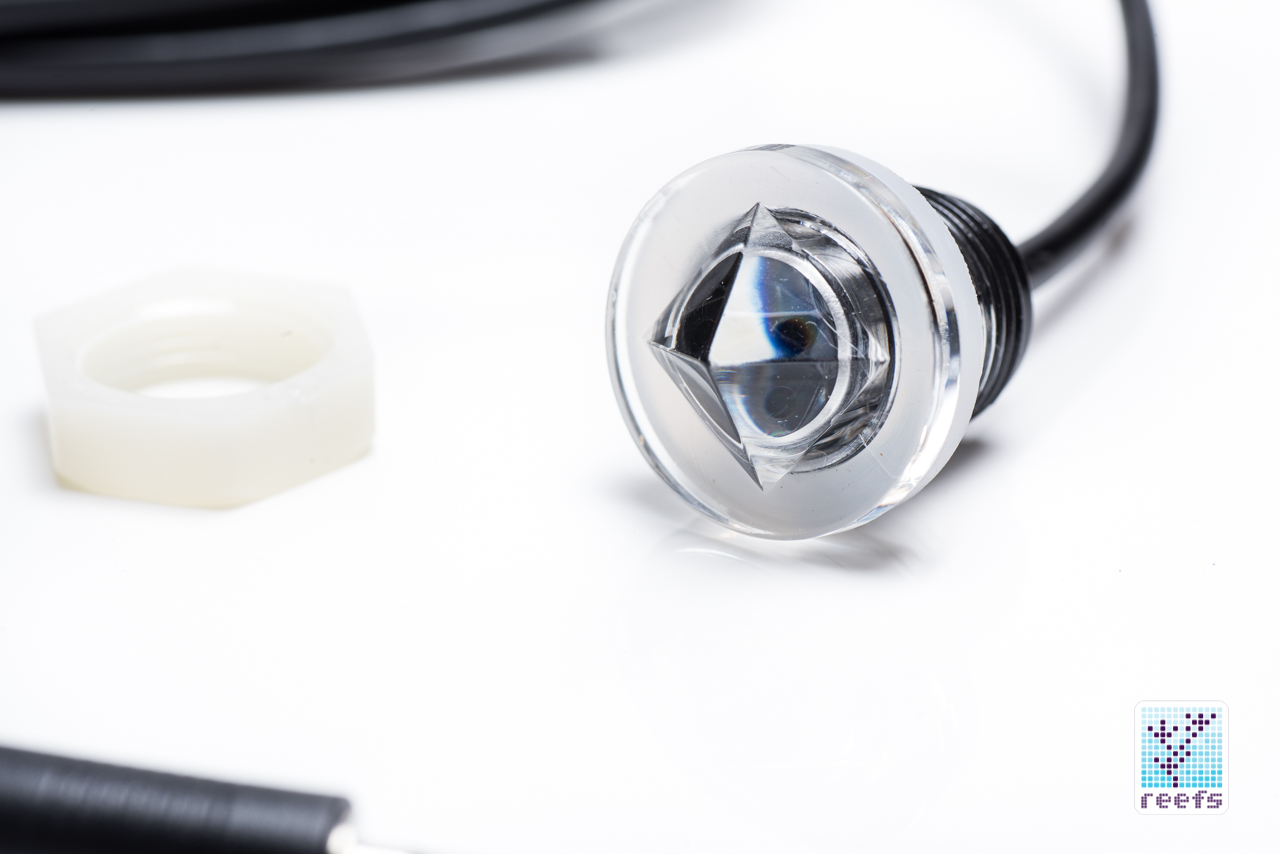
Optical Sensor
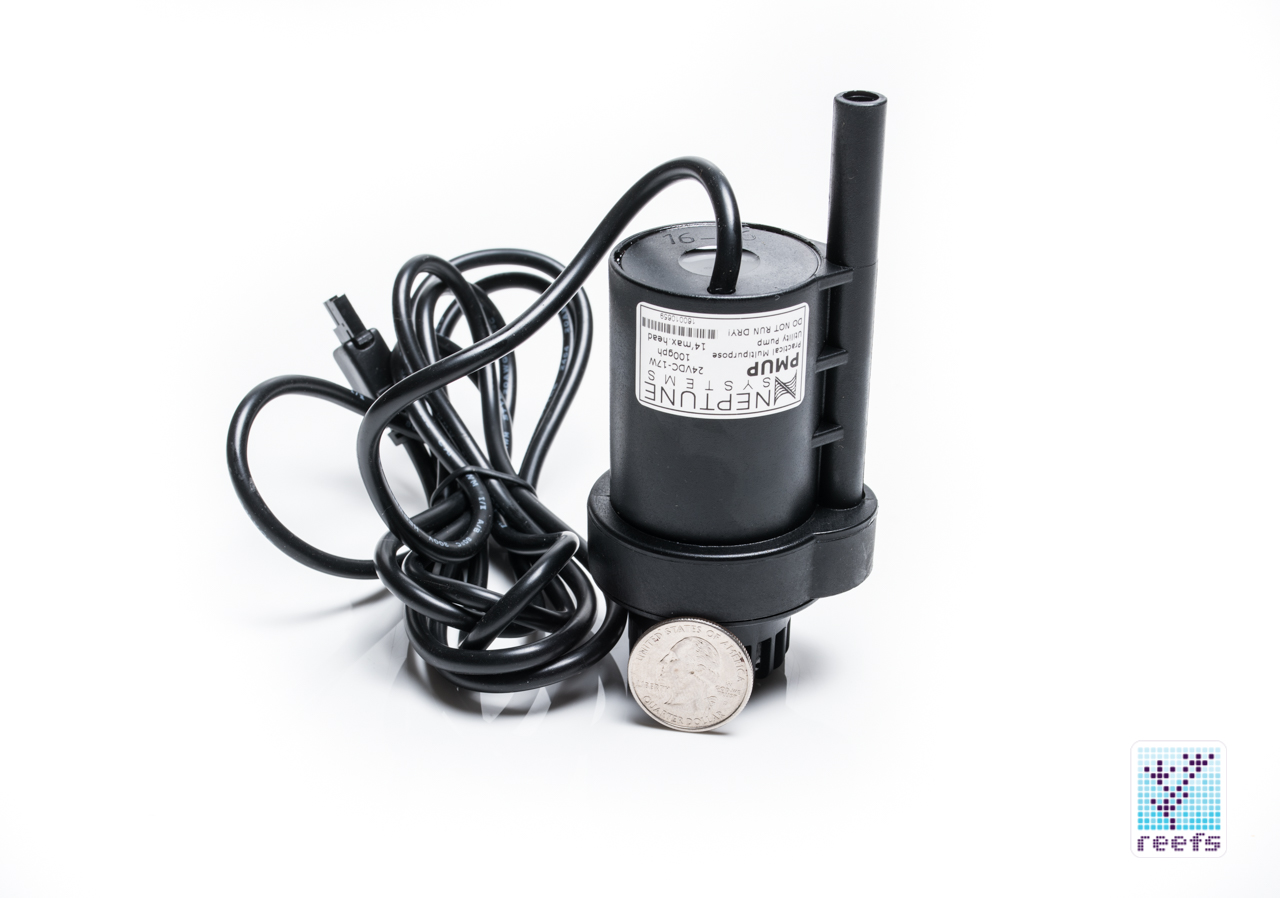
Finally, the ACC port present in FMM is the same port that was introduced with 1LINK, the only difference being that it needs a separately-purchased 24V DC adapter for it to be powered. The ACC ports are also present in the new apex. neptune Systems promised that they will be coming out with a variety of small devices that use the 24V DC power and we already saw one such gadget hit the market. PMUP, or Practical Multi-Purpose Utility Pump (sounds like a good name for new ISS module) is a tiny yet powerful submersible pump that can stand on its intake side and pump water up to 14ft of head. It can be used for ATO, calcium reactors feed, media reactors pump, automatic water change pump, and more.
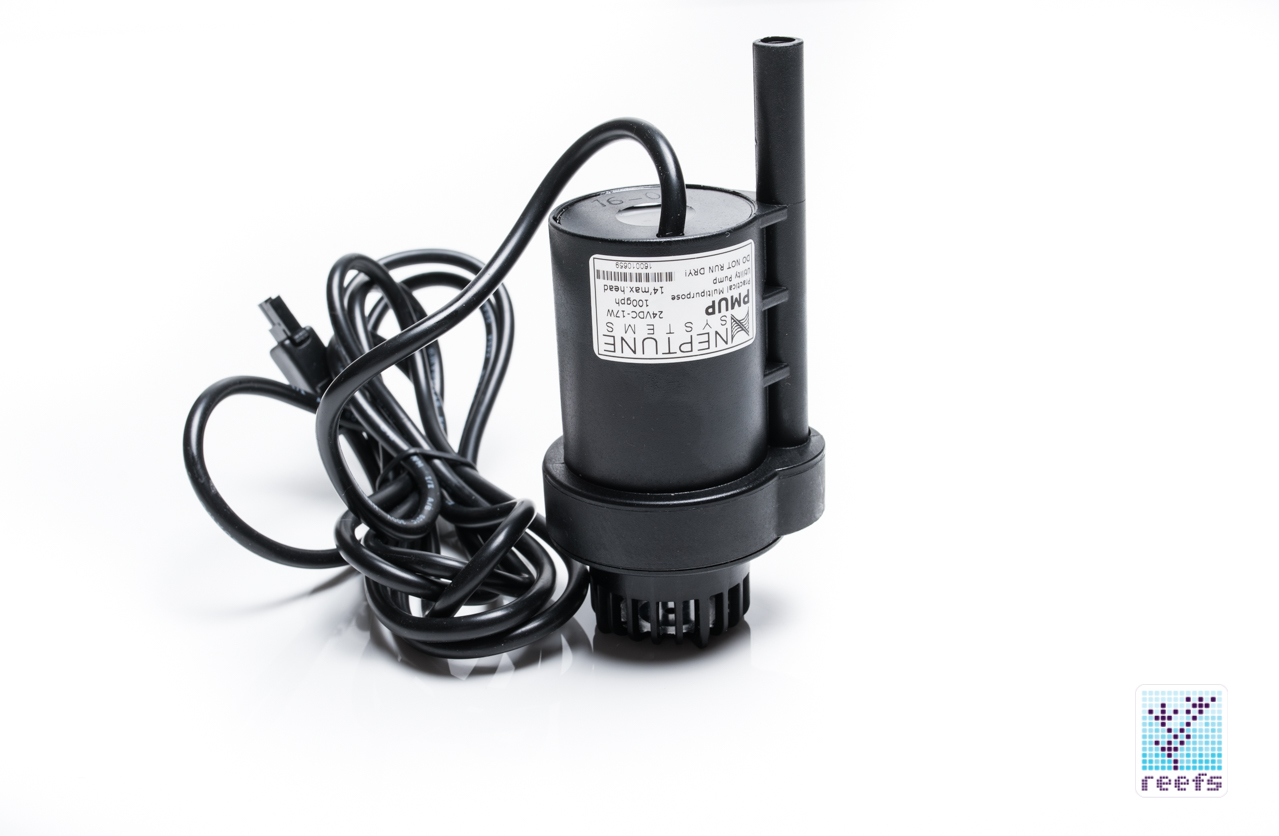
PMUP
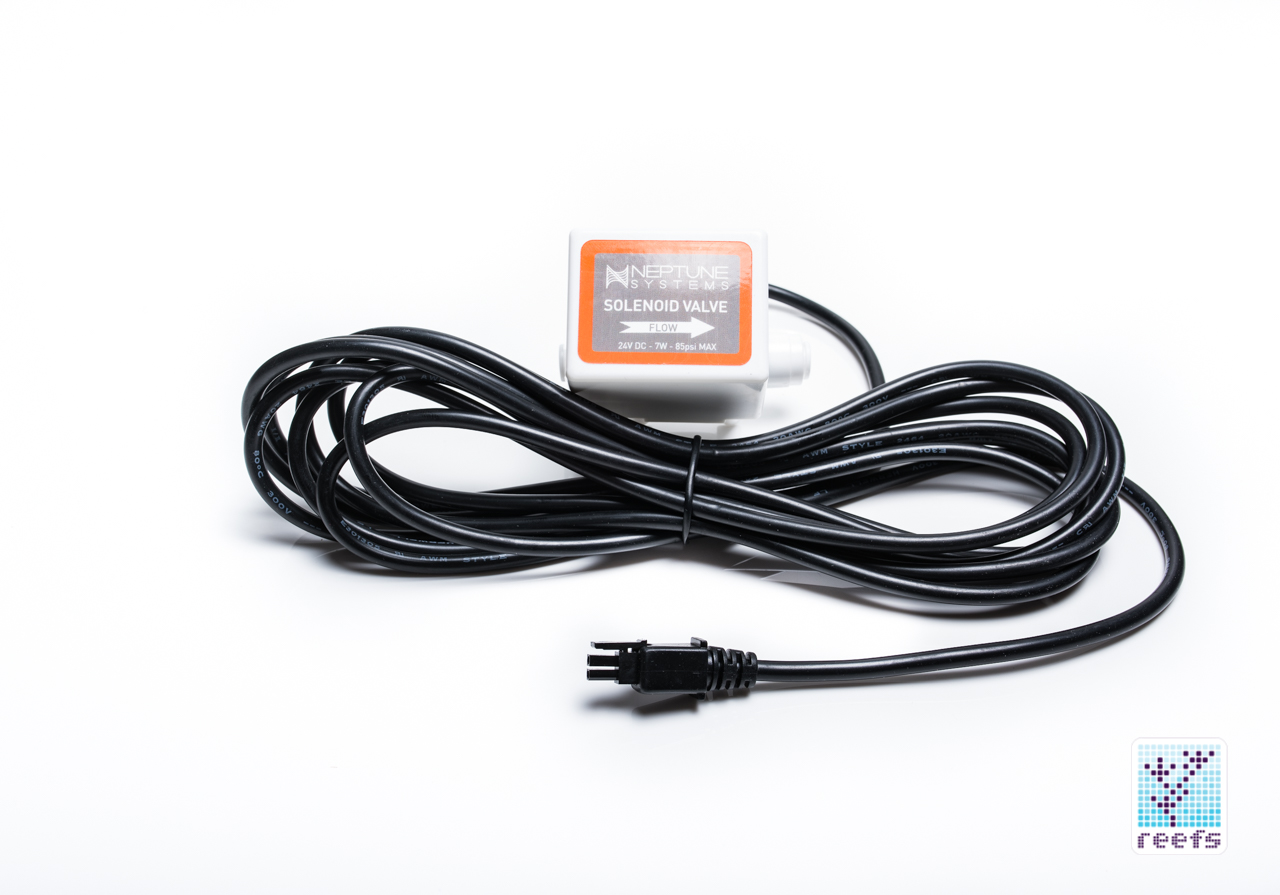
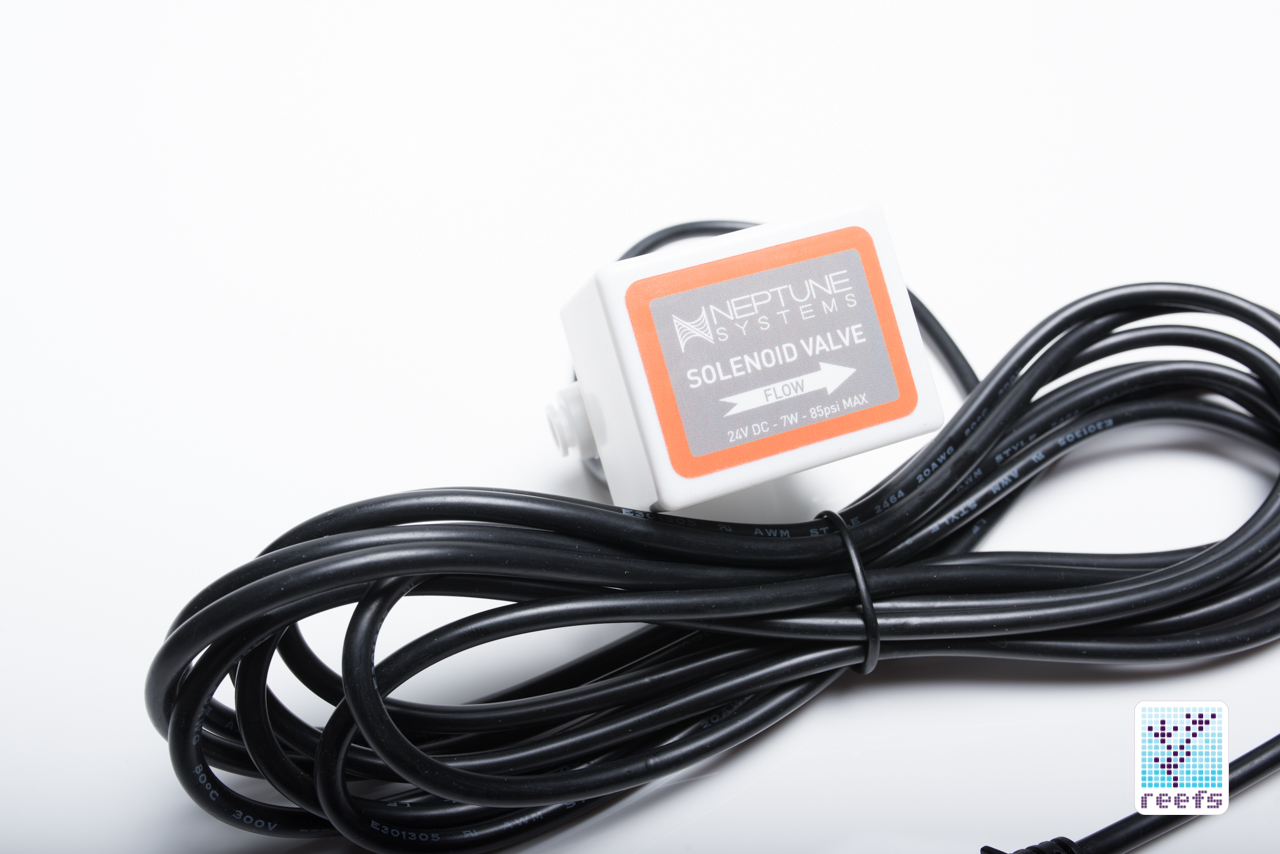
FMK’s debut accompanies another 24V device hitting the market. SV-1 is a NC (normally closed) electronic solenoid valve that uses standard ¼” push-connect fittings and can be used with RODI tubing. It’s a piece of equipment many aquarists, including me, have been waiting for. When combined with the earlier mentioned sensors and connected with apex, the different configurations it can be used for are almost endless. For example, you can use it with Leak Detection Probes and program apex to turn off RODI unit when it detects it leaking. It can also be paired with the ¼” flow sensor as a safety measure for dosing pumps or calcium reactor’s effluent line. I will present a couple of examples in the programming part of this review.
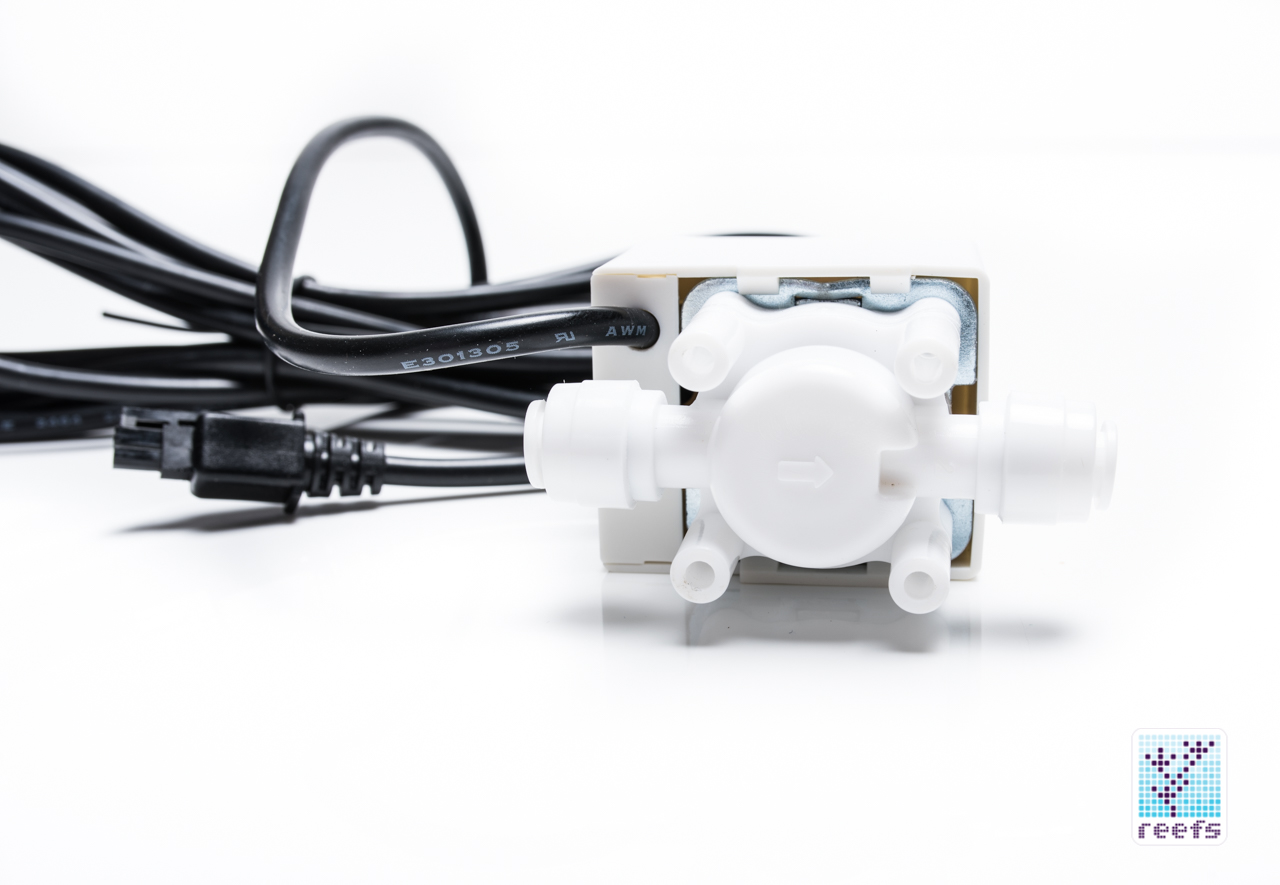
Neptune Systems Solenoid Valve

In summary, the FMM module and its accompanying peripherals provide apex users with an entirely new level of control. In addition, it looks like neptune Systems designed FMM to be future-proof and we’ve been told that new devices using either the 2.5mm jack ports or ACC sockets will be released in the foreseeable future.
FMK INSTALLATION
The FMK installation process consists of two steps- hooking up the flow sensors and any additional equipment to FMM, and programming the module to the apex infrastructure.
For the physical part, you need pliers, some Teflon tape or thread paste (I always use drinking water-grade Teflon tape on all my aquarium plumbing threads), and PVC glue & primer. FMK came just in time for my tank transfer and so I hooked it up to my brand-new plumbing grid. I also went ahead and purchased a second FMM module as I decided to use all FMM accessories shipped for this review. My setup looks like this:
Fluid sensors in author’s tank
FMM 1
2.5mm ports:
- 1” flow sensor serving return pump and installed before the manifold that feeds reactors
- ½” flow sensor on the GFO reactor input’s line
- ½” flow sensor on the Carbon reactor’s input line
- ¼” flow sensor on the Calcium Reactor input line
ACC PMUP that I use for water changes
FMM2
2.5mm ports
- Optical Sensor installed on the overflow side wall, close to the tank rim, that is programmed to turn off ATO in case water level in the main display rises to a dangerous level
- Optical Sensor on top of ATO storage tank programmed to close the SV-1 solenoid valve when ATO tank is full
- LD-1 Leak Detection sensor sitting inside the ATO cabinet, programmed to turn off RODI unit in case of leak or water level sensor failure
- LD-2 Leak Detection sensor sitting next to my three reactors, programmed to cut off power to return pump in case of a leak
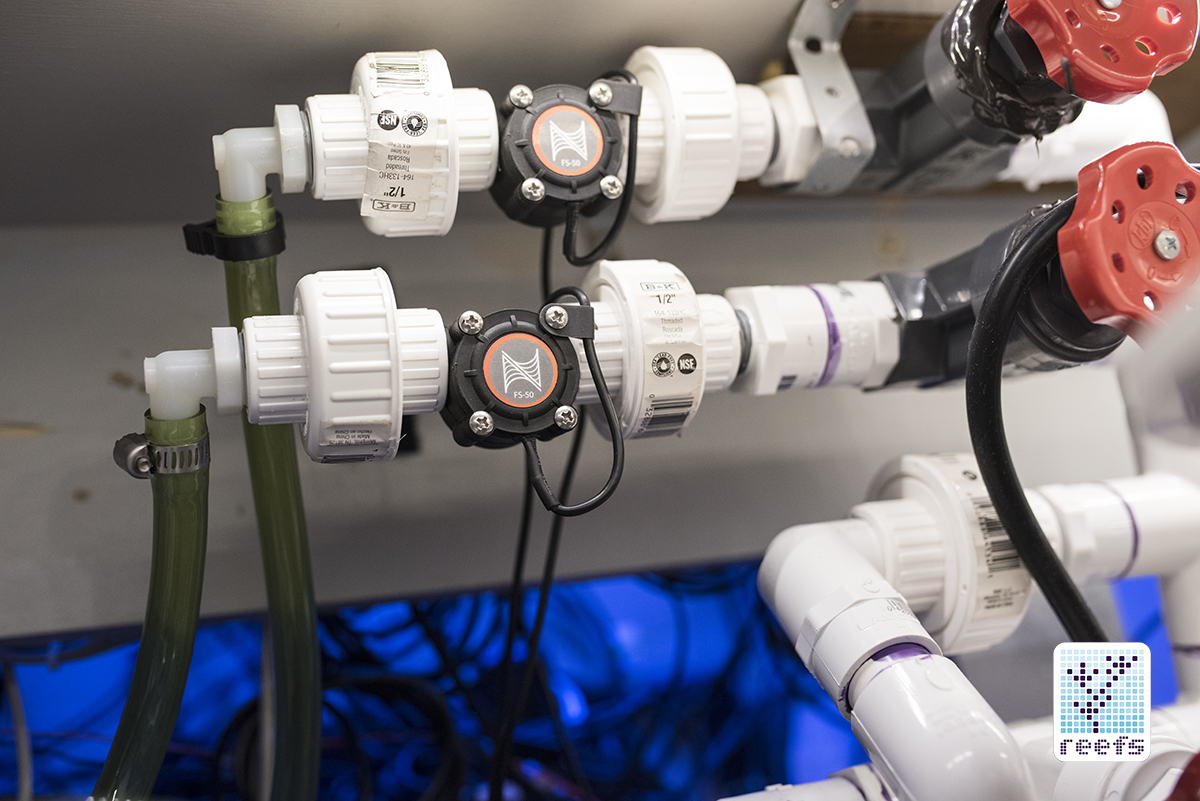
Keeping in mind the fact that flow sensors contain moving parts, I had to design my plumbing in a way that allows for easy removal of the sensors for cleaning. The 2” and 1” sensors come with their own unions, which resolves the accessibility issue for the main pump return pipe. The smaller ½” sensors only come with threaded/slip couplings and therefore require additional unions for them to be serviceable. Even though neptune Systems advertises the ½” sensors as having non-standard (for USA) threads, I’ve had zero problems screwing regular NPT ½” Union valves onto them. They have been running in my system for over a month now and I did not experience any leaks, so it looks like BSPP threads are somewhat compatible with NPT ½” threads. Be advised that your mileage may vary and I’m simply reporting what worked for me.
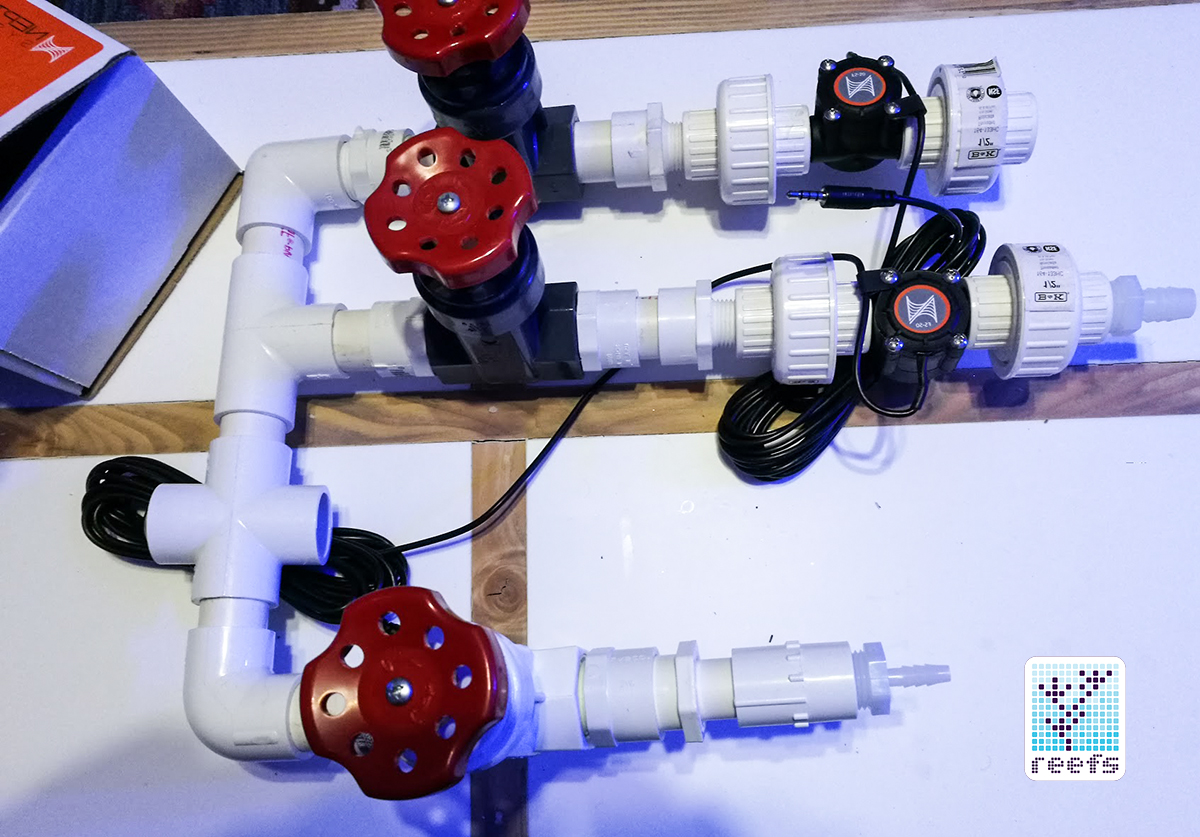
Author’s manifold with flow sensors installed
The ¼” sensor has compression fittings that fit ¼” RODI line, which prompted me to modify my CaRx input line to accept ¼” tubing. Unfortunately, I miscalculated the flow value my Calcium reactor requires and found the ¼” sensor workable flow range to be higher than the actual amount of water flowing through CaRx. Oh well. Perhaps in the future, neptune Systems will release a sensor that reads in milliliters instead of gallons for use in dosing systems and CaRx effluent lines. Perhaps the 1/4″ flow meters would work in larger systems where the stream coming from CaRx is much stronger.
That concludes the plumbing part and honestly, my only comment about the process is that if you know how to plumb your aquarium, you will have zero problems incorporating FMK sensors into your piping.
Leak detector installation is as simple as connecting them to the corresponding ports of the FMM and dropping them, their contacts facing the floor, wherever needed.
Optical sensors require more work, as holes need to be drilled to install them. A 9/16”” drill bit is perfect for that operation. Each sensor has a seal that prevents leakage. I installed one sensor on top of my overflow box and another in the upper corner of my Auto Top Off Container. I will explain the reasoning behind this in the next paragraph of this review.
APEX FUSION
Getting FMK to show onto the apex Fusion Dashboard is a plug & play experience, just like the other modules that Neptune Systems has in its library. Simply plug in the supplied USB cable to a port in your EB8 (or EB832 on the new apex model), update the module if an update is available, and go over to the padlock icon on the dashboard that should indicate new tiles are available.

Fusion Dashboard
Each flow sensor plugged into one of the four 2.5mm jack ports on the FMM will show in Fusion as a separate icon of a miniature graph with a number attached to it, representing the current flow value. Users can set the type of sensor used and the unit of measurement, whether gallons per hour or liters per hour. I believe that can be done right in the Fusion Dashboard for the 2016 version of apex, while people using older models of apex need to go over to the classic Dashboard to access that function. Clicking on each sensor’s value brings up a more detailed graph of the flow readings, which are updated every 15 minutes by default.
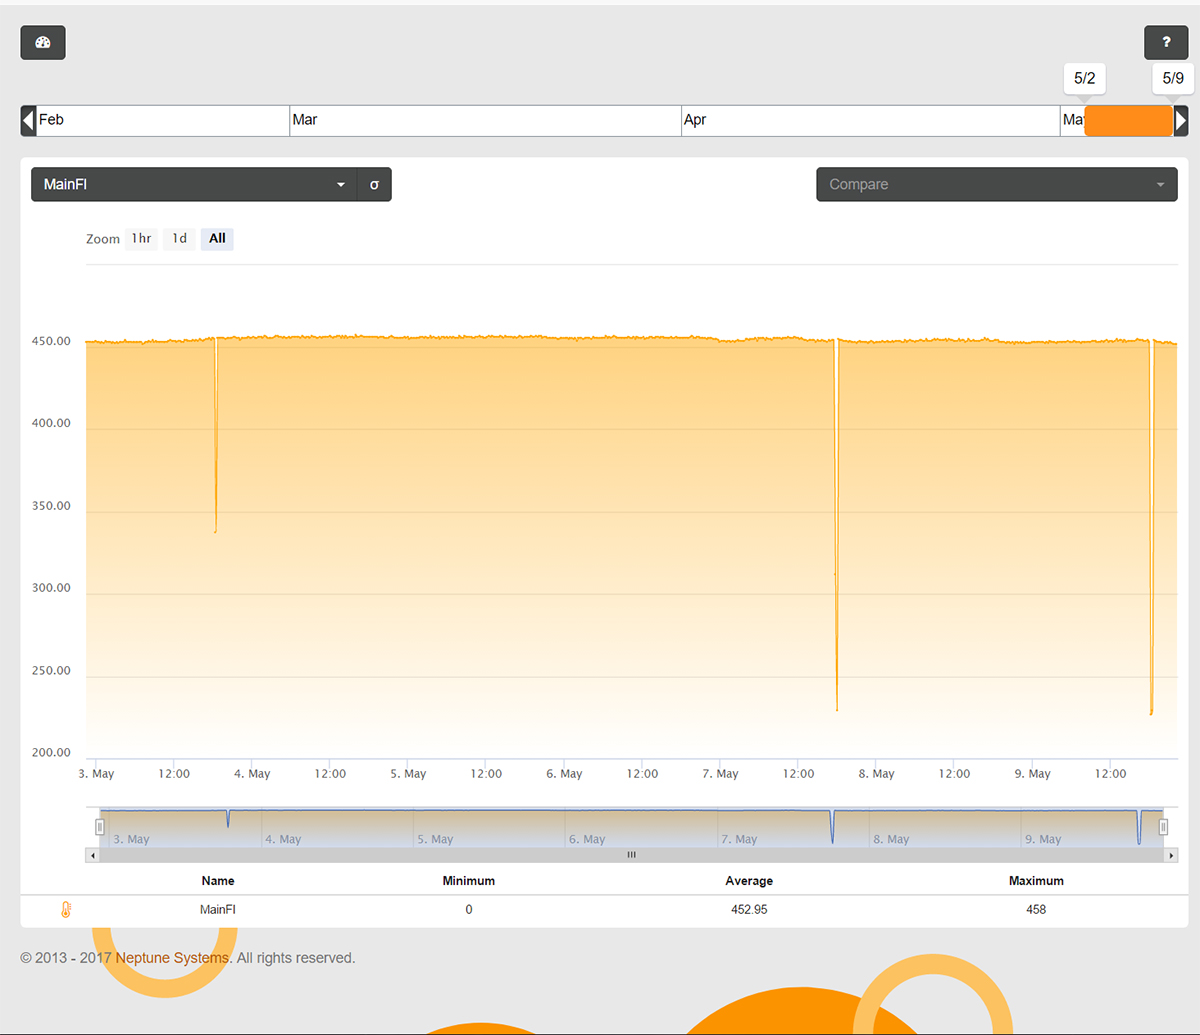
Flow graph
The ACC port, provided there’s an accessory plugged into it, will show on the dashboard as a physical outlet, much like any outlet on EB8 (or EB832), and can be programmed to function in conjunction with any other outlet, may it be virtual or physical, in the apex grid.
Other types of sensors sold for the FMM, namely the optical sensor and the leak detectors, show as passive switches that can be in one of the two states- OPEN or CLOSED, much like what you might have experienced using the good old Breakout Box or the ALD module sensors.
APEX PROGRAMMING
Programming FMM sensors and leak detectors is just the same as setting up the other outlets controlled by apex. For the flow meters, you can use flow readings to send email and text message alerts, while the solenoid, combined with optical sensors, allows for even more sophisticated level of control. Let me explain by giving you examples based on my tank and the way I utilized the new devices neptune released with the introduction of FMK Kit.
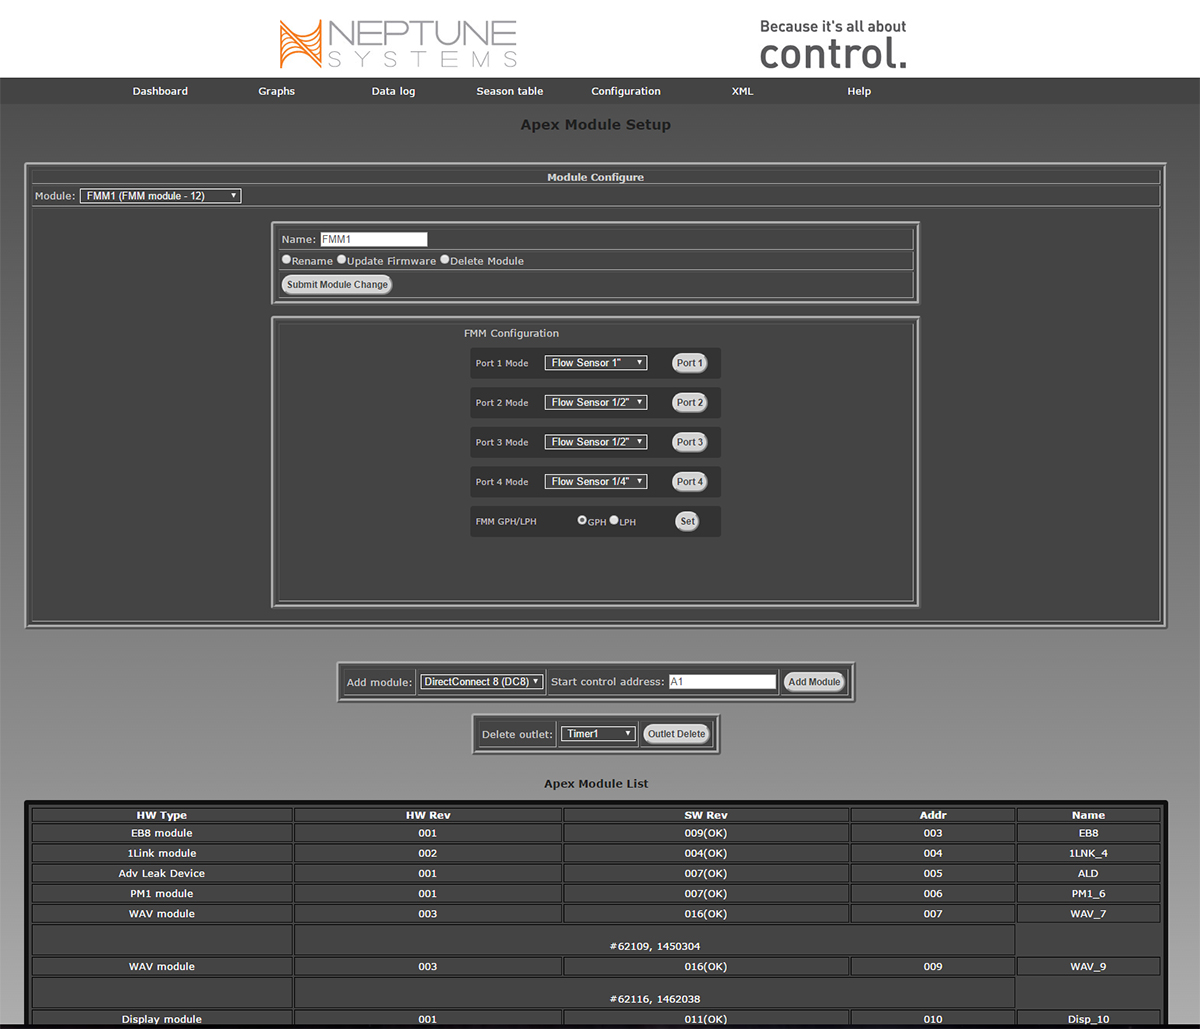
FMM settings in classic dashboard
When it comes to flow sensors plumbed to my return pump, gfo, and carbon reactors, I programmed them rather passively, meaning their readings do not affect any physical outlets in my tank. I tend to analyze and monitor the data they output to see if any of the reactor media is getting clogged, but not much besides that. I have, however, a line of code in my email alert virtual outlet that informs me of a sudden drop in flow in the return line of my main pump, which may indicate of a major leak in the system or a sensor failure. The code looks like this:
If MAINFL < 300 Then ON
MAINFL is the 1” sensor hooked up to the return side of my pump, past all the manifolds feeding reactors. The average flow my return pump produces hovers around 450 gph, and I programmed the text message/email outlet to send me an alert if the value drops to 2/3 of that. You can do the same for the remaining sensors and even program them into physical outlets to trigger the ON/OFF
The optical sensors & solenoid valve were both game changers for me. I sincerely did not expect FMK to have such a broad spectrum of capabilities. In my case, the combination of FMM, two optical sensors, and solenoid valve not only provided a safeguard against leaks (I live on the 5th floor of my apartment building and I am paranoid about my tank’s water seeping through the ceilings of my neighbors’ apartments), but also automated the process of replenishing ATO container. Here’s how I did it:
PREVENTING DISASTERS WITH FMM
Back when my reef ready tank served as a freshwater planted aquarium, I suffered a terrible accident. While vacationing (of course!), one of my plants got uprooted and flew towards the overflow grill, blocking most of the grill’s slots. That raised the level in the display area, while dropping in the sump. ATO kicked in and dumped 5 gallons of additional water that, in a matter of minutes, overflowed onto the carpet and, through cracks in the hardwood floor, on my downstairs neighbor’s head. It was a rookie mistake, not safeguarding against that scenario and I decided the new reef tank must have numerous safety nets. When neptune Systems sent me the new FMK with all the accessories that accompany it and after reading the release kit, I quickly realized FMM has the potential to be a key part of my disaster- prevention task force.
A little bit about my system: it’s a roughly 100g tank with 30g sump and 4 floors of furnished apartments below it. Before the release of FMM, I used a combination of two mechanical float switches, one mounted in the sump above the water line and one in the overflow box, and 3 leak detection probes, each in a different location throughout the tank and sump, hooked to ALD module. The code lines for the return pump, skimmer, calcium reactor, ATO pump and CO2 solenoid valve were as follows:
If LOVERFL CLOSED Then OFF
If LSTAND CLOSED Then OFF
If LBACK CLOSED Then ON
If SumpH OPEN Then OFF
The correspondent piece of code for the EMAIL outlet looks like this
If LOVERFL CLOSED Then ON
If LSTAND CLOSED Then ON
If LBACK CLOSED Then ON
If SumpH OPEN Then ON
LOVERFL, LSTAND, and LBACK are leak detection probes and SumpH is the float valve mounted high in the sump. Even though I had a functional leak alert system running off of apex, it did not cover all the bases. I tried adding a float valve in the display tank (which would prevent the scenario I presented above), but it had proven to be problematic, due to the fact it would have to be somehow mounted above the top edge of the tank to function.
OS-1 installed in author’s overflow wall
Fluid Monitoring Module’s optical sensors closed that gap and allowed me to expand WLPDS, my water leak prevention defense system. I added two additional leak detection probes and I placed one in the ATO cabinet and one right next to the CaRx. In addition to that, I put the optical sensors to use. One ended up on top of the acrylic overflow box to detect a dangerous rise in the display tank’s waterline and the other, replacing the float valve, was mounted on a makeshift bracket pointing downwards, set to detect a dangerous rise in the sump. The additional codes for earlier mentioned outlets are:
If TankH OPEN Then OFF
If SumpH Open Then OFF
If LATO OPEN Then OFF
If LCARX OPEN THEN OFF
TankH and SumpH are the optical sensors and LATO and LCARX are leak detection probes in the ATO Cabinet and near the Calcium reactor.
EMAIL outlet program, in turn, looks like this:
If TankH OPEN Then ON
If SumpH Open Then ON
If LATO OPEN Then ON
If LCARX OPEN THEN ON
I tested both leak detection probes (by touching the undercount contacts with a wet hand) and optical sensors (by purposely raising the water in the tank/sump, as well as by splashing water directly on the sensor) and they engaged every single time. The response time from apex is amazing, I received a text message from the controller mere seconds after submerging the optical sensor or getting the leak detector’s sensor in contact with water.
ATO AUTOMATION
The combination of the new solenoid valve, an optical sensor, and a breakout box with float sensor makes up for yet another use of the FMM module. Since my reef tank goes against a wall shared with the kitchen, a very long drill bit shooting through the kitchen sink cabinet and going out behind the tank provided me with an opportunity to automate my ATO refilling process. I used to haul 5 gal jugs from the kitchen sink, where they were filled with RO/DI water to replenish the top off container, now, with a touch of a button on my tablet, I can fill the ATO tank without lifting my finger (well, except to slide the solenoid valve outlet to ON position on my tablet). I already had an established ATO pump, and added apex functionality to it by setting up the latter as a watchdog for the pump.
The acrylic ATO container was drilled on top corner of the rear panel to accommodate the optical sensor (named ATOoff). A float sensor (ATOLow) was then attached towards the bottom of the tank and a solenoid valve (ATOSOL) hooked up to the RO/DI unit sitting behind my kitchen sink. As an additional safety step, I only refill the ATO container when I am home and have an additional swing valve attached to the RODI line feeding the ATO tank. I could automate the process completely if I wanted to, but as I said before, I am paranoid about this stuff. Anyway, the whole setup works like this- when the water level drops in the ATO tank to the point where it engages the float valve (ATOLow), I receive an email/text message alert to my phone. I open the swing valve, set the solenoid valve (ATOSOL) to AUTO and wait till the container fills up to the point that it reaches the level of optical switch (ATOoff). When engaged, ATOoff turns the ATOSOL off and send me another text message so I remember to close the swing valve as well. As an additional precaution, I have the earlier mentioned leak detection sensor (LATO) that would shut the whole system down (including the ATO pump, which is hooked up to one of the outlets in the apex EB8) in case the solenoid fails to close the stream of water from the RO/DI unit). Here’s how the code works for that:
On the ATO outlet in apex EB8 module:
If Lback CLOSED Then OFF
If Ltank CLOSED Then OFF
If Lovfl CLOSED Then OFF
If Overfl CLOSED Then OFF
If LATO CLOSED Then OFF
If SumpH OPEN Then OFF
which shuts the ATO pump down if any of my leak detection probes triggers.
On the solenoid valve outlet (ATOSOL), the code looks like that:
If Lback CLOSED Then OFF
If Ltank CLOSED Then OFF
If Lovfl CLOSED Then OFF
If Overfl CLOSED Then OFF
If LATO CLOSED Then OFF
If ATOoff CLOSED Then OFF
If SumpH OPEN Then ON
Which closes the solenoid if any of the leak detection probes triggers and when water in the ATO container reaches the ATOoff sensor level
Finally, the corresponding lines of code in the EMAIL outlet are:
If ATOoff CLOSED Then ON
If LowATO CLOSED Then ON
Which informs me of the ATO container being either full or near empty.
VERDICT

I must say, with every new introduction to the apex family of products, Neptune Systems raises the bar and solidifies its position as a leader in aquarium monitoring and automation devices. For someone who’s not familiar with the apex Controller environment, Flow Monitoring Kit may appear to be yet another aquarium gadget- a powerful tool in the hands of a certain type of reefkeeper, but one that most aquarists can live without. I would totally agree with such a statement, if not for the Fluid Monitoring Module. On the basic level, it serves as a hub for all the various flow sensors neptune Systems came out with, although the true potential FMM represents lays in the accessories that can be used with it. Leak detection probes, optical sensors, and ACC ports accepting accessories such as PMUP and Solenoid open a gate to a new level of automation and puts neptune Systems even closer to being an all-in-one solution for the home aquarium. I only presented a small window into what can be achieved using the new module and with promised future releases, FMM may well become the standard apex add-on for anyone investing in the system. I am especially excited about the 24V ACC ports present on FMM (as well as on 1LINK and the new apex main unit) because they can be used for the same purpose as some third-party devices connected to apex, freeing the always in short supply 120V outlets.
In terms of the functionality and long term reliability of the FMK Kit, I can report that after using it for over a month, everything works and performs as on day one. I still get reliable readings from the flow sensors and can spot changes in the flow as I tweak my numerous manifolds, something that helps me better understand the flow redistribution in the tank. Reliability of Neptune Systems equipment was never an issue for me, I still have and use the first generation apex I bought few months after it was released, and to which I’ve hooked up all the additional modules NS came out with throughout the years.
I see a bright future in the FMM, especially if neptune Systems keeps releasing new probes and 24V accessories. It’s quite possible that with the recent “takeover” of DC-powered devices in the aquarium hobby, one day apex users will rely less on third party 120V equipment and more on the DC 24V accessories produced by Neptune Systems. Until that day comes, give Fluid Monitoring Kit a close look and see how FMM can help you achieve success in the reefing hobby.
At the time of writing this review, Flow Monitoring Kit with FMM, one 1” sensor, two ½” sensors, and all the connecting plumbing, including 1″ unions for the former sensor, and 1/2″ slip adapters for the latter two, sells for $199.95.
The optional 2” and ¼” flow sensors cost $99.95 and $19.95 respectively. The leak detectors each cost $29.95 and the optical sensor is priced at $24.95. Additional 1” and ½” flow sensors are $59.95 and $29.95. Finally, the solenoid valve will leave you with $29.95 less in your pocket, while PMUP pump is sold for $39.95. If you intend to use the ACC ports on FMM, you’ll also need a sold separately 24V power supply, for $29.95.
USEFUL LINKS
Neptune Systems FMK Product Page
Neptune Systems YouTube channel


Nice job Marcin Smok
My return path thru a Reeflo is 1 1/2 dia so I expect that that I would need to use the 2″ sensor to monitor flow? I would seem that using the 1″ senor would restrict by system? Or does it not matter?