
“You get what you pay for”. We know that sentence all too well and our emotional response to the phrase is universally a negative one. But is it really fair to dismiss something just because its price seems “too good to be true”? Not always. According to businessdictionary.com, the definition of “value” in marketing terms is:
The extent to which a good or service is perceived by its customer to meet his or her needs or wants, measured by customer’s willingness to pay for it. It commonly depends more on the customer’s perception of the worth of the product than on its intrinsic value.
I recently read a series of studies by researchers at three different business schools (source) where participants were given energy drinks advertised to give them more energy and help them focus. Some got these drinks at discounted prices, some paid full price for the exact same item. After chugging down these drinks, participants were asked to solve a series of word puzzles. In all three studies, people that paid full price for the drink solved consistently more puzzles than these that got them at a discount.
“Value” depends more on the customer’s perception of the worth of the product than on its intrinsic value.
I have faced this dilemma numerous times at my local pharmacy’s over the counter drug section: You see two different painkillers, one generic and one brand name, read the ingredient list of each, and find that both medications have the exact same amounts of the identical active ingredients. That should be the end of the debate… if they both have the same content, you choose generic for its discount price.But it’s never as simple as that, right? What I do in that situation is google “Is medication X the same as its generic counterpart?” and I go with the recommendation of the medical advice I get from the list of search results. Where you get that opinion matters too, obviously. I trust information posted on drugs.com.
The reason I started this review in this unusual matter is two-fold:
- Always do your own research, regardless of what some internet blogger is telling you. I am not here to influence you one way or another; my role is to give you as many facts as I could collect from my experience with a product and possibly help you decide if that product is right for you. I’m just a reef keeping aficionado like you, and despite having the good fortune to be able to test and evaluate new and exciting aquarium equipment, I don’t know everything, and sometimes, I may omit something that other people correctly point out.
- Have perspective. Over and over, I read the (often unpopular) opinion on manufacturers’ online user groups “Don’t buy this, it’s overpriced crap”. Is it always? Compared to what? It’s hard to find two identical products from two different companies with the same price tag, doing the exact same thing. Instead, ask yourself these questions before you spend your hard-earned money on something you may later regret: Do I need this in my life? What features of this product can I actually utilize? Can I afford to have extras I may never use? Do I own a private jet? Sometimes, a “lower value” product can be sufficient to one’s needs but not to one’s desires and that’s ok. Have perspective and use logic to make your choices.
ENTER REEF BREEDERS PHOTON V2+
I have here a product that is a perfect case study for the inquiry presented in the previous paragraph and, based on my personal experience, I am in a good position to add some constructive criticism to the topic.
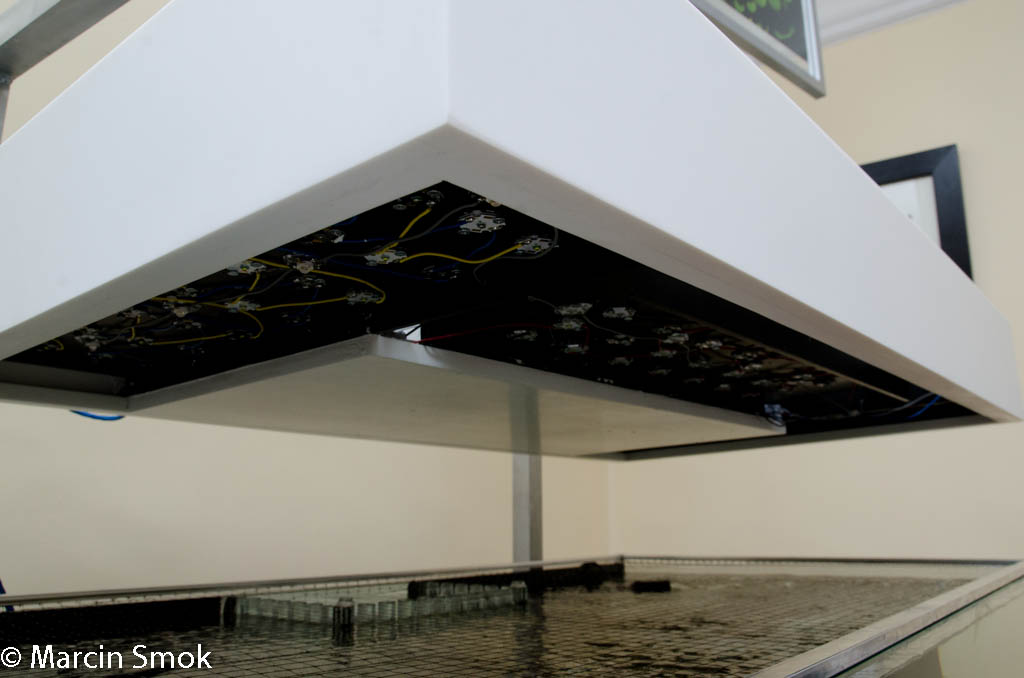
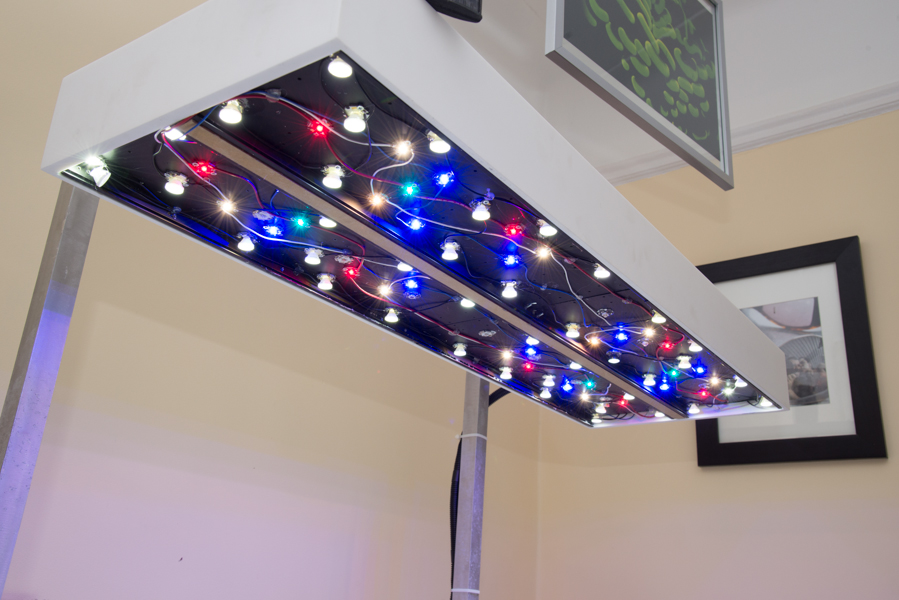
Those of you that have read any of my previous LED light reviews know that I am a big fan of the technology. Not only for aquarium use, but in real-world applications as well. I employed LEDs for reef keeping use in the early days, back when the only affordable option was to build one from scratch using newly (at the time) available high-power LED emitters and accompanying constant current drivers and manual 0-10V potentiometer chips. This is the monster I built back then, my first real LED fixture:
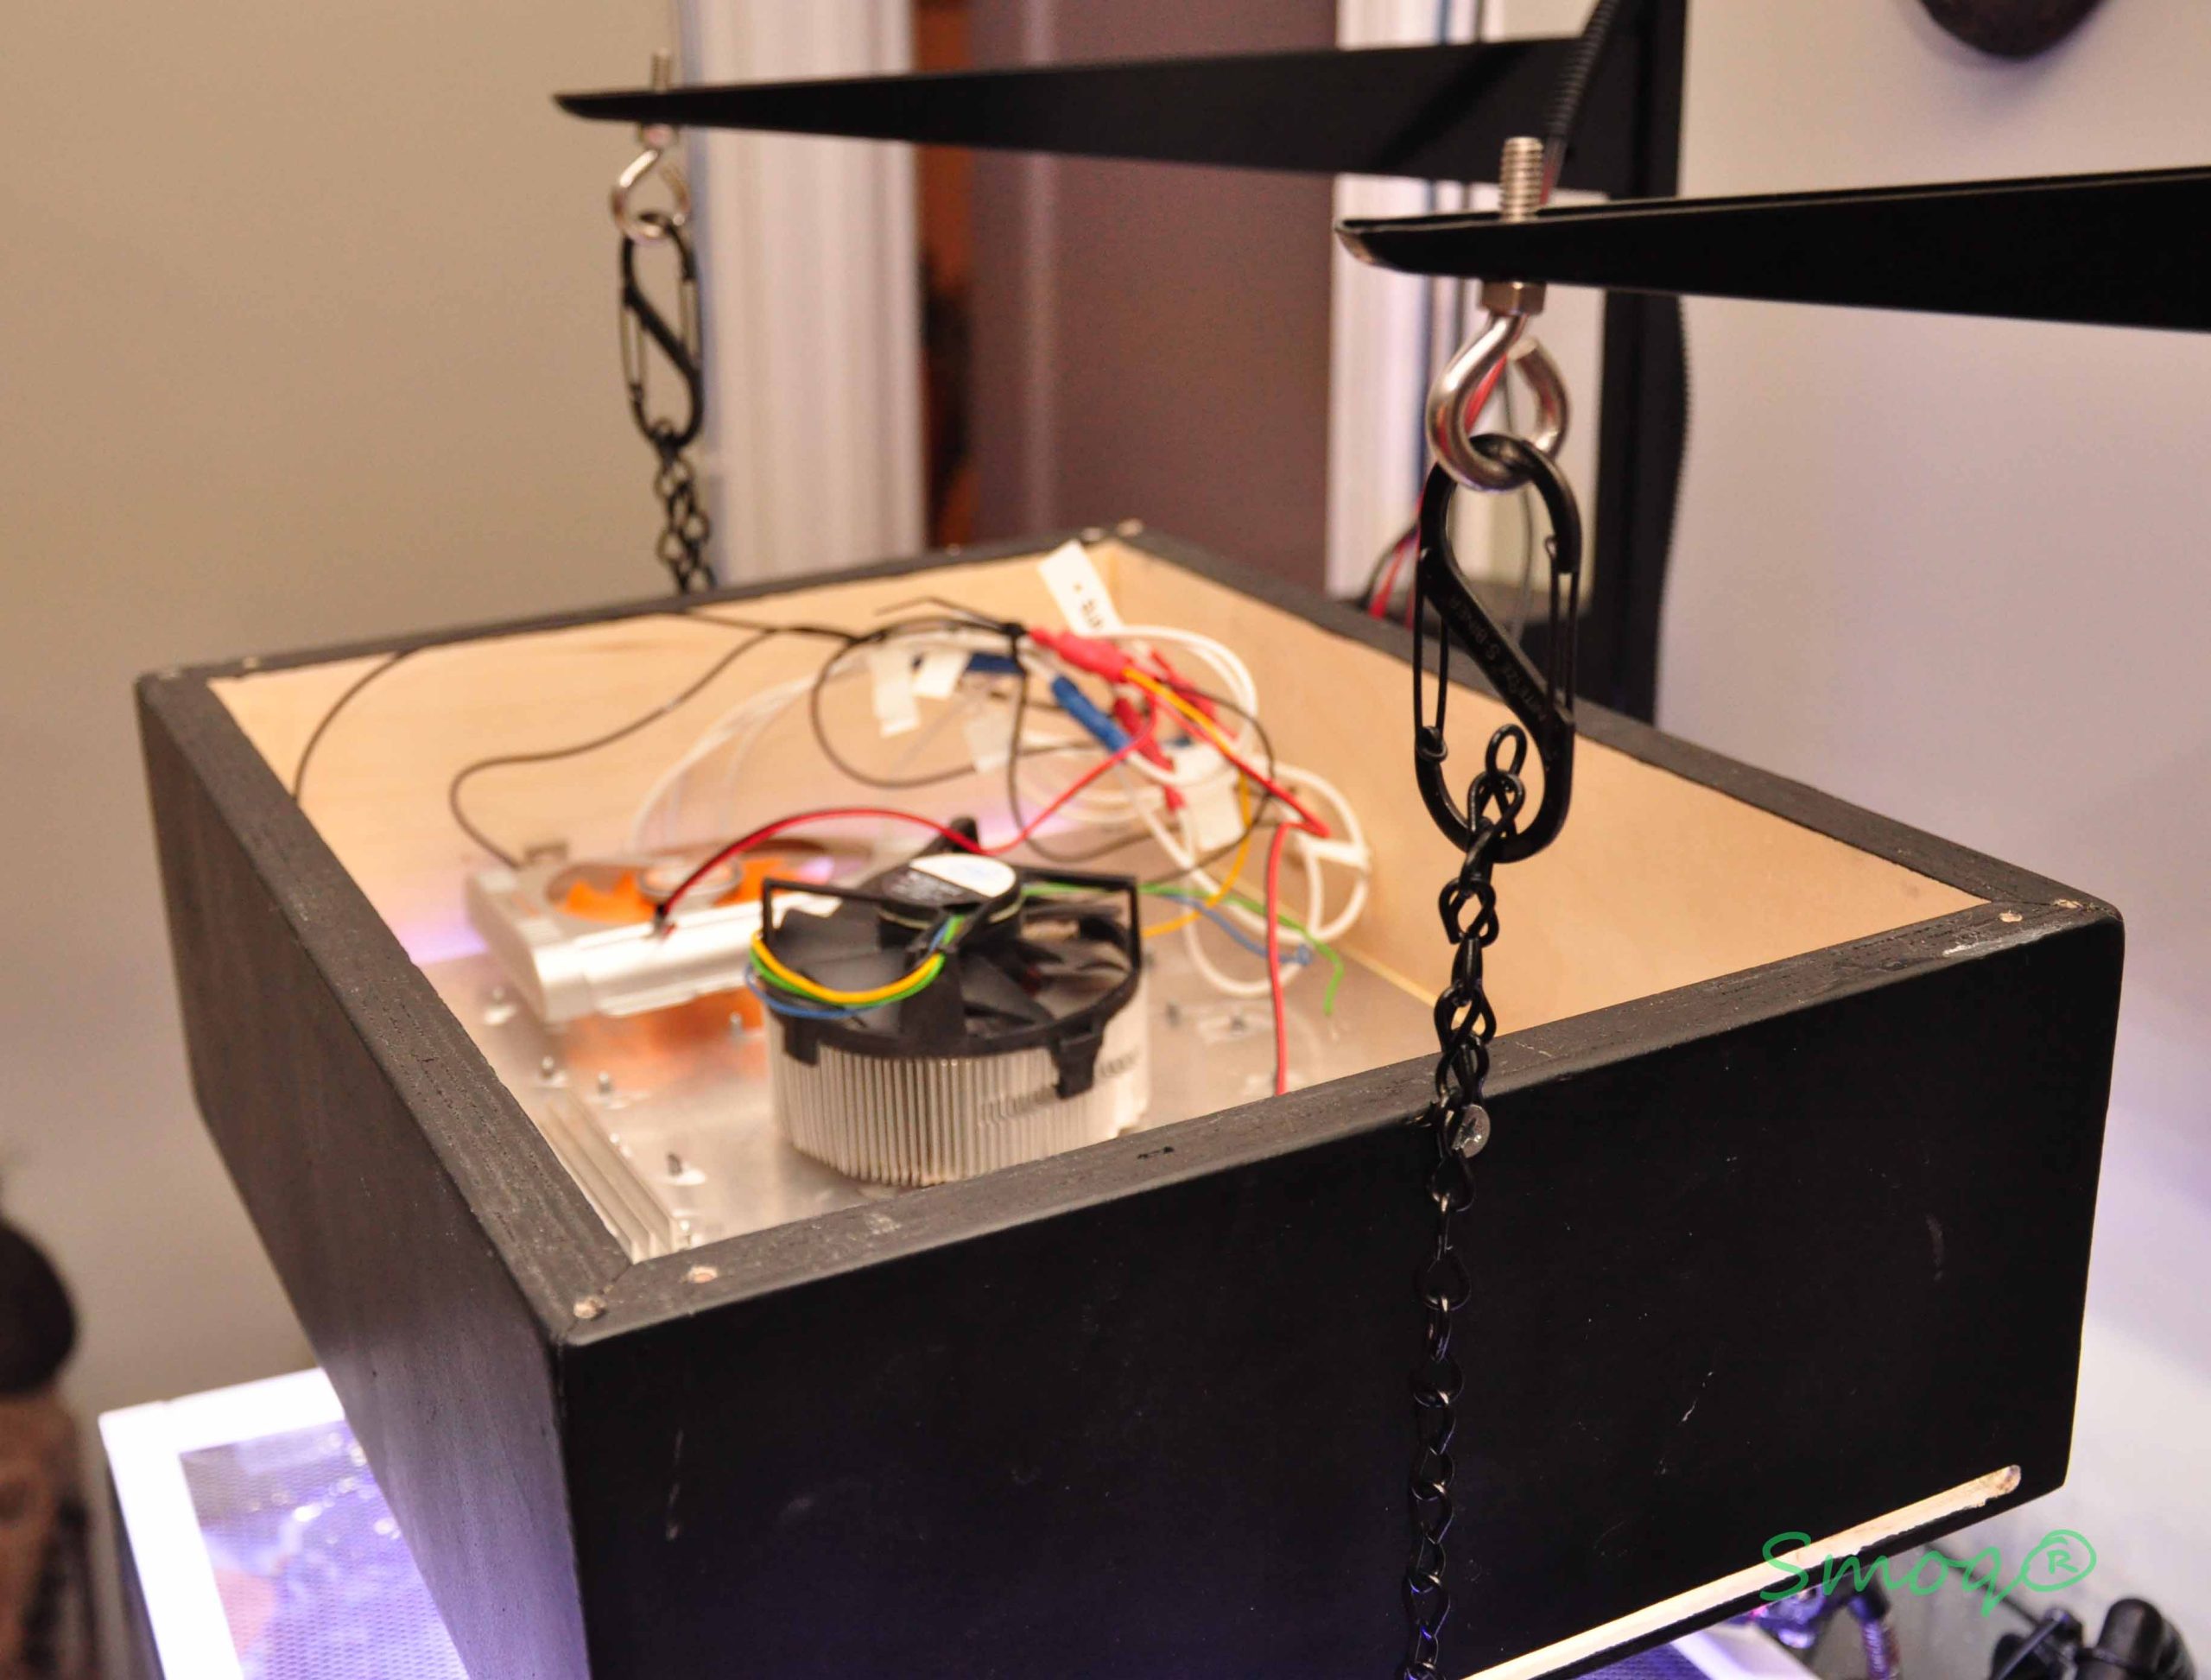
It was ugly, inelegant, and very DIY-looking. But it grew corals. It was in fact so good at growing corals that a few months later they outgrew the 34g cube and I upgraded that tank to a 57g, 36×20” footprint aquarium. I also built a second version of the LED light, larger and slightly better looking, using the latest (at the time) LED emitters from Philips and Cree. That grew corals too.
And I upgraded again. And I built another light.
And then another…
The point is, all these lights were good at growing corals, despite being nothing more than a DIY project.
Now I have an AquaticLife Hybrid T5 light combined with Ecotech radion G4 Pro fixtures. Would I go back to the DIY lights I’ve been using for all these years? No, I wouldn’t, my Radions are great and not an eyesore like some of the Frankensteins I built.
But then, if I was on a tight budget and could not afford the Ecotech LED panels I own, I would consider getting something in the slightly lower-tier segment, just like the light that is a topic of today’s Definitive Review. Let’s dissect…
ON PAPER
Photon V2+ is a light made by the Rhode Island-based company Reef Breeders. I received a 48” version (which is not the actual length of the fixture but let’s leave it for later) of that light, which, at the time of writing this article, costs $699. The company also sells it in 16, 24, 32 and 50” models (again, not the actual length but rather the tank length it is designed for), priced from $375 to $715 USD. What you get for your hard-earned money is an LED fixture using brand name emitters from Cree, Philips, Semi-LED, and Osram, encapsulated in an aluminum case, paired with a supplied Wi-Fi controller and shipped with both legs and a hanging kit. I will use the Photon 48-V2+ model in this case study, as this is the light I have in front of me.
SPECIFICATIONS
Let’s talk about the obvious first- emitters. Photon 48-V2+ has 88 of them, divided by 6 channels of control, each representing a corresponding LED color. These are:
| Channel 1 | Deep Red | 4 | Osram | 3watt | 660nm |
| Channel 2 | Green | 4 | Semi LED | 3watt | 520nm |
| Channel 3 | Royal Blue | 24 | Cree XT-E | 5watt | 450nm |
| Channel 4 | White | 20 | Cree XP-E | 5watt | 5500K |
| Channel 5 | Cool Blue | 16 | Cree XP-E | 3watt | 480nm |
| Channel 6 | Violet | 20 | Semi LED | 3watt | 420nm |
The LED ratio represents a modern trend in reef oriented lights, with a roughly 2:1 ratio of blue to white emitters and a good number of cool blue diodes that produce an effective visual brightness. All emitters that make up the Reef Breeders fixture are of high quality and I’ve had personal experience with most of them while building my own lights in the past. I especially am impressed with the 5W Cree emitters; these things are technological marvels.
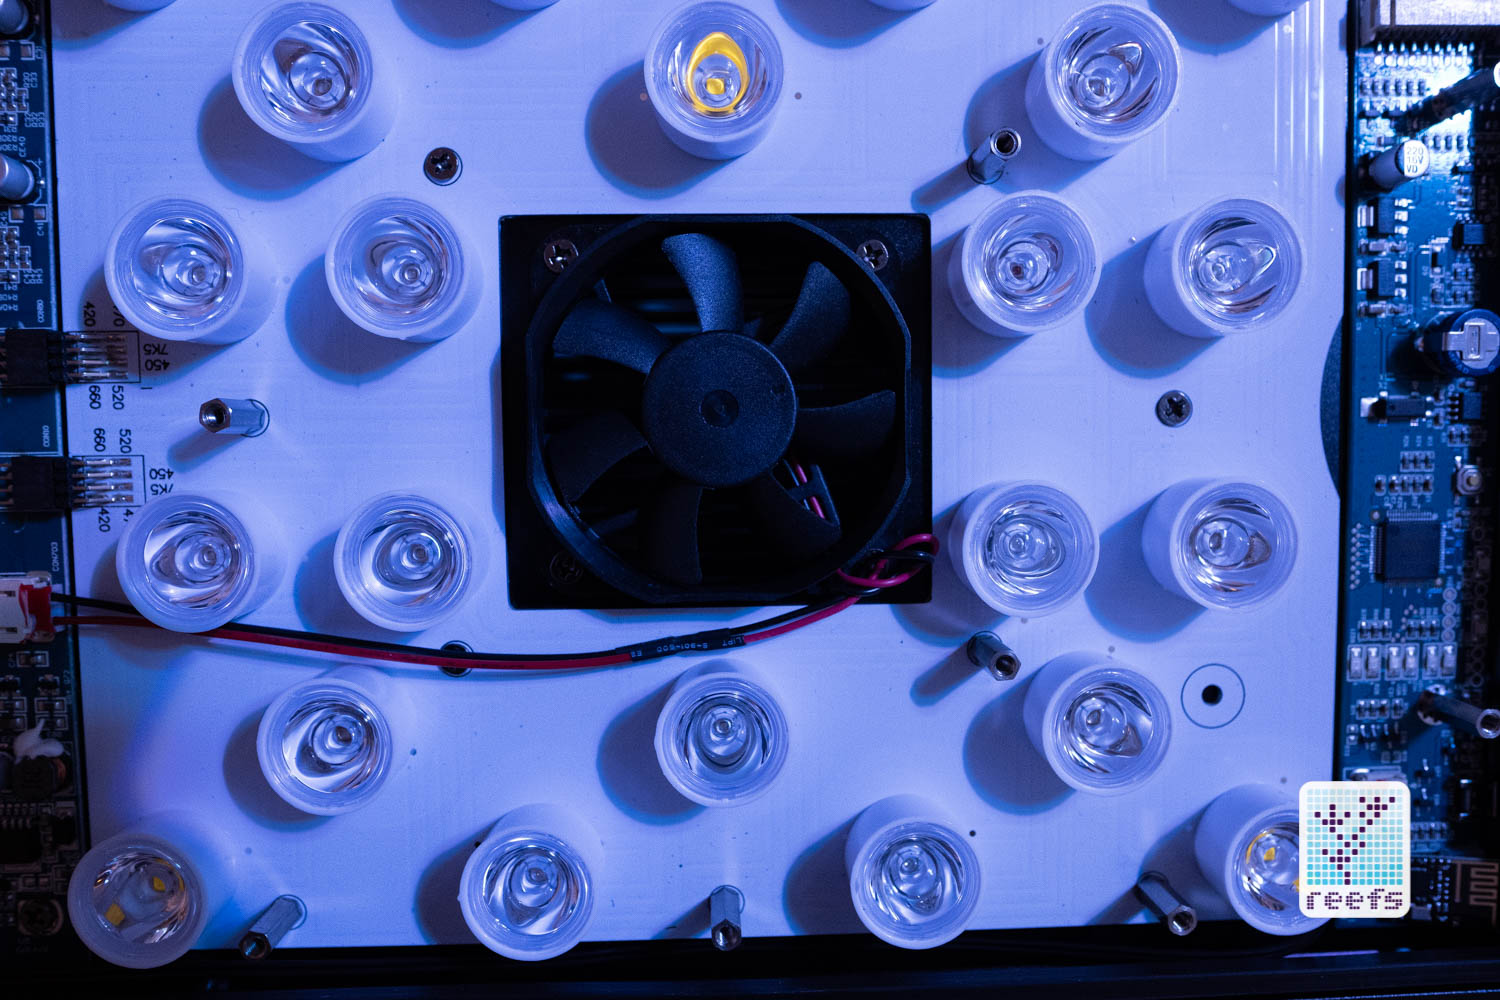

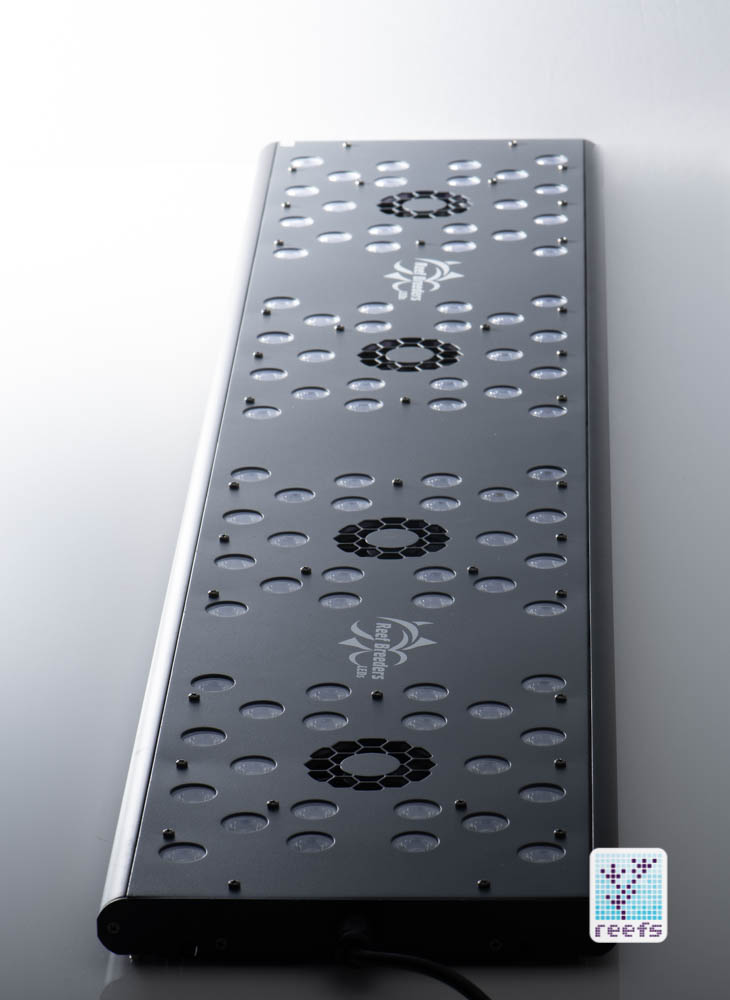
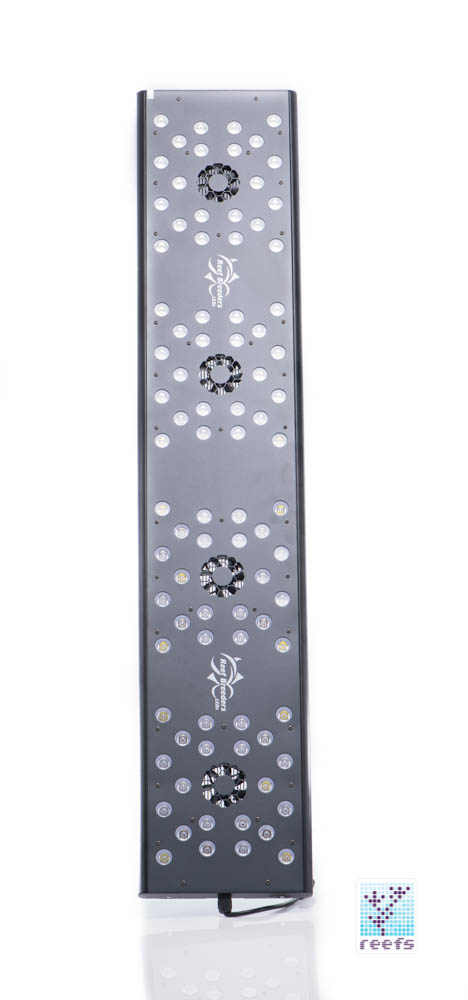
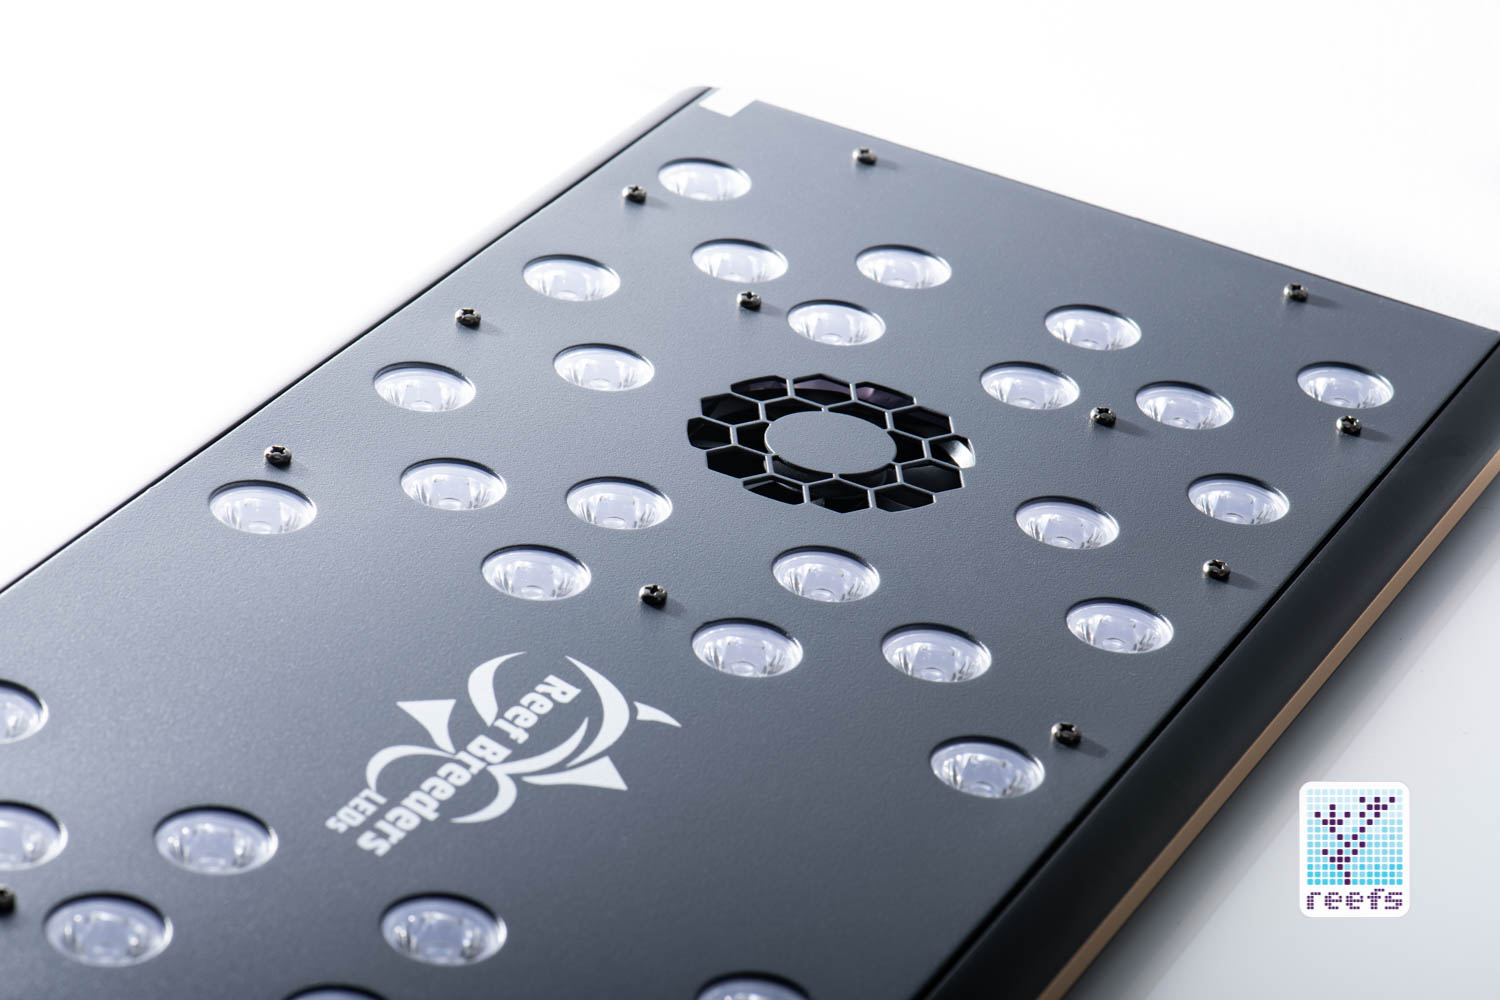
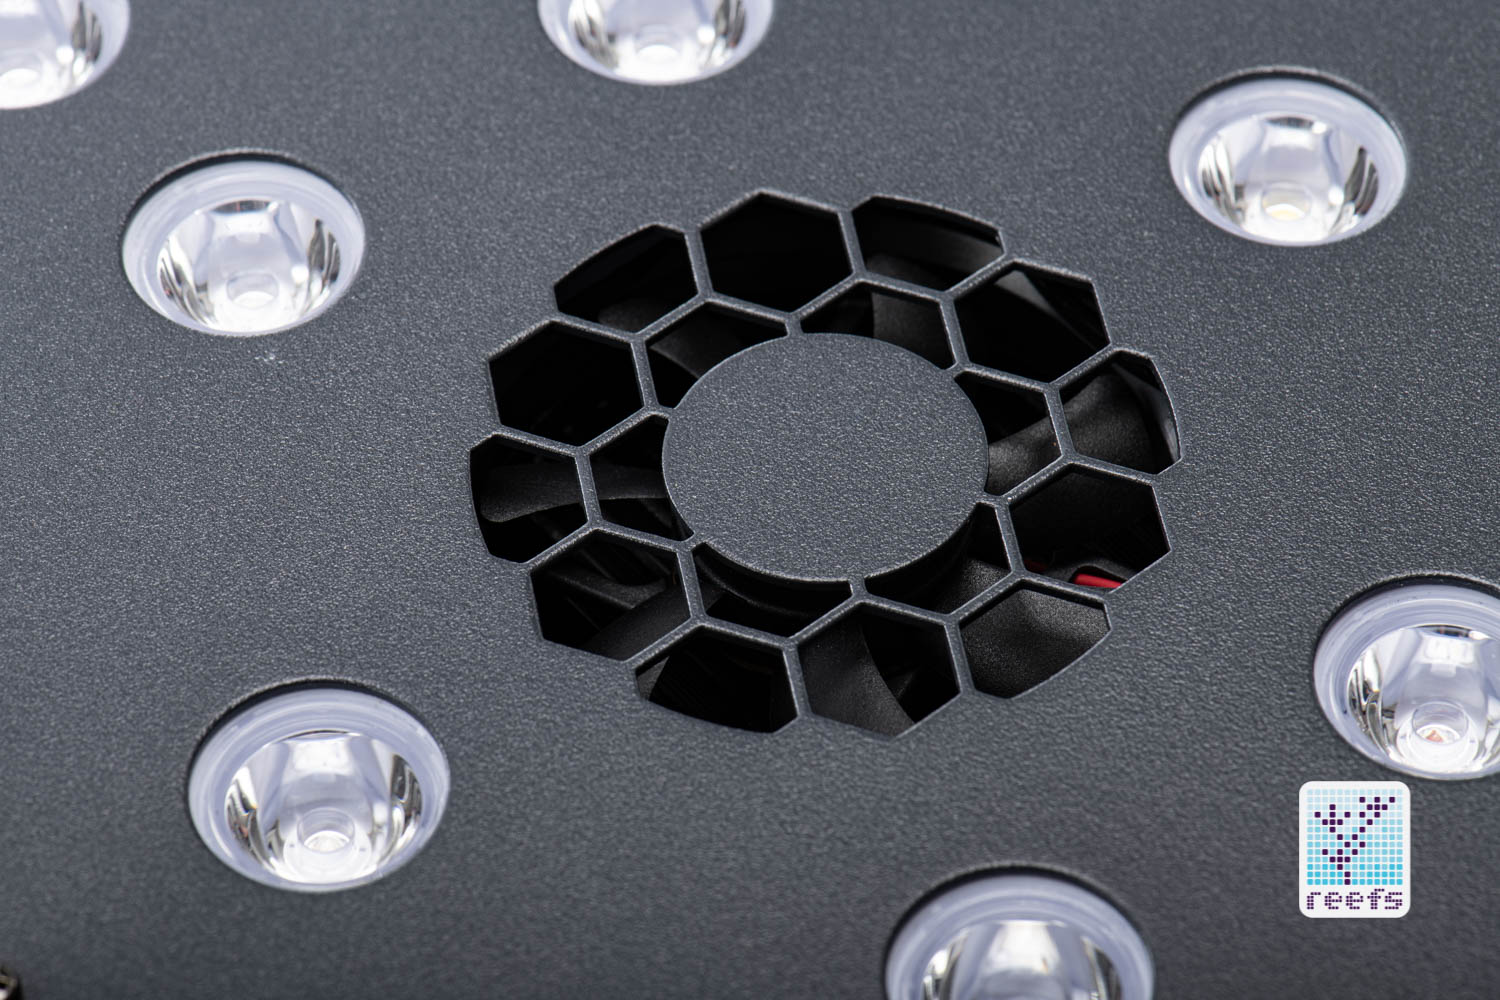
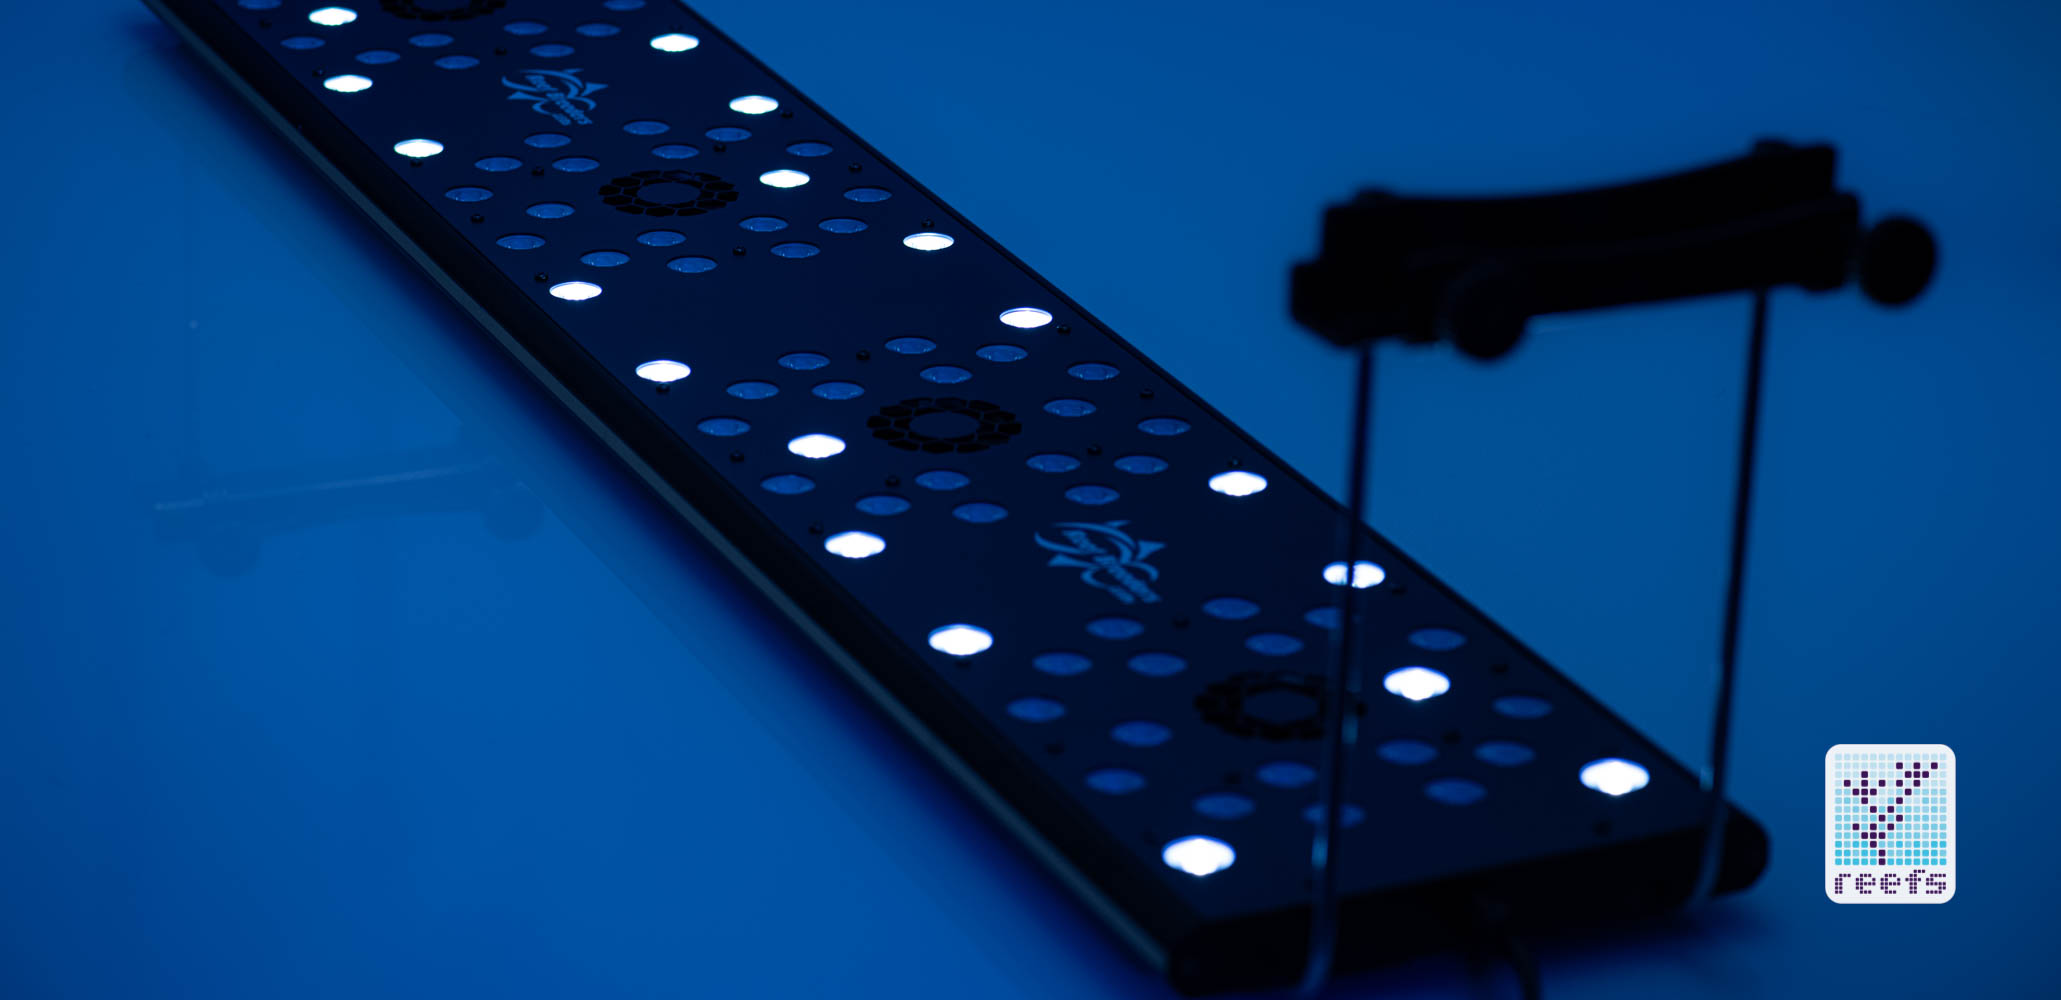
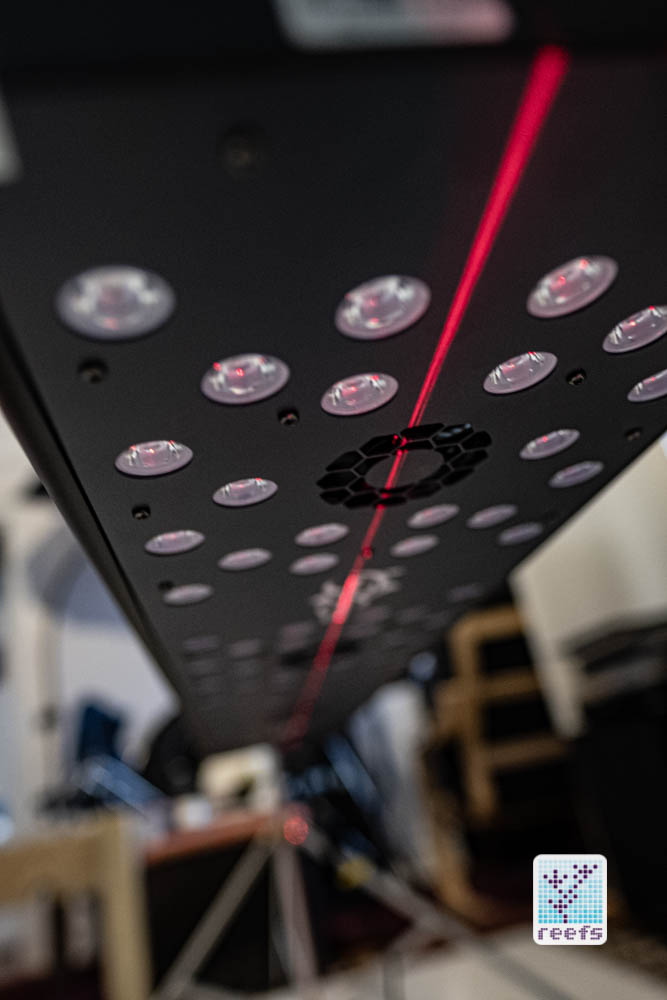
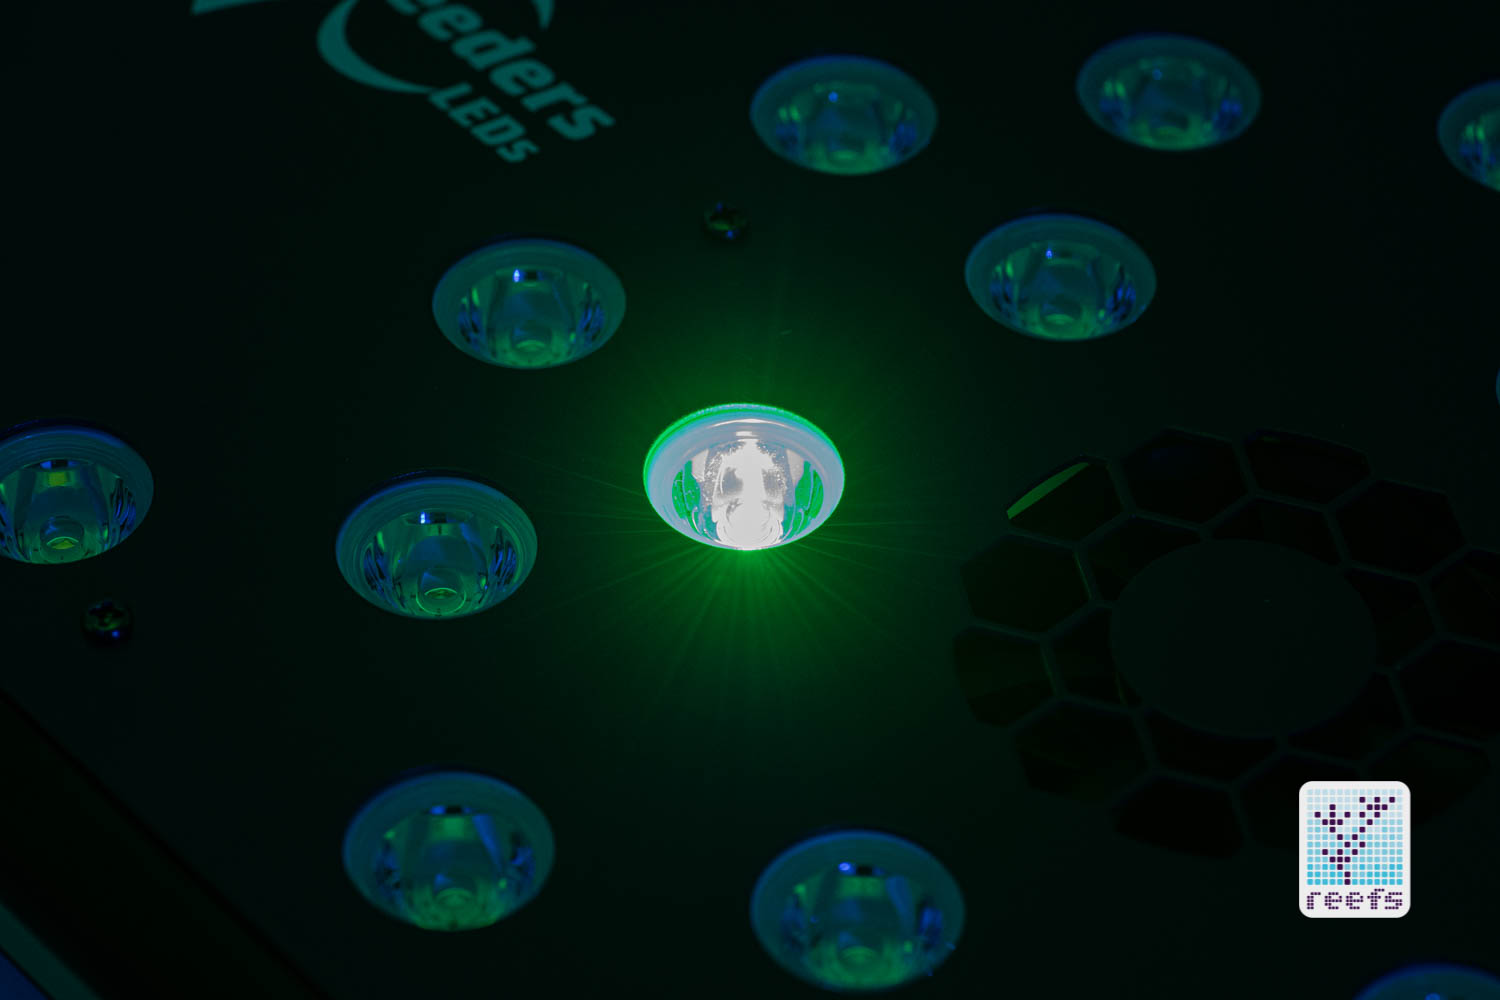
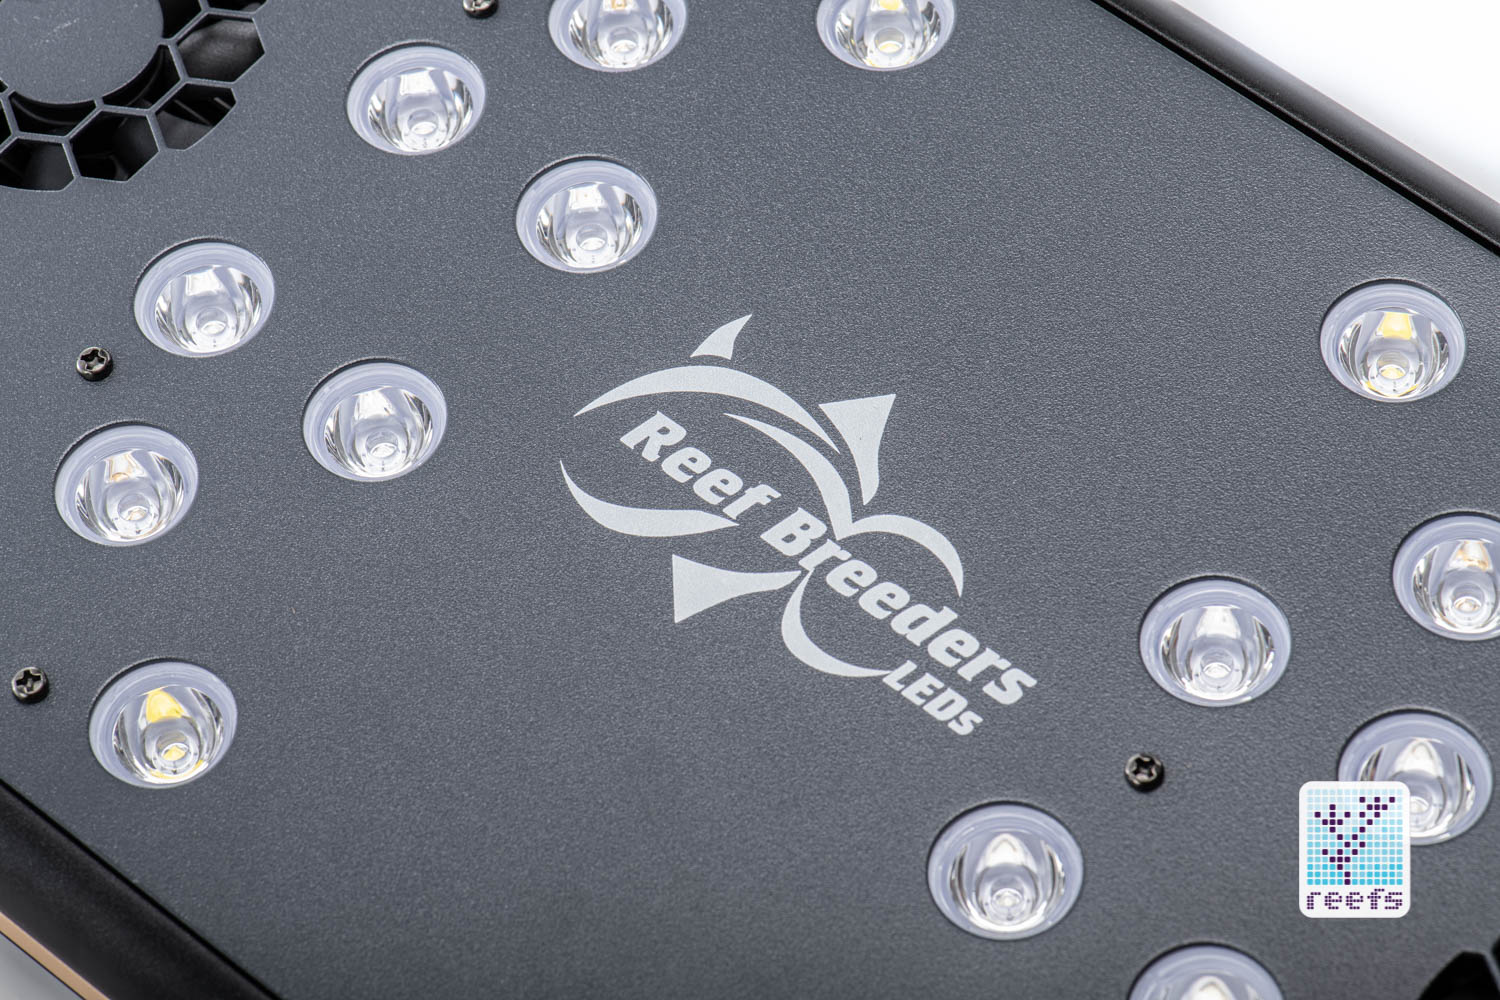
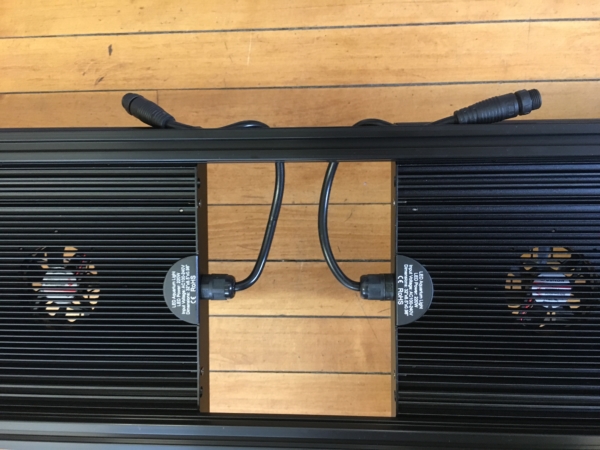
Emitters in Photon 48-V2+ are arranged in 4 honeycomb-shaped clusters, each with a small fan in the center and about 3.5” of space in between them. You can see the emitters’ arrangement within clusters from the photo I took with all channels on at 100%. The white LEDs are on the outside, farthest from the fan in the center, then closer to it we have a mix of royal blue, violet, and cool blue that form the main PAR output of the fixture. Closest to the center and staggered diagonally from each other are single red and green emitters. That’s an optimal arrangement in my opinion, you will most likely never run either the red or green at full power anyway as they are overwhelming to the human eye, hence there are only 4 of each in the entire fixture.
The combined power of Reef Breeders Photon 48-V2+ 88 LEDs produce an advertised 240W of max power and light of a spectrum peaking in the 420nm and 450nm wavelengths for optimal coral growth. Each emitter is equipped with its own lens that looks very similar to the ones being sold in DYI emitter kits, although I may be wrong on this one.
The light also comes with a WiFi remote, a universal power adapter, and both mounting legs and hanging kit. Let’s dissect further, shall we?
UNBOXING
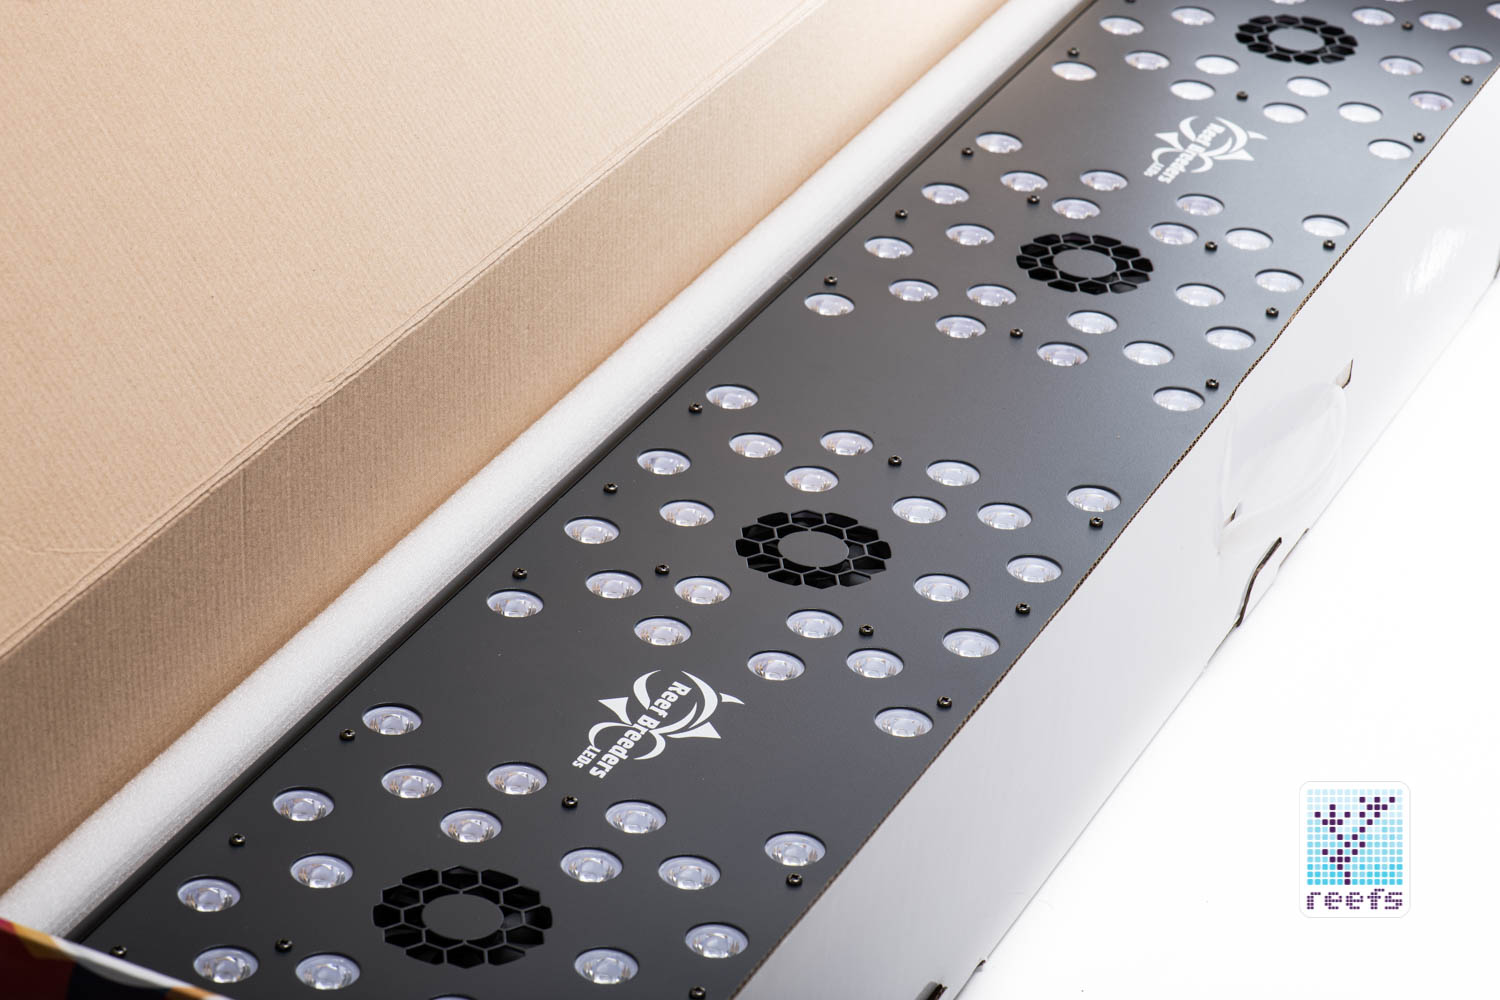
Right out of the box (literally and oh please, let it be the right use of this word) Reef Breeders should receive praise for their packaging efforts. The box the light was shipped in has a half-inch thick wall (I’m keeping that box!) and the light itself sits in a second box with a custom rigid foam insert with cutouts for the fixture components. Unless your delivery guy is named Ace Ventura, you are going to get this thing in one piece, no doubt about it.
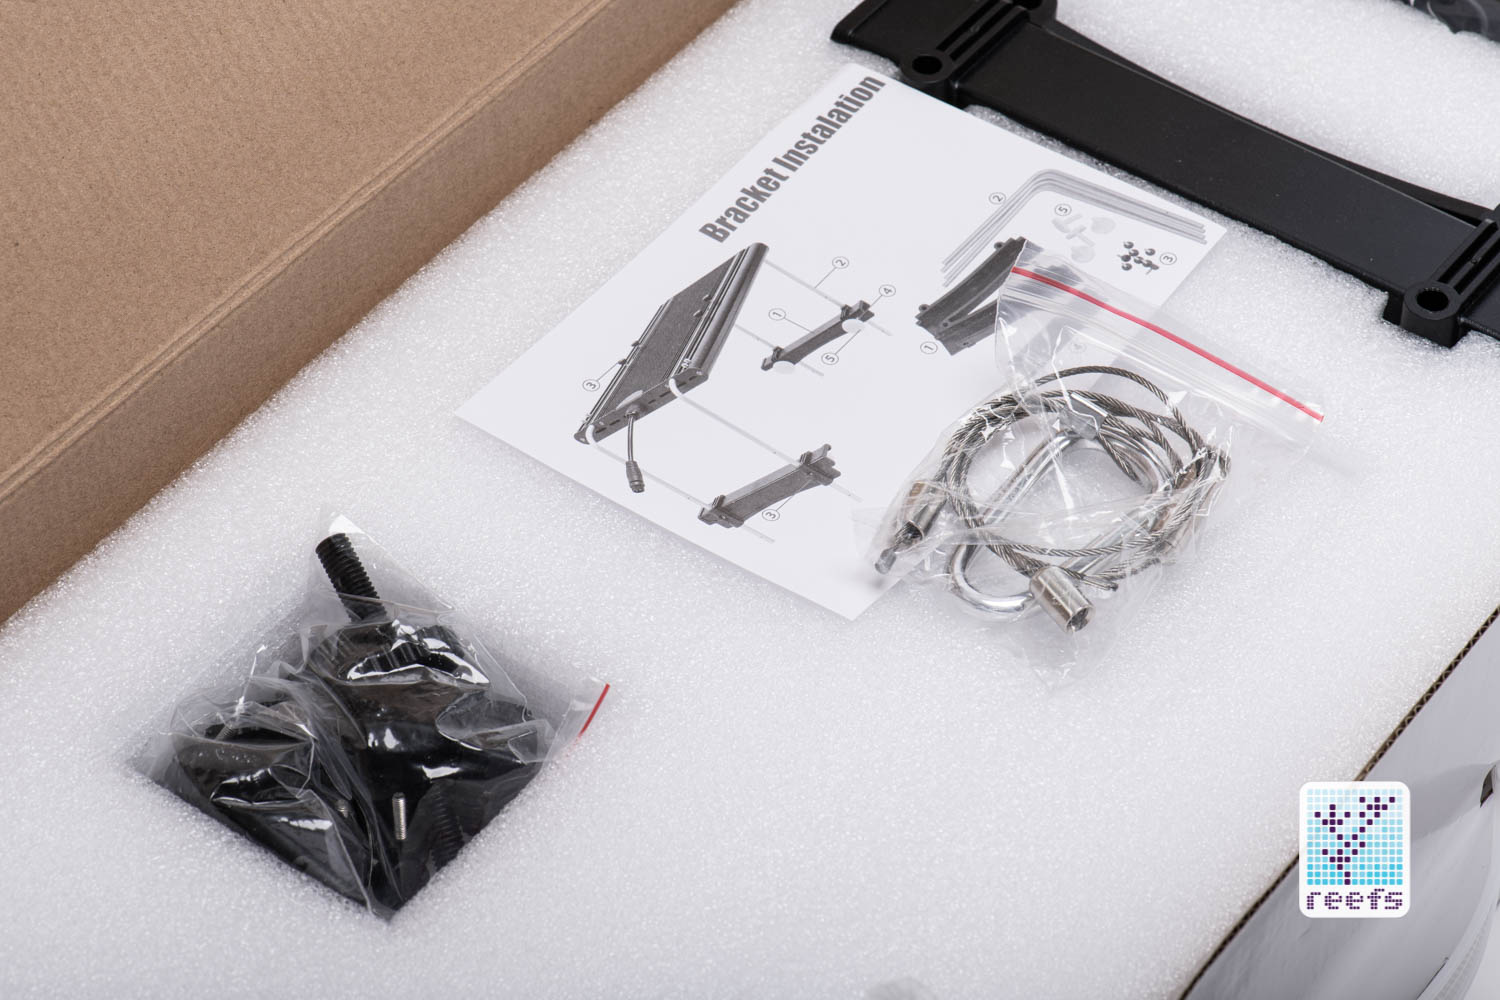
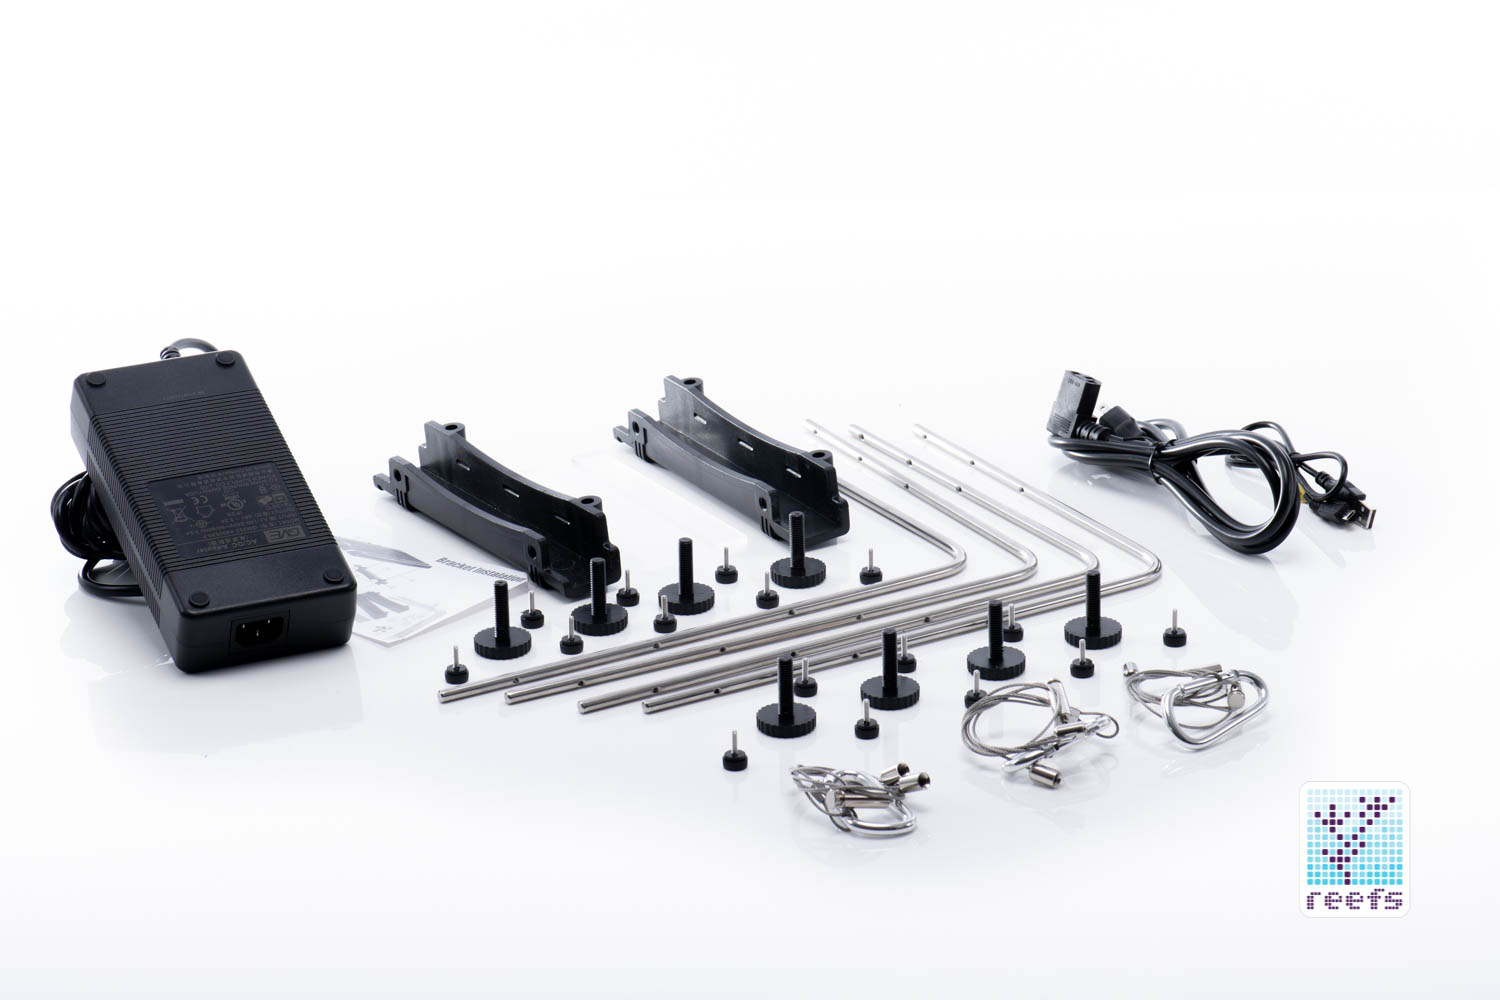
Inside this Russian doll packaging, we have:
-the light
-power brick and C-14 standard power cable
-stainless steel leg rails
-leg brackets with all necessary hardware
-WiFi remote and an USB cable to charge it
-hanging kit
-printed instructions
THE LIGHT
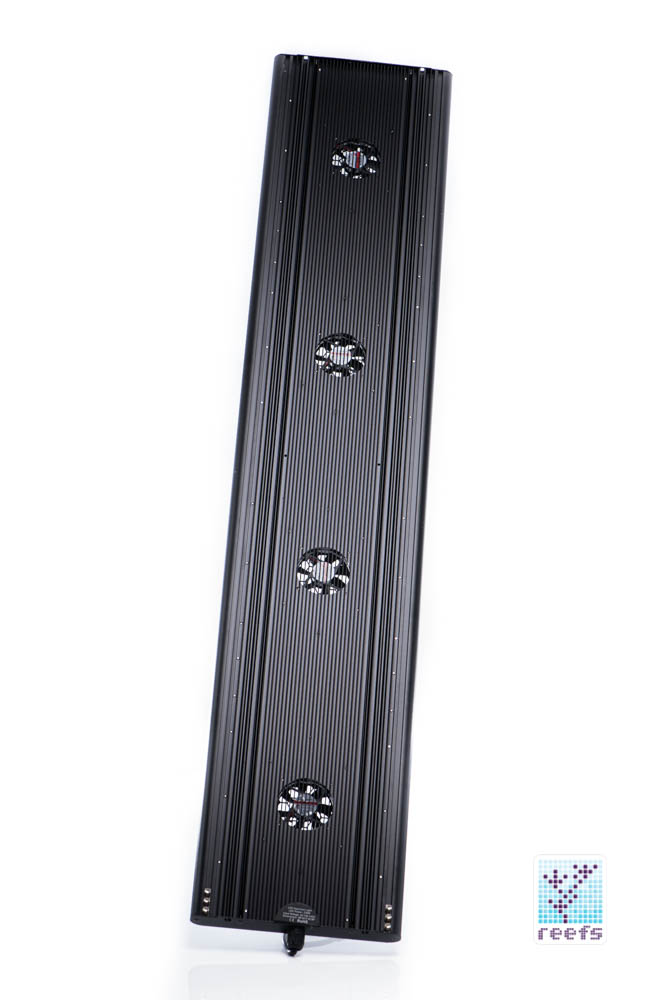
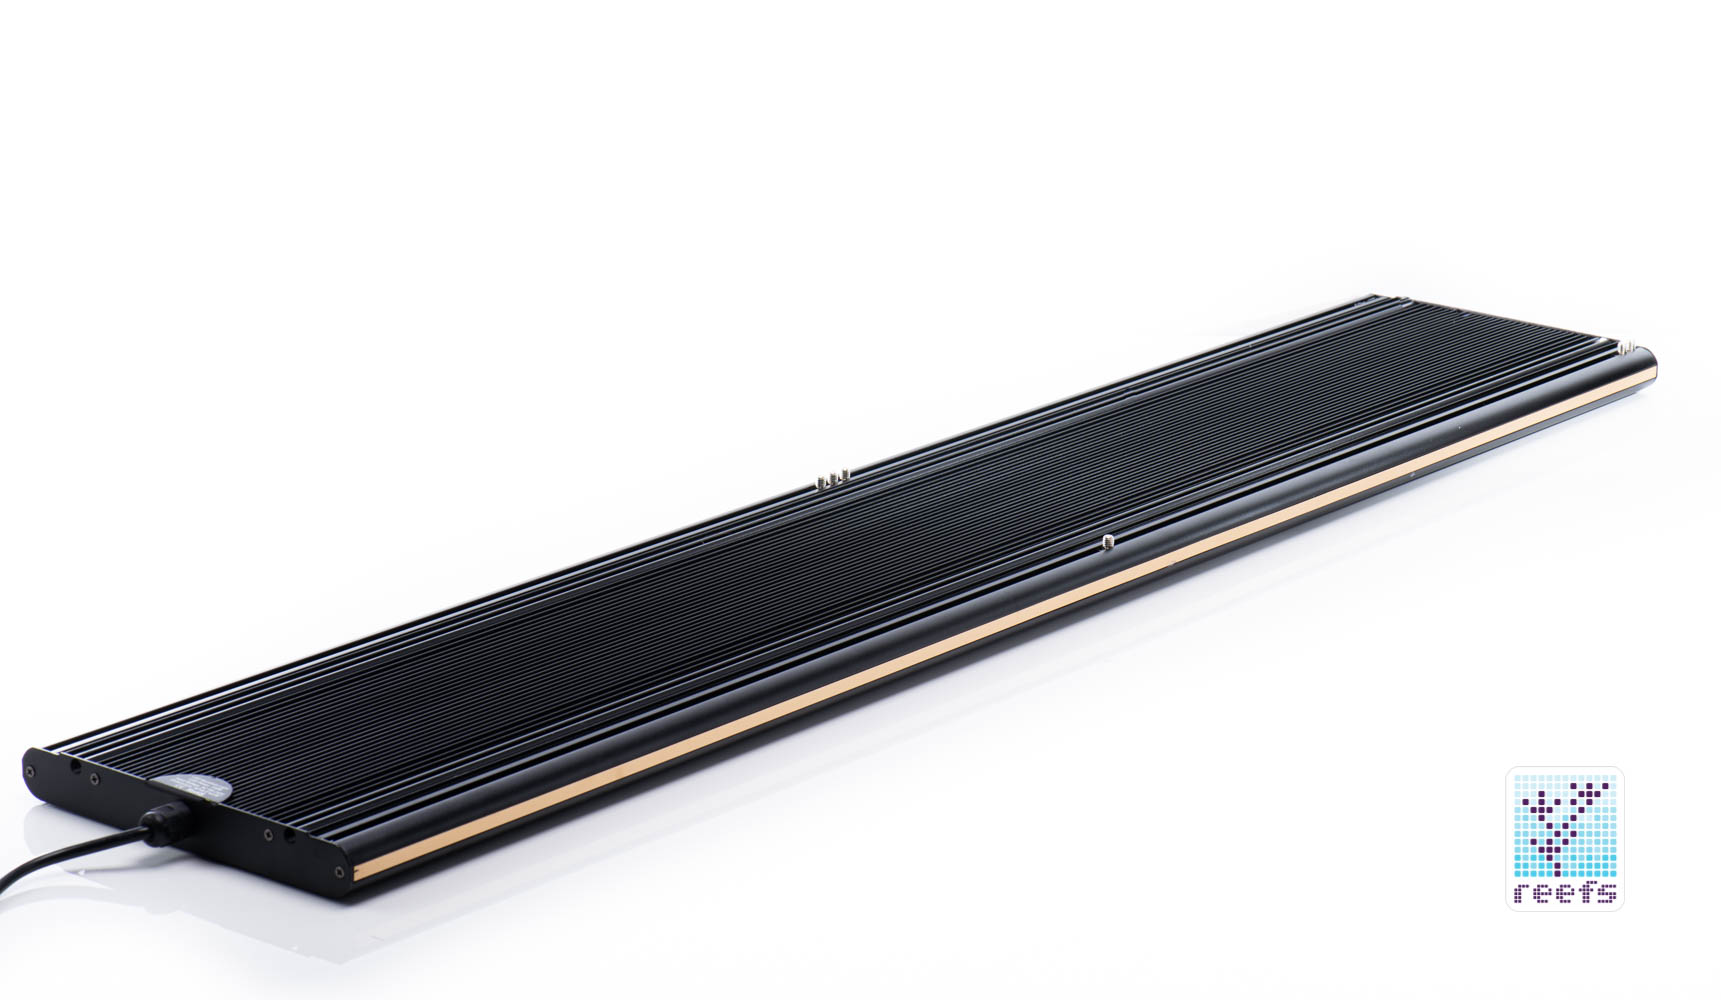
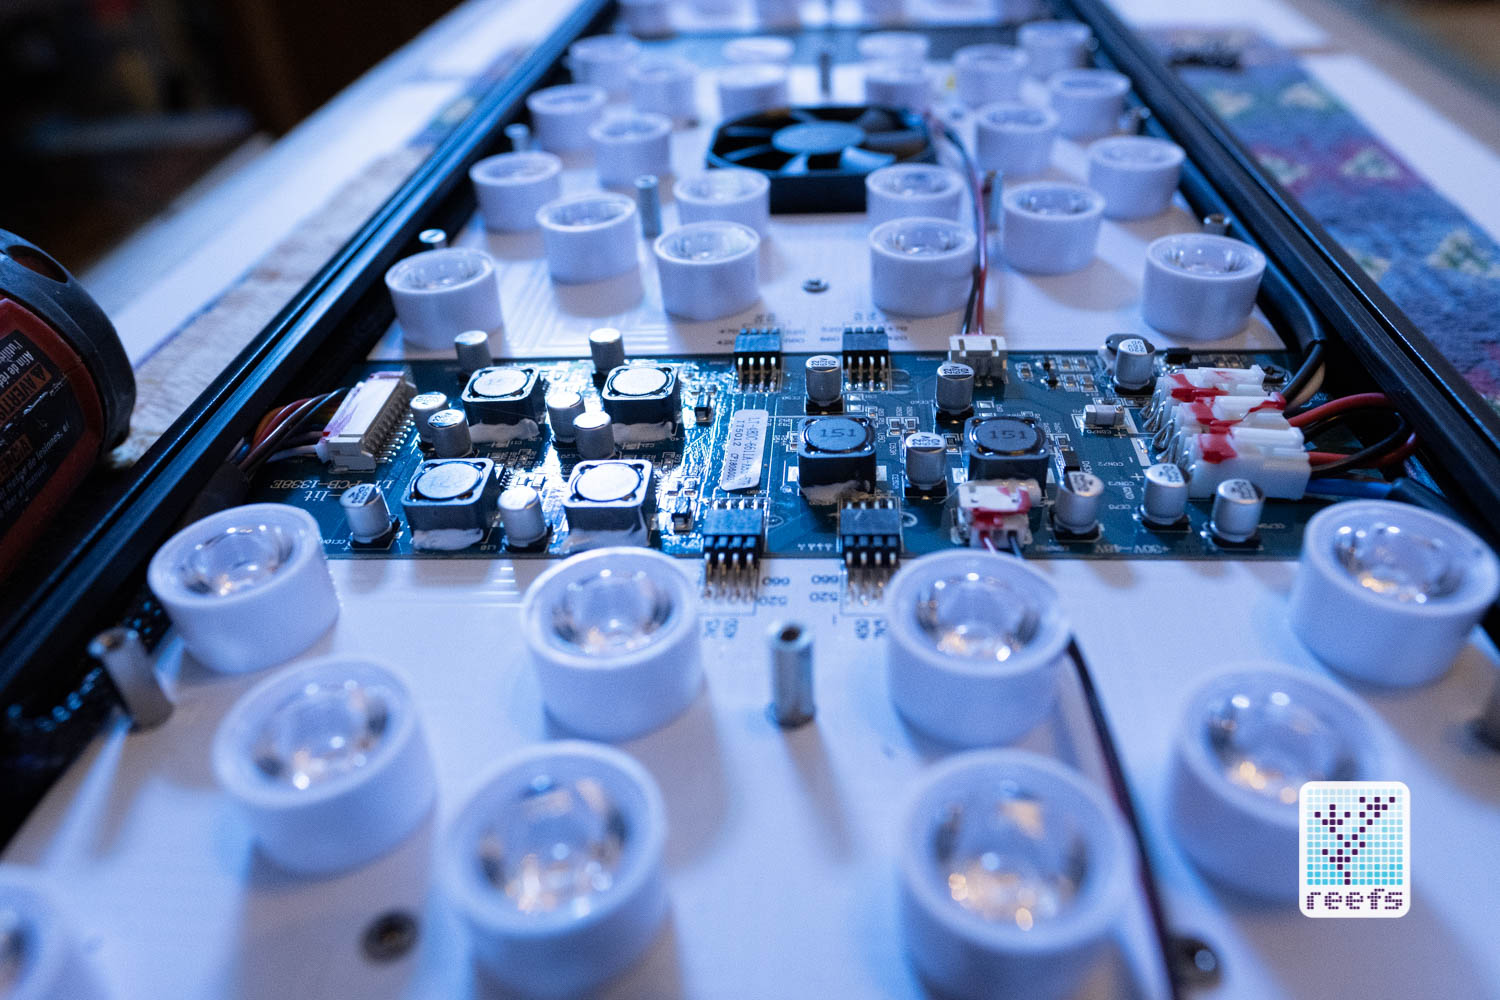
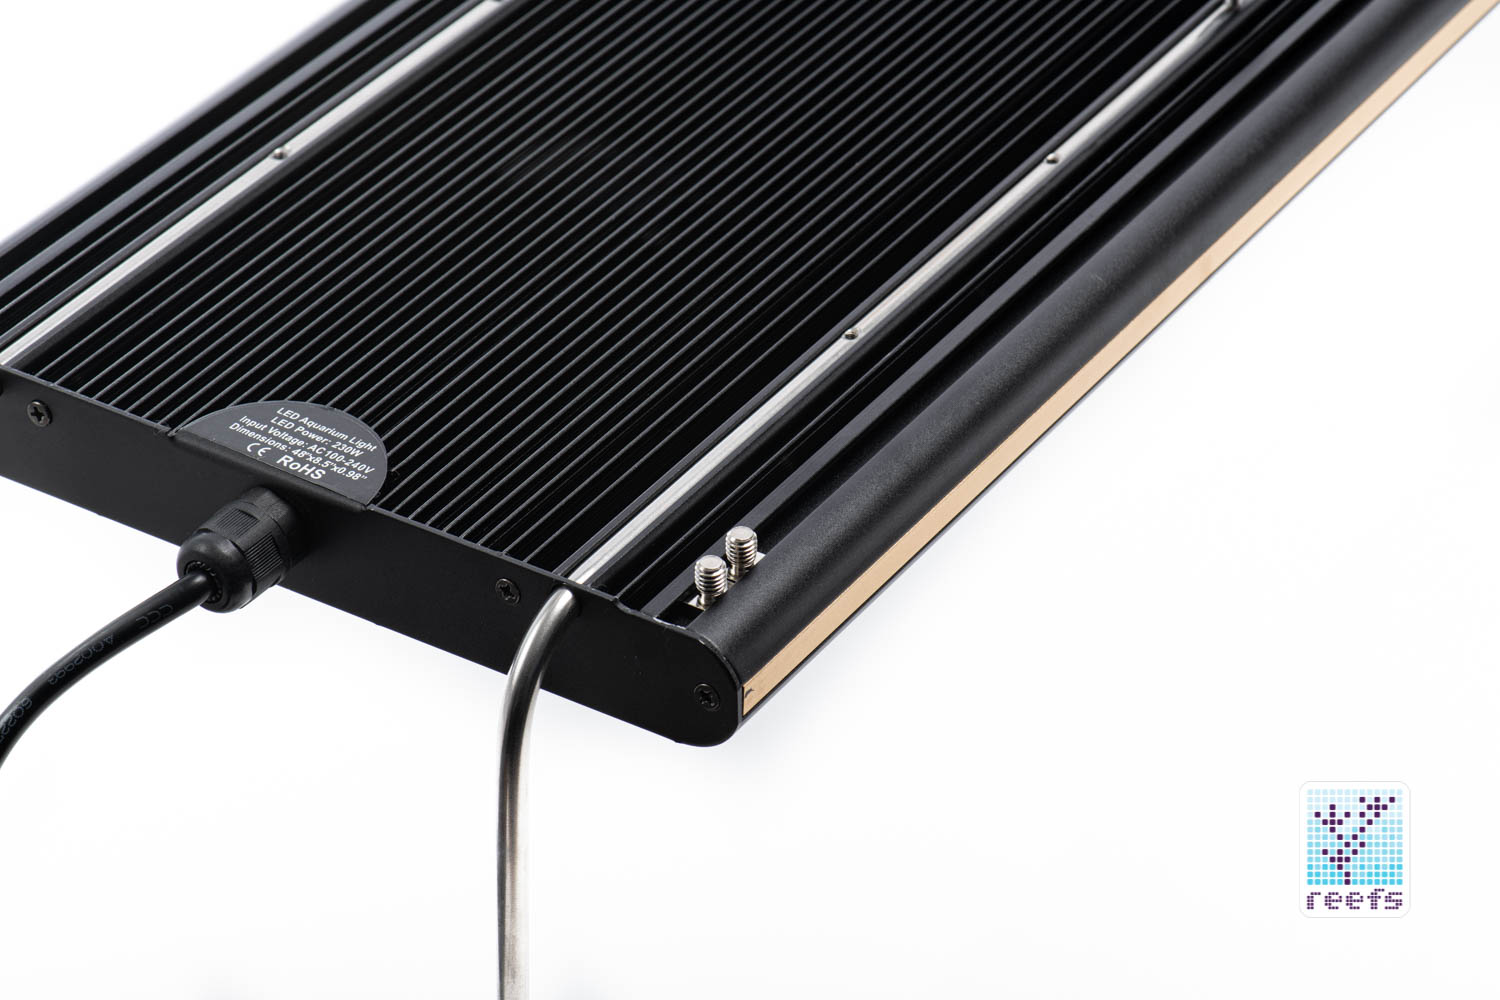
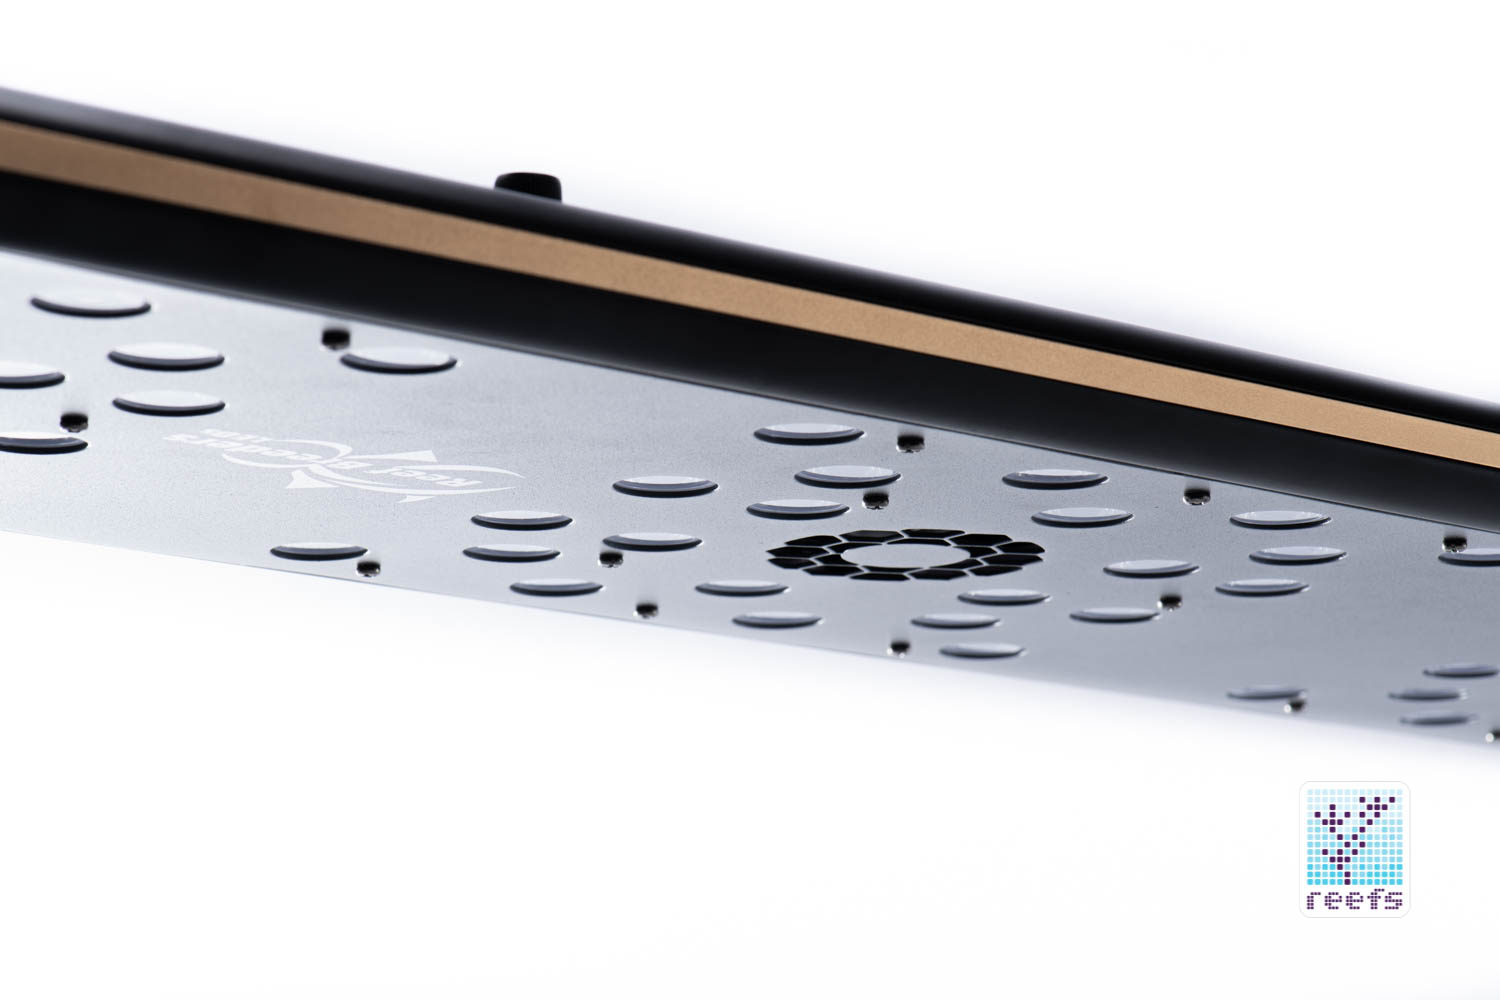
The first impression upon taking the light out of its foam bed is utterly positive. In one sentence, it’s a solid build through-and-through. The whole thing is one (well, two, the bottom and top) sleek aluminum piece of reefing sculpture that also double as a massive heatsink. When I say sleek, I am saying no unnecessary protrusions, questionable design elements, or over-the-top color schemes. At only 1-1/16” (27mm) thick with no hard edges found anywhere, it also feels slim and aerodynamic. The only break from the uniform blackness of the powder-coated aluminum body is a thin gold stripe running along the back and front (you decide which is which, the power cord is on the side) of the light and a Reef Breeders logo on the underside.
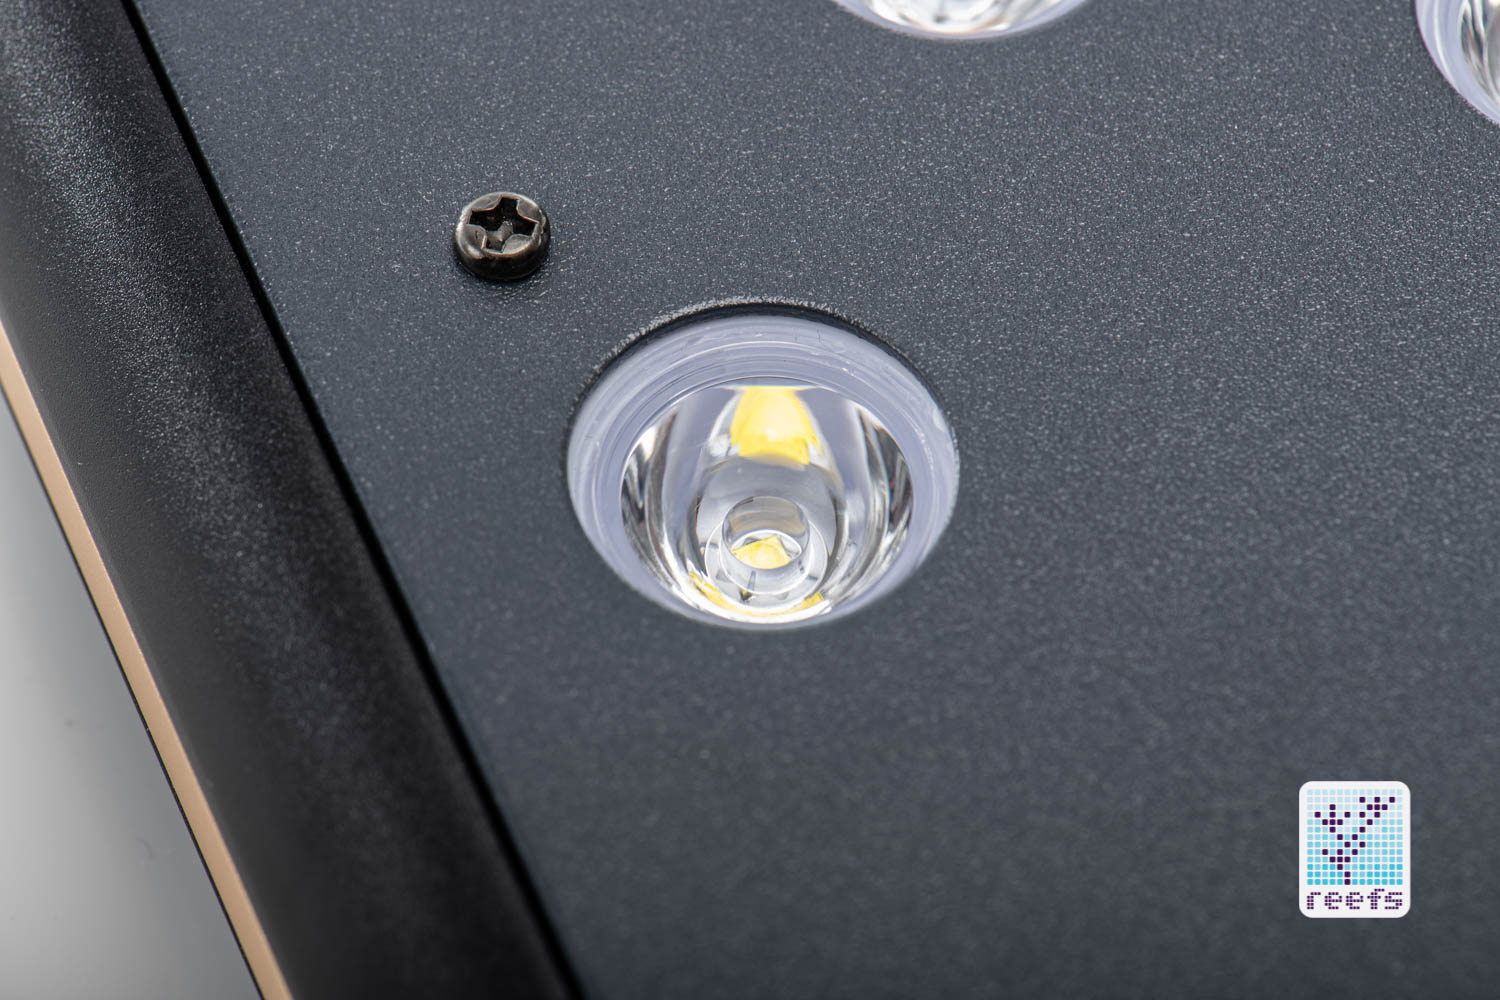
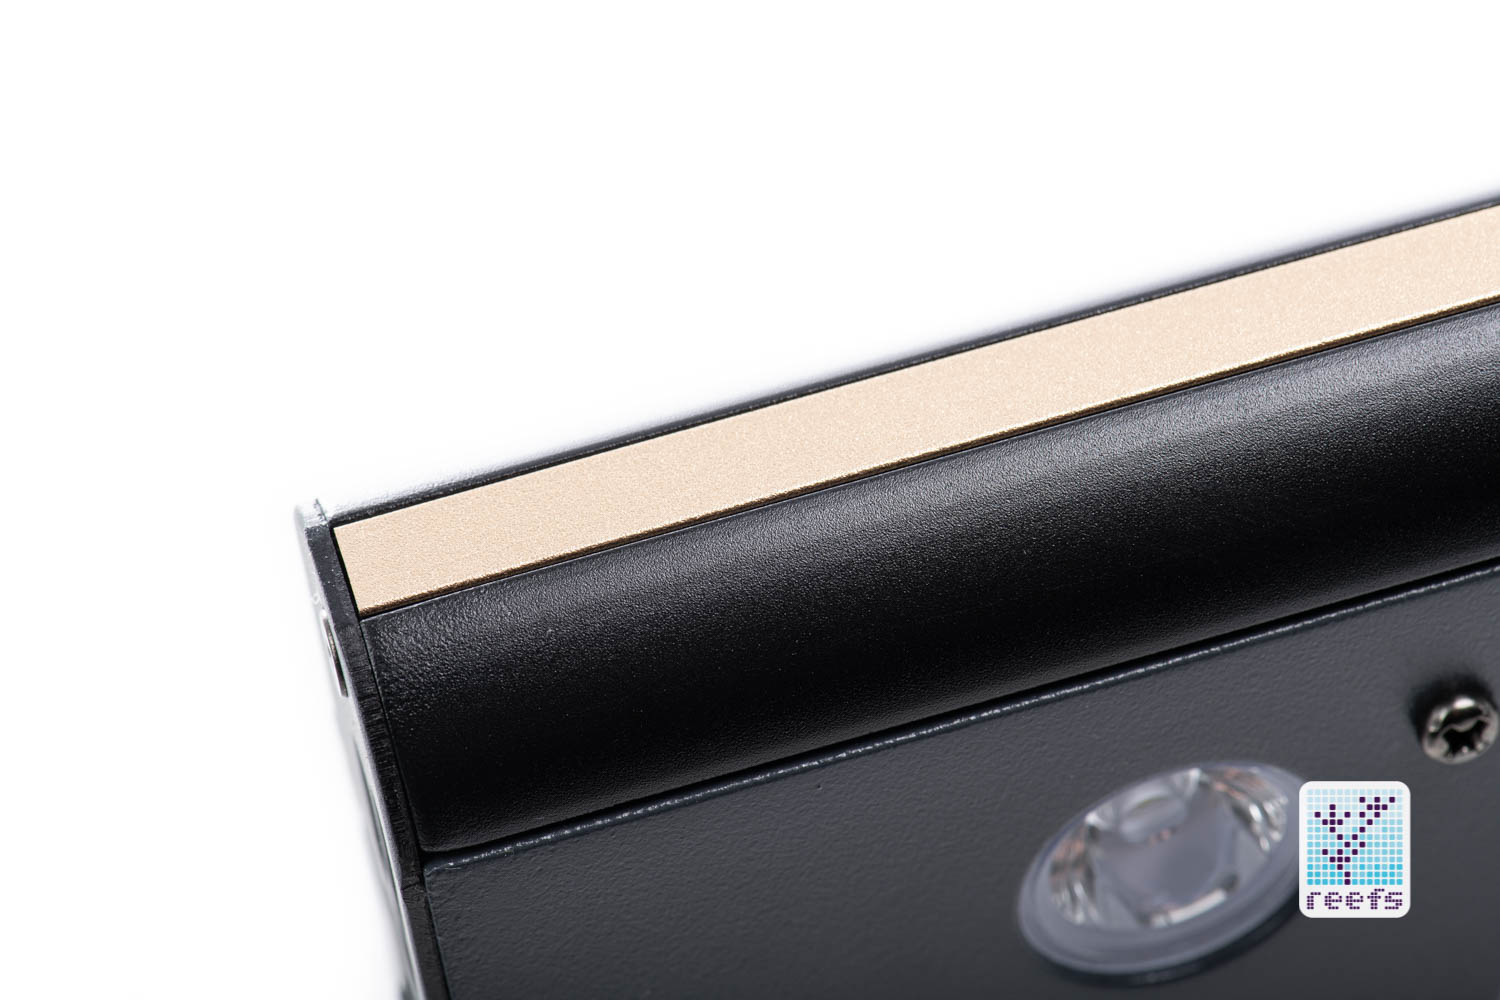
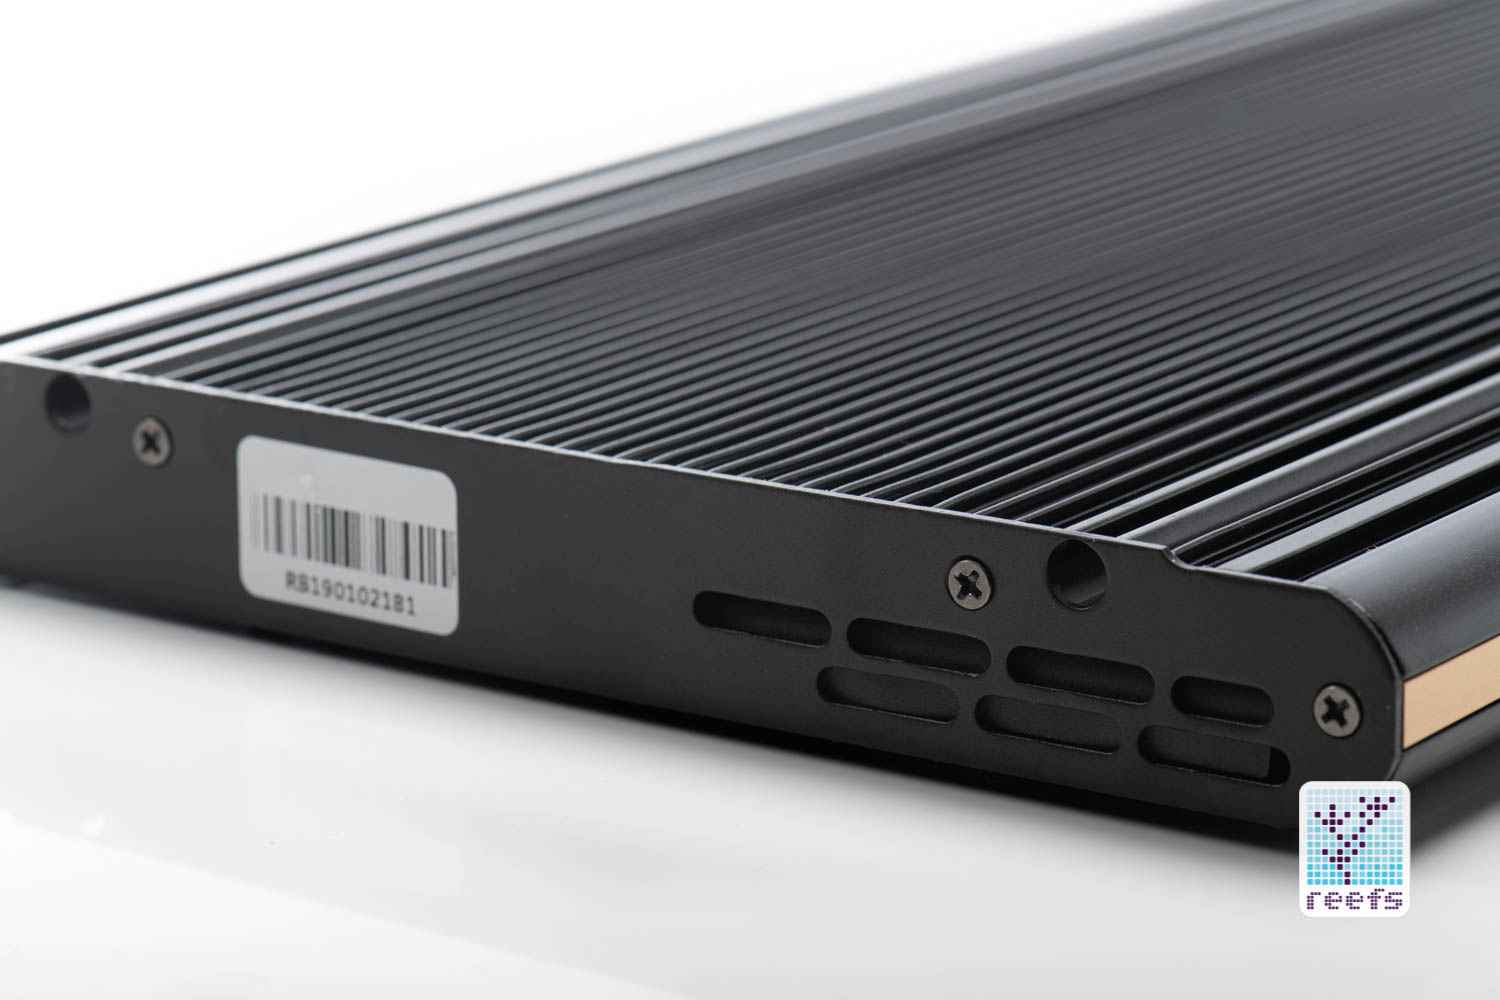
The LED lenses sit flush in perfect cutouts on the bottom cover. I took my trusty neodymium magnet to see if there are any weak spots that may rust over time and the only place the magnet was attracted to was at the fan rotors, but that’s understandable (I mean, that’s how they operate). Even the visible screws that hold the bottom cover are either good stainless steel alloy or some other non-magnetic metal. In summary, impressive build quality across the board. I should also mention that the fixture is quite light for the size, presumably because all the operational weight has been moved to the rather big power supply.
WIFI REMOTE
I will describe the use and function of the supplied remote in the “operation” section of the review, meanwhile, let’s talk about its build and appearance. First of all, it uses a WiFi protocol, which is important, because you can mount the light inside the canopy and still be able to program the schedule. It has a decent reach too; I was able to control Photon from another room in my house no problem. I don’t know why you would ever do that, but you can. Second of all, the remote is the only way to operate the light, there are zero physical buttons on the fixture itself, so if you lose it or your dog destroys it, you are out of luck. Don’t drop it in the tank either, while it looks splash-proof, it definitely is not fully water-sealed. Fortunately, if you do any of the above things (or blame it on your furry friend), Reef Breeders is happy to sell you another one, available on their website. Users of the previous generation of V2 lights are also able to upgrade to the V2+ platform via the “Photon V2 to V2+ Upgrade Kit”. Finally, the Photon remote has an internal battery, rechargeable with the supplied USB cable and any phone charger.
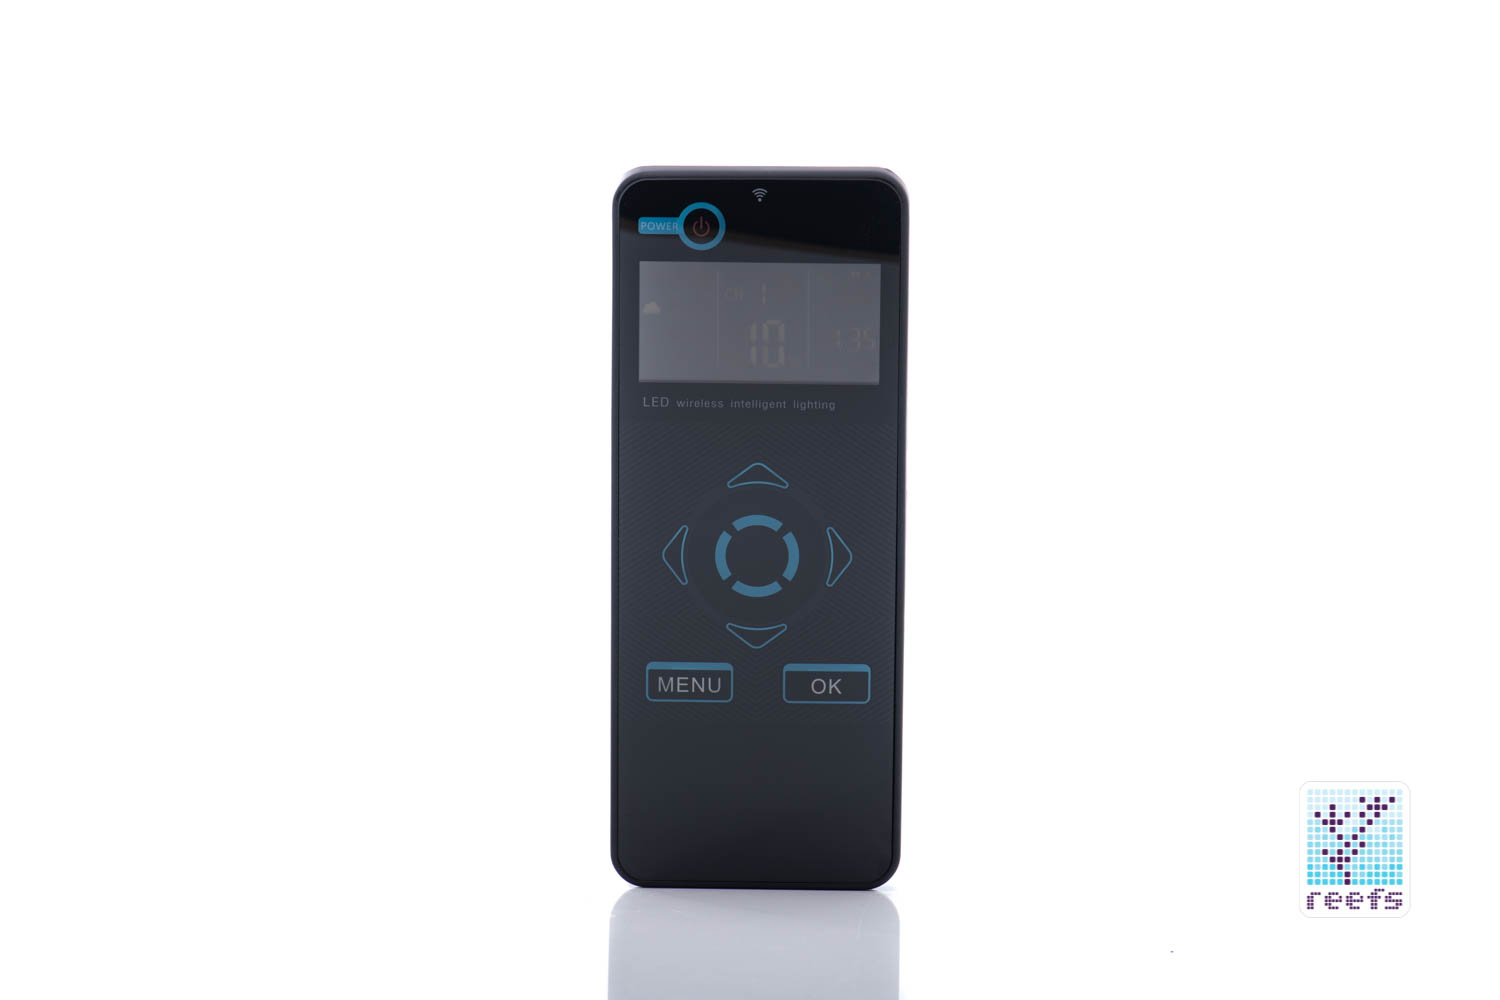
In terms of looks, it’s a pretty standard LED remote the size of a big smartphone, with a big alphanumeric screen, a series of capacitance buttons- a power button on the top, Omni-directional buttons in the center to scroll around the menu and two buttons on the bottom, labeled “MENU” and “OK” to switch between menus and confirm changes, respectively, and a USB adapter on the bottom. The battery lasts a long time too, I’ve been playing with the light for quite some time and I only drained one bar from it.
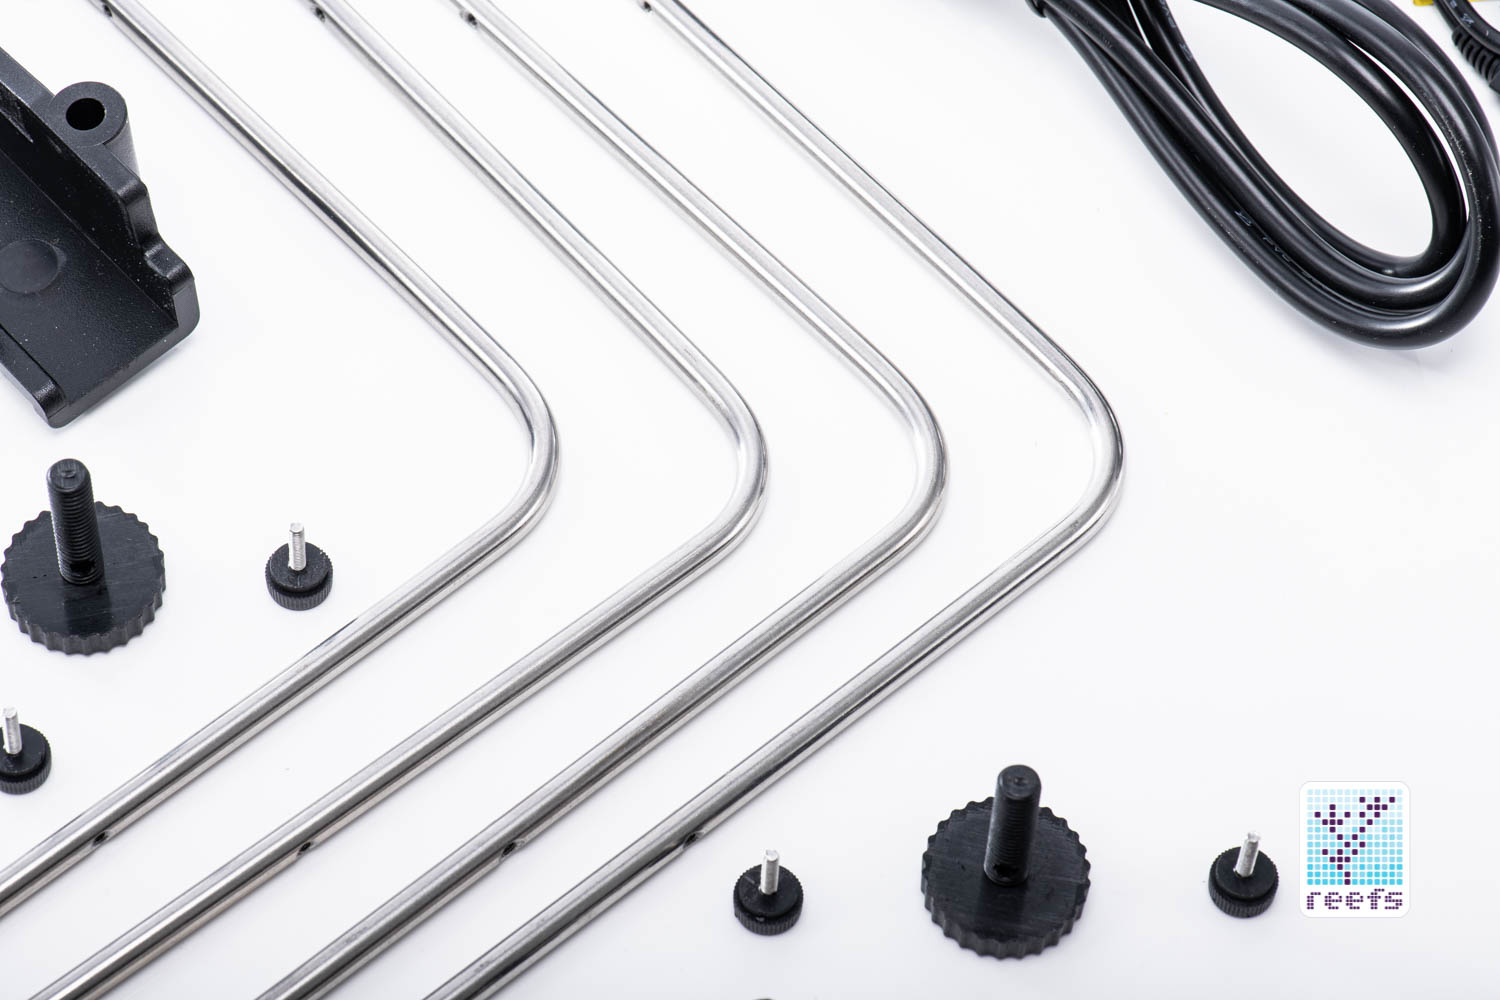
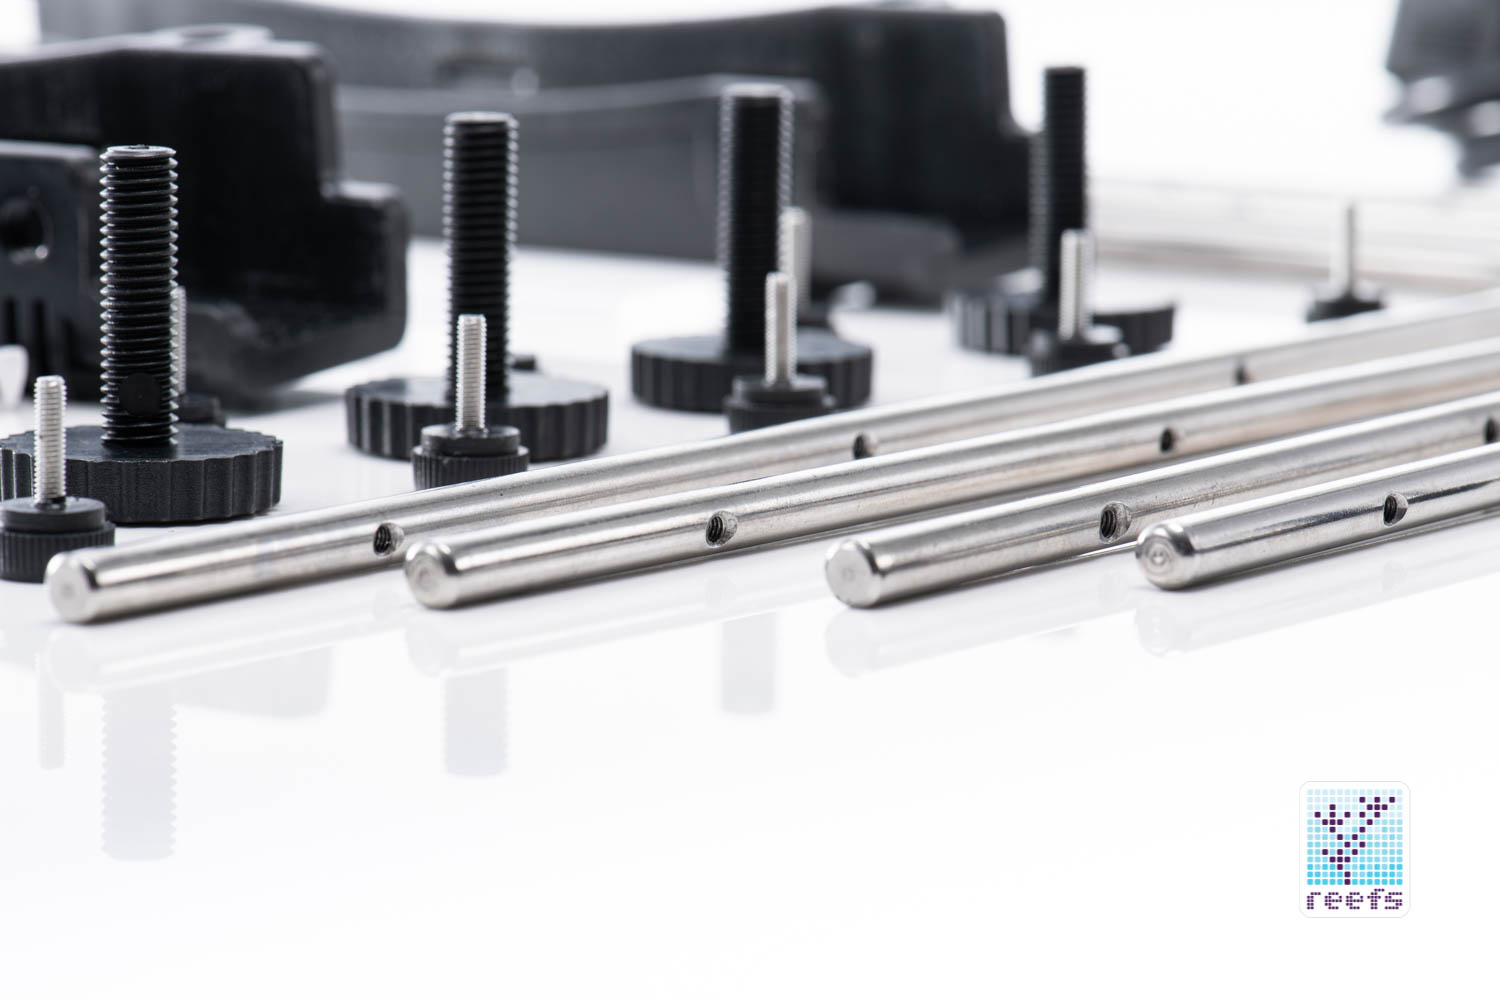
HANGING KIT & MOUNTING LEGS
It’s important to state upfront that Reef Breeders Photon is the only light on the market I’m aware of that ships with both a hanging kit and mounting legs supplied free of charge, which significantly adds to its value. Oftentimes, you buy a light thinking that’s the end of your expenditures toward it, only to find that you need to shell out an additional $100 to be able to mount it to your tank.
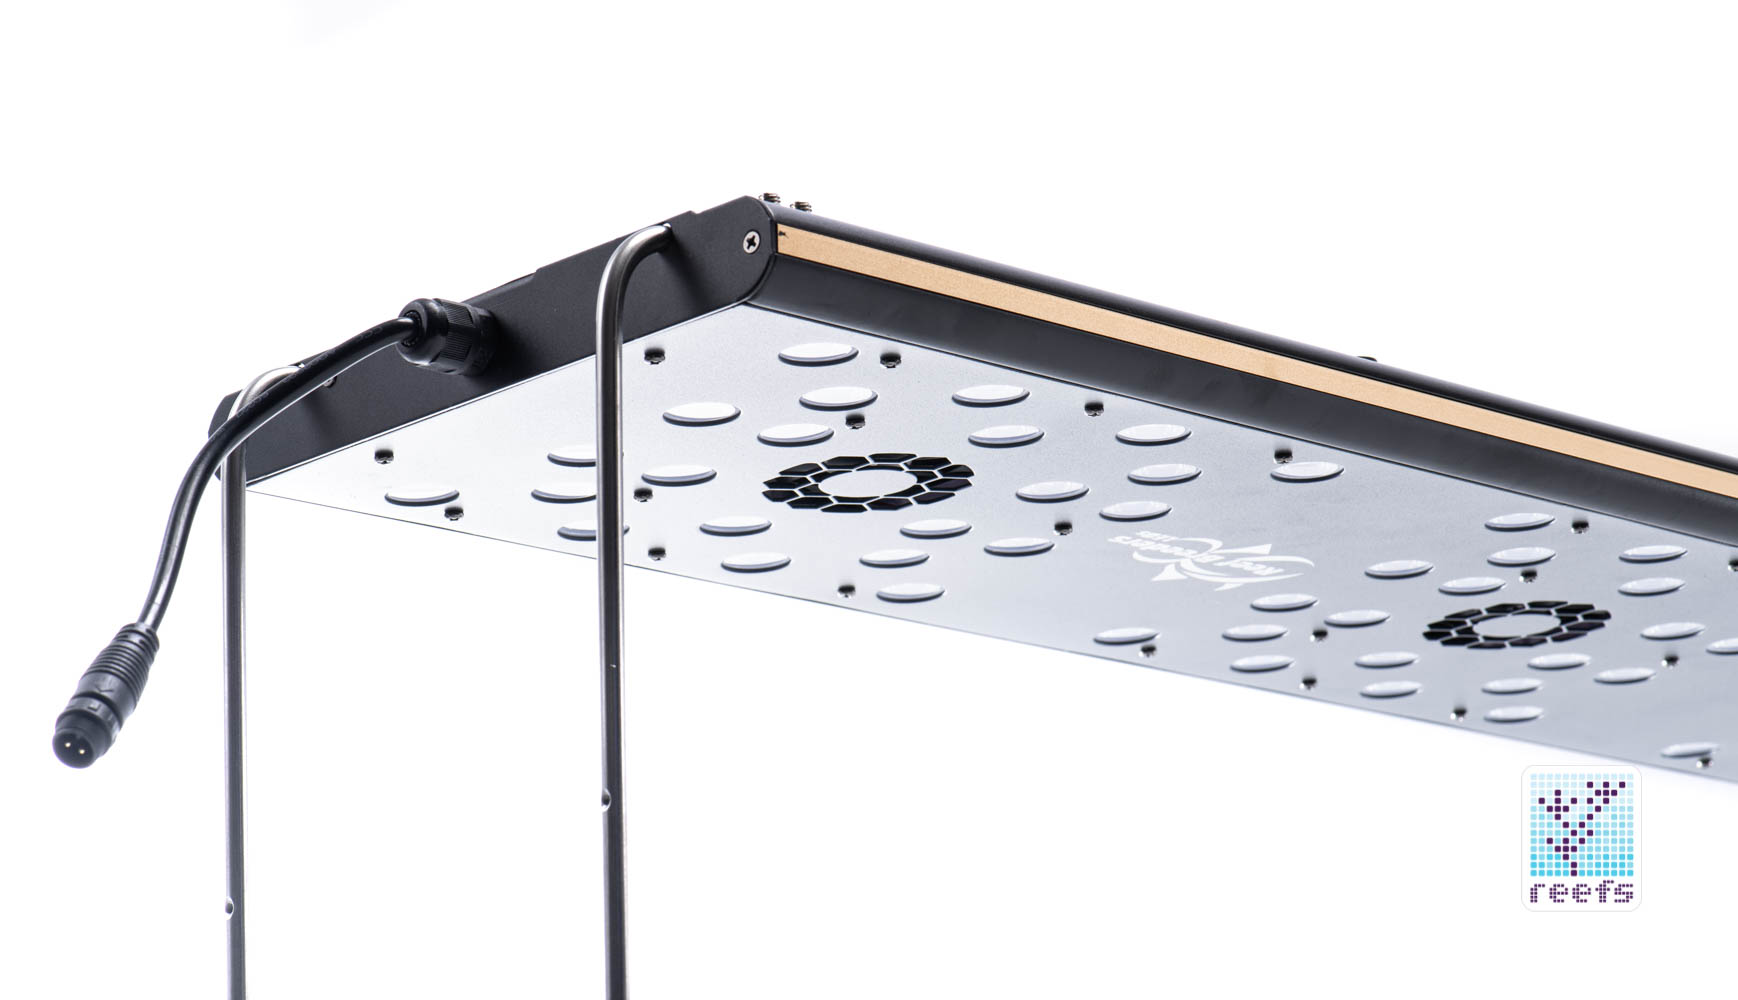
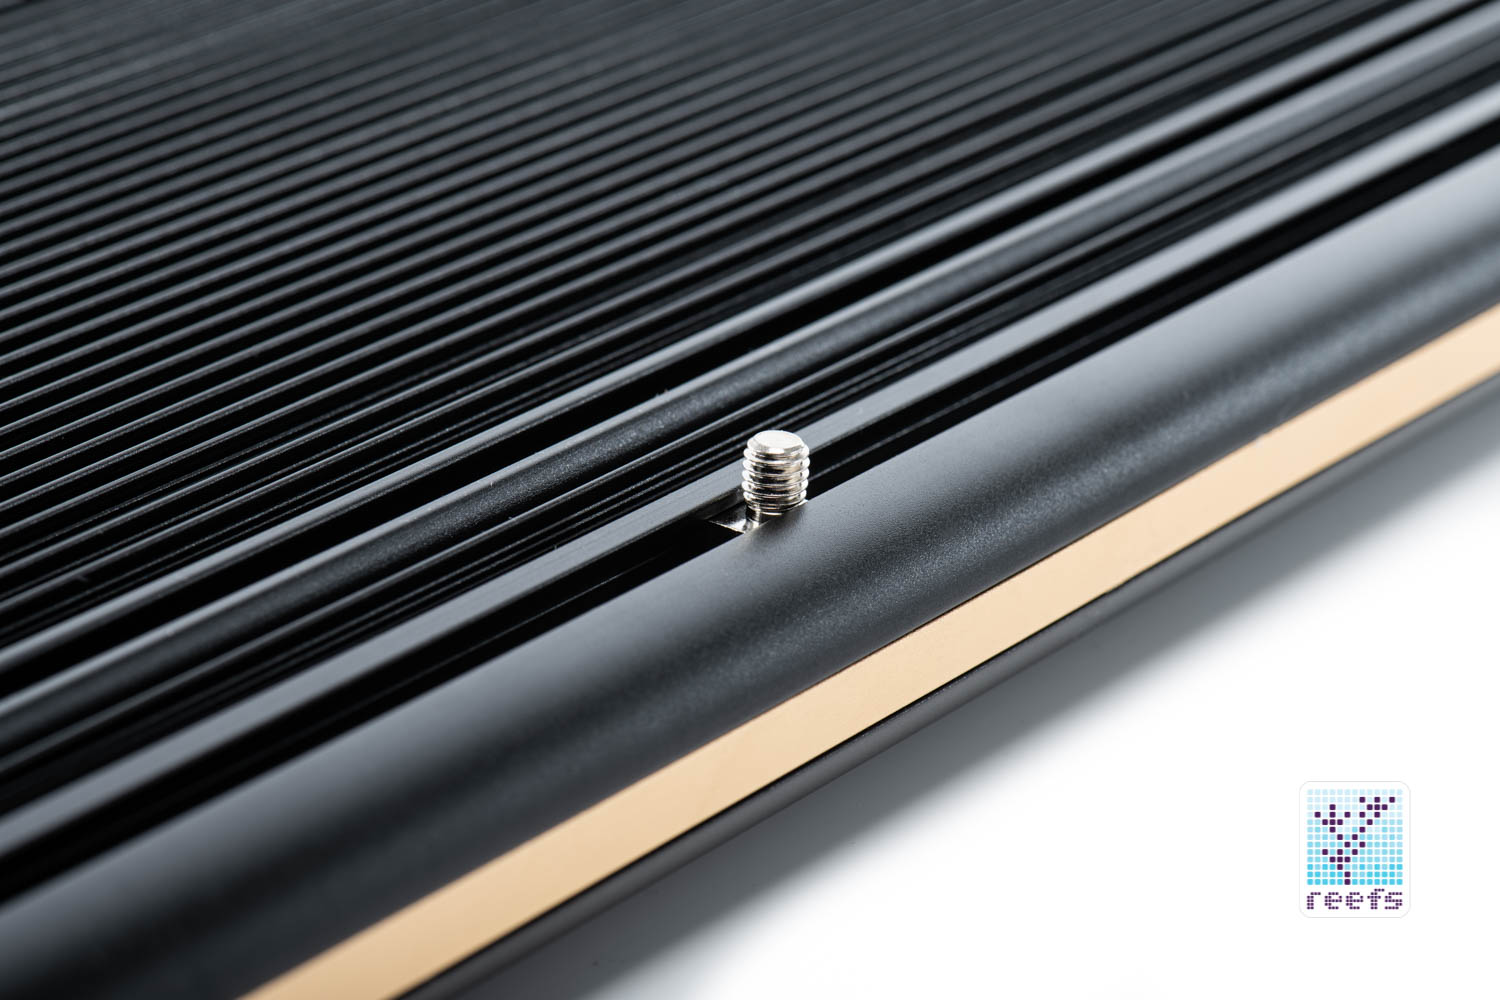
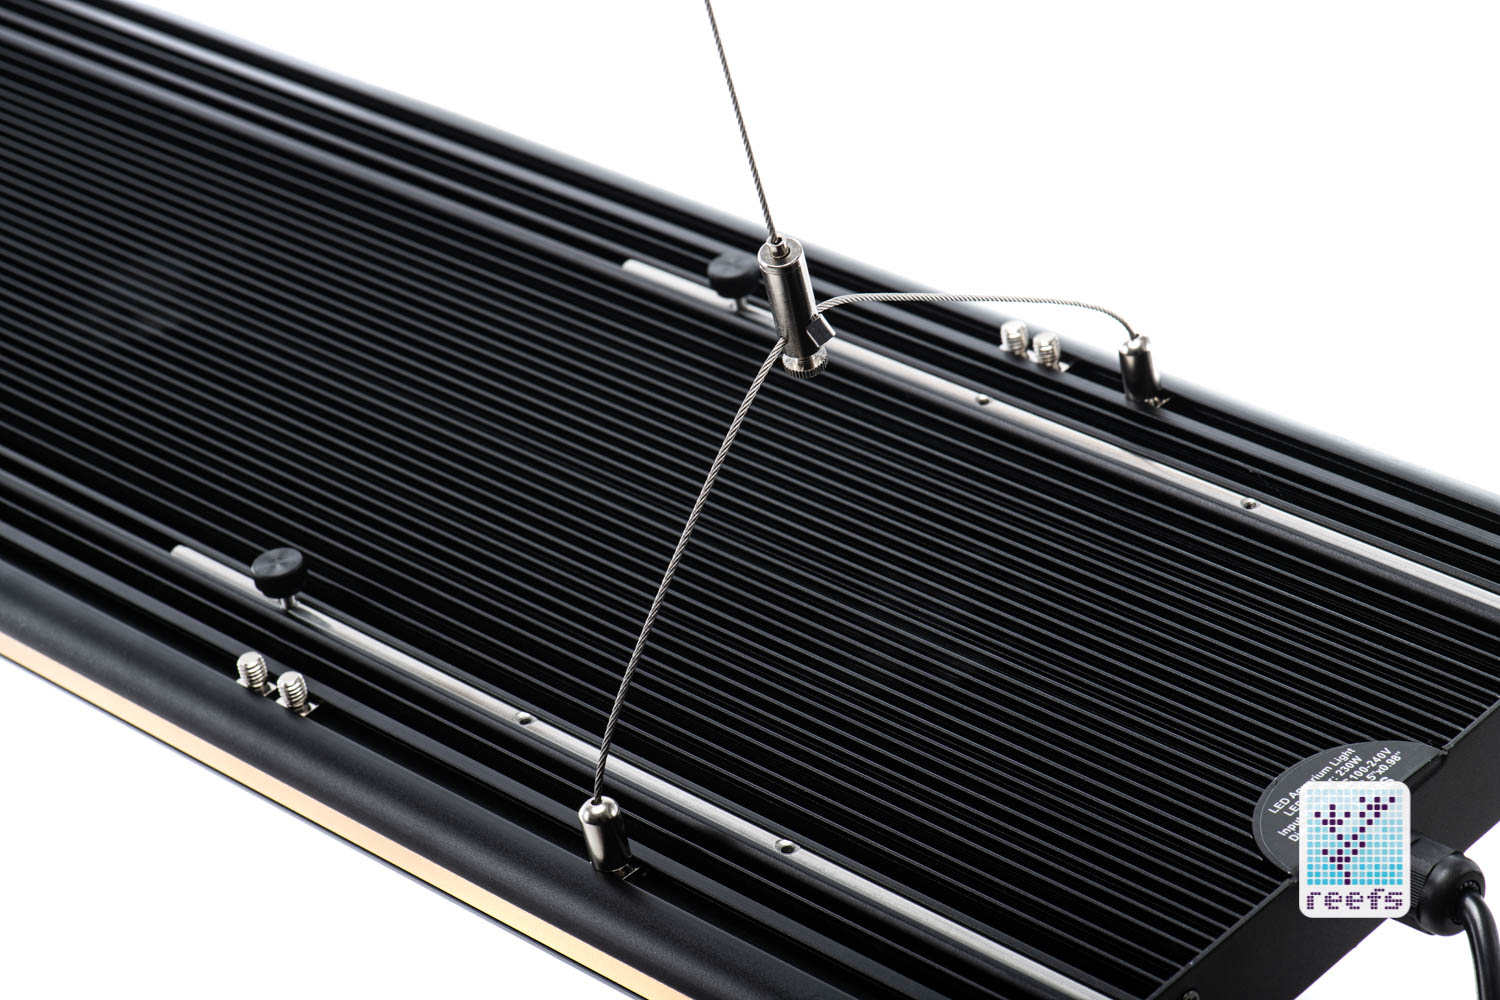
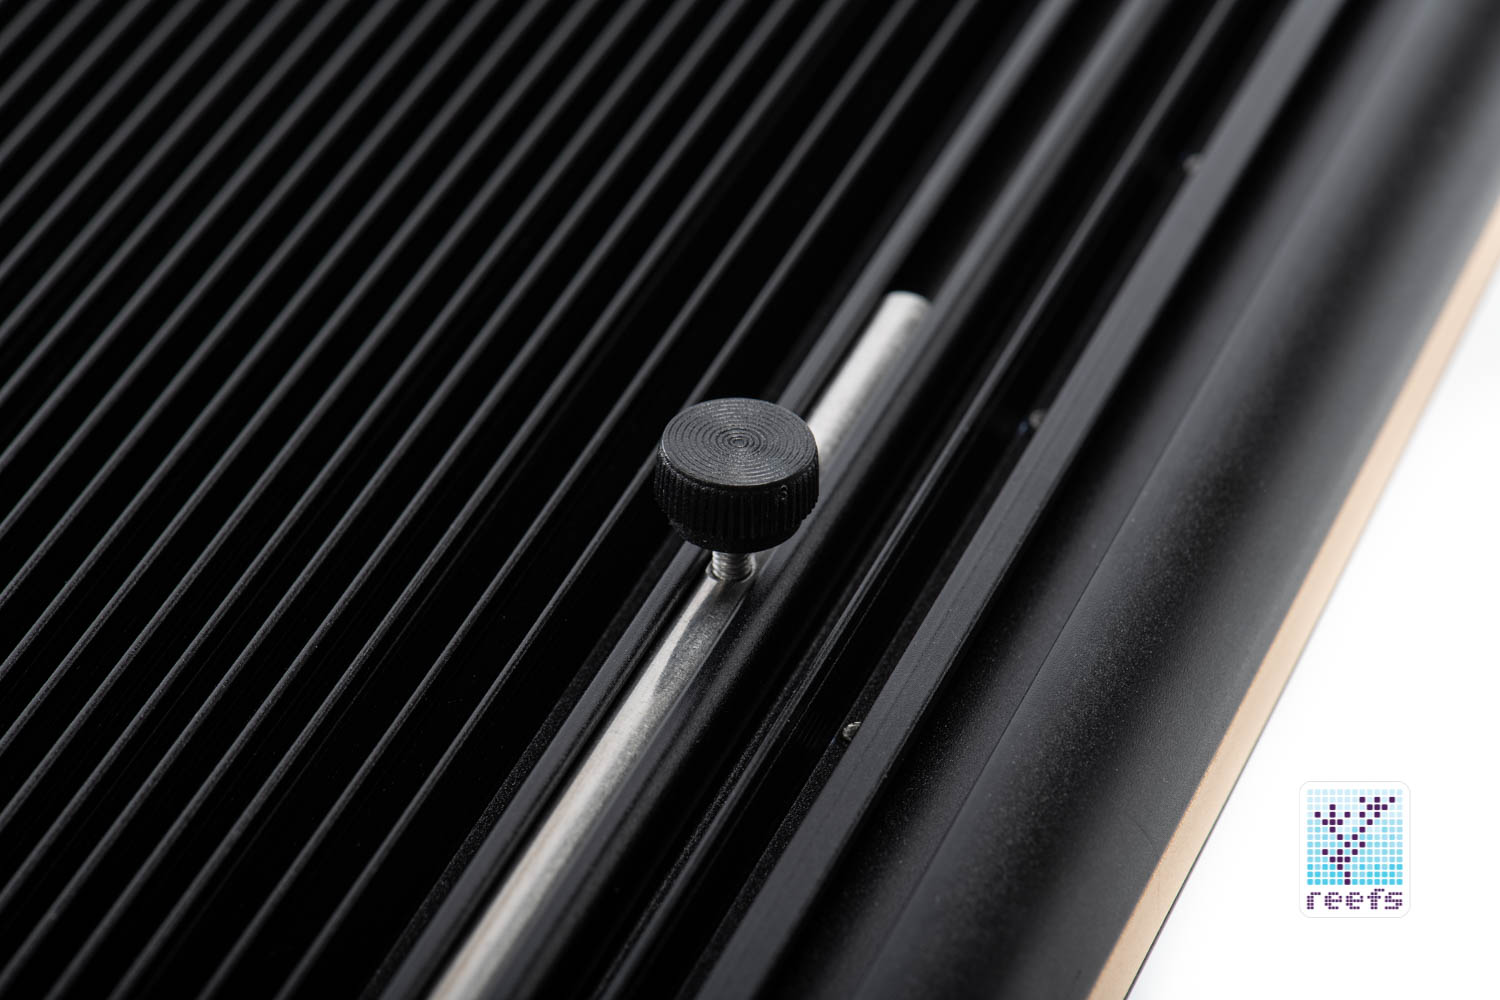
Anyways, starting with the hanging kit, it’s a standard steel cable system that I personally find to be the best solution for hanging reef LED lights above aquariums. The 48-V2+ I got for the review comes with three of these, I would argue though that two would be more than enough to support Photon’s moderate weight in case you only have two brackets to hang it from. You can move the hanging kit across the light’s length, there are six small threaded pegs on top of the fixture that slide freely in nicely milled channels (see photos below).
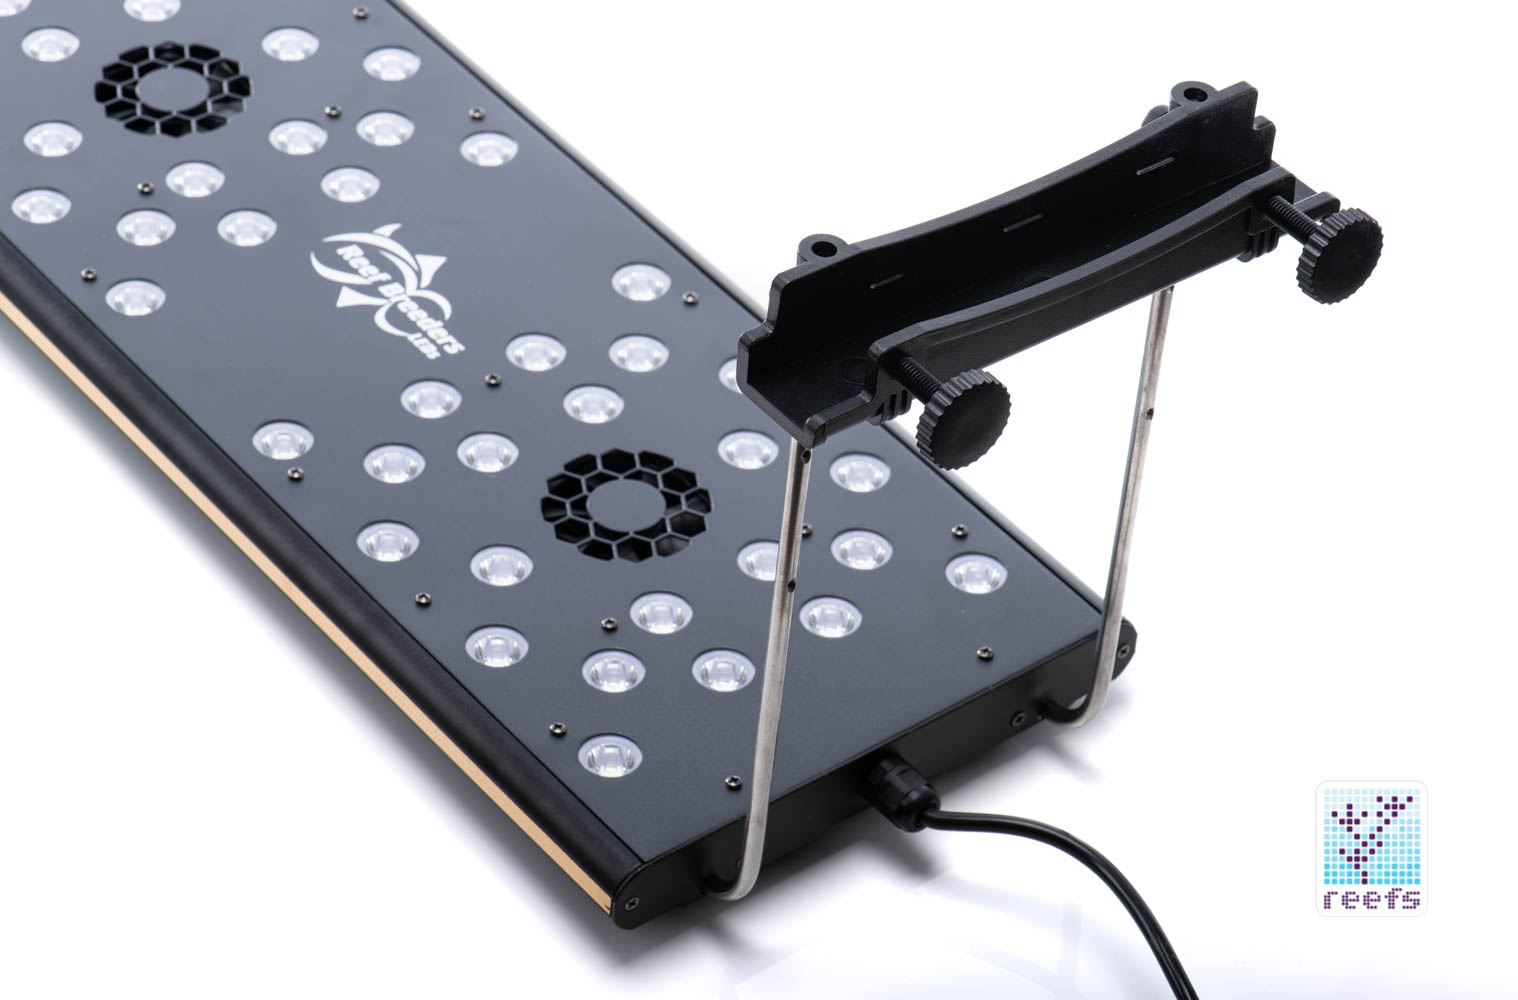
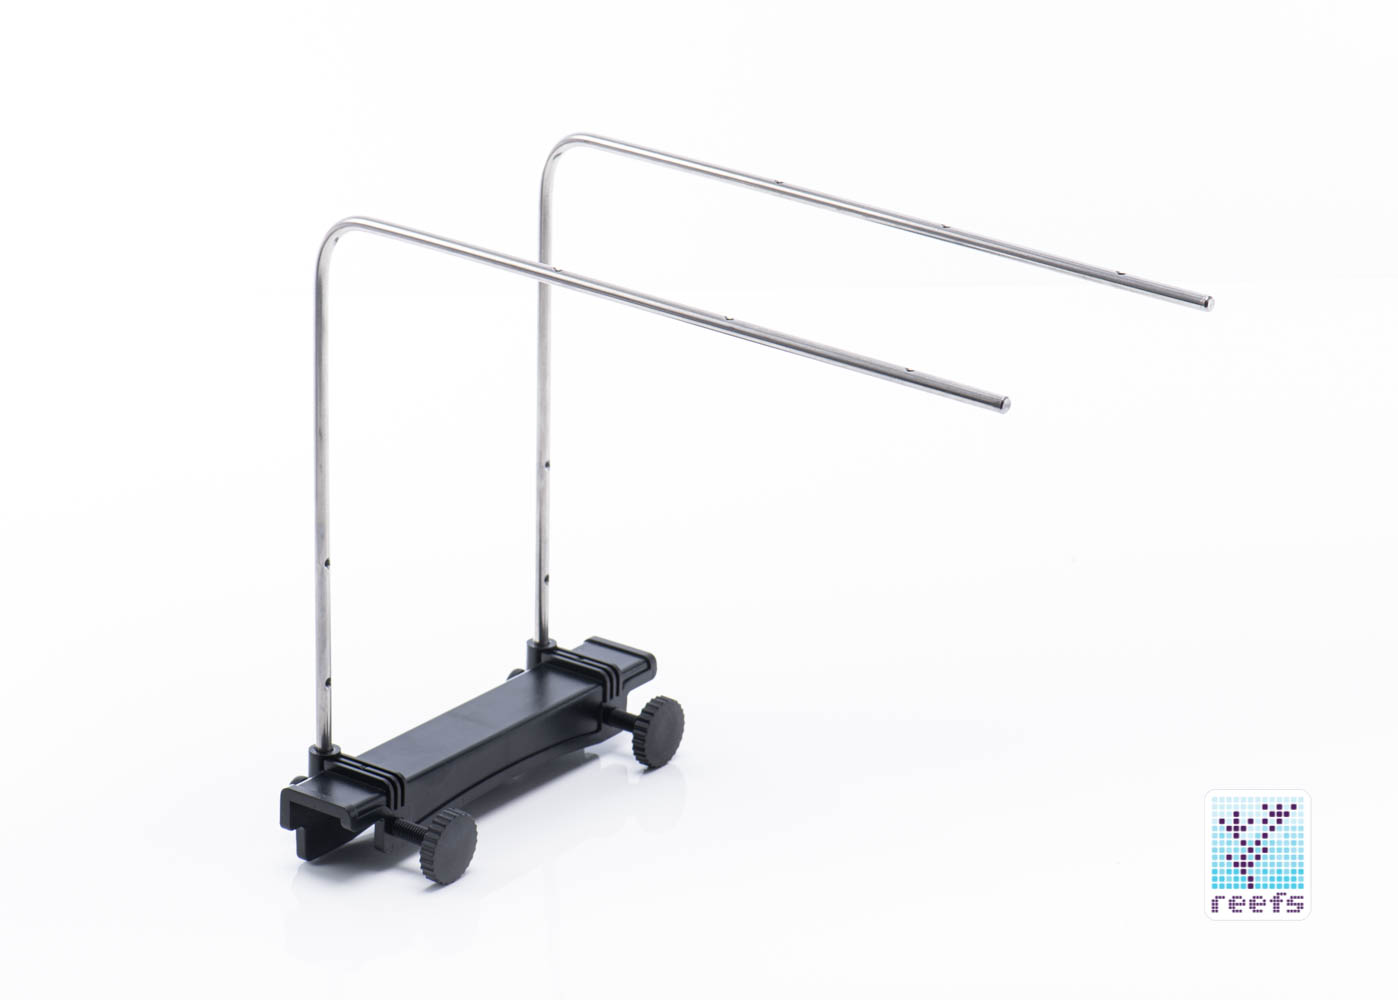
Nowhere to hang the light from? No problem, Photon V2+ also comes with a set of legs to support it from the tank’s sidewalls. It’s an equally clever design and it works quite well- it has two nylon tank brackets, wide enough (slightly over an inch or 28mm) to be mounted on aquariums with top braces and secured with a set of nylon thumb-screws that hold the bracket securely to the tank. The bracket is connected to the light with four L-shaped stainless steel arms, equipped with pre-drilled and threaded holes that accept supplied small thumb-screws. That way you can not only change the light’s height from the surface of the water but also the width of the overall fixture. From what I was able to determine with my handy little tape measure, you can set the 48-V2+ Photon up on tanks from 46” (117cm) to as wide as 65” (166cm) securely. Again, a big plus for Reef Breeders for making Photon so versatile.

OPERATION/PROGRAMMING

Let’s step back for a moment. I have been in this hobby long enough to remember remotes or on-fixture displays as the only means to program an aquarium light and getting to know how to set up Photon V2+ was a pretty straightforward experience for me. However, for the crowds of reefers that entered the hobby during the modern cloud-based platform programming and mobile app integration, Reef Breeders’ solution may be a throwback. It simply is not as easy and straightforward as what you experience with most modern lights. This is where the whole perspective idea I proposed at the beginning of this review comes into play. I am pretty sure Reef Breeders designed Photon with a specific client in mind- one on a tight budget that needs a light that can grow corals efficiently and doesn’t care about bells & whistles. The corners had to be cut and that’s one area where cuts were performed. It takes a team of developers, a big budget, and a lengthy process to design and put up an app on Google and the Apple store and you can’t simply do that without increasing the product’s price.
With all that said, programming Photon V2+ is not that hard. There is a learning curve, yes, but once you get the basics and how to navigate through the menu, it’s mostly repeating the same actions to program each channel. Where it gets quite annoying is when you want to re-program the light as every time you want to do that, you need to get through the same monotonous process, so frequent light tweakers, be aware.
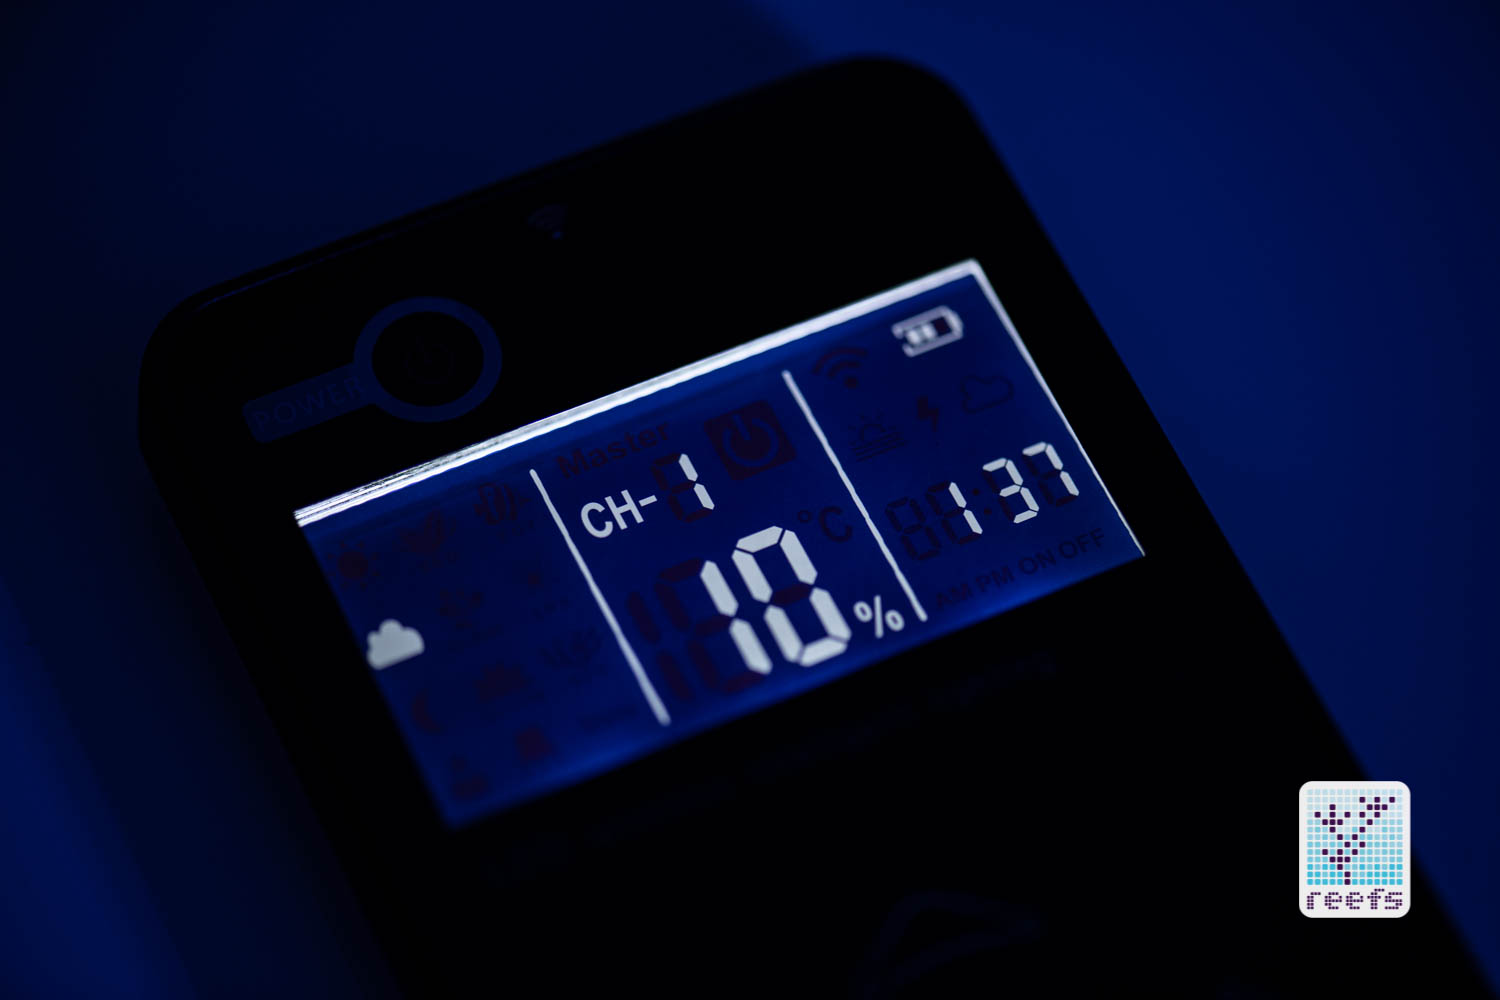
First, the remote interface. I’ve had a negative experience with capacitive touch buttons in the past and always prefer mechanical ones, fortunately, this is not the case here. Photon’s remote is responsive and I never had a problem with it registering my fingers, even with wet hands (saltwater wet). I have nothing negative to say about the monochromatic screen either- it’s backlit, big enough to clearly see what it displays, and arranged in a way that makes sense program-wise.
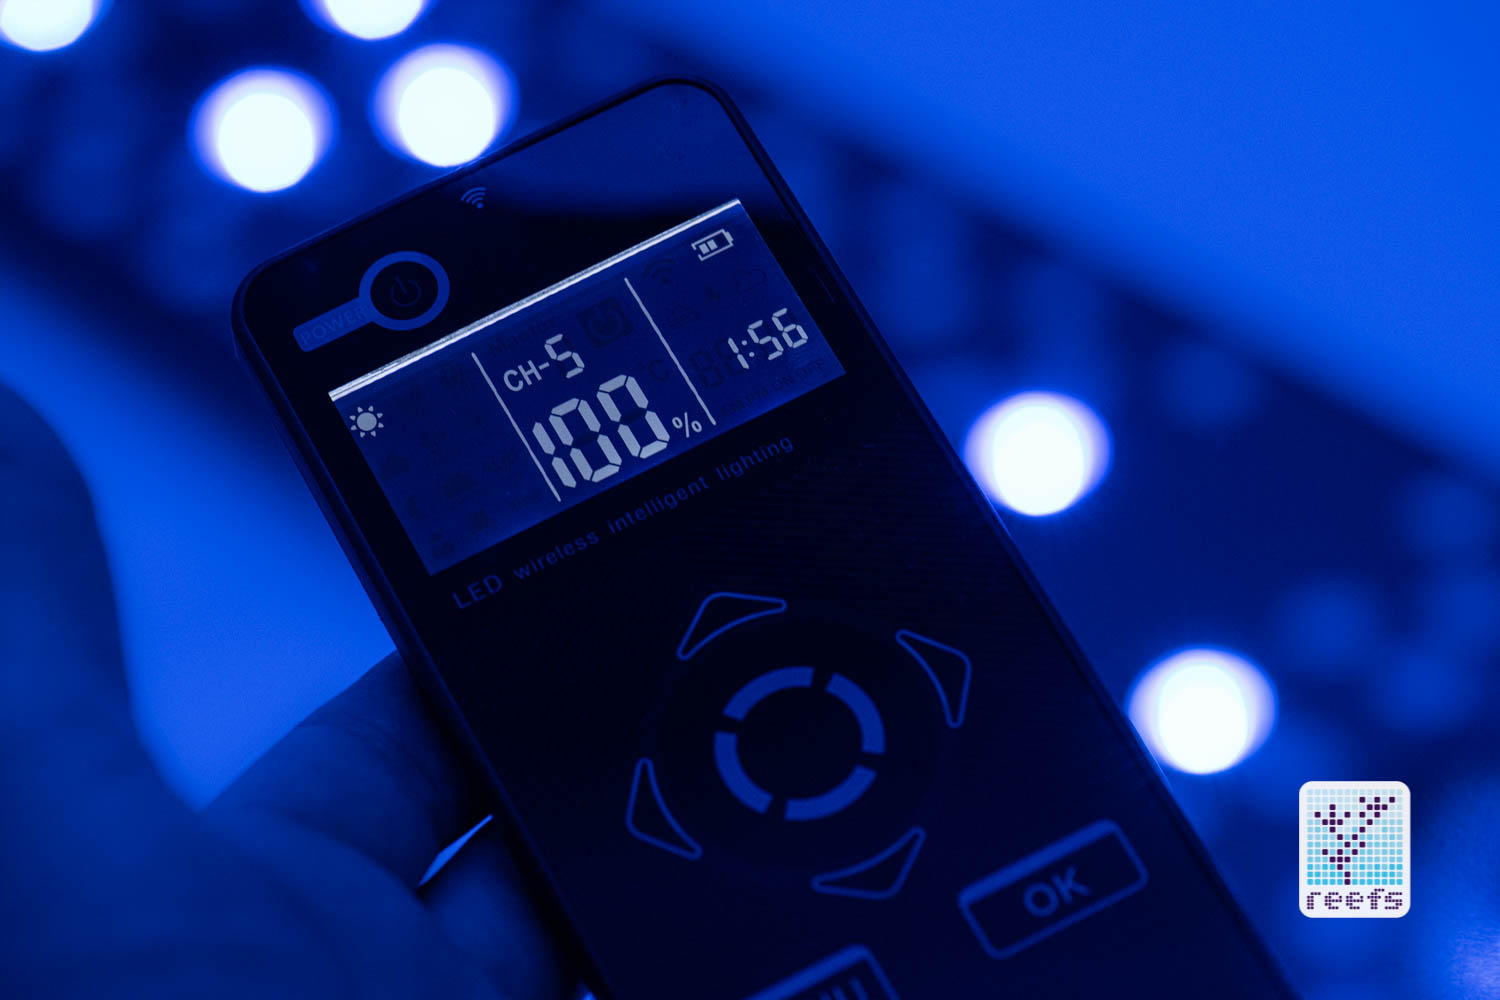
Speaking of, here’s how the light/program functions. When you have the remote fully charged, a single button on top left of the remote turns the light/screen on. The menu on the screen is divided into three sections: from the right, we have the current time, the battery level, connection status, and different pre-programmed effects (more on that later). The center section shows the current channel and the intensity level of that channel (from 0-100%). Farthest to the left, we have an indicator of the mode the light is currently in. There are four modes, three manual (cloudy, night, and sun) that would run 24h/365 days and the one almost everyone owning the light uses, the custom mode. The deal is, Reef Breeders Photon V2+ is a totally user-customizable light. You are in control of each of the six channels- the time they run and the intensity they are on at each hour. That’s all there is to explain. There are no pre-programmed scenarios, you are fully responsible for programming the light to your needs. I wish there were at least a couple of factory set programs to which you only change the time they run, but there ain’t any. To be fair, that’s not entirely true, there is one pre-programmed default custom setting, but it’s only useful if you would be 100% satisfied with the channel ratio represented by it. The instructions that come with V2+ have some example custom settings that explain and visualize the programming but be prepared to spend at least an hour setting this thing up to your liking. Through the research I did working on this review, I’ve learned the previous generation had an accompanying Excel spreadsheet that helped with the programming part and I would like to see one for this light as well. Fortunately, Reef Breeders has an ample fanbase of dedicated users that help others in programming their lights and creating custom spreadsheets to aid with that process. Google is your friend.
I could describe how that process works on this digital paper, but it makes no sense when you have Logan, the company’s owner, doing just that, but better. I’m lazy.
There are also weather effects built into the Photon’s program if you’re into such things; check out that video above. I’m not a big fan of these gimmicky show-off effects (they do nothing but scare my fish), but again, I’m just one reefing guy with one opinion.
In terms of heat dissipation, Reef Breeders Photon’s 48-V2+4 fans and its massive heatsink do a great job of keeping the temperature in check. Even at 100% intensity on all channels, the light stays at most warm to touch. Fans are temperature-controlled, meaning they turn on only when the temperature sensor “tells” them to and they stay virtually noiseless during operation.
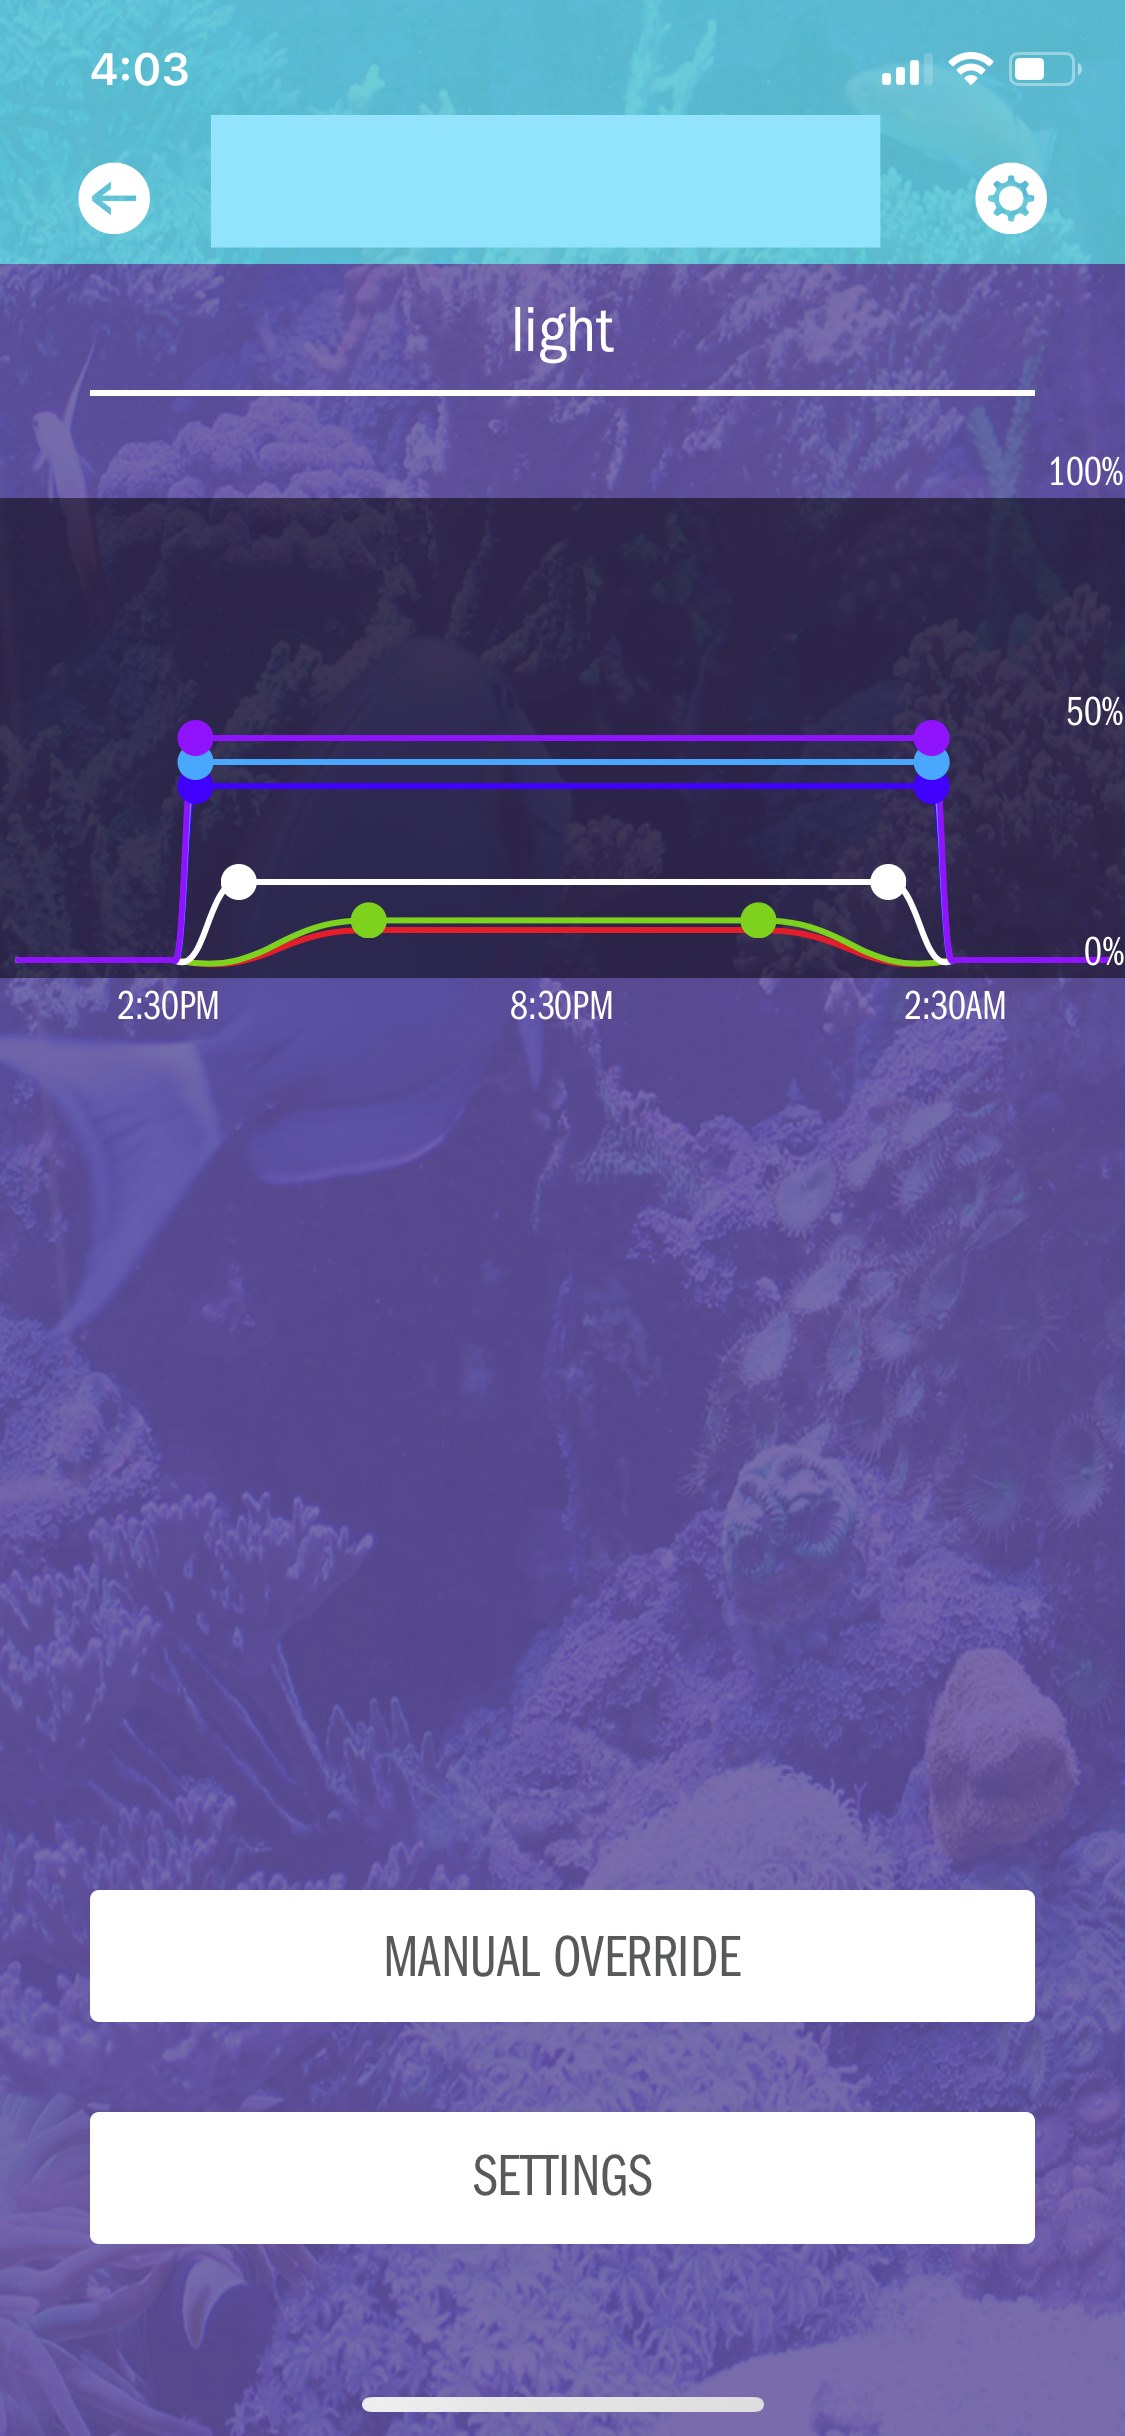
UPDATE: I was almost ready to submit the write up for editorial review when I learned, through a friend of mine and the Reef Breeders Owners Facebook page that Logan, the company’s owner, is working on a mobile app for his fixtures. Currently in the alpha stage and available as some sort of an upgrade sometime in the future, the app would be a game-changer and the whole paragraph I wrote may expire after its introduction. Logan shared with me a screenshot of the early version of the app (which does not necessarily represent how it will look in its final stage) and said he is currently testing it to be released in the future. That’s some great news straight from the source!
NEPTUNE SYSTEMS APEX INTEGRATION
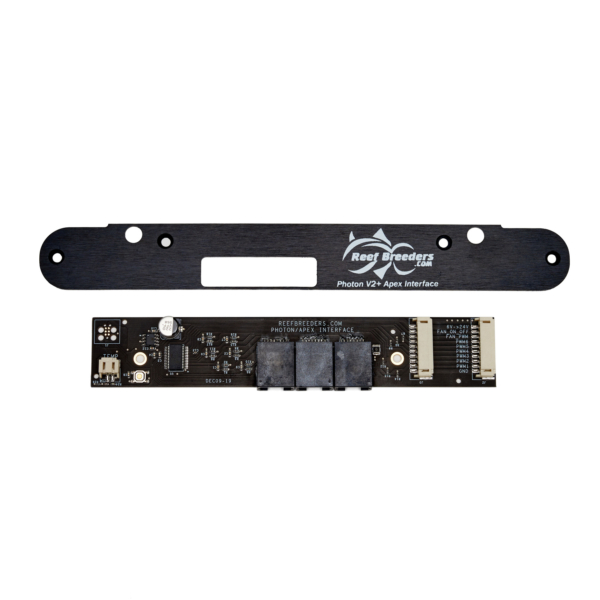
There is a way to make Reef Breeders Photon programmable on the fly without the use of the included WiFi controller. The manufacturer sells, as an accessory, a chip that allows the light to be controlled via Neptune Systems apex using the controller’s 0-10V VDM ports. Since there are 6 channels of control on the Photon, both ports on the apex are used by the light. The kit comes with the chip mentioned, a replacement faceplate and two 7-foot long ethernet cables. Therefore, if you are an owner of an apex controller and absolutely need wireless control over your lights, you can use the full power of apex Fusion and never touch the WiFi remote again with this accessory. The kit sells for $89 on the Reef Breeders website.
PAR RESULTS
The PAR test was performed on a custom built rig (my invention) using Apogee MQ-500 quantum meter. All tests were performed out of the water as this is how Apogee recommends using their original PAR sensor. PAR measurements taken in the air read higher than those taken underwater, because of the so-called immersion effect, and therefore my results should be divided by 1.08 for the actual PAR reading you would expect when the sensor is immersed in saltwater.
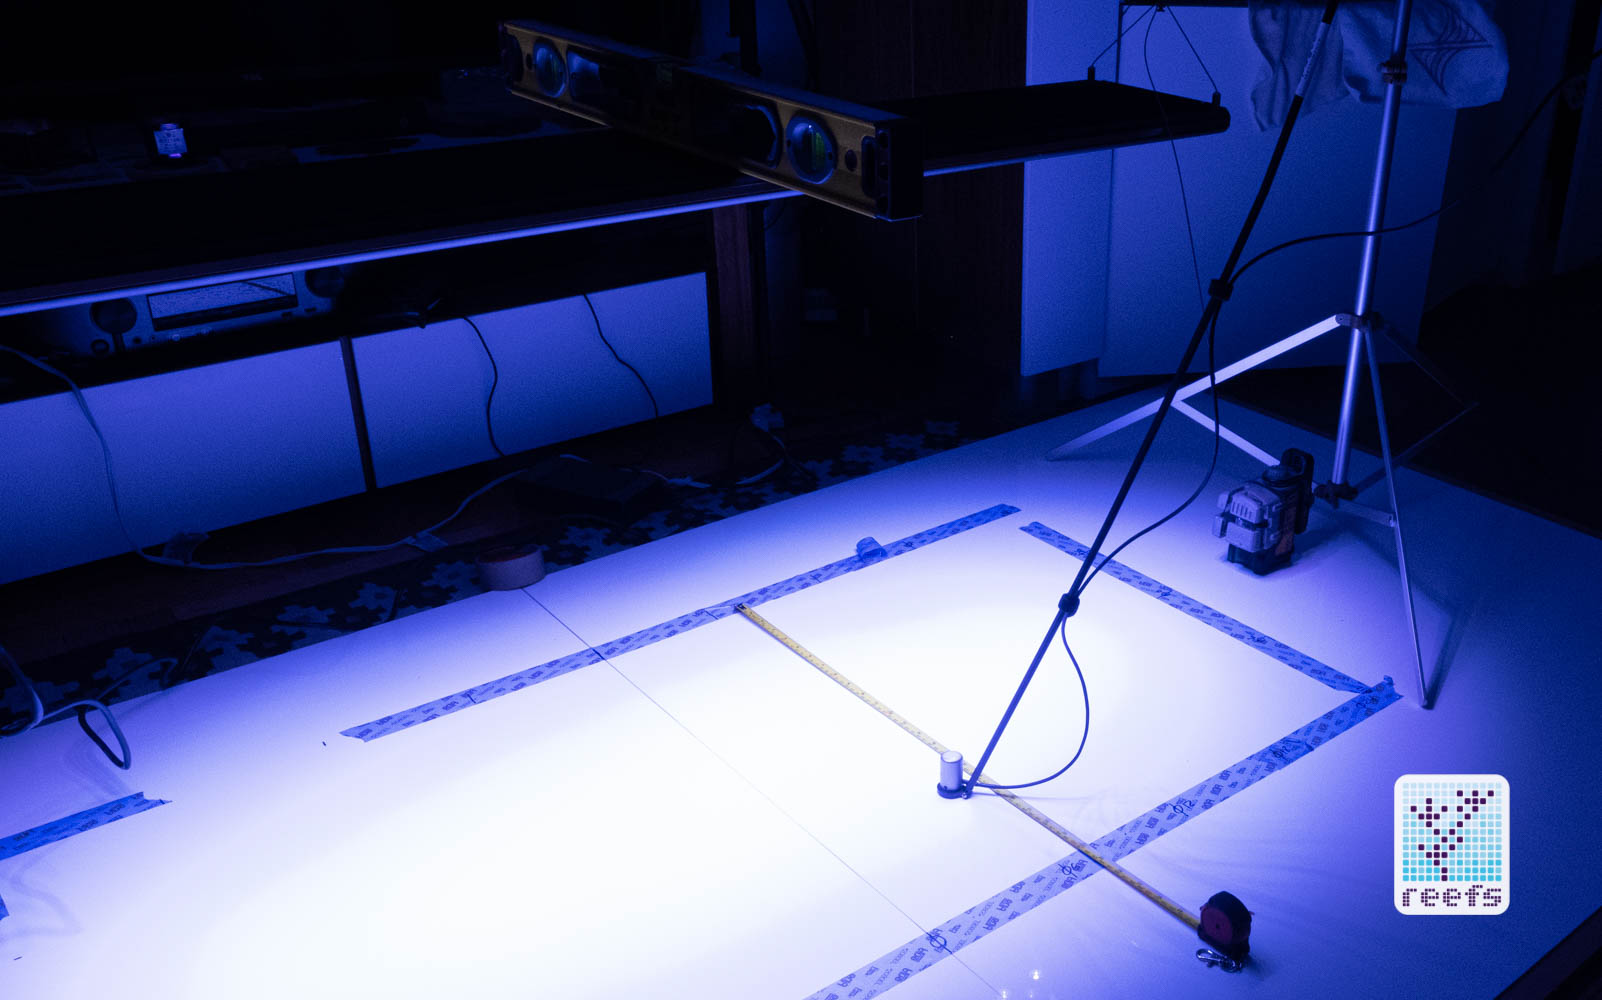
There are some other factors that make taking accurate PAR measurement underwater more difficult (such as water movement, sensor positioning in relation to the light source, etc) and so I decided a controlled, flat surface of my home studio would render more accurate test results. For further reading on the topic of underwater PAR measurements, go to:
“Underwater PAR Measurements” from Apogee Instruments website
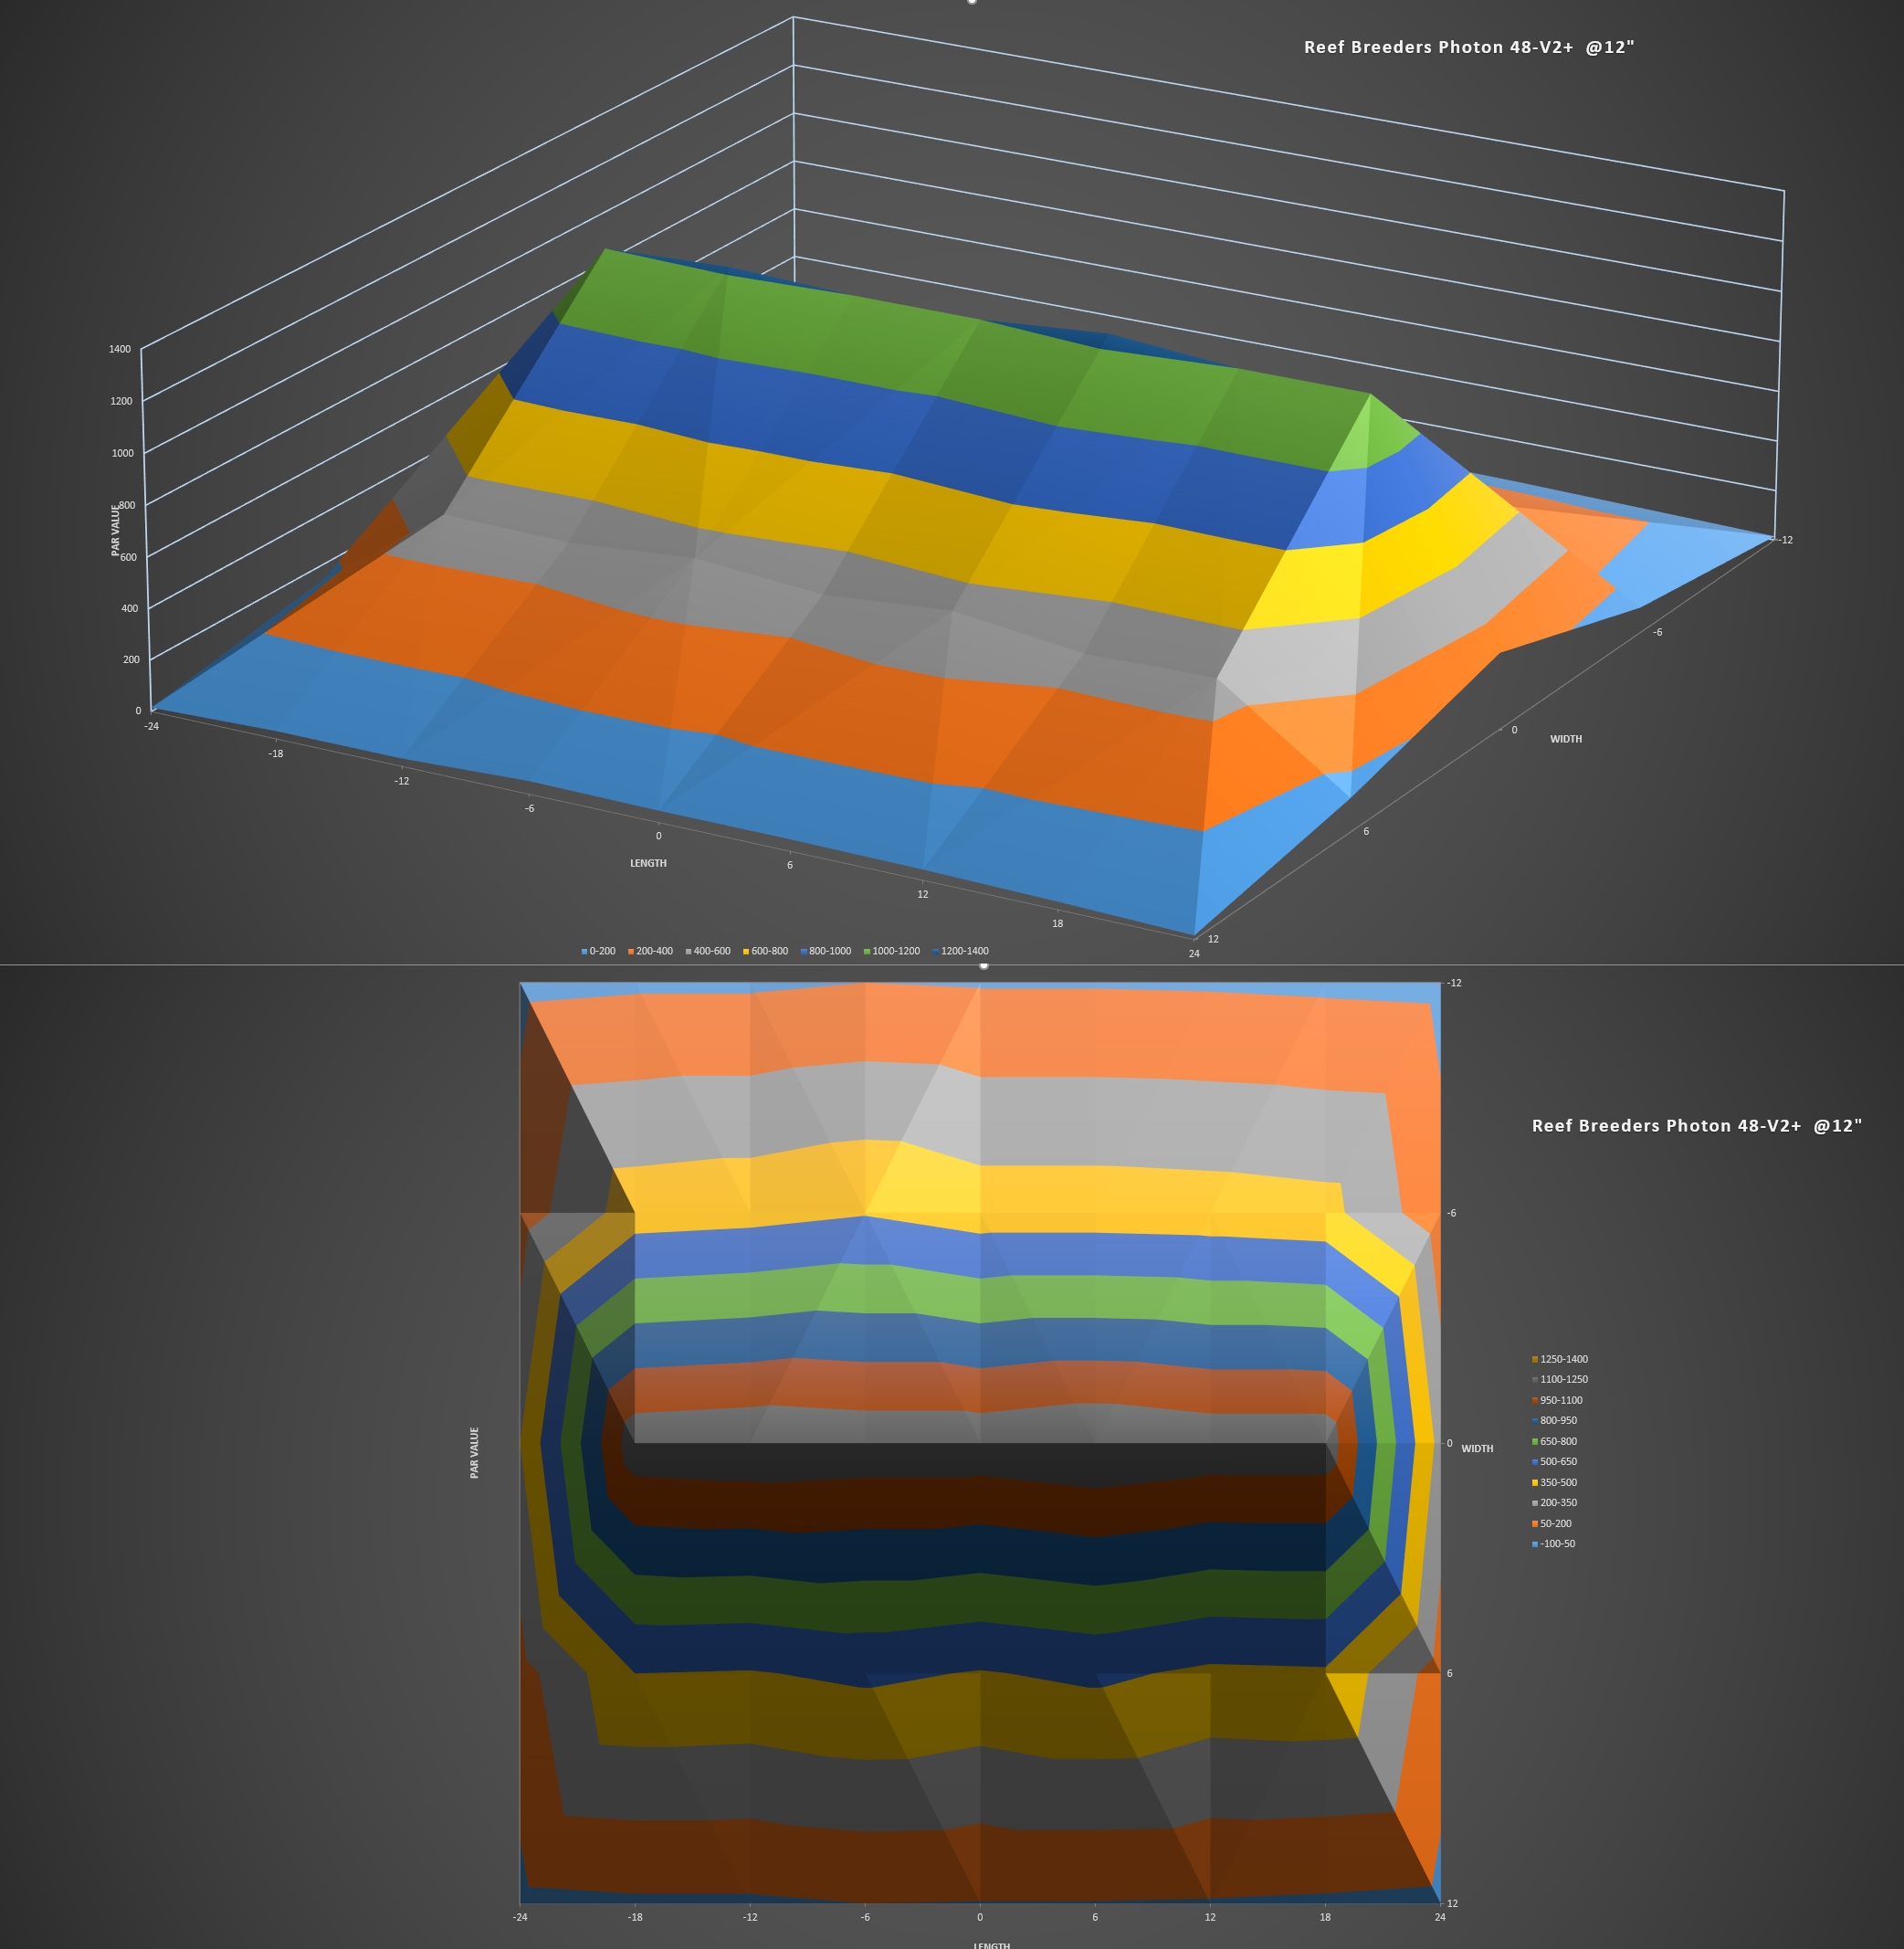
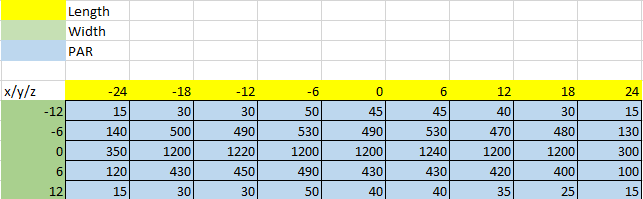
The PAR test I performed for this review covers an area of 24” x 48”, measured at four different distances from the surface of the main LEDs’ lens: 12”, 18”, 24” and 30”. Each PAR reading was repeated for accuracy and the median from the two readings is represented on the PAR chart:
@12″
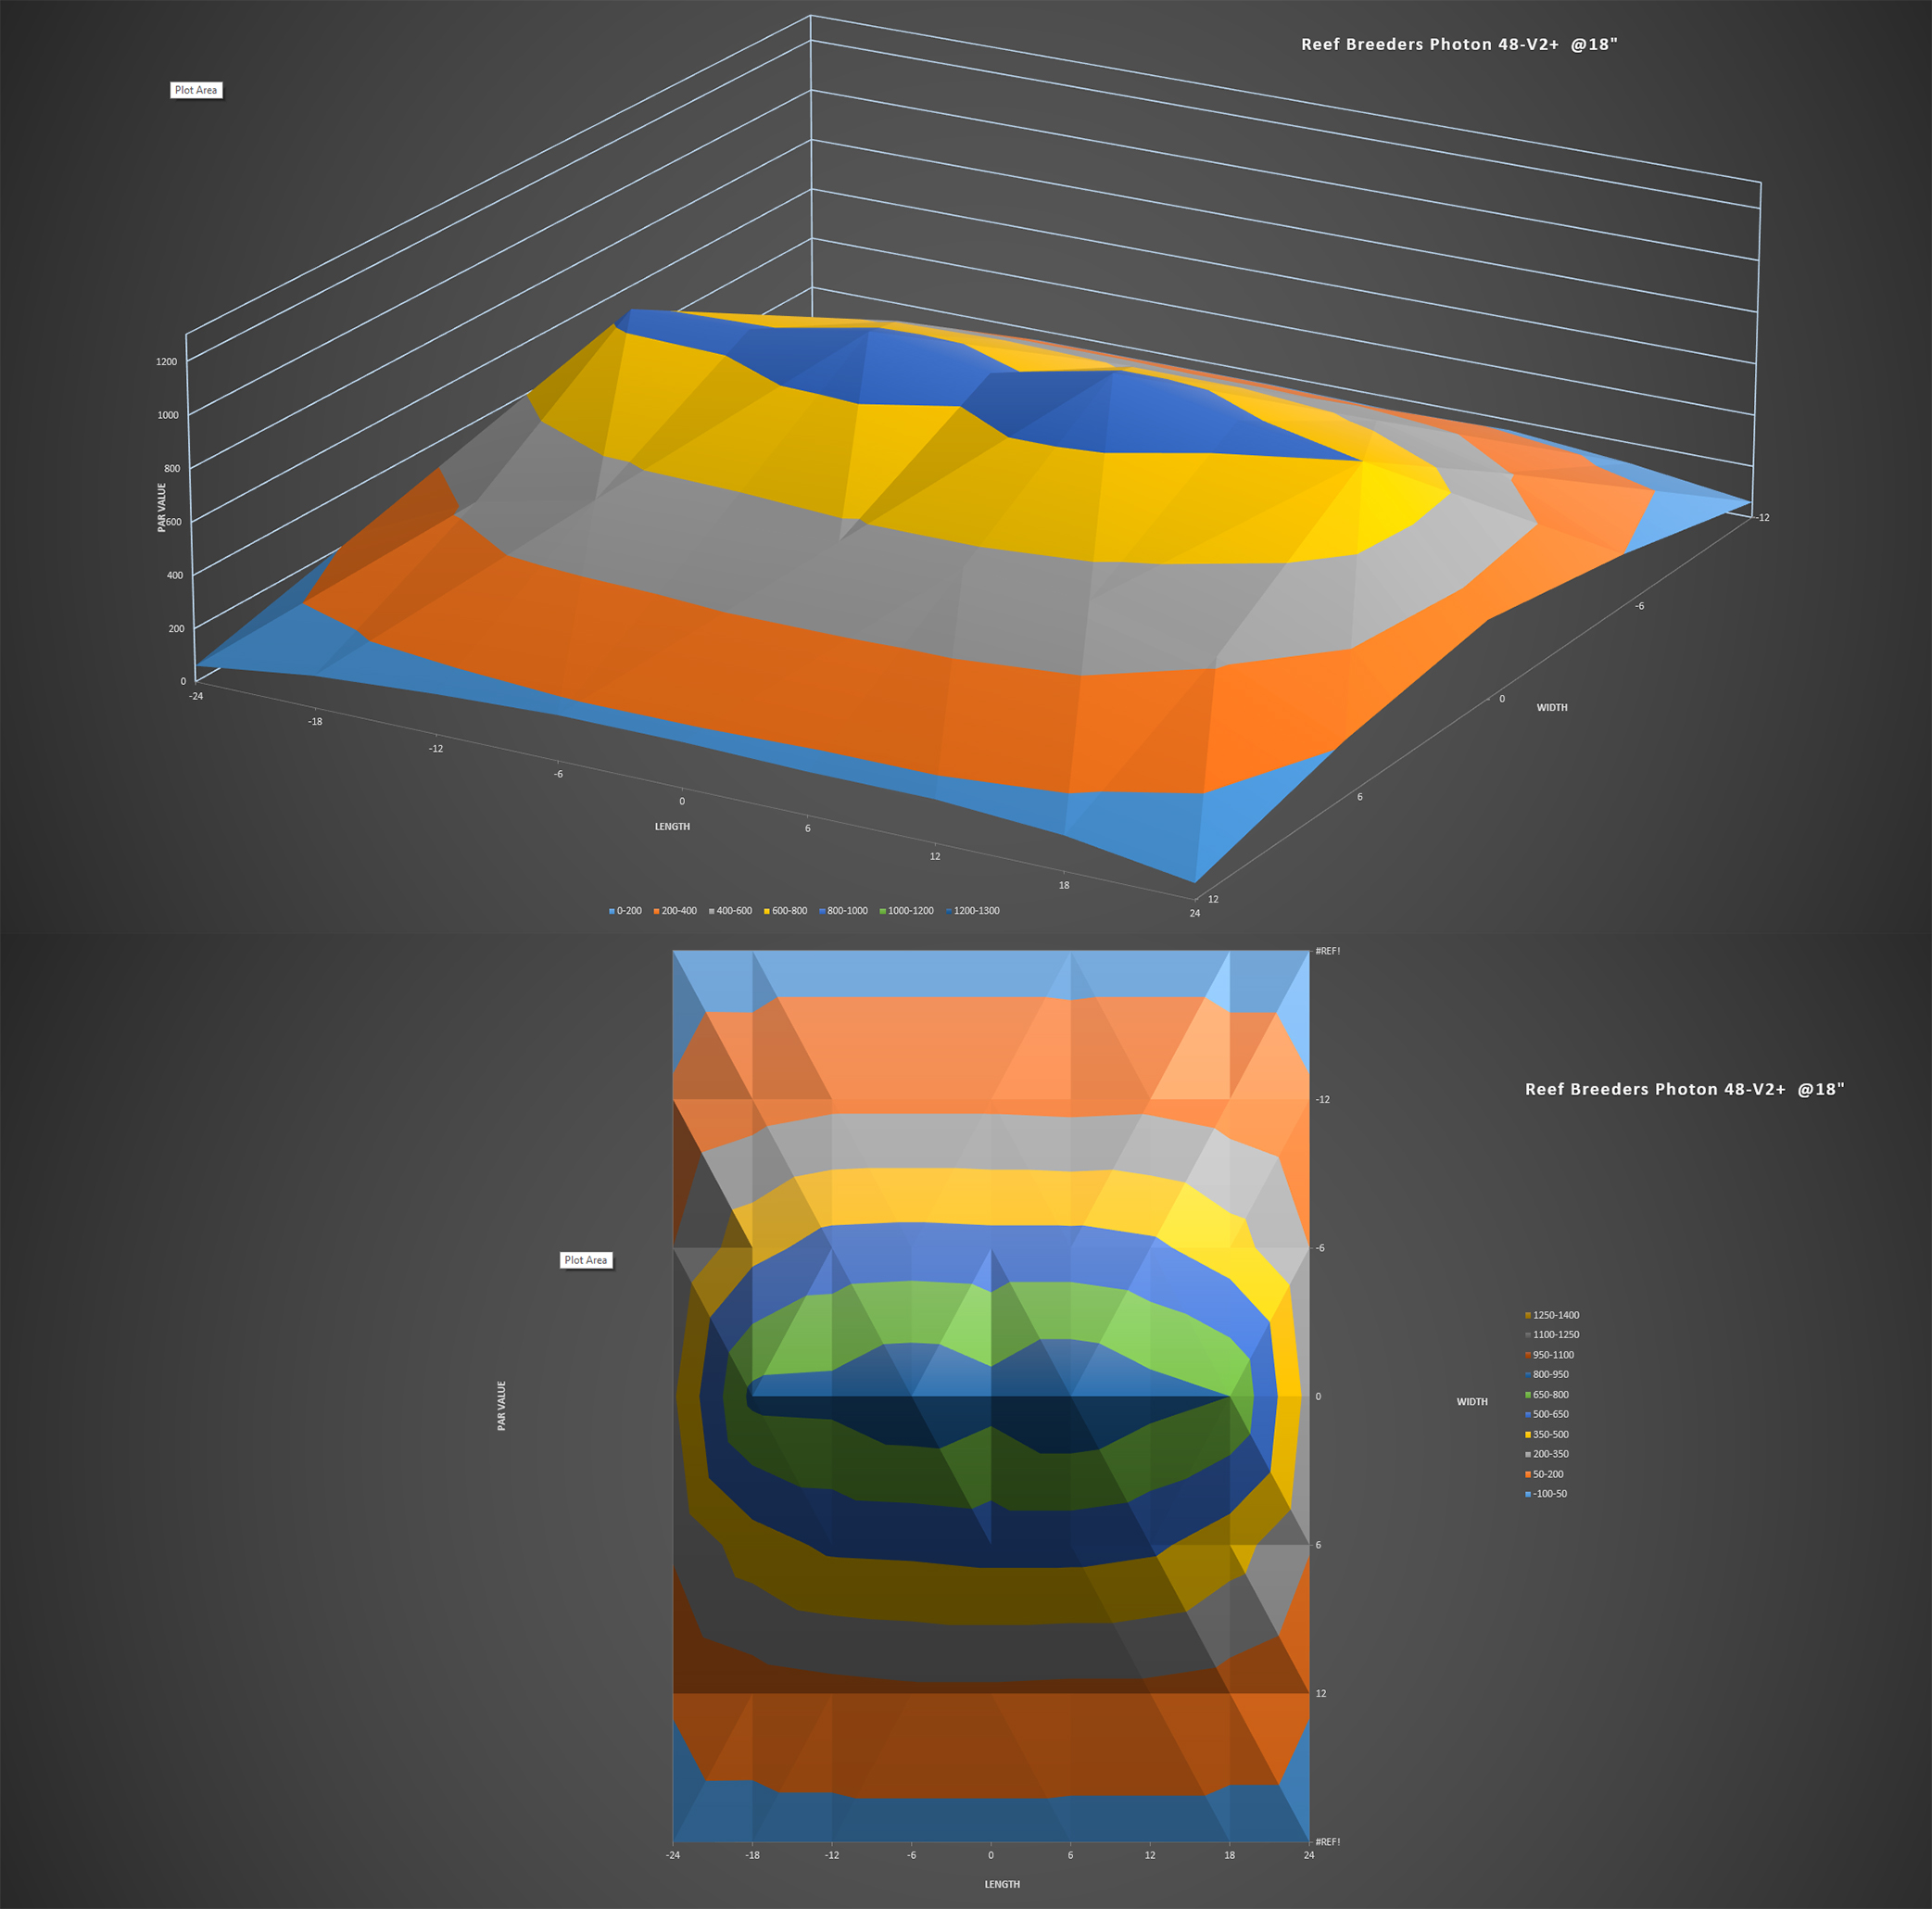
@18″

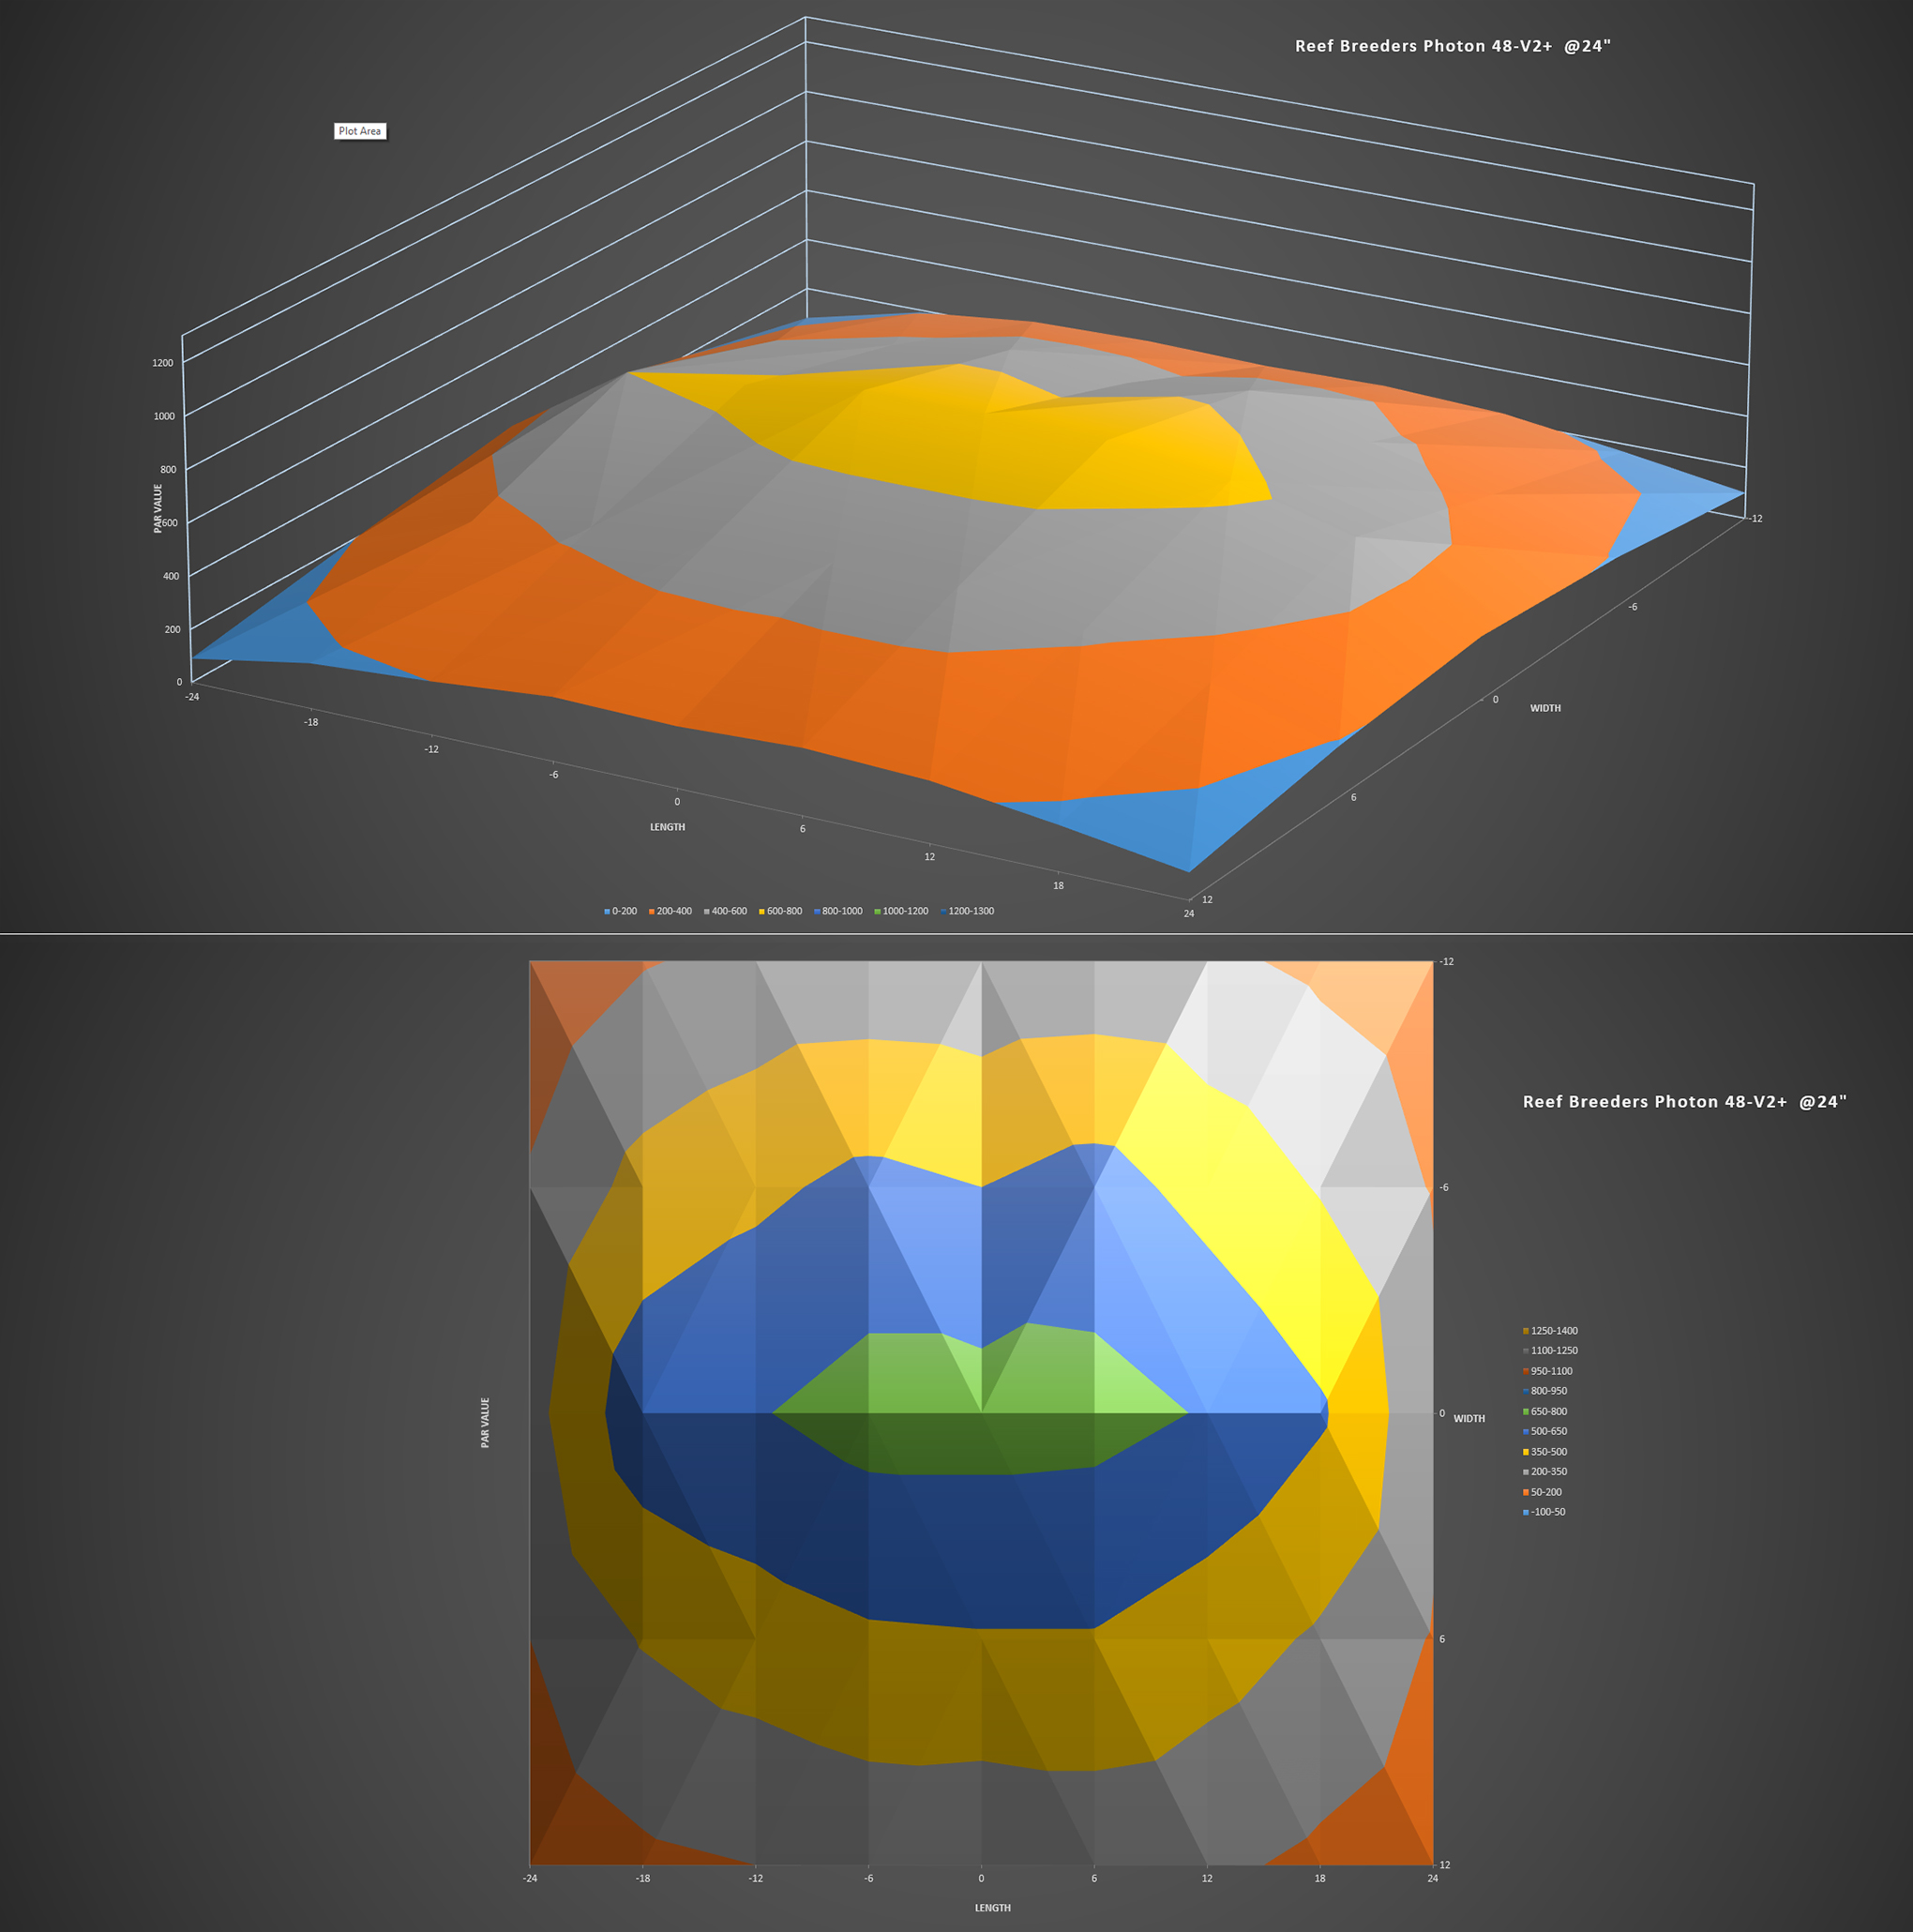
@24″

@30″
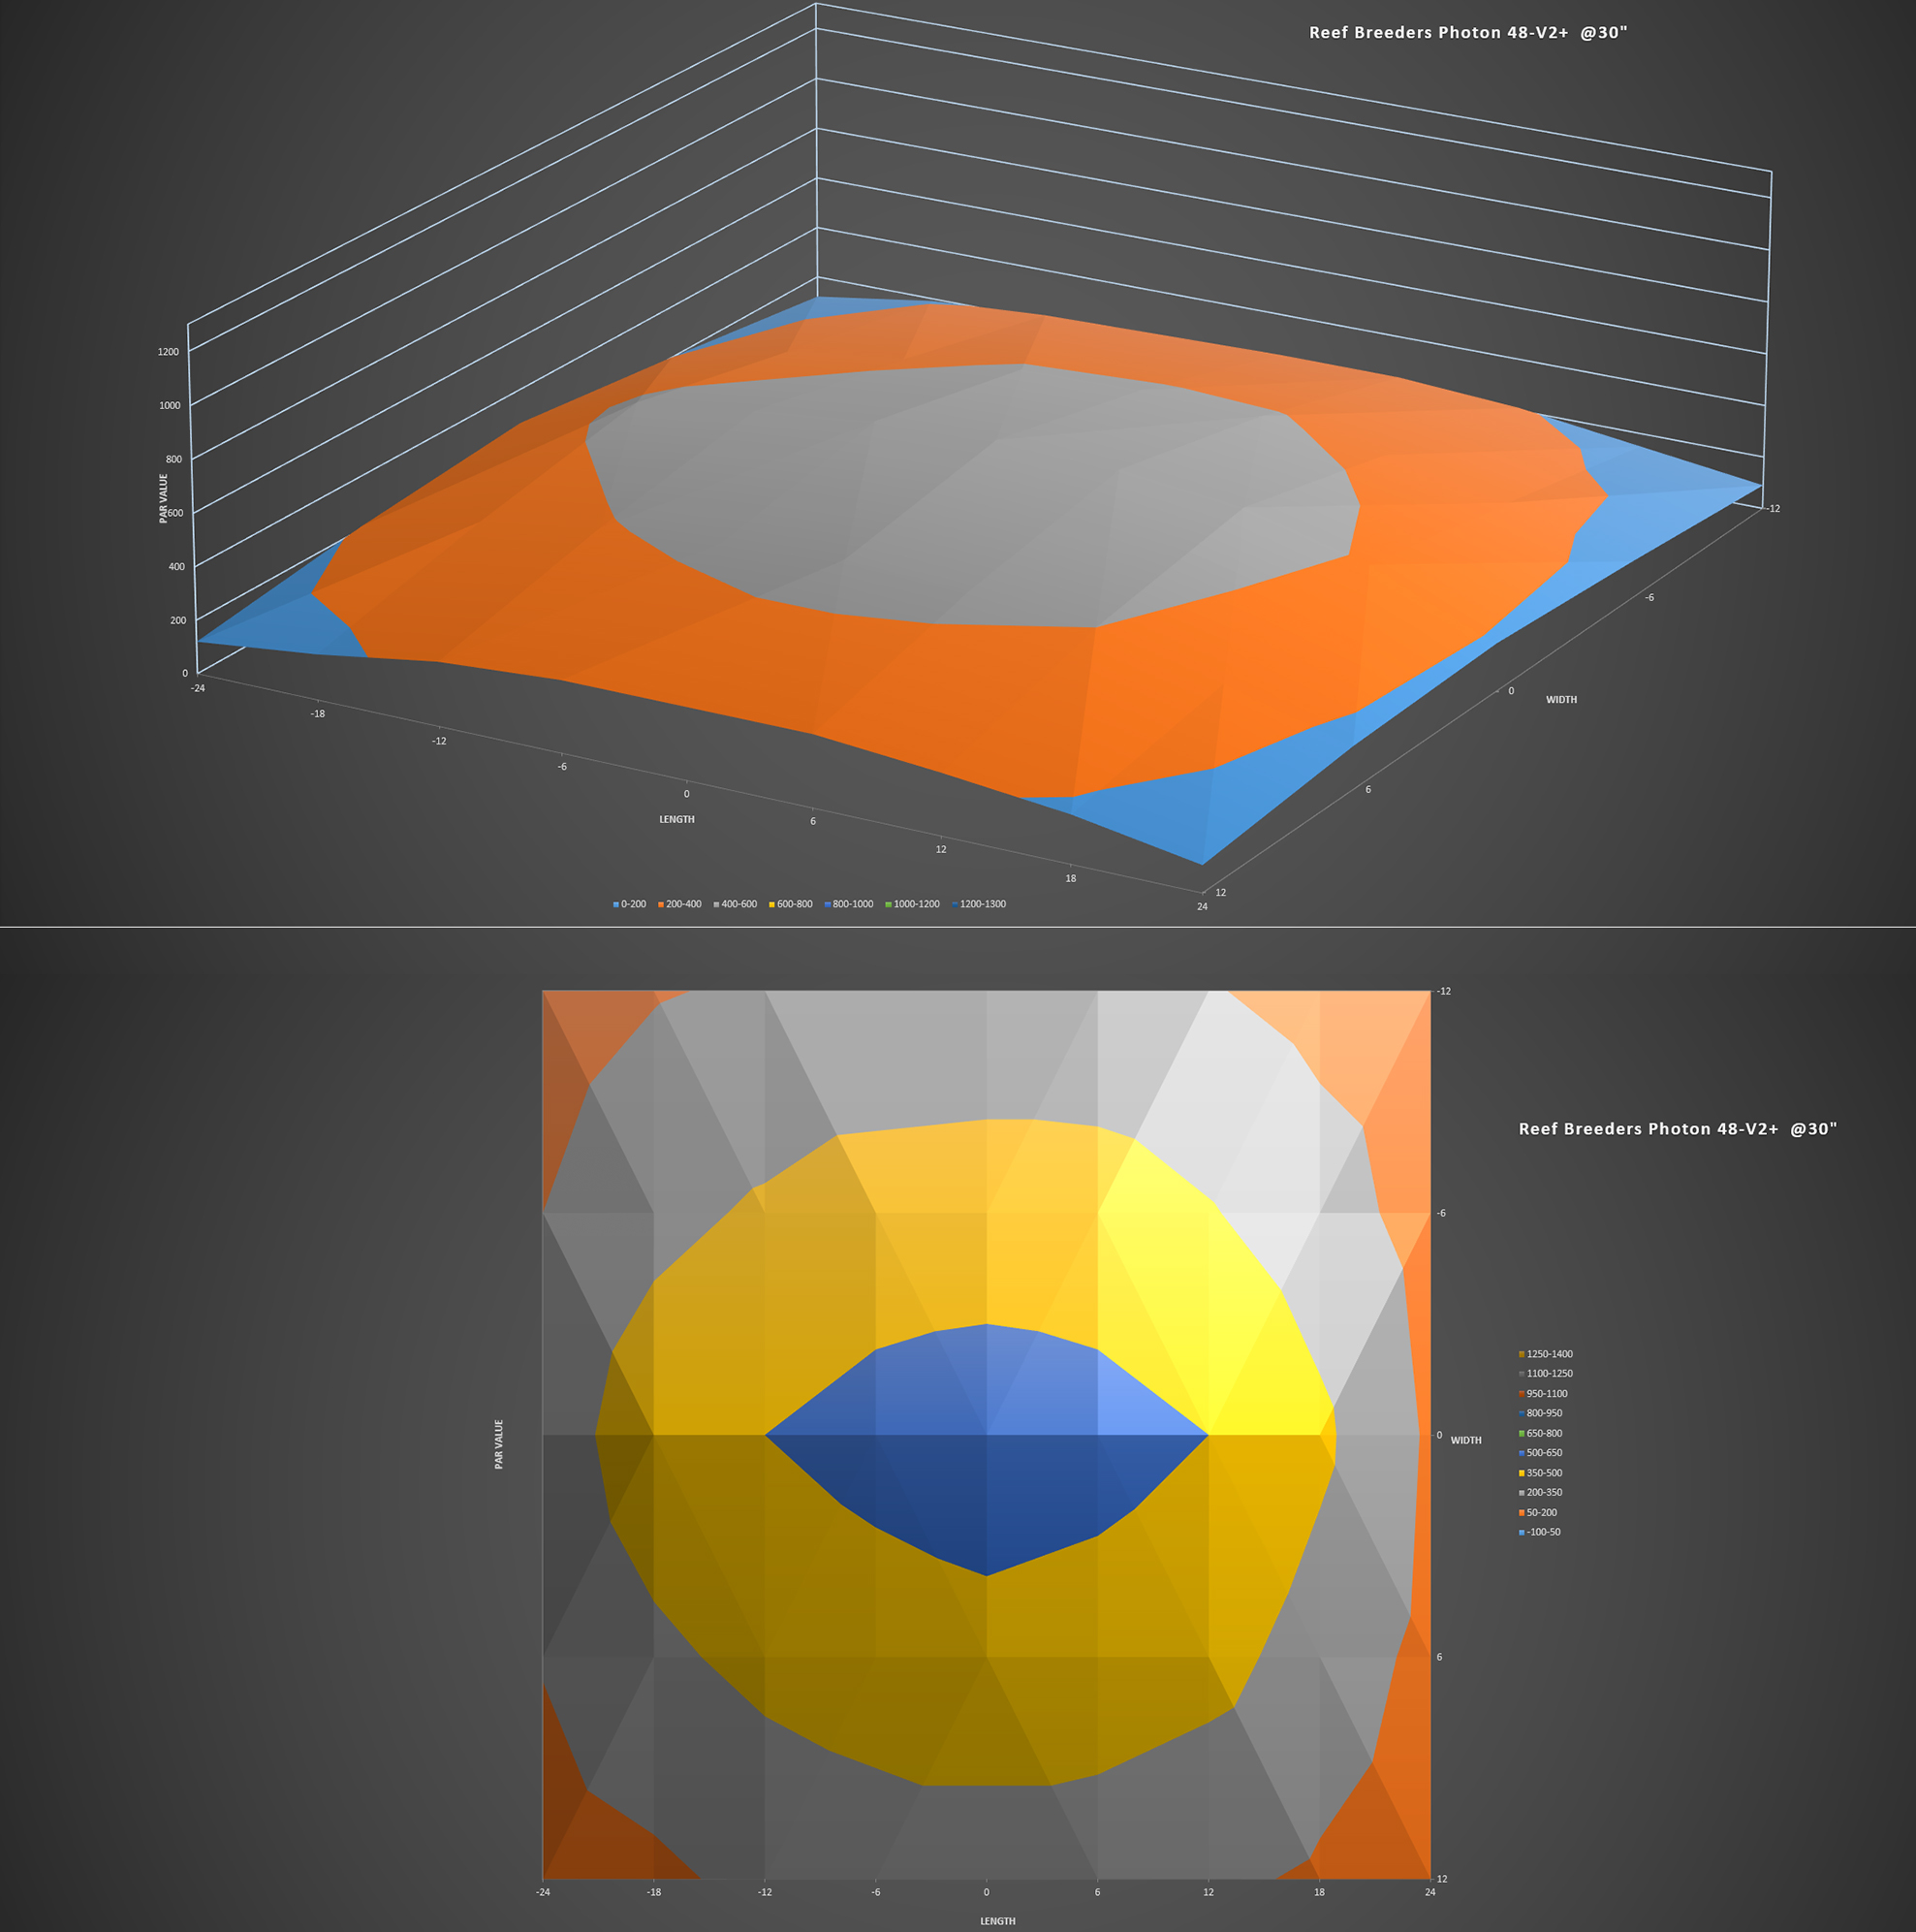

Conclusions from the PAR readings:
- The light is a PAR monster, it creates massive amounts of usable for coral growth light over its 88 LEDs that can compete with the top players in the aquarium industry
- The LED array and distribution over the length of the fixture is very good and it shows in the PAR results; the spread is even at all measured depths and usable PAR reaches as far as 30”, which translates to the ability to grow SPS and other light-demanding corals at any depth in the tank
- The slight dips you see in the PAR graphs are the result of the testing protocols rather than the light performance; the distances from the center of the fixture lay exactly at the spaces in between the LED arrays, especially at 6” and 12” marks; they are quite irrelevant though
- There are some variances in PAR between the right and left side of the light, but again, these are more likely due to the human error (that would be me) and the PAR meter’s tolerance
The downsides I found testing the light output are a matter of personal preference, nevertheless, they can be shared with other like-minded hobbyists. One is the shimmer- it is ever-present and quite visible. Some people like it, I personally hate it. If you do too, consider the use of some diffusing material over Photon’s LEDs, as it will drive you crazy. The other one is the visual brightness of the emitters- you can’t stare at the LEDs for any period of time or you will go blind. Again, the solution would be a diffuser. On the other hand, the so-called disco-effect where individual colors don’t mix well together and create a rainbow-like effect in the water column, while present, is surprisingly minimal. Again, it’s due to the well-designed spacing in between individual emitters, I think.
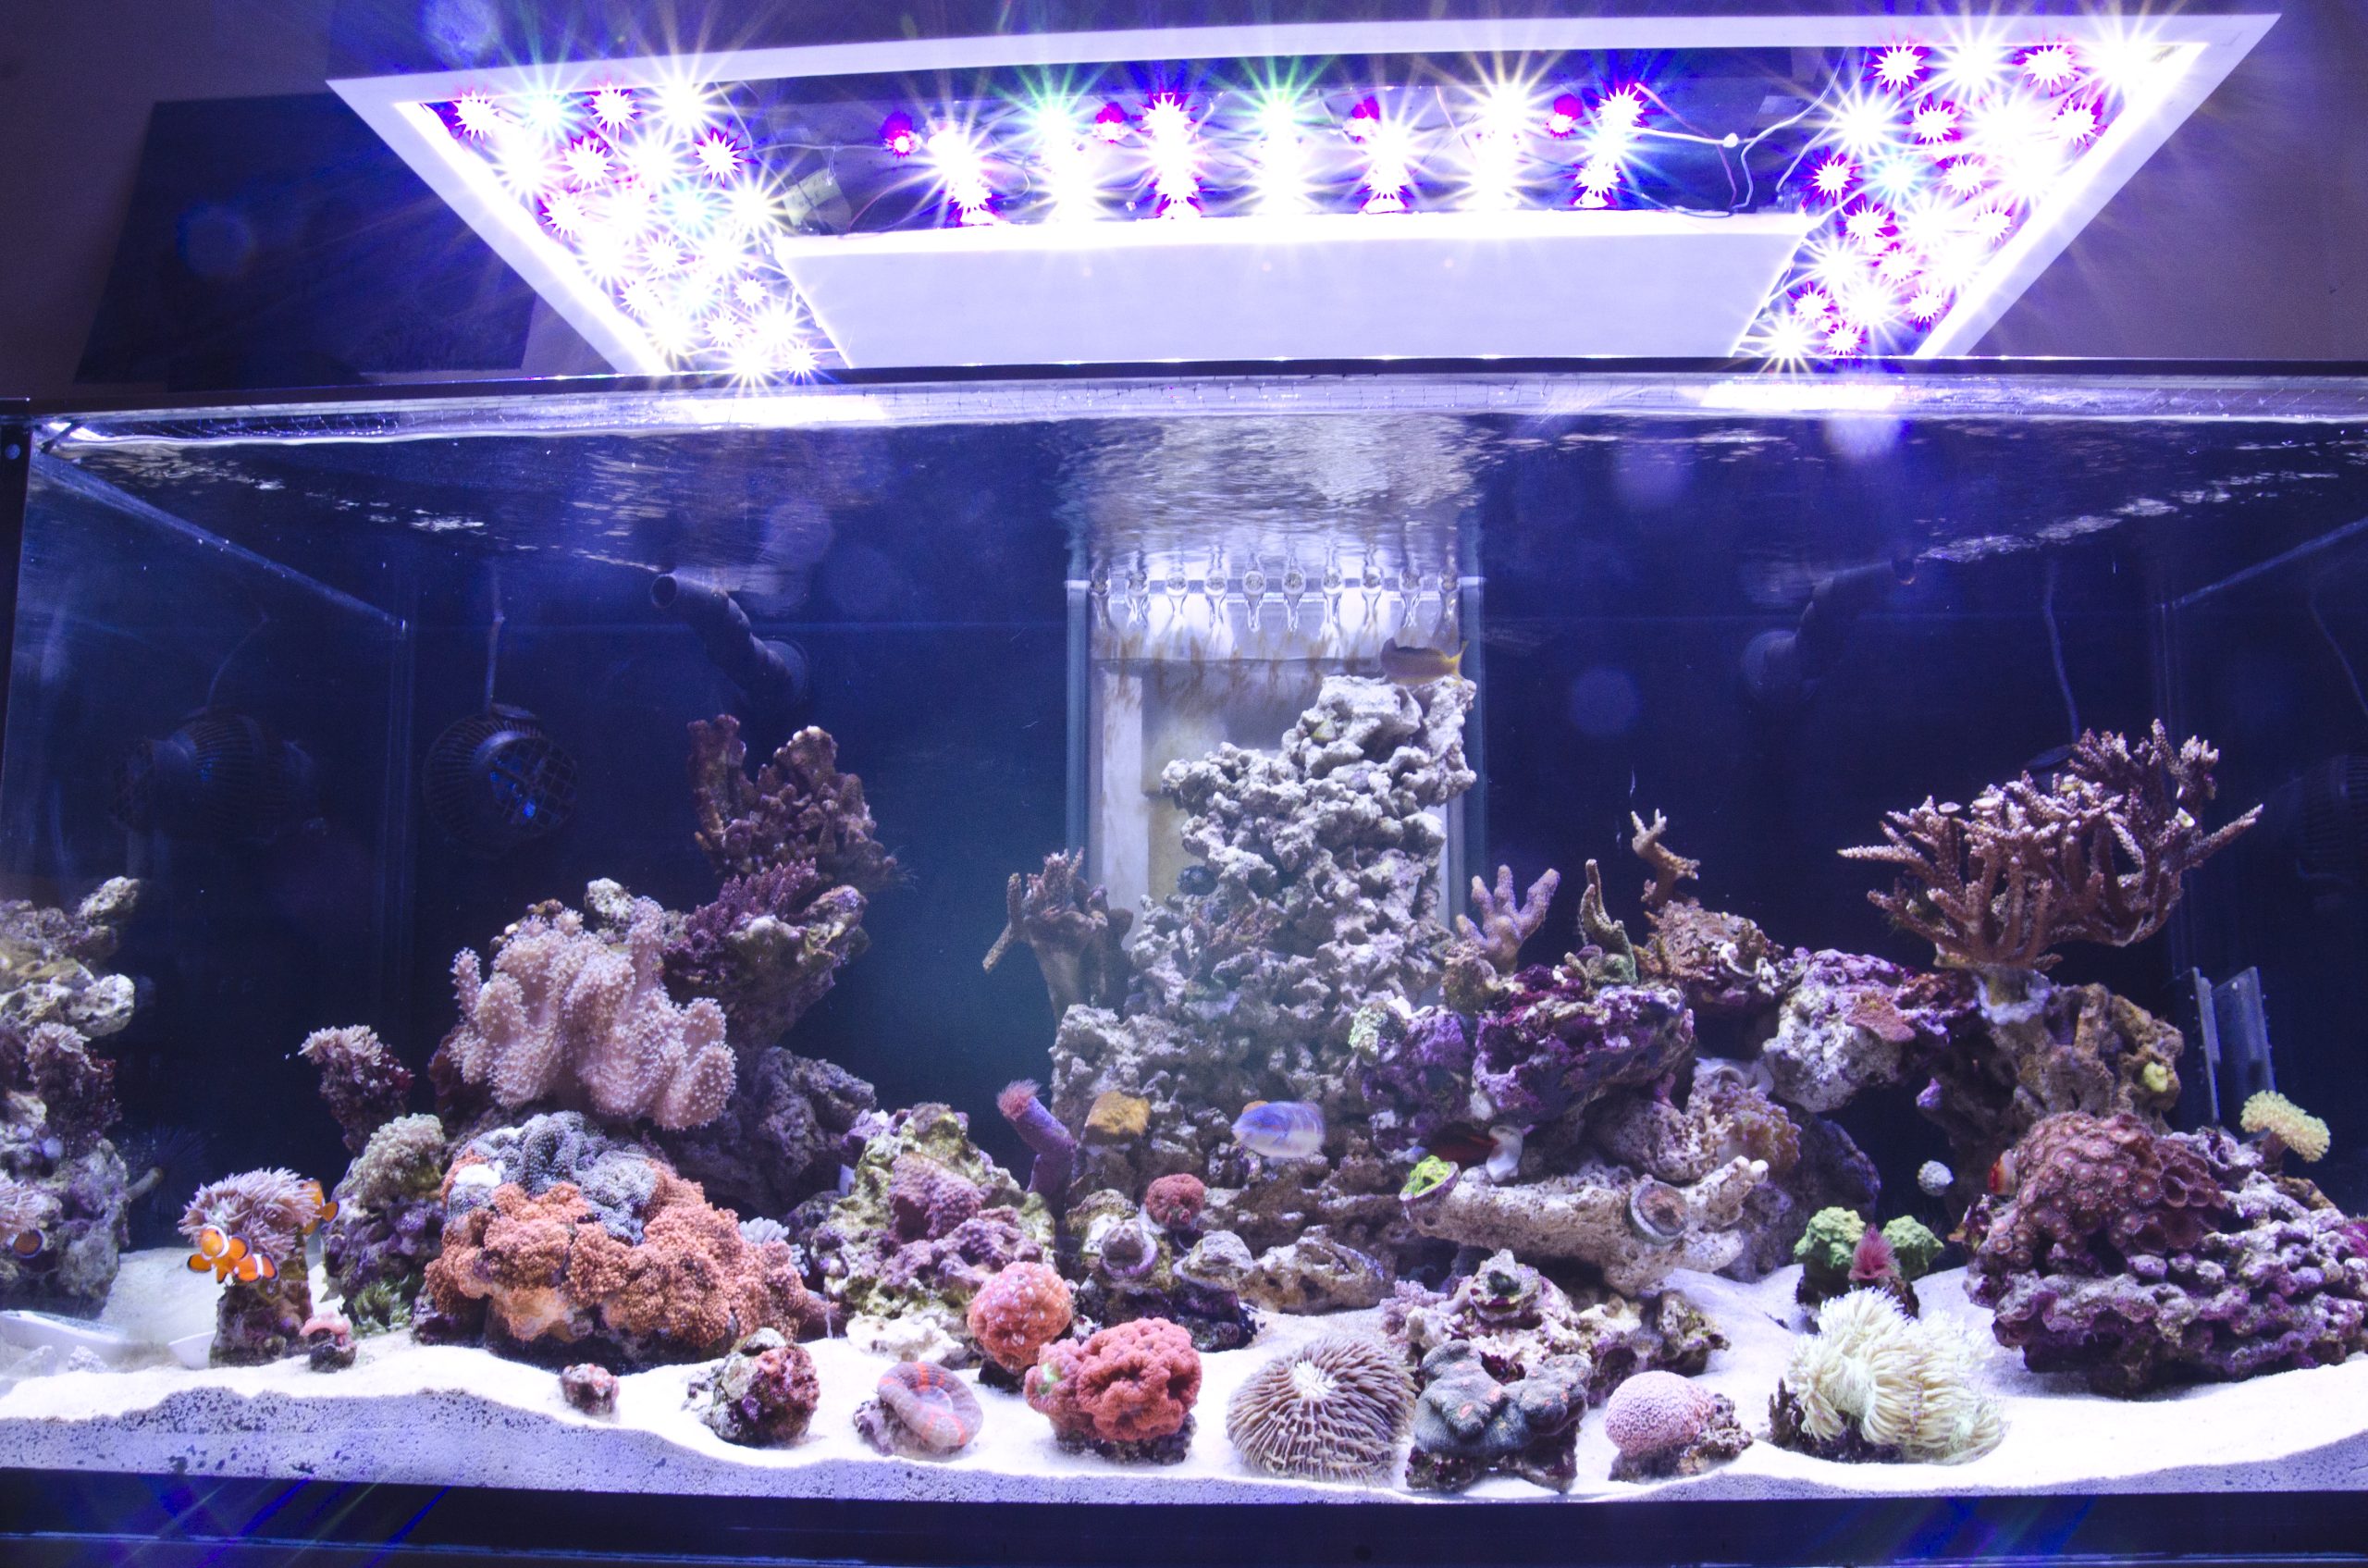
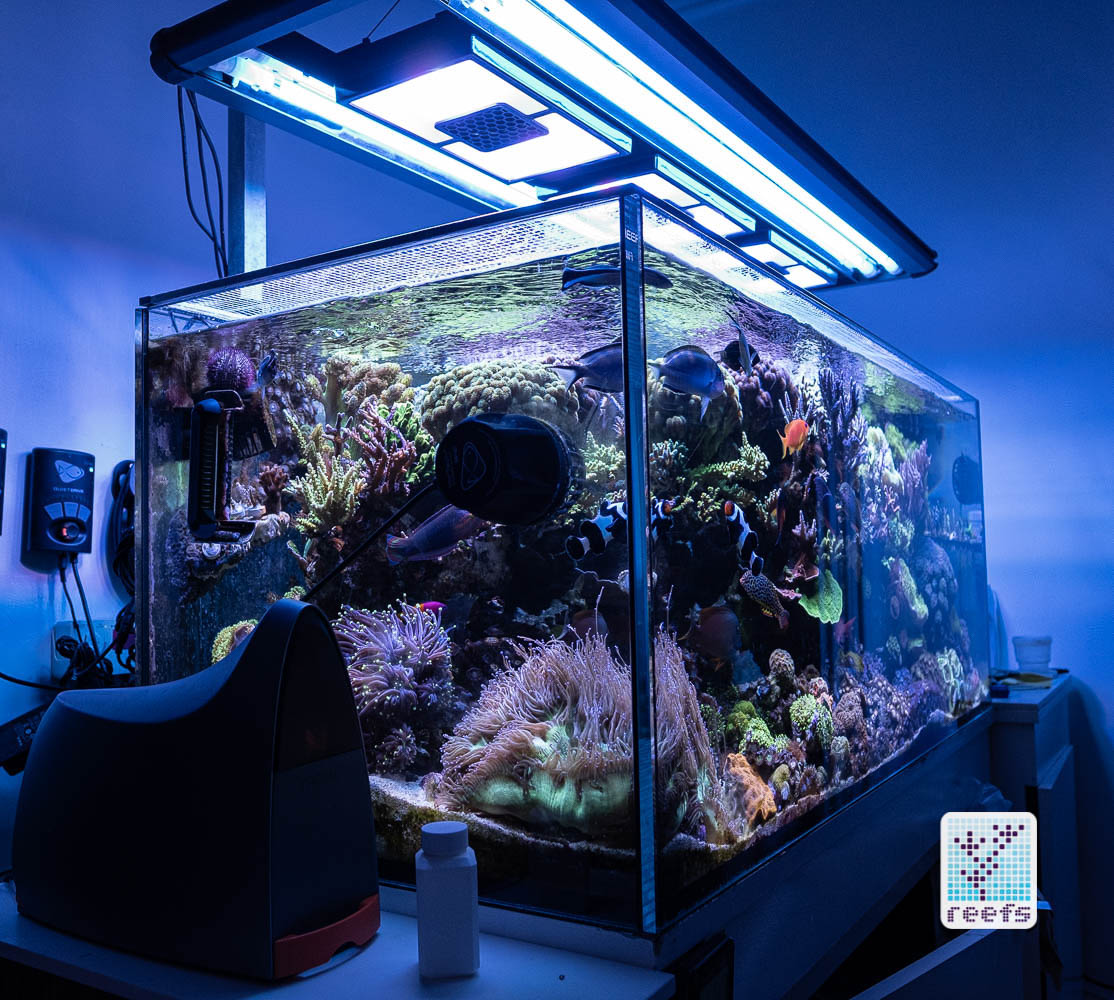
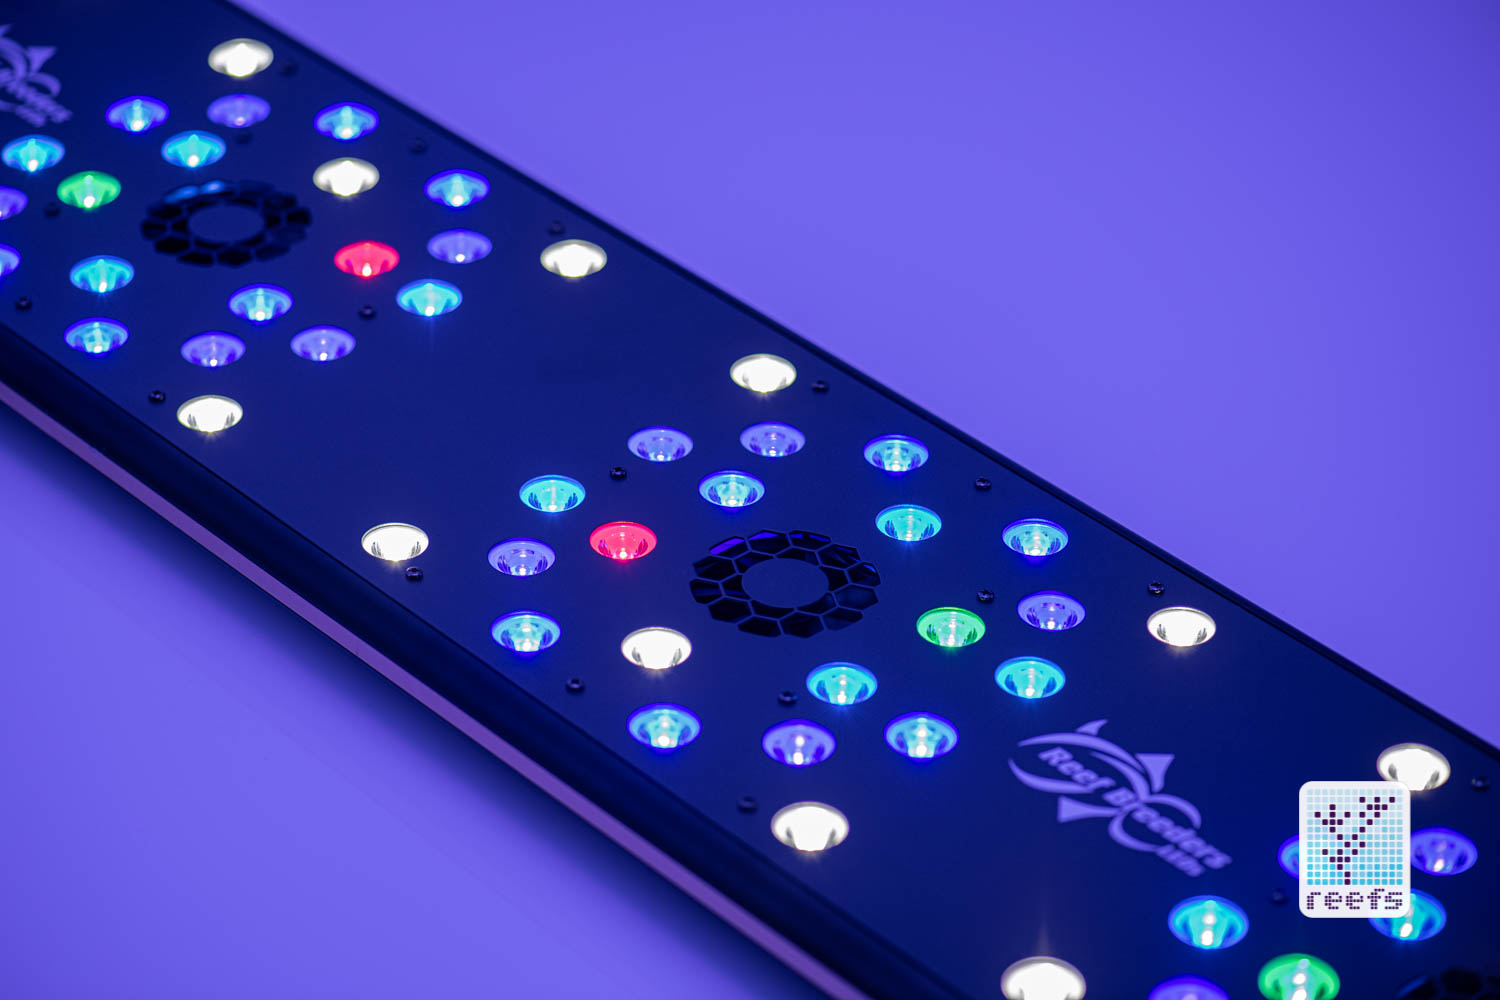
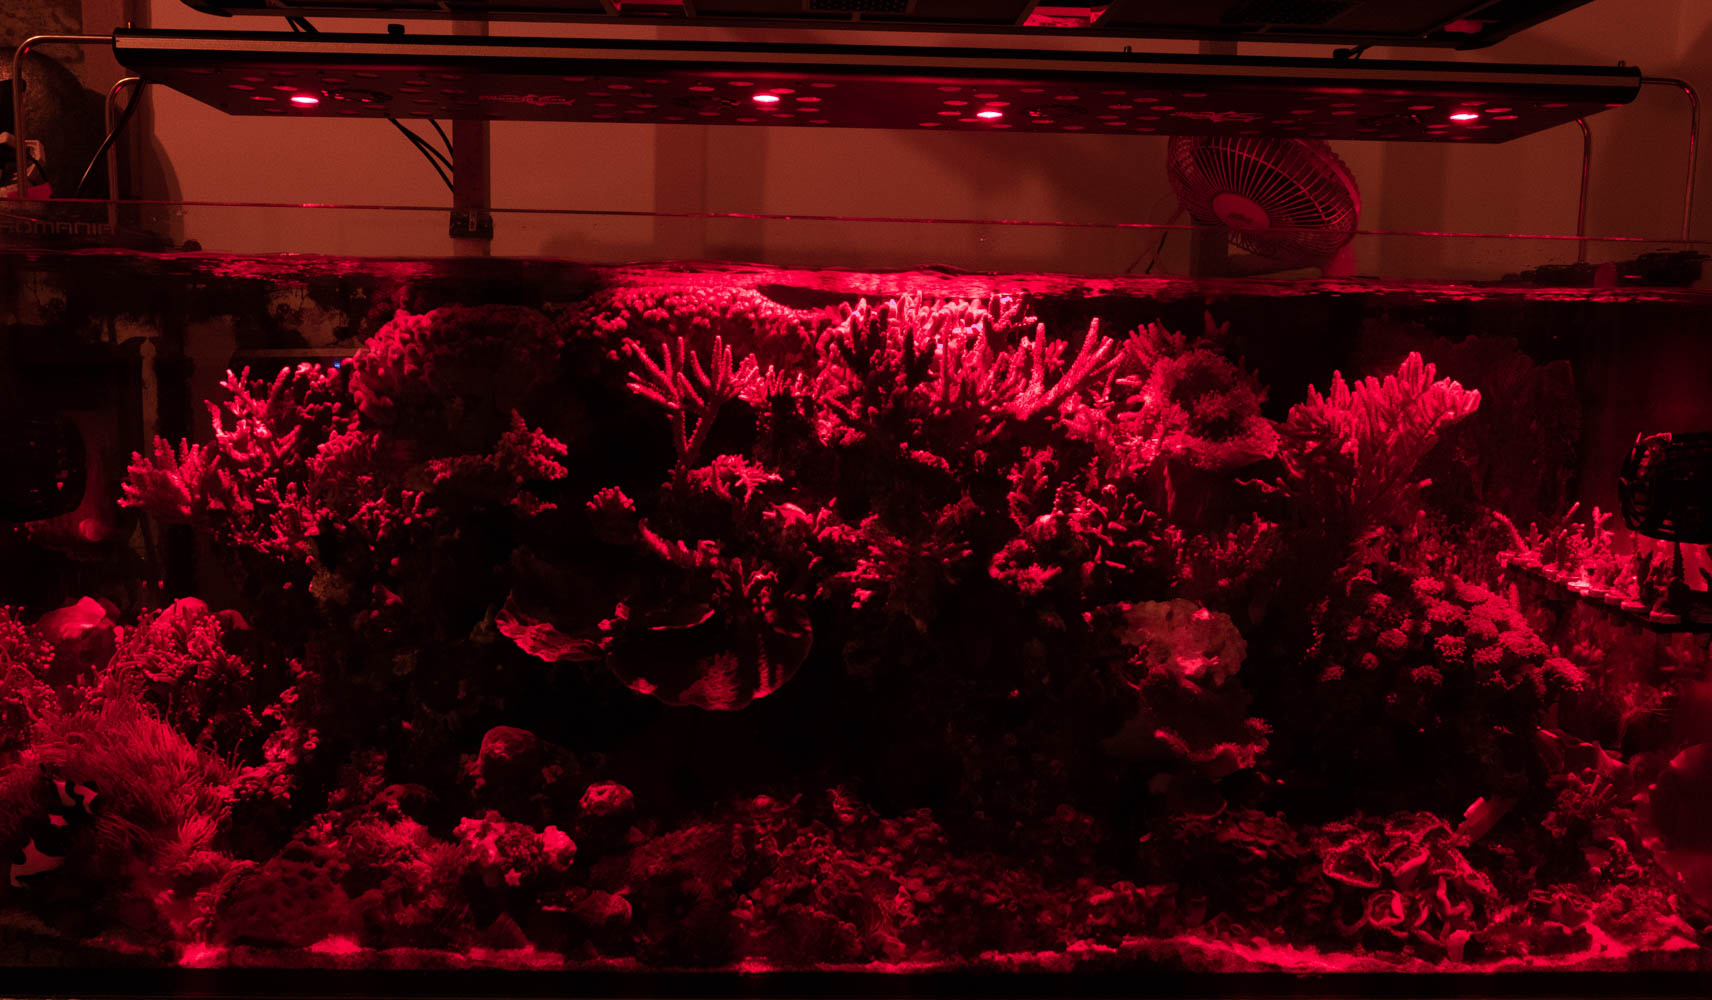
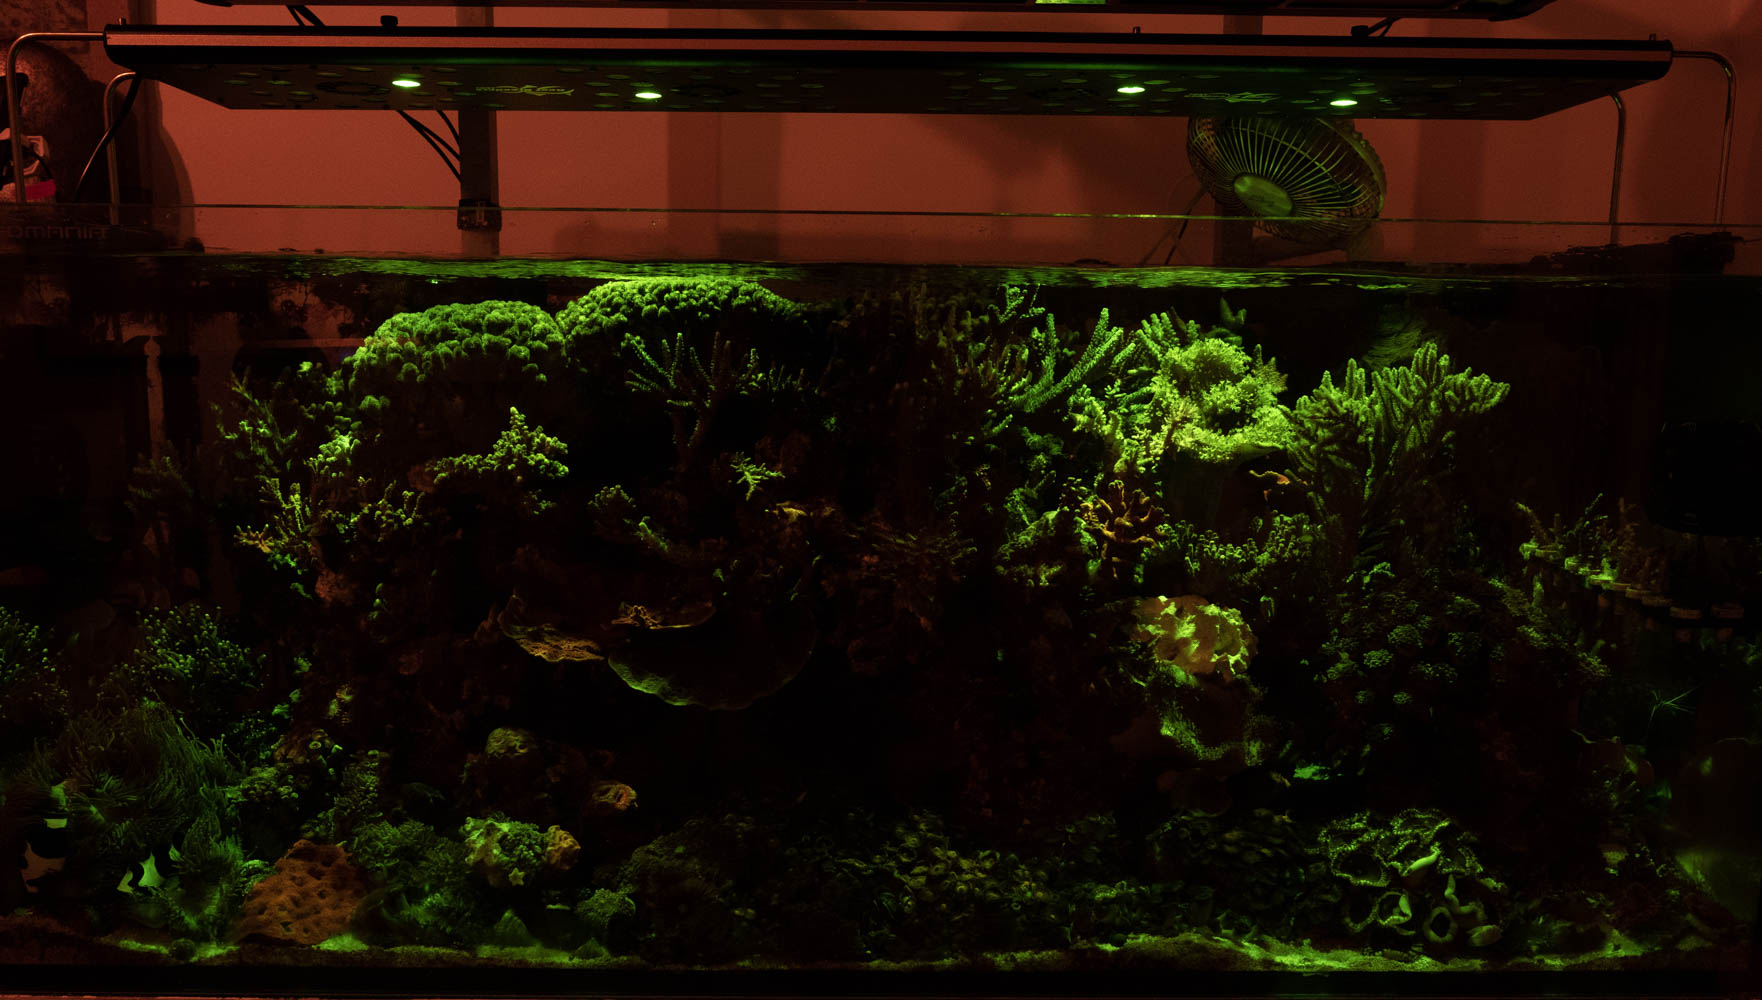
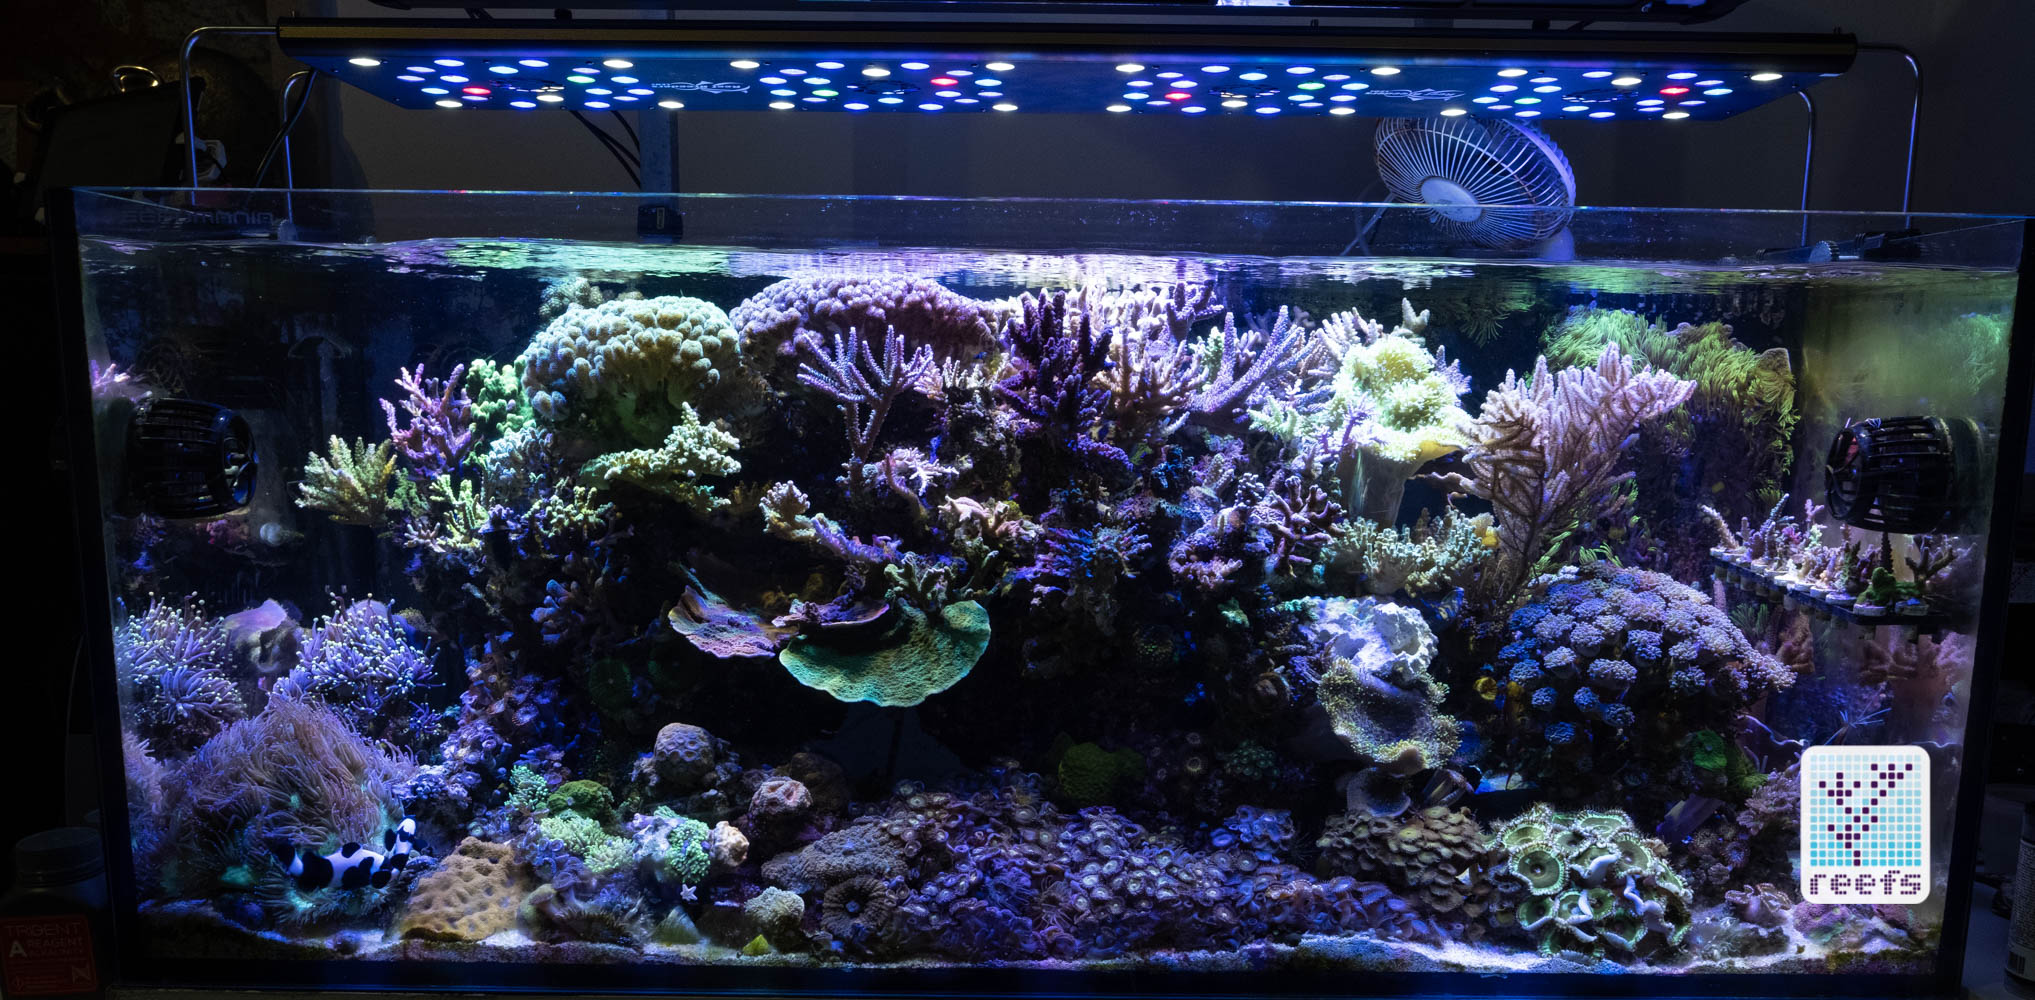
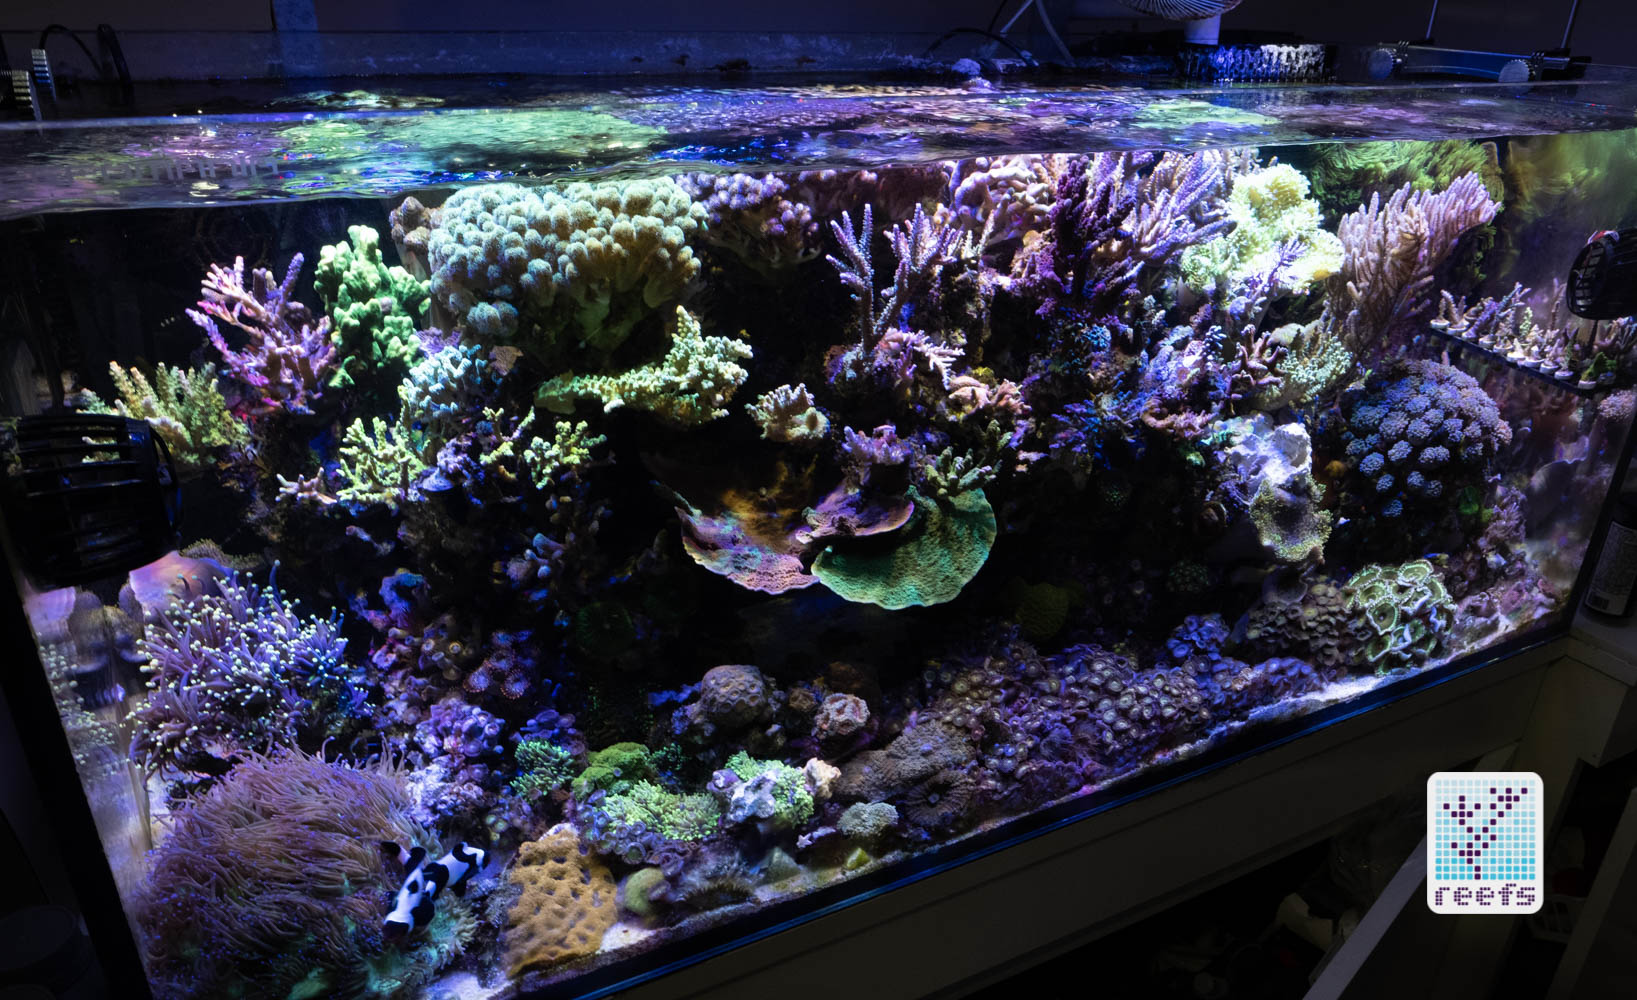
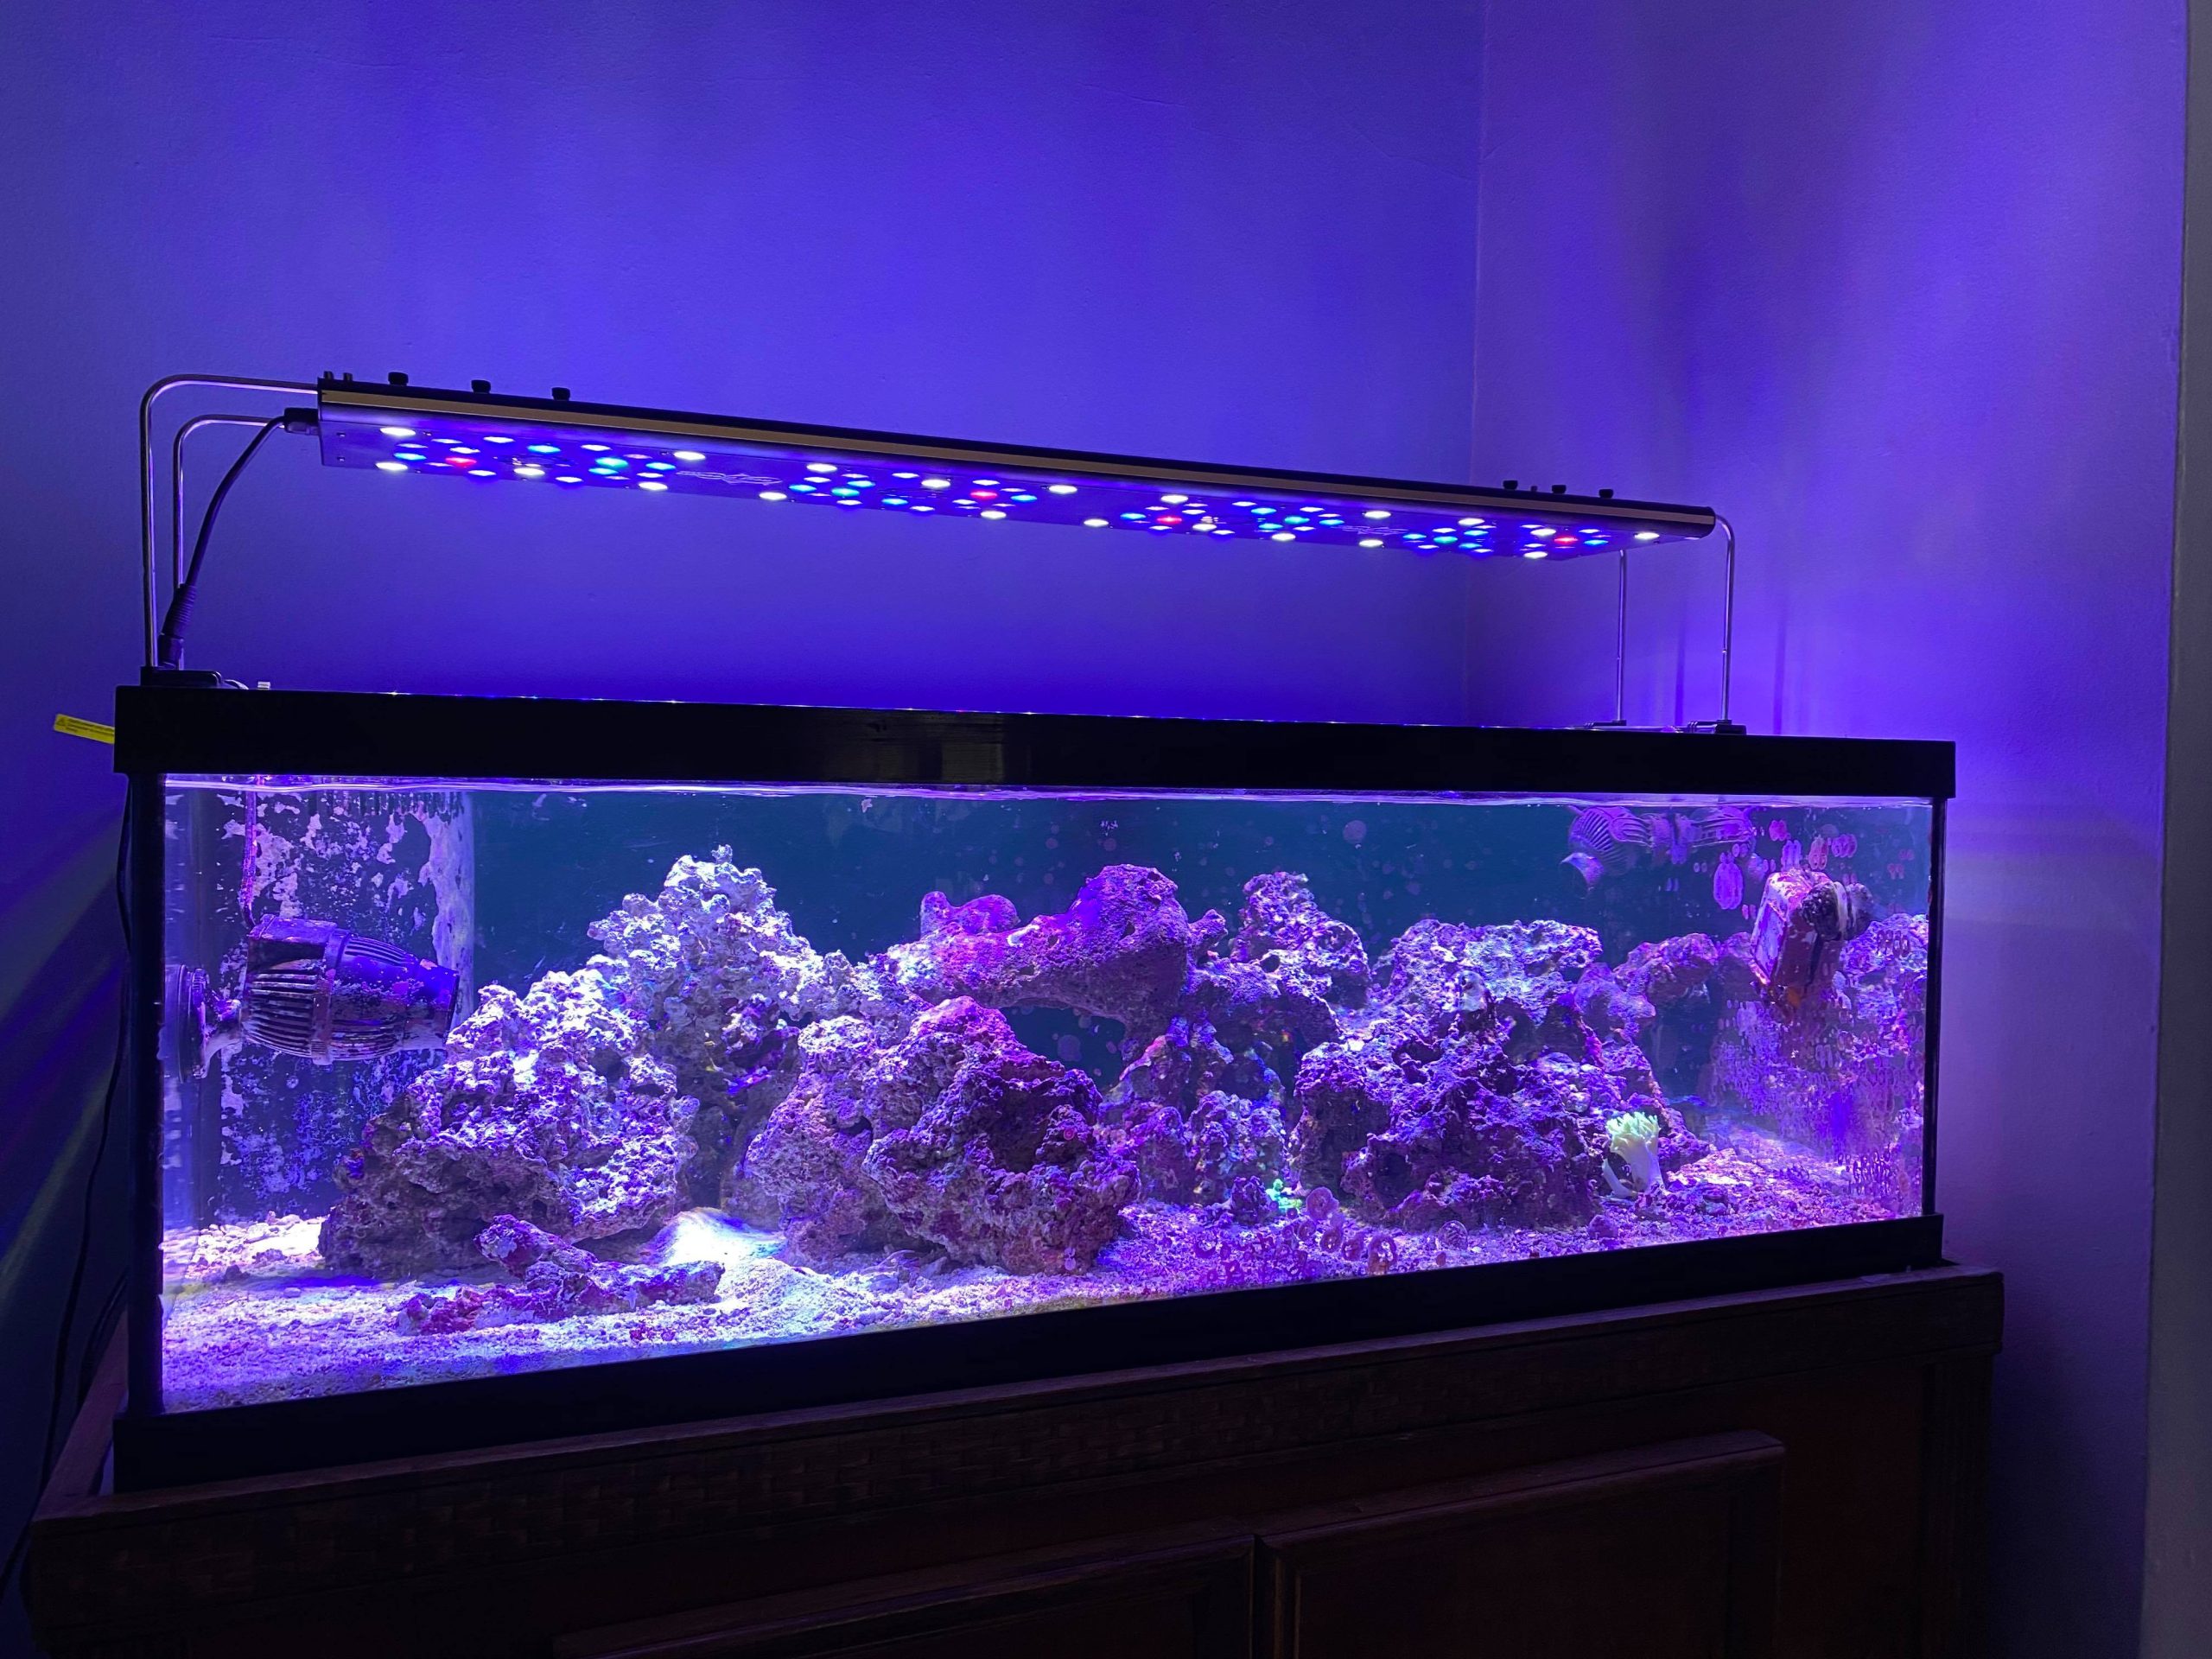
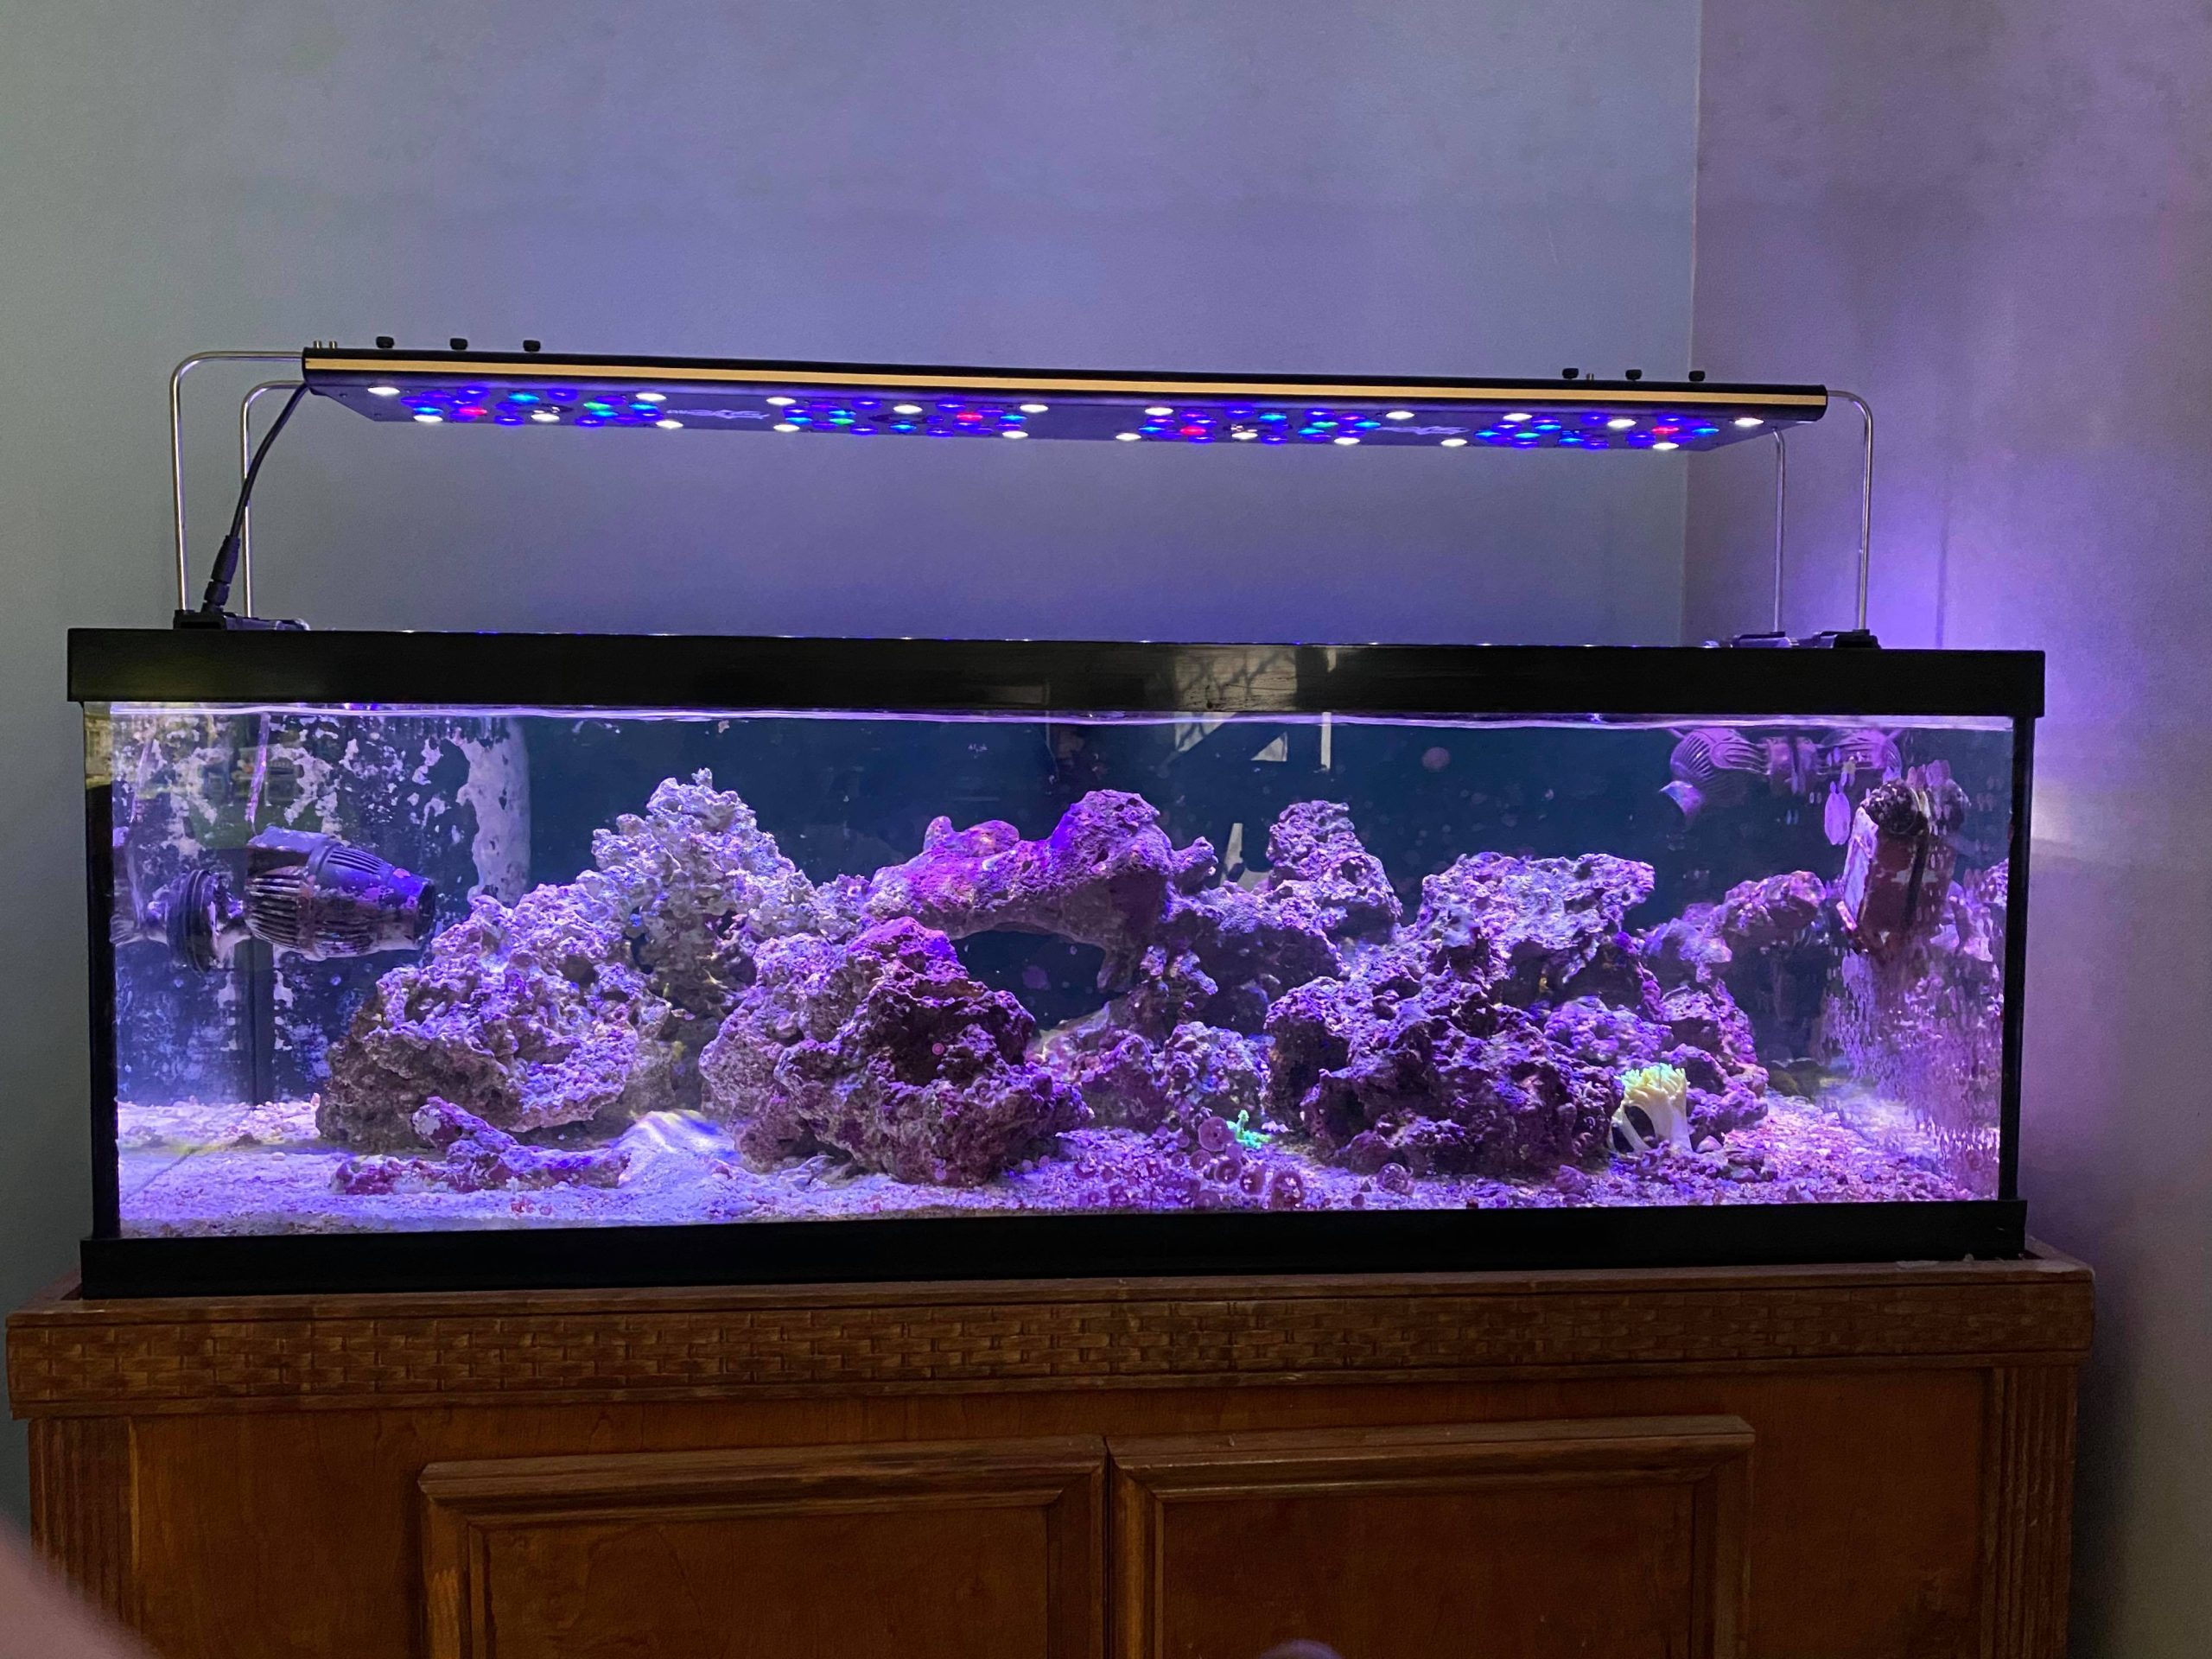
Here’s the light over my tank with different channels at 100% (please forgive the disgusting right-side panel where the frag rack is, that was an amateur omission on my part)
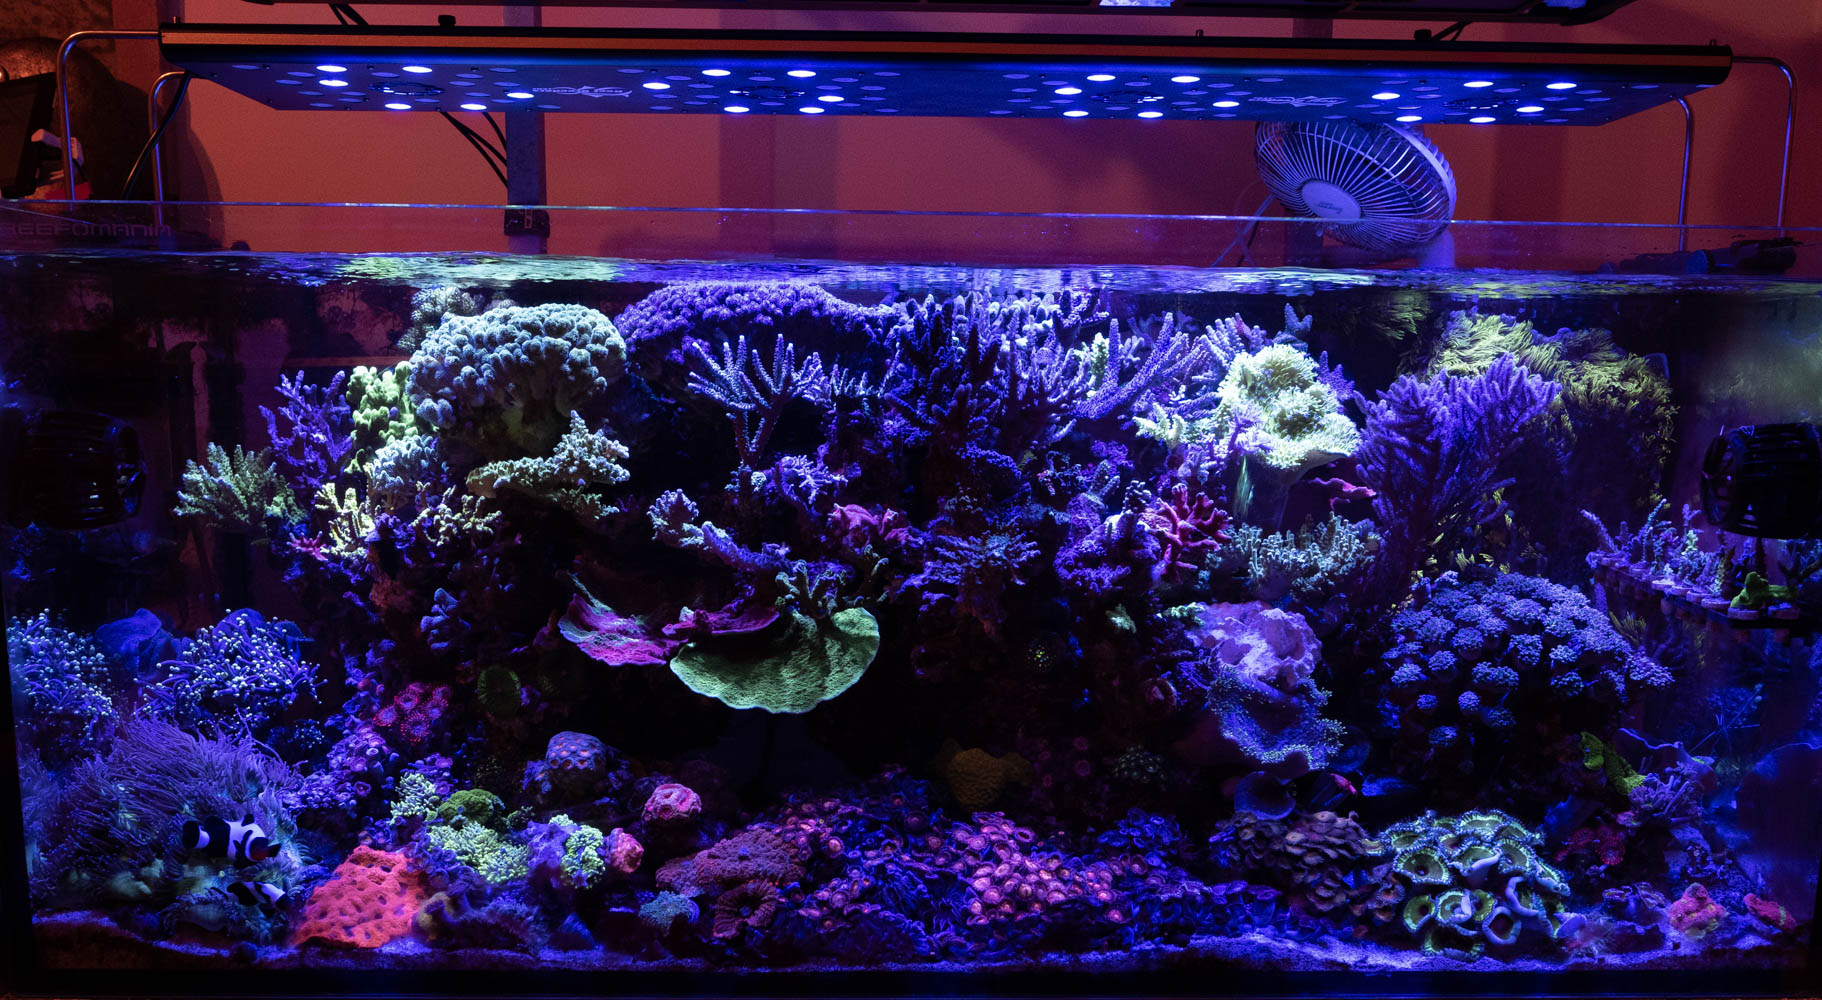
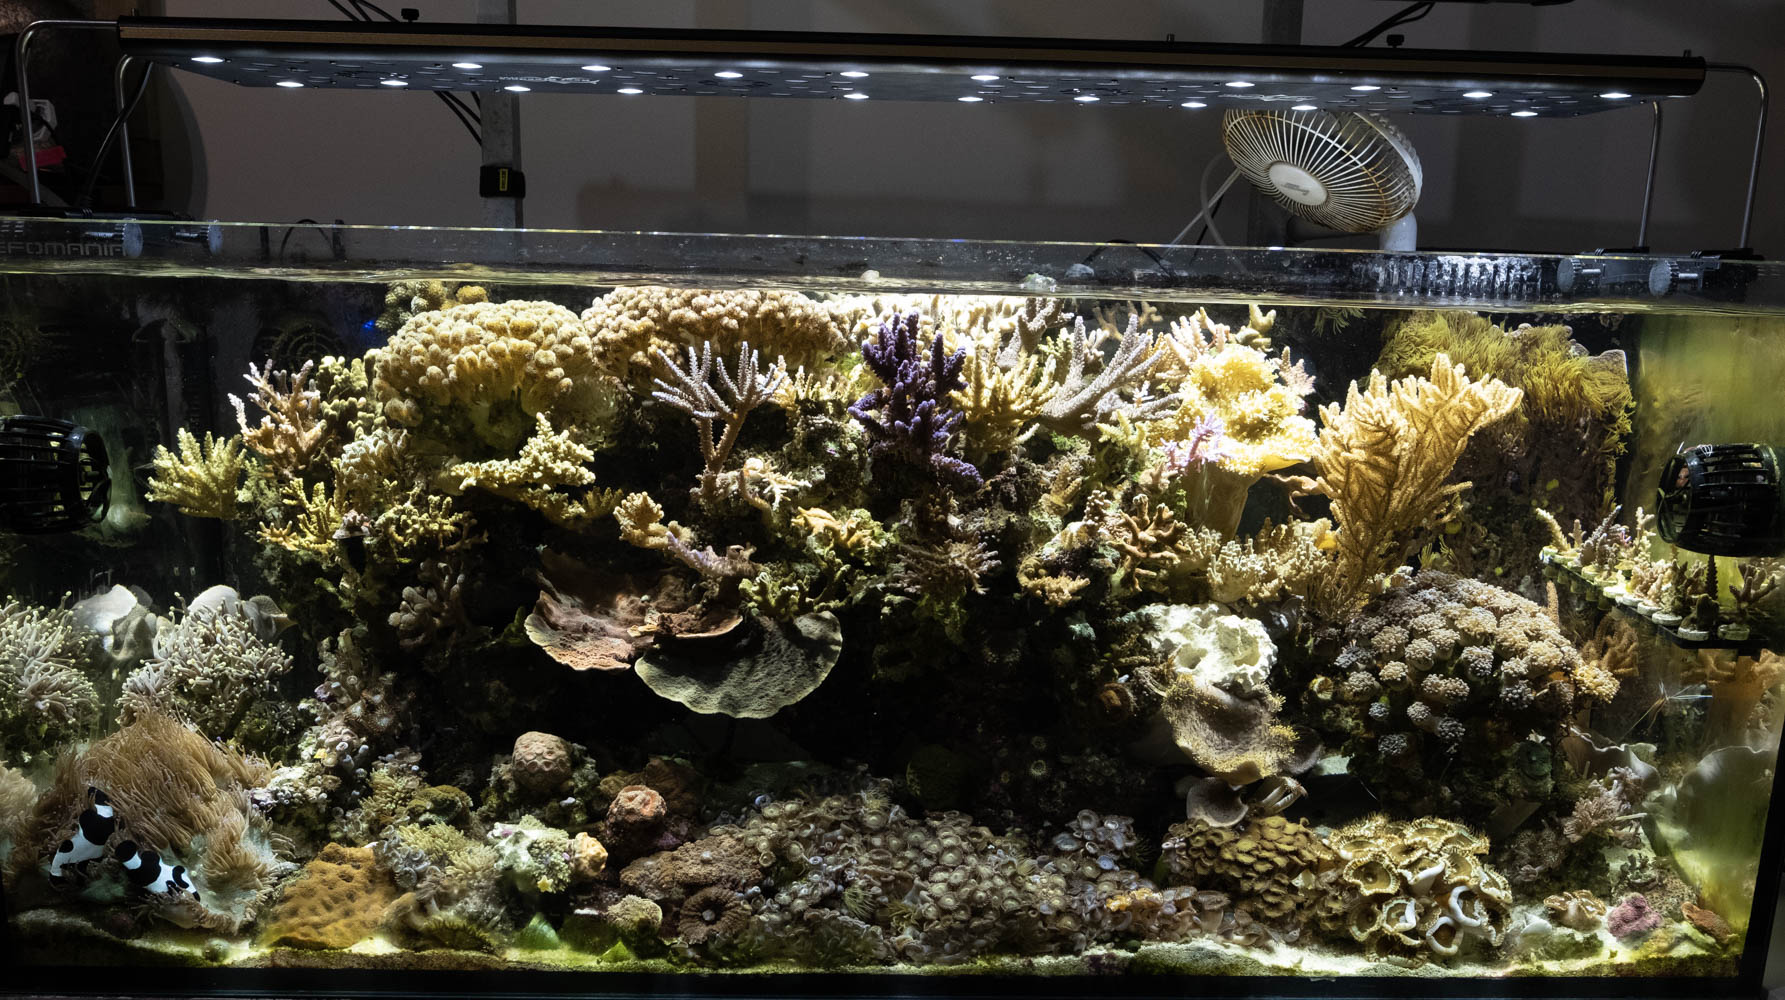
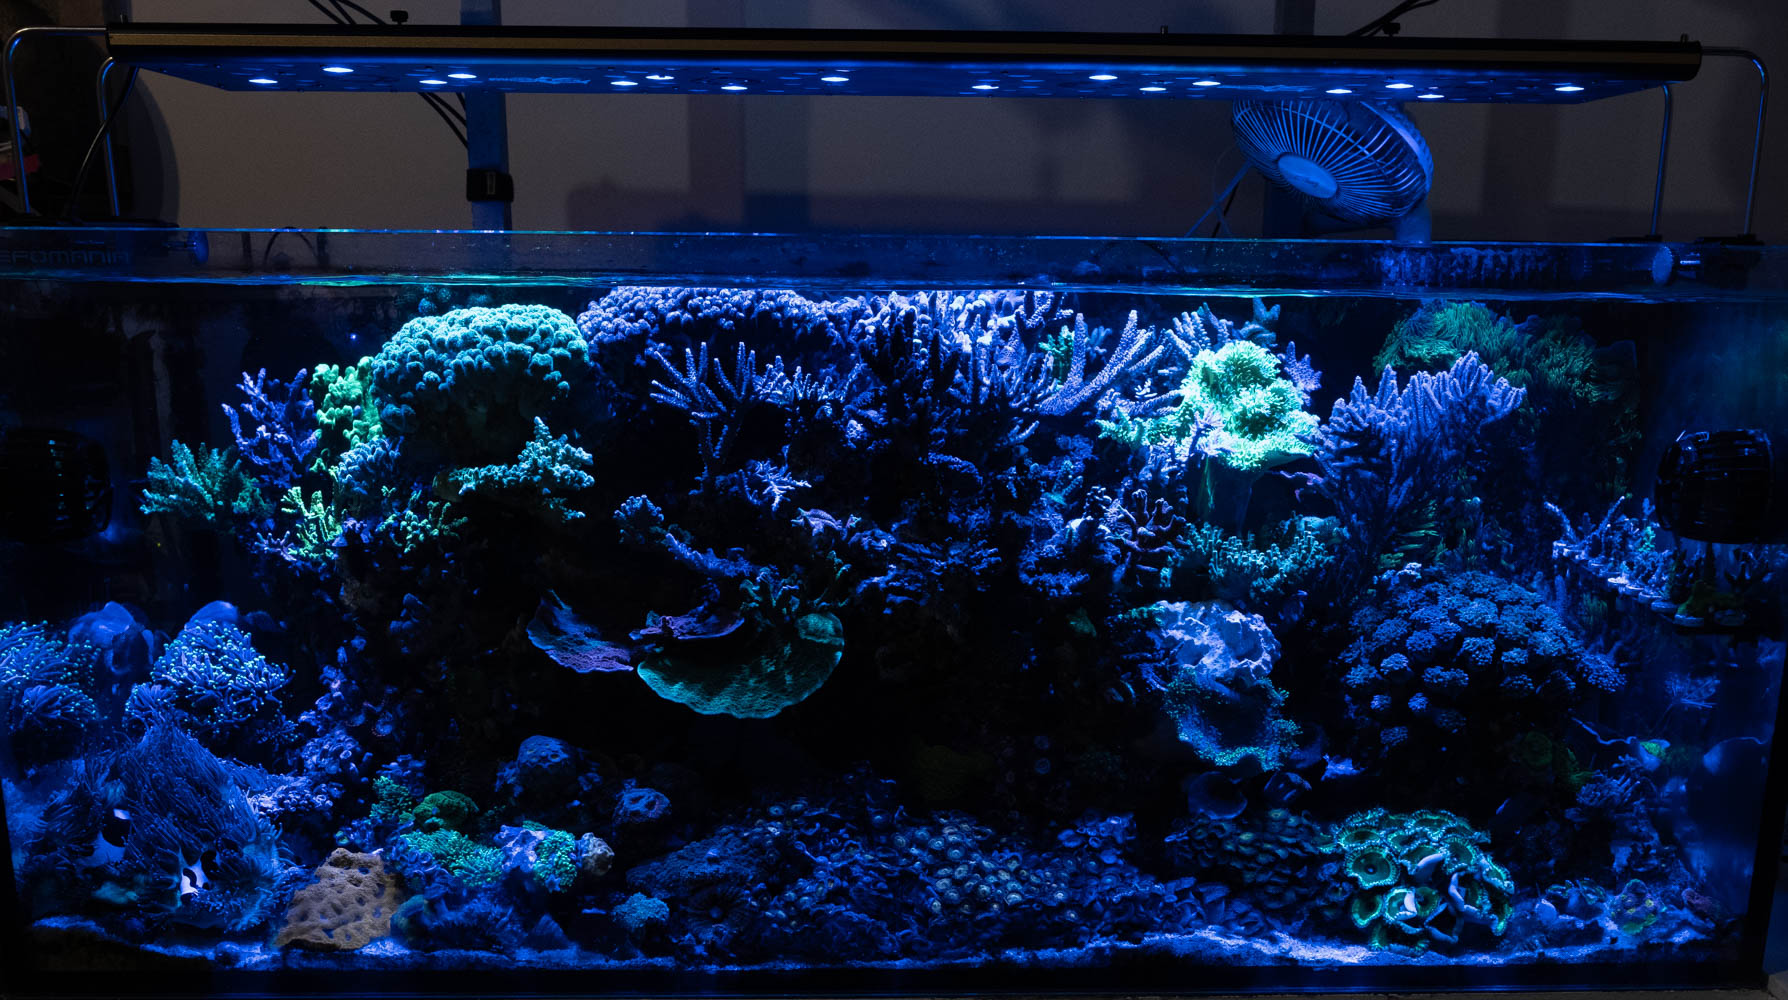
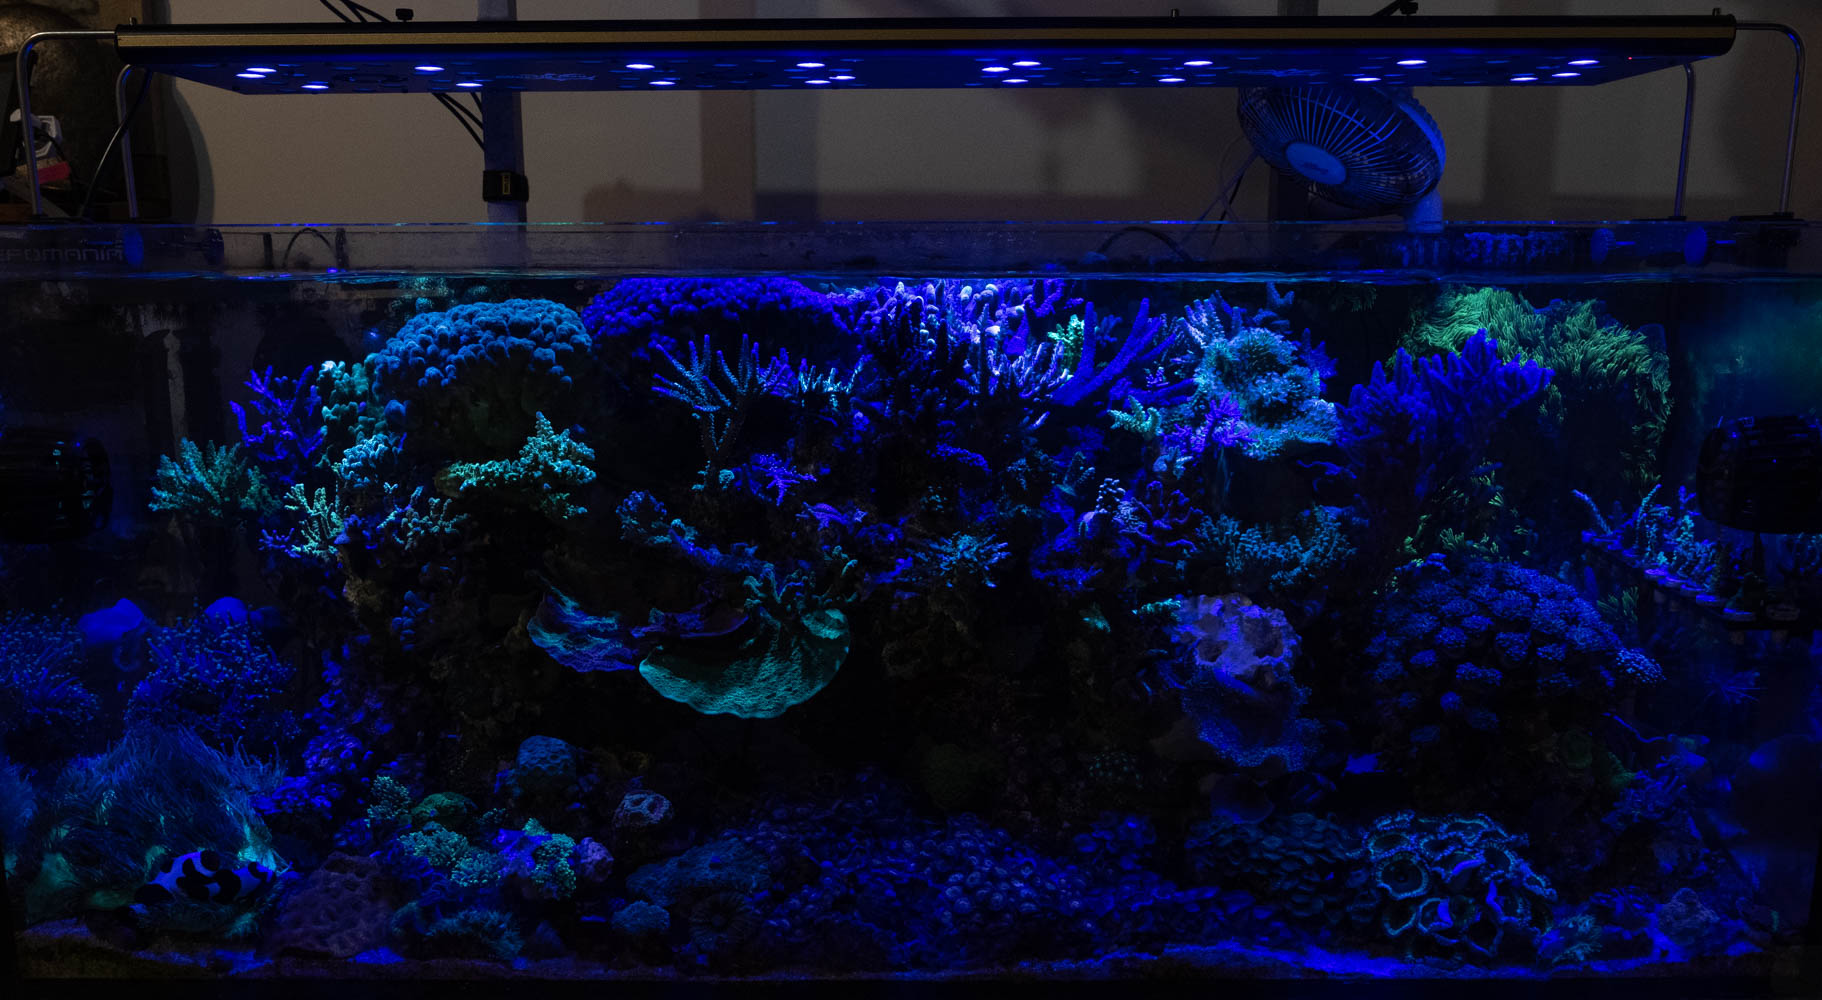
And with all channels on
CONCLUSIONS & VERDICT
And so, “you get what you paid for”. In this instance, you get a well-designed light that performs almost comparably to top-shelf counterparts at almost half the price. However, you don’t get that without some sacrifices, though in this case, the sacrifices are few and far between. You won’t get the easy interface and 5 minutes setup we’ve been spoiled with by other LED panels available today or the finely diffused light possible only with sophisticated lens design and the use of diffuser materials in the optics. But that’s pretty much it. As I mentioned before, the first problem can be somewhat eliminated if you have Neptune Systems apex and are willing to spend an additional on top of the fixture’s asking price.
Coming back to the topic of perspective and the perception of value- I, with all my obvious biases and the limited time I have with products I evaluate, always try to present a fact-based, impartial opinion about a product I’ve been given to try and write about. I’m not trying to influence anybody to purchase anything, the relationship between me and the reader is simple- I write what I learned about the product, what I liked and disliked about it, the rest is up to you. I always end my reviews with “Who is it for?”, so….
WHO IS REEF BREEDERS PHOTON V2+ FOR?
Short answer- anyone who understands its power and can live with its few limiting factors. You can’t currently get a light of this quality at this price; if you want a better overall light with more bells and whistles out of the box, you just have to spend way more. In my honest opinion, Reef Breeders Photon V2+ is an excellent value for its money and you won’t be disappointed getting one. Will it grow corals? You bet, anywhere in the tank and any corals you throw at it. Will it win medals for the best light ever created? No, but I doubt that’s what the manufacturer was hoping for. If you are on a tight budget and need a solid light to grow demanding corals, Photon V2+ will be a good choice. At the time of writing this review, the 48-V2+ model costs $699 and comes with a great, 2-year US warranty, on top of all the extras you’ve seen reading this article.
ACCESSORIES
Two accessories worth mentioning that weren’t a part of this review.
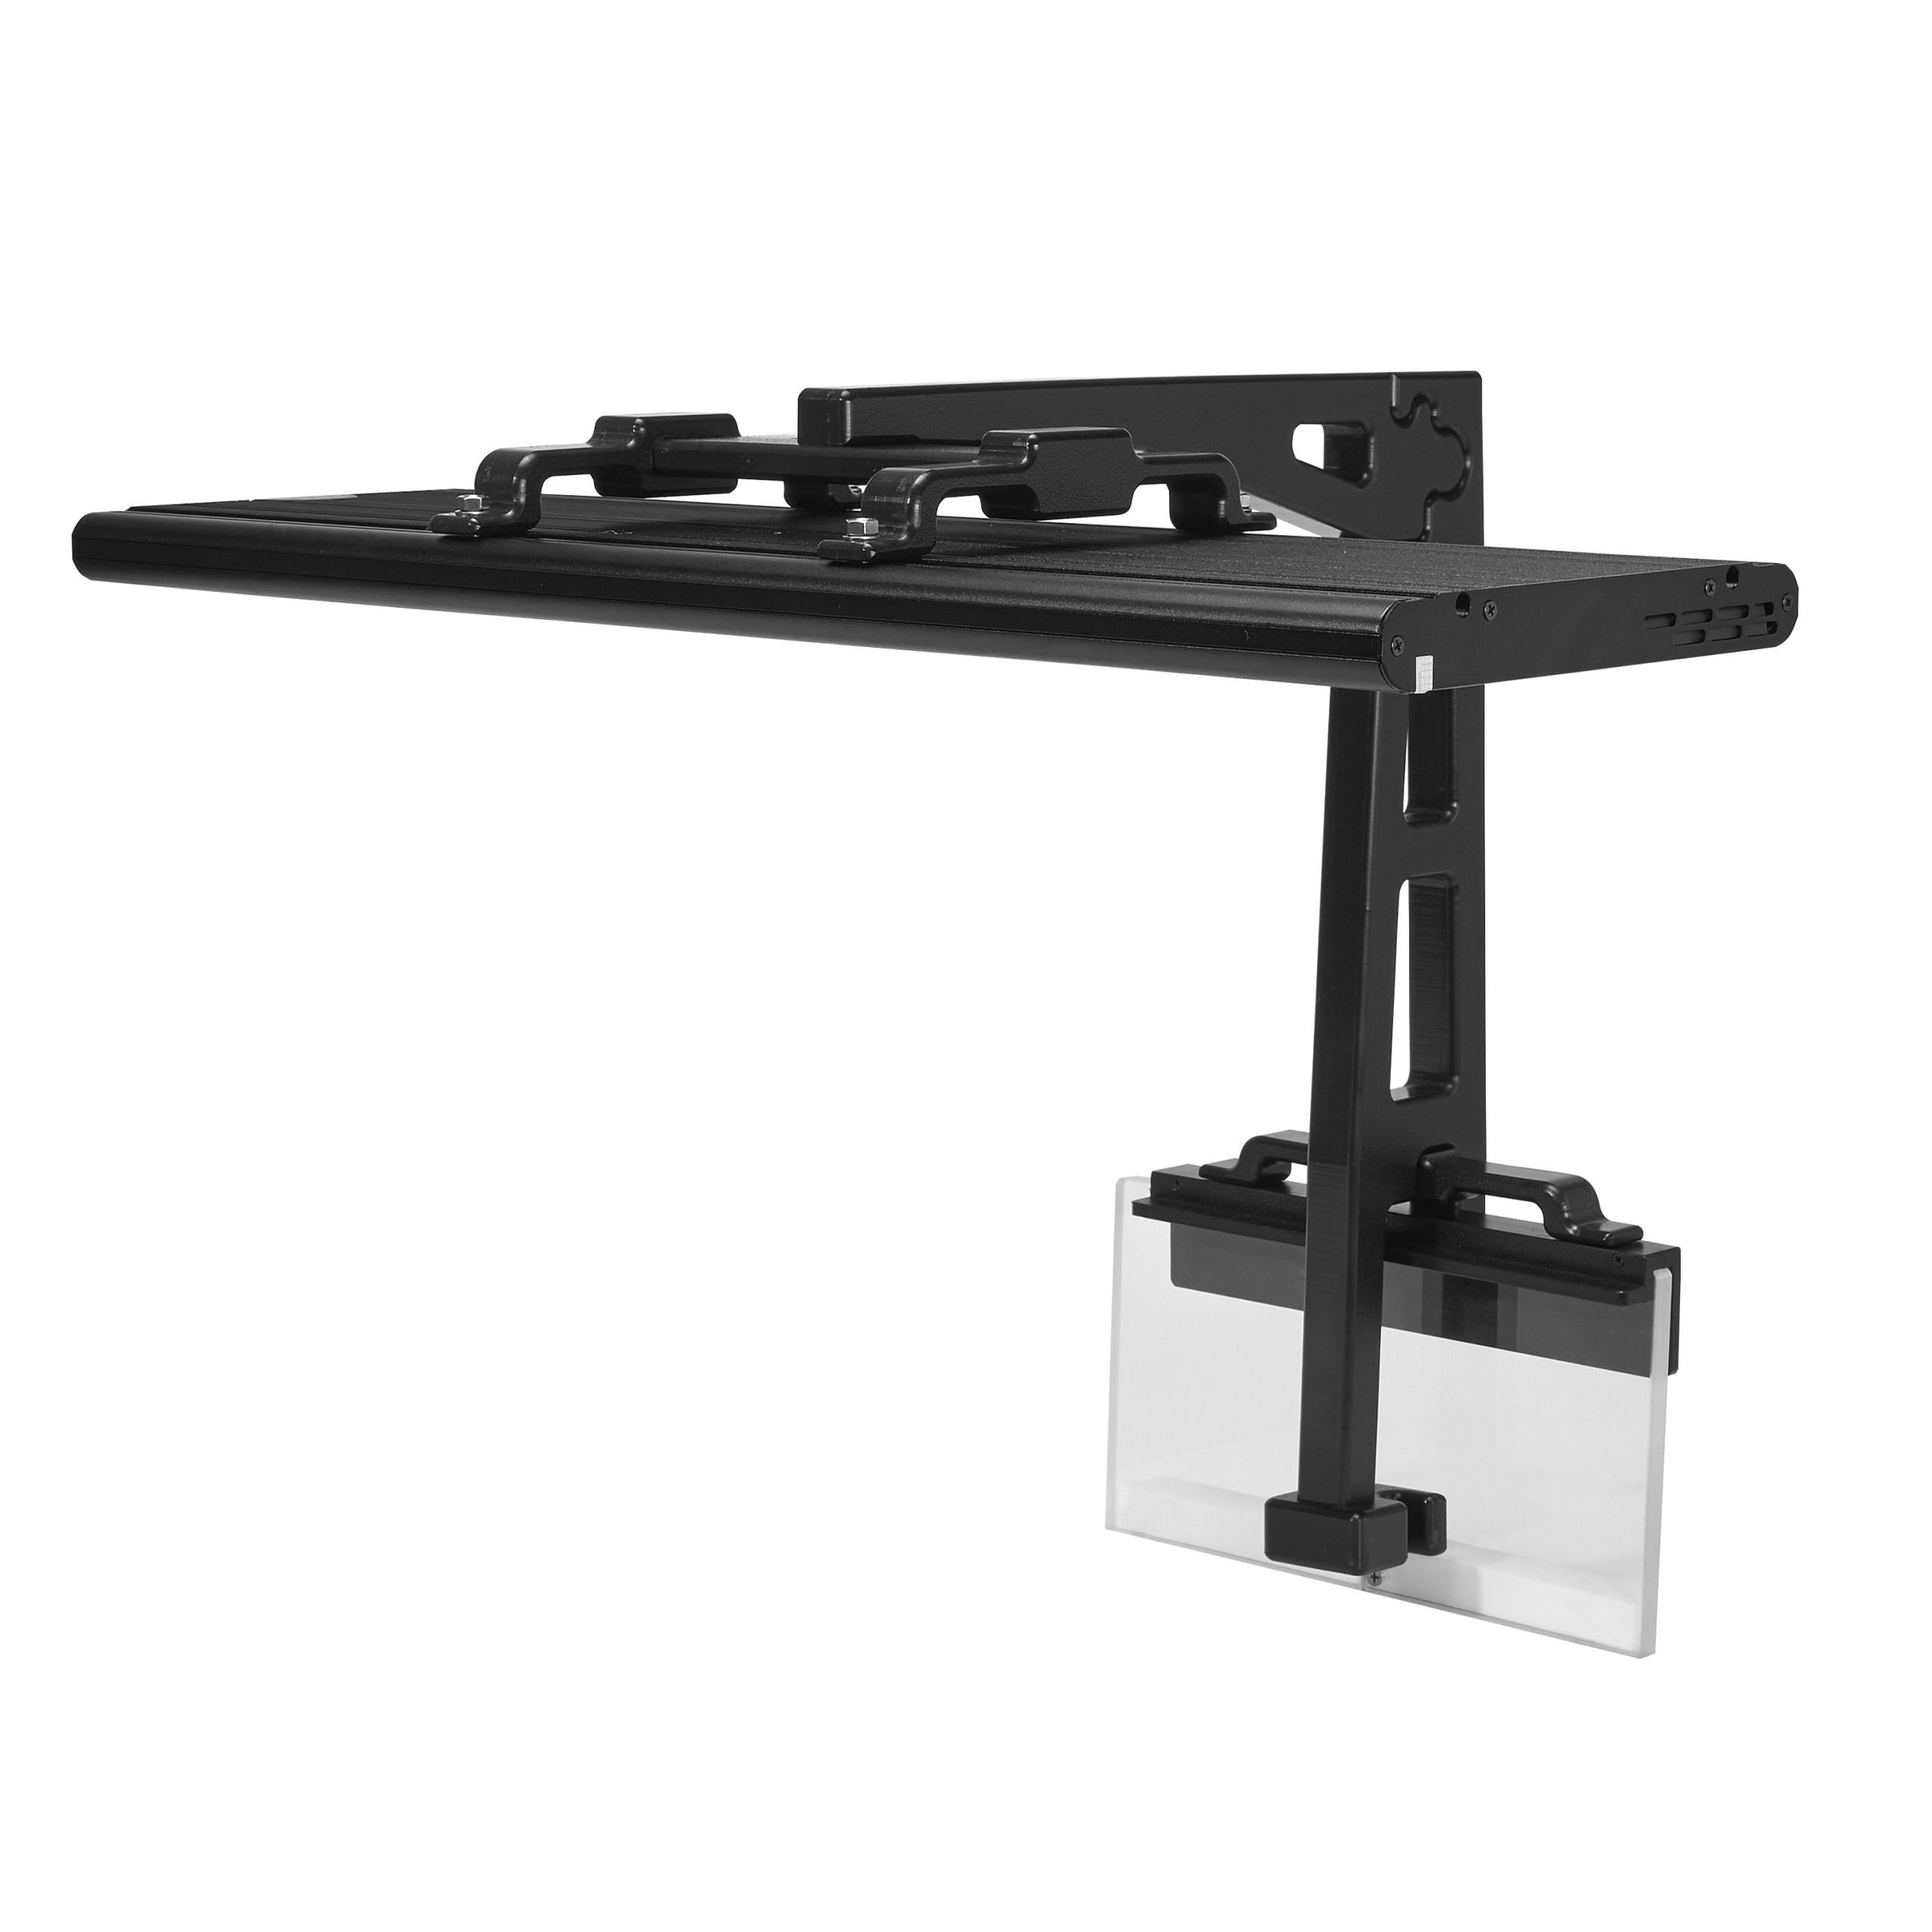
First is a sturdy looking back-panel mount for the Reef Breeder lights called the BOT Mounting System. I saw this thing at a show I attended recently and it is an awesome piece of gear that can be used not only with the Photon, but also with any light equipped with a similar mounting system (with some elbow grease, of course).
The second piece of add-on gear, called Photon Link Kit, is a piece of aluminum track that allows you to link two Photon 32-V2/+ lights to cover a 6-foot aquarium using the included mounting legs.
FINAL WORD
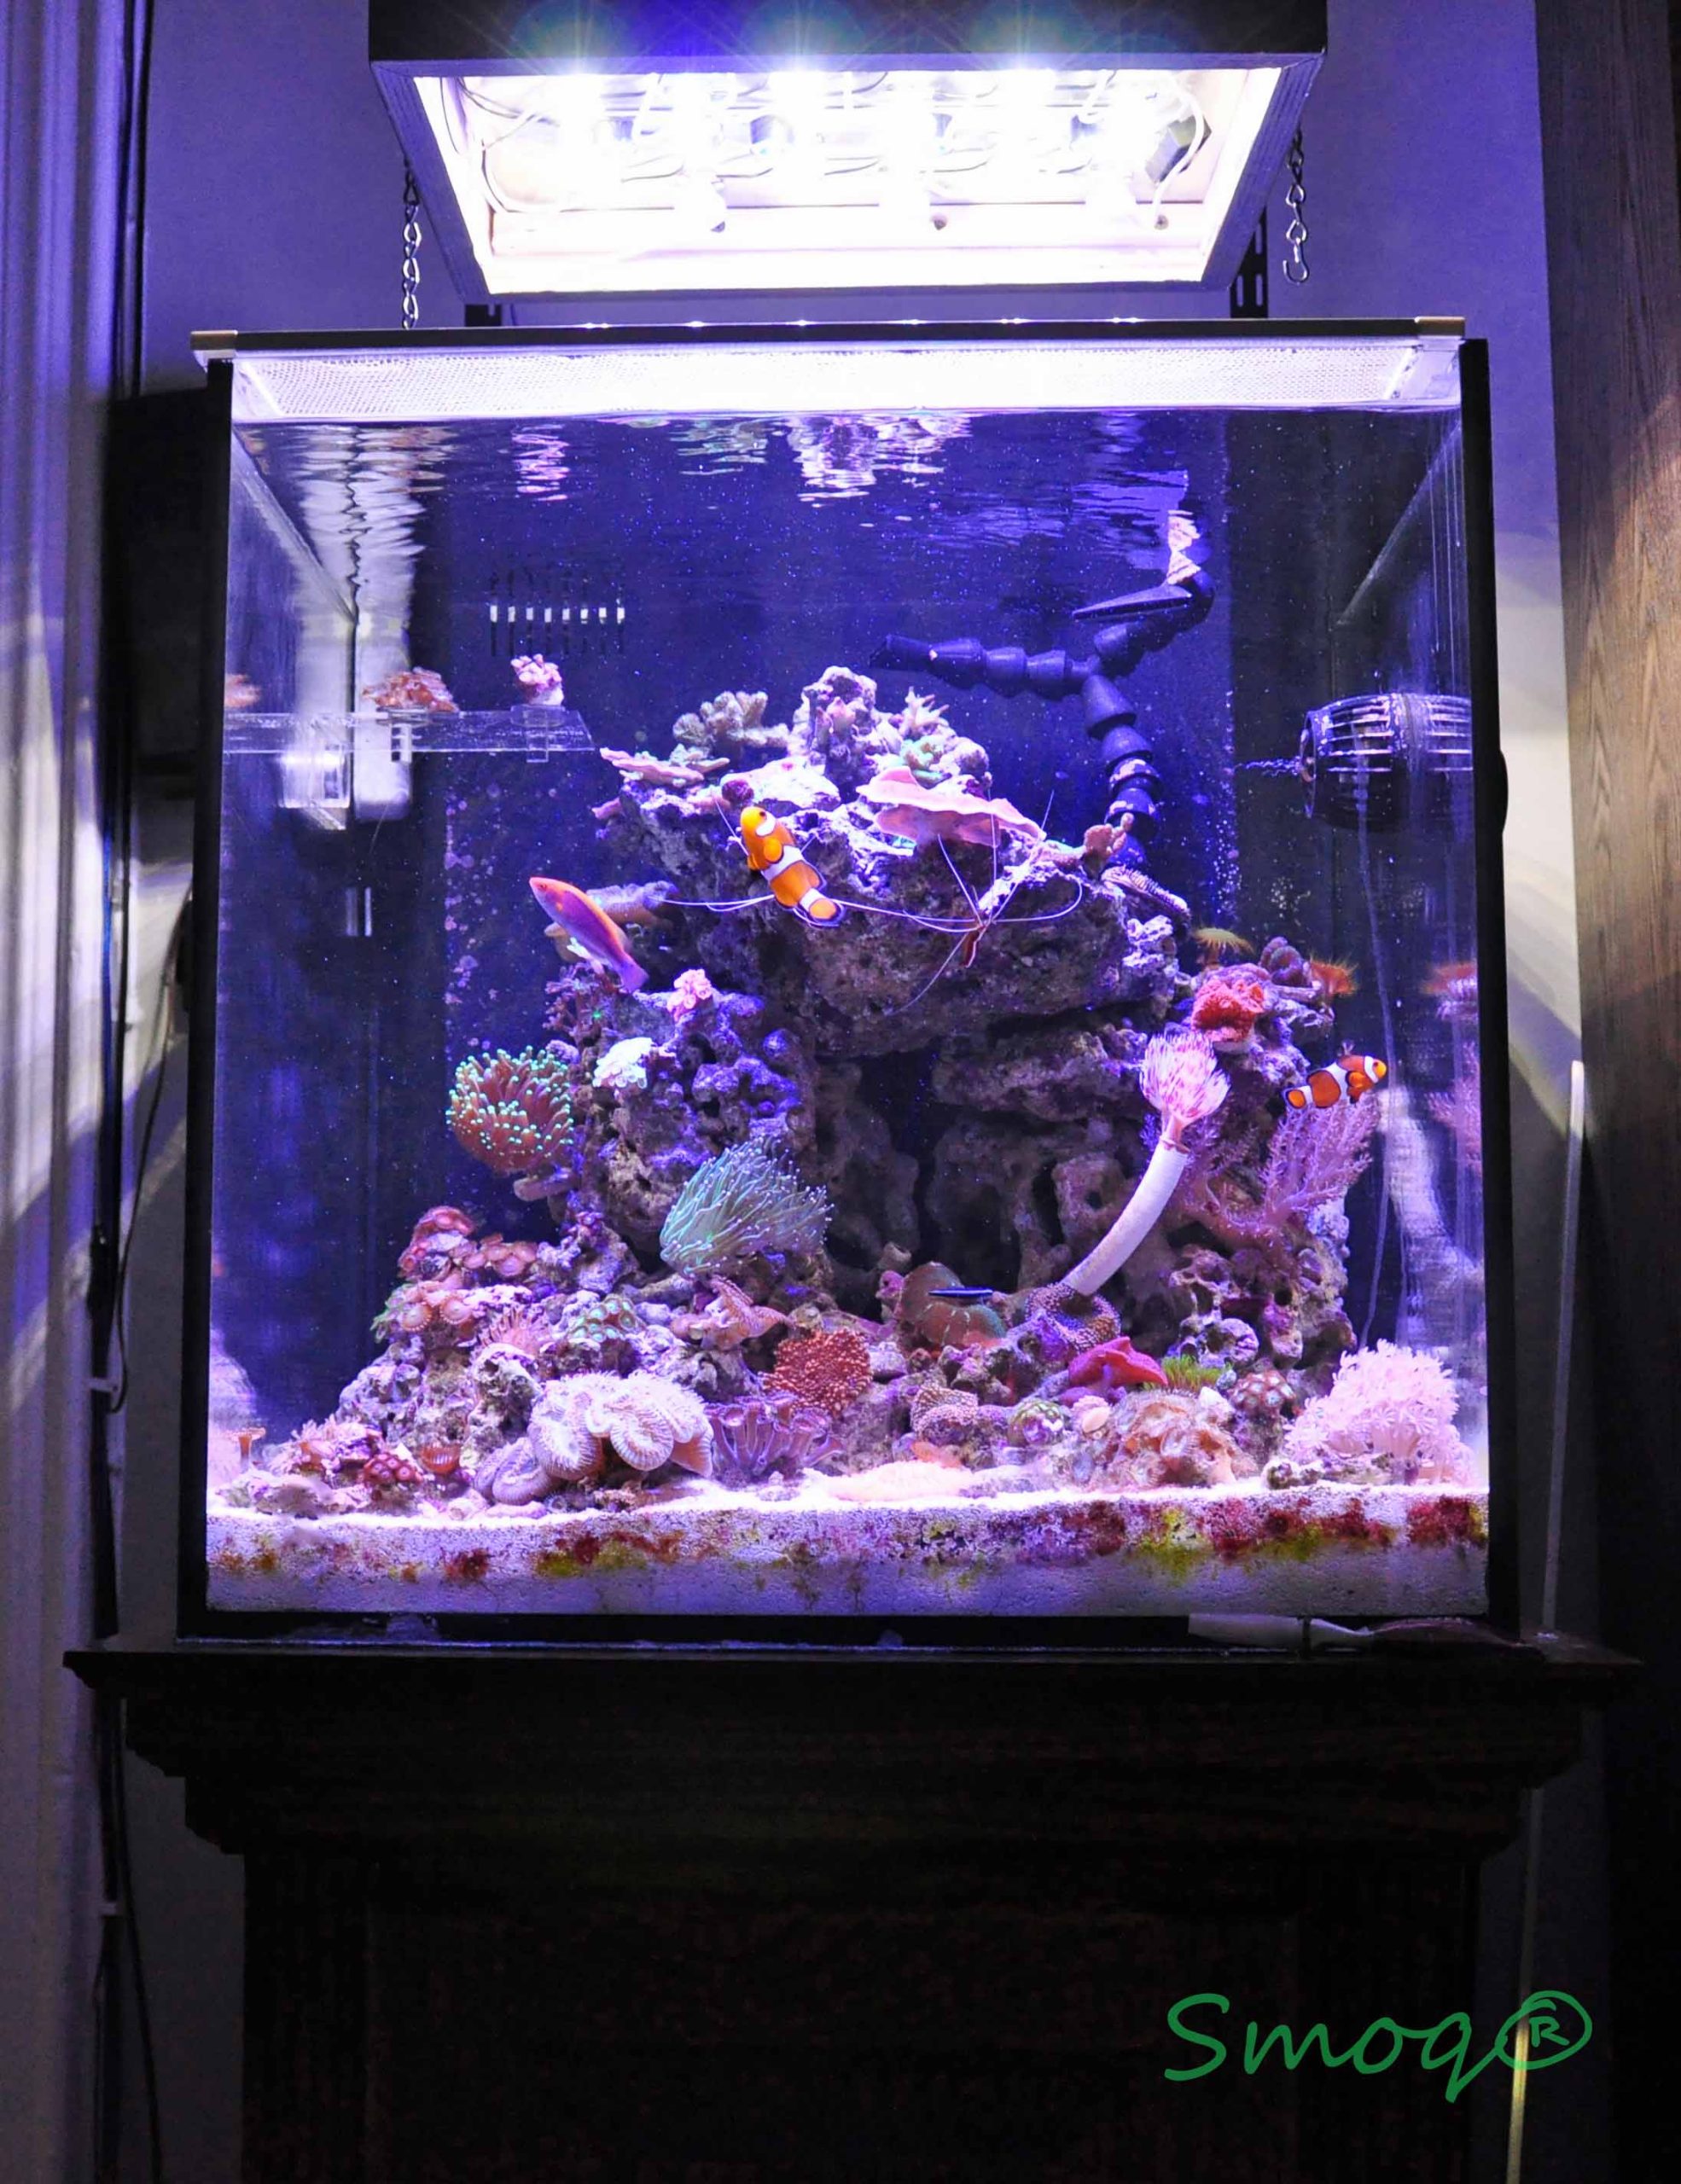
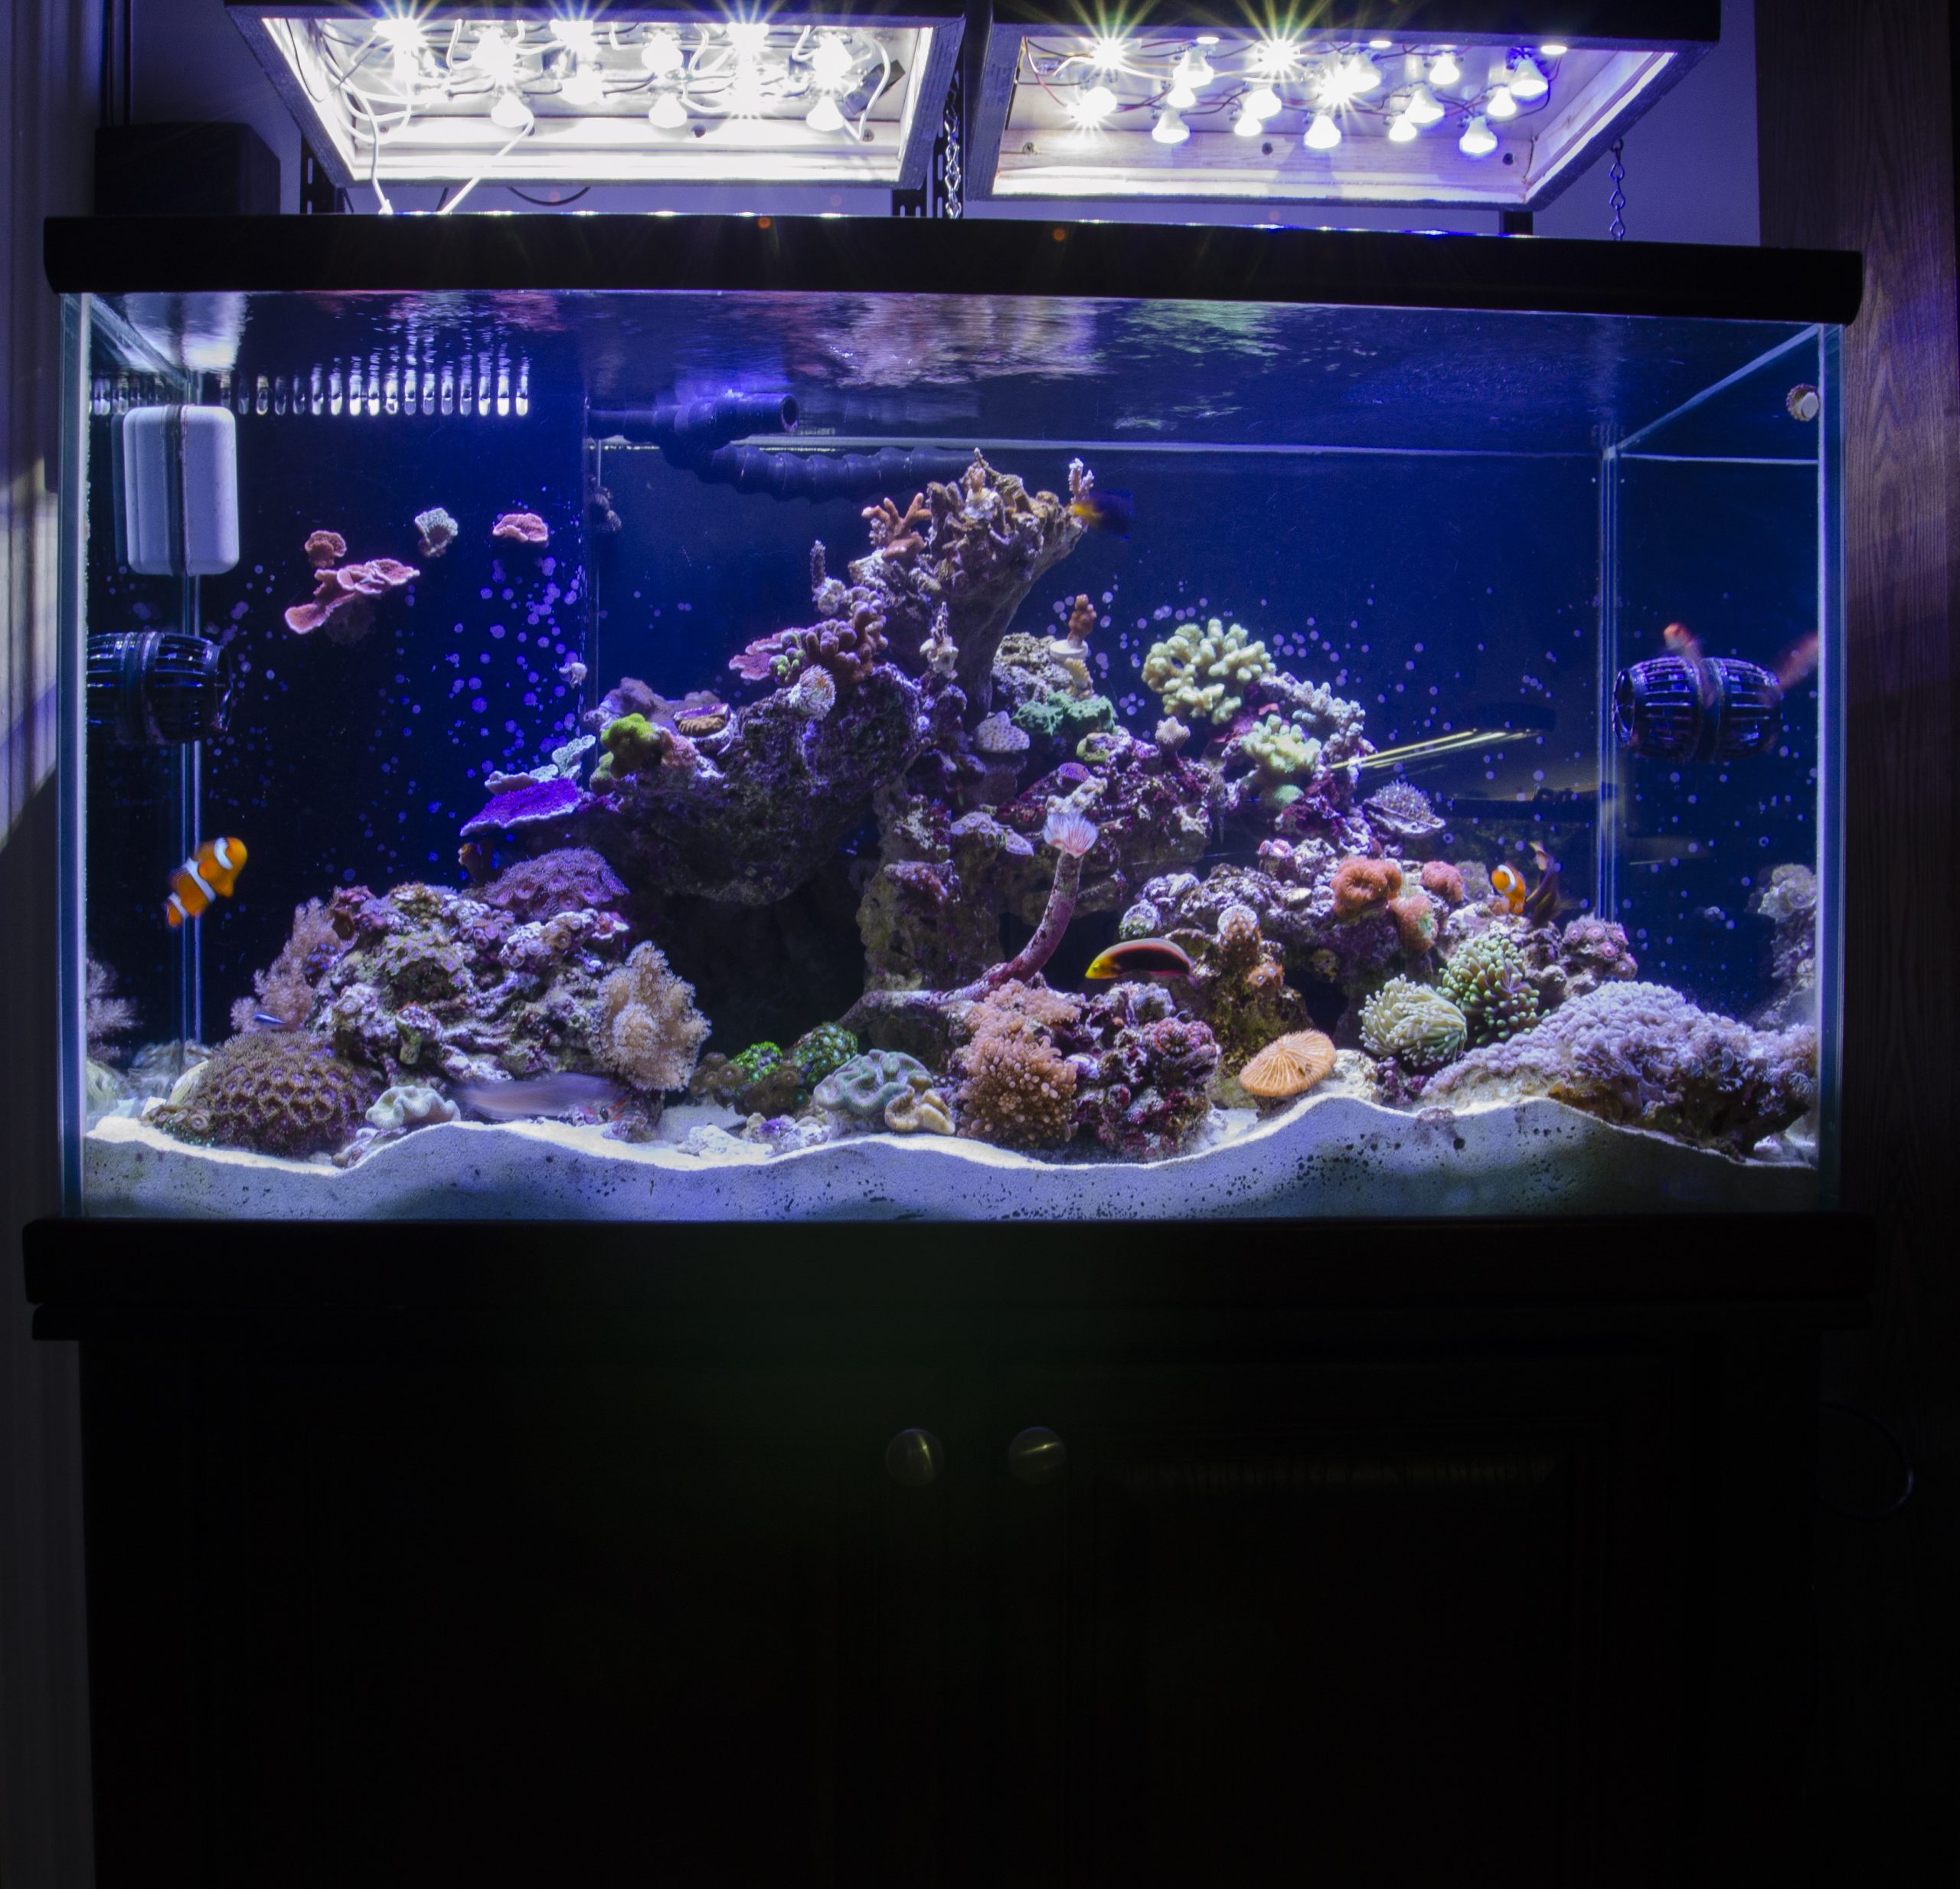
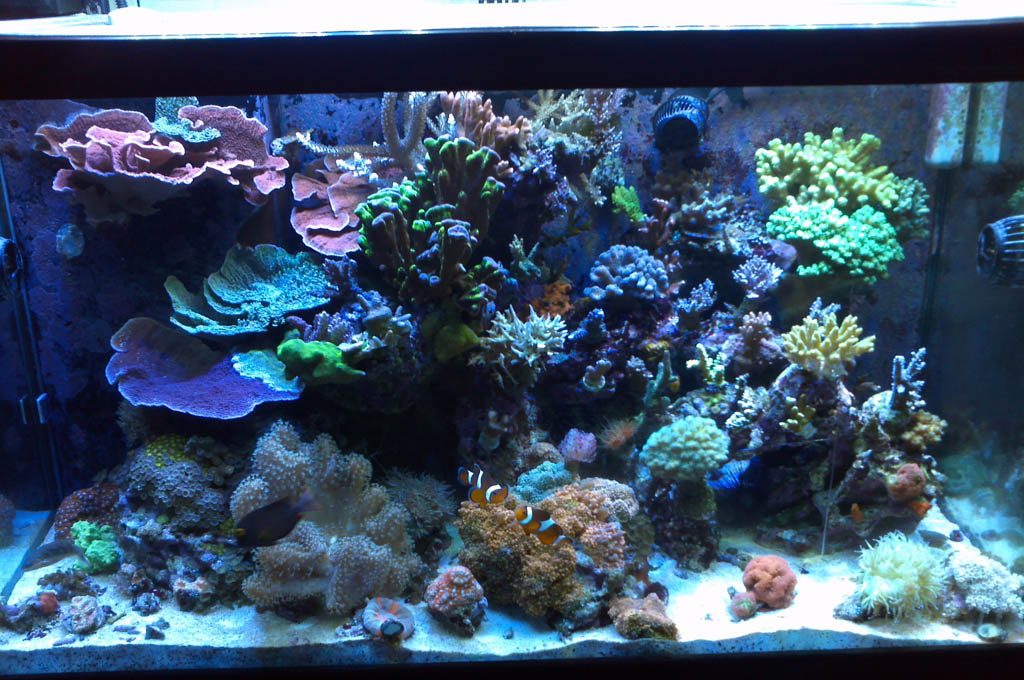
I am happy to announce that the light reviewed went to a fellow reefer in-need and a good friend of mine. He recently lost a member of his family and suffered from some health issues so I thought he can at least use the time to heal his wounds by looking at his tank in a new light. He sent me a couple of pictures of his setup and I thought I’d share them with you.
Thank you for reading.
To learn more about Reef Breeders Photon lights go to: https://www.reefbreeders.com/product-category/photon_v2plus/
Also, check out and join the company’s user group on Facebook: Reef Breeders Experts Club


Hello I’ve been trying to find this specific mount with the part on top. What is it called and where did you find it, thank you
It’s where you were talking about this “ First is a sturdy looking back-panel mount for the Reef Breeder lights called the BOT Mounting System. I saw this thing at a show I attended recently and it is an awesome piece of gear that can be used not only with the Photon, but also with any light equipped with a similar mounting system (with some elbow grease, of course). ”