 The original article on this topic presented an overview of how an auto water change system can be used to connect new systems without the need to hard plumb.
A reader requested a pictorial on how this was implemented on my system. This example connects the Fluval EVO 13.5 nano-reef to my 50 gallon lagoon tank. I used the Auto Aqua AWC package for this solution.
The only change from the original OEM install instruction is to substitute the primary system as the source of fresh saltwater and the drain destination. The controller comes with 3 pumps, 2 optical sensors, and all the tubing accessories.
Implementation
- The controller currently has the Auto Top Off function disabled and the Auto Water Changing scheduled for every hour. Set the speed of the refill slower to allow water levels to settle from the impacts of the protein skimmer refilling.
 Place the high level and low level optical sensors in the return chamber. Space them for the largest water change possible. Do not allow the small 50W heater or return pump to run dry.

- Place the drain pump in the return pump chamber. Add the anti-siphon fitting in line. Place the refill tube over the second chamber. This will minimize the false positives on the high level sensor from the protein skimmer refilling.

- Place the auto top off pump in a 5 gallon bucket of reverse osmosis water. A mechanical float valve direct connected to the reverse osmosis system keeps the container full at all times.

- Span the drain and refill hose between the adjacent tanks. Try to keep the pumps at the same height to avoid unnecessary head pressure loading the small pumps.
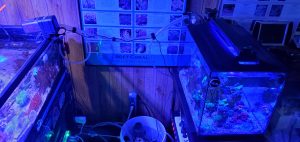
- Place the refill pump in the adjacent tank/sump. Position the drain tube above the water line to prevent back siphoning to the nano-reef tank. This acts as a redundant anti siphon if the small fitting clogs.

- Manually enable the Auto Top Off if you see the salinity is rising to compensate for a higher evaporation rate. Use the stock cover on the Fluval EVO 13.5 to minimize evaporation as compared to using a screen top.
To enable this same solution with the Hydros controller follow their instructions on the Hydros Controller link here. Just perform the same source water and drain substitution.









0 Comments