• Why not take a moment to introduce yourself to our members?

hfmann

Advanced Reefer
Rating - 0%
0   0   0
Hey Modo,

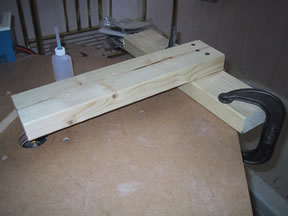
That's really interesting. I want to look at it more closely and see if I can figure out how make it work under the table. The concept looks pretty much like the contraption I bought years ago as an overarm router setup (pictures earliere in this thread). I don't know why it couldn't also work upside down. In other words have one arm with the pin on the top, and another that holds the router underneath.

Thanks.

Hal
 

agiacosa

Experienced Reefer
Rating - 0%
0   0   0
OK, OK. I'll post the pics today.

I did look at the DIY pin router setup in the Popular Mechanics website. WAY too complicated for me at this time. Maybe if I was retired. If I ever make these things for a living, I'll invest in a good pin router.

Some details on my setup before the picture. I set the router bit at the desired height. I attach the pin mechanism so that the pin (screw in my case) is exactly over the bit. I than place the pieace in between the pin and the router.

Of course, the piece is sitting on the router bit. When you turn on the router, it simply falls perfectly flat. I then start to cut. You do not need to raise the router into the piece. You simply spin the piece with the pin tracing the needed circle.

I have made two types of cut with this setup. The O-ring groove and the channel to sit the reactor chamber. The reactor chamber channel came out perfect. The O-ring not so much. I think I know why.

The template I did for the O-ring simply has a 1/8" groove. The reactor channel has a straight cut 1/2" channel in the template. The channel holds the pin well and prevents any wiggle when I turn the pieace. The O-ring template doesn't hold the pin tight and allows for wiggle. This resulted in an on even groove. I am making a new template for the O-ring that will be a channel rather than a groove. I believe this will make cleaner cuts.

Hal, thanks for your experimentation with the wing nuts. I too wanted to go with the thumb screws. Now I know better. I prefer a good seal over looks.

Regards,

Art
 

hfmann

Advanced Reefer
Rating - 0%
0   0   0
Art,

Thanks for the explanation on the setting of the under table router. I just imagined the stock getting spun all over the place if you didn't raise the bit into the piece. Very interesting indeed.

Having worked with the overarm router setup I've got, I can see how much safer it is to have the solid template between you and the router bit!

Anxious to see the pix. :)

Wingnuts! Yeh, next time I stick with the zen master's recommendations. :lol: I've now adopted the attitude "the wingnuts give it a more durable, heavy duty, industrial, serious piece of equipment, won't ever break" look! Much better than that "wussy, nouveau, suitable for the parlor, but not for the serious, high intensity reefkeeper" threaded bolts approach. :lol:

Take care Art,
Hal
 

agiacosa

Experienced Reefer
Rating - 0%
0   0   0
OK, here are the pictures.

The first image is of the very simple setup. Works great.

The second one is of the actual screw I use as the pin. You can screw it up or down depending on the clearance needed.

The third one is the O-ring groove on the template. This is wrong and should be a channel like what I did in the next image.

Art
 

Attachments

  • inverted router.jpg
    inverted router.jpg
    10.6 KB · Views: 106
  • screw.jpg
    screw.jpg
    11.1 KB · Views: 108
  • groove.gif
    groove.gif
    21.3 KB · Views: 106

agiacosa

Experienced Reefer
Rating - 0%
0   0   0
Actually, I see the images uploaded backwards in the last post.

The first image is the channel for the reactor tube.

The second image is what happened when I used the O-ring groove template. As you can see, the cut is not nice and smooth.

Art
 

Attachments

  • acrylic.gif
    acrylic.gif
    21.4 KB · Views: 107
  • channel.gif
    channel.gif
    22 KB · Views: 105

hfmann

Advanced Reefer
Rating - 0%
0   0   0
Art,

That is great! Simple but apparently effective.

Tell me more about how you go about setting it up. Looks like you align your pin with your router bit and then clamp the pin arm down to the table. But then how do you get your template and product under the pin. Or do you align the pin, then somhow raise it while still keeping the overarm apparatus clamped. Color me mystified.

Hal
 

agiacosa

Experienced Reefer
Rating - 0%
0   0   0
Hal,

Thanks.

The image you are seeing is a little misleading as I have the roundover bit in there. The round nose bit I'm using for the O-ring would only slightly be visible above the table. I then align the pin with the router bit. Then I turn the screw to raise it. Put the piece in and then turn the screw down onto the piece.

Regards,

Art
 

hfmann

Advanced Reefer
Rating - 0%
0   0   0
Thank so much for the pictures.

Ah! So, your pin (screw) raises and lowers from the top of the side of the arm. Well, that makes sense.

So the channel in your template is deep enough, and the pin long enough to still ride in the channel once the stock drops down to the depth of the router cut? For example, if you're cutting a 3/8" thick piece of acrylic, have the bit raised just a little higher, like 7/16", then the stock will drop 7/16' once you start the router. So your pin has to be long enough and the channel deep enough to cover this drop to keep the pin in the channel. Is that how it works?

Hal
 

agiacosa

Experienced Reefer
Rating - 0%
0   0   0
That's how it works. I also add some weight to the pin arm before I start cutting. The added weight causes the arm to tilt slightly downward applying pressure onto the template.

The channel depth on the template can be deep and really doesn't have an impact on what you cut. That is dependent on the bit depth.

Regards,

Art
 

hfmann

Advanced Reefer
Rating - 0%
0   0   0
Very nice Art,

I'll bet your anxious to try it out some more for the upcoming skimmer class.

Keep us informed.

Take care,
Hal
 

Unresistible Blue

Experienced Reefer
Location
OH
Rating - 0%
0   0   0
Brian - above you wrote:

Yup, that's perfect. The channel for the tube is similar, but needs to be JUST over .25" because of the poor tolerances in tube wall. There needs to be a little slop in there. Then you carefully fill that channel with #40, and set the tube into it, rock it just a little to seat it in there, and you're good to go. The squeezeout from the joint will be clear, and will shrink as it dries, forming a fillet around the tube.

In the class you had us use #40 for glueing dissimilar materials - PVC to acrylic. So why use 40 in this case? Wouldn't 4 be to glue of choice? Or are you using 40 to avoid blushing?

Russ
 

fergy

Advanced Reefer
Rating - 0%
0   0   0
You can use solvent in the groove, but the #40 is a cement, and has some mass to it. It creates a better seal, and you don't get left with any sort of gap when it dries. When you cut the groove slightly oversize, because of the poor tolerances of the tube, there can be a little gap left between the wall of the tube and the wall of the channel. #40 alleviates this. Also, #40 makes a better bond, much less risk of any bubbles, and no need to clamp. It's also stronger than #4, and the ends of the tube don't have to be prepped as well.

BRIAN
_________________
hash
 

agiacosa

Experienced Reefer
Rating - 0%
0   0   0
Just be careful not to cover the tube. I put a little weight on the tube when I bonded it to the box.
Of course, I got busy for a day or so. When I returned the tube had crazed in places.

Art
 

fergy

Advanced Reefer
Rating - 0%
0   0   0
Didn't have enough ventilation? The gasses coming off the #40 as it cures are heavier than air, and will settle. Covering up the top of the tube can cause this. However, it may also be from heat when prepping the end of the tube. Sometimes, it's pretty tough to prevent all of the variables from adding up to a crazed seam.

BRIAN
_________________
Chevy Vehicles
 

agiacosa

Experienced Reefer
Rating - 0%
0   0   0
I found it strange too. I did not prep the tube very well as I machined a groove and used the 40 instead of the 4. THe only thing I can think of is the fumes.

Art
 

Sponsor Reefs

We're a FREE website, and we exist because of hobbyists like YOU who help us run this community.

Click here to sponsor $10:


Top