• Why not take a moment to introduce yourself to our members?

atnixon

Experienced Reefer
Rating - 0%
0   0   0
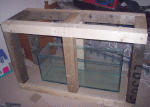
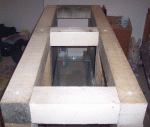
Well, today I finally got to make a start with the build for new system.

Just to start off with, will throw some dimensions at you all so you know what I working with.

Display Tank - 53"L x 15"W x 24.5"T ( about 100 US Gals )
Sump - 36"L x 12"W x 15"T ( about 20 US Gals )
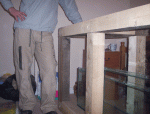
Tank Stand - 54"L x 20"W x 35"T
Plumbing - 1" ( UK Measurements ) through-out with a 1700 litre per hour pump for the return
Lighting - got to save a little cash for this bit. But will just be using the T8's from my old tank for the time being.

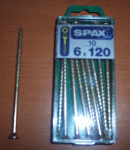
The timber i am using is all 4" x 4" untreated. I know it may be a little over kill on the structure of the frame, but I always prefer to edge on the side of caution.

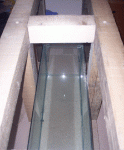
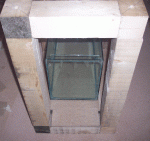
Now, you attentive people may of noticed that the stand is actually wider than the what the tank is, 5" wider actually. The reason why it is like this is to allow a gap of 12" at the end to be able to slide the sump tank inside the frame from the end. Some one did say that to build the sump inside the frame as I am building it. Yes, that may be good, but, what happens if for reason it shatters...How you going to get another sump in that’s the same size? So, that is why the stand in wider than the tank.

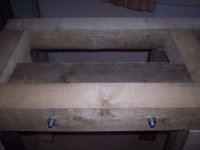
To compensate for this, I am adding 4 extra supports around the top frame of the tank, in 4" x 4" again which will have large bolts going through them which clamp these to the outside frame. That bit will be come more apparent as this beast gets built and you will see from the photos later.

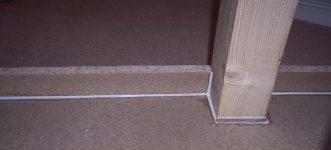
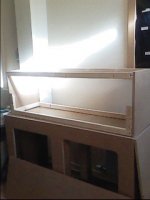
So, so far today, I have made up the basic frame installed the base floor of the stand. The base floor will be having a lip installed all around the edge which will be 2" tall and completely sealed, so, any overflow or water splashed from the sump will not seep out from the stand but be just contained inside.

Next part of the stand to be built will be installing the extra tank supports on the top frame, fitting angle brackets on all joints for extra strength, fitting the top which the stand will sit on to, and to install the mini flood barrier around the inside of the bottom and then seal the entire bottom..

That’s it for day one...its now time for a few well deserved beers I think...

Any feedback or constructive criticism is always welcome


Right then...death by picture for you now..

Niko
 

Attachments

  • The-Wood.gif
    The-Wood.gif
    208.5 KB · Views: 11,743
  • Screws.gif
    Screws.gif
    131.7 KB · Views: 11,744
  • The-Sump.gif
    The-Sump.gif
    223.1 KB · Views: 11,769

atnixon

Experienced Reefer
Rating - 0%
0   0   0
Some more pics
 

Attachments

  • Front.gif
    Front.gif
    232.4 KB · Views: 11,737
  • Height-of-stand.gif
    Height-of-stand.gif
    220.3 KB · Views: 11,739
  • From-Above.gif
    From-Above.gif
    164.7 KB · Views: 11,734

atnixon

Experienced Reefer
Rating - 0%
0   0   0
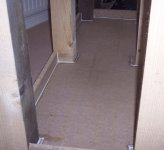
last few now....promise....!!!!

Niko
 

Attachments

  • Down-the-length.gif
    Down-the-length.gif
    181.1 KB · Views: 11,746
  • At-the-end.gif
    At-the-end.gif
    180.4 KB · Views: 11,758

atnixon

Experienced Reefer
Rating - 0%
0   0   0
ha ha ha ha...the weight of it, you could park two...it is a beast, i know when i come to move it into to right place in the house, i aint going to be able to do it alone...

Niko
 

mr_X

Advanced Reefer
Location
paoli, pa
Rating - 0%
0   0   0
you might even be able to use 2 diagonal braces on the outer legs and get rid of the center brace, so you can have better access to the sump.
i used steel, so i have no center brace, and let me tell you, i'm glad i have the extra space
 

atnixon

Experienced Reefer
Rating - 0%
0   0   0
Hey X, good to hear from you...Yes, i did think of that, how-ever, as the stand i am building is quite tall, there is loads of room through the front opening..i can actually get inside the stand up to my waist with the sump tank inside...So, i got loads of room to work on the sump if needs be..Tell ya what..its ruddy heavy...Its gonna take three people to get it down stairs to actual place its gonna go...I know i should of built it down stairs, but i have not got the room and have a spare bedroom up stairs...But, its coming along now finally..

Niko
 

atnixon

Experienced Reefer
Rating - 0%
0   0   0
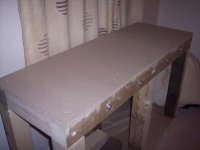
Fitted the top now..Used 18mm chip for the top..Will be sealed with UPVA glue when the sides have been fitted...
 

Attachments

  • 18mm Top fitted.jpg
    18mm Top fitted.jpg
    64.3 KB · Views: 11,557

atnixon

Experienced Reefer
Rating - 0%
0   0   0
Hello there people..

Just a quick little update for anybody who is following this..

Installed the 2.5" spill barrier all around the inside bottom of the base, sealed with silicon. When that has dried, the entire bottom will be painted in a UPVA glue paint to completely seal the bottom. So, any splashes or spills will get held inside the bottom rather than soaking into the wood or seeping through on to the carpet underneath the stand..Plus, it should also help towards the flood proofing for the sump..

Next job is to cut the wood that is going to be the front and 2 sides, cut out the openings for the two doors, stain it and fix in position..Am going to be using 18mm MDF for the casing of the frame, gives me plenty of thickness to playwith and should keep it sturdy..

Bye for now

Niko
 

Attachments

  • Spill Barrier.JPG
    Spill Barrier.JPG
    91 KB · Views: 11,553
  • Spill Barrier Close Up.JPG
    Spill Barrier Close Up.JPG
    117.5 KB · Views: 11,559
A

Anonymous

Guest
Rating - 0%
0   0   0
In the 18mm Top fitted.jpg, I see a few bolts and nuts. What is their purpose?

Nice, simple stand!
 

atnixon

Experienced Reefer
Rating - 0%
0   0   0
Their purpose is rather simple...As i purposely made the stand wider than what the tank is, to enable the sump to slide into the stand through the end in case i ever need to swap it..Because of that, i had to put some strengtheners on the inside to give extra support for the display tank itself as it does not totally sit on the outside perimeter of the stand..

Just me covering my ass really mate..Attached a pic, you may understand better with seeing this...

Thanks for the comments people..

Niko
 

Attachments

  • Extra Supports.jpg
    Extra Supports.jpg
    71.8 KB · Views: 11,529

atnixon

Experienced Reefer
Rating - 0%
0   0   0
Hello there people..

Just thought i would post a quick update as to a little progress..

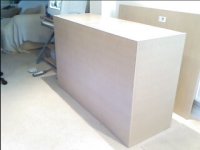
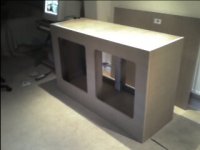
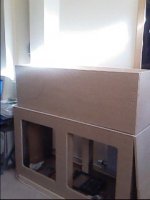
Today, i "Finally" got around to getting the front and sides sorted out on the stand..

Used 18mm MDF board for the casing as its a great wood to work with and stains evenly aswell...

So, front and two sides mounted, aperatured cut out and doors now cut..

The side on the right, looking from the front is the only one that is not glued and screwed, just got a few screws in it as this is my extra access panel that can be easily removed in case of an emergency. Just used quick screws on it..Two turns by hand and its off...great invention...Am going to be mounting the doors last off all as i want to get the hood build next and make a start on the plumbing work. Will order all the plumbing about middle of next week..

Enjoy..

Niko
 

Attachments

  • IMG002.JPG
    IMG002.JPG
    13.4 KB · Views: 11,374
  • IMG005.JPG
    IMG005.JPG
    13.6 KB · Views: 11,367

atnixon

Experienced Reefer
Rating - 0%
0   0   0
Hello people...A few picture updates now for you..Pics are not brill as i taken them on my mobile...The numbers refer to the pictures...

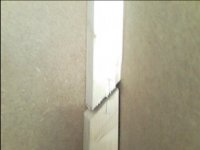
1) + 2) + 3) constructed the frame that is going to become the canopy..Just use 2 x 1 wood for the frame work. Covered both sides in 18mm MDF board. The front is completly removably, it just lifts up and away from the frame of the hood..You will see in a picture that i have just used a length of wood, cut at 45 degree angle and used that as the front retainer..So simple and works an absolutle dream..Fitted two wooded handles to the front piece for lifting it off..

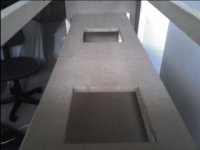
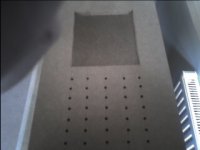
4) Next job was to make the shelf inside the hood to house the 2 x 250w metal halides. Cut out the oblongs where the actual light will be shining through in to the tank.

5) Next i have drilled lots of air holes that will be in effect on the underside of the light unit. I did intend to strip the halides out of their casing's and mount it all on the board, but, they will go in quite nice. Just got to make a little frame around the light boxes so they dont move. The shelf that the lights sit on lifts up on hinges which makes access into the top of the tank just great. The shelf lifts up vertical if you want it to.. I have also made two different hights available to me for the shelf..Set one height at 9 inches above water level for normal running and a spare set of brackets set at 12 inches high for when new bulbs are installed, and can then be lowered down to 9 inches when run in...Just got install my actinics in the hood now and then lighting is done..

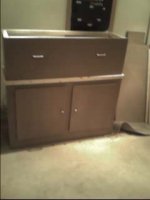
6) And here we are at the end of today...am knackered.........................As you can see in picture 6, all handles are on, doors fitted, push barrier fitted for the tank to push up against...Oh, got asked about this on a forum in the UK..Its a signed Real Madrid Football Shirt in the frame above the tank..

So...Had a good day at it today..Next little job is to use wood filler and fill in all the screw holes, wait for that to dry, sand off, then its stain and varnish time...

Niko
 

Attachments

  • 1.JPG
    1.JPG
    15.9 KB · Views: 11,259
  • 2.JPG
    2.JPG
    15.7 KB · Views: 11,260
  • 3.JPG
    3.JPG
    13.9 KB · Views: 11,274

atnixon

Experienced Reefer
Rating - 0%
0   0   0
few more....these aint going on in order..hmmmmmm...check the numbers though in the thread...

Niko
 

Attachments

  • 4.JPG
    4.JPG
    12.4 KB · Views: 11,255
  • 5.JPG
    5.JPG
    12 KB · Views: 11,251
  • 6.JPG
    6.JPG
    16 KB · Views: 11,256

atnixon

Experienced Reefer
Rating - 0%
0   0   0
Hiya mate...Yes, i wanted to build it with room to make sure that it is a little future proof..It will look a little different when the two meyal halides and actinics are installed...BY the way X, this is the hood that i was asking about fitting the coling fans...

Niko
 

atnixon

Experienced Reefer
Rating - 0%
0   0   0
thanks for the comments matey...

Real Madrid shirt is signed by David Beckham. Michael Own, Zidane, Raul, Francesco Pavon, Roberto Carlos, Luis Figo, Mejia, Iker Casillas and Thomas Graveson....

Its my pride and joy mate...

Niko
 

bleedingthought

Advanced Reefer
Rating - 0%
0   0   0
Wow, that's quite a line-up, there!!! Congratulations!

Not to steal your impressive accomplishment, but why not Ronaldo? Beckham and Zidane alone would have been sufficient for me, but being Brazilian, I had to ask. :) :)
 

Sponsor Reefs

We're a FREE website, and we exist because of hobbyists like YOU who help us run this community.

Click here to sponsor $10:


Top