- Location
- Vernon, NJ
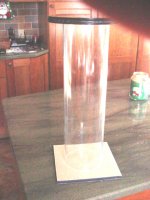
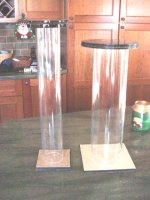
here are some pics of the construction of my Ozone reactor. I started work on this prior to my router (power tool for all you comoputer guys) failing and needing repair
I havent been feeling well so work has been on hold
the base is 3/8 black 8X8 the edges are finished with a 45deg angle
the chamber is 18" tall and 5" diameter
there will be 2 drip plates one on the bottom approx 3" from the base, and one on the top.
there will be a 1/2 PVC pipe runing down the center through the drip plates.
between th drip plates will be 1 gallon of large blue bio balls.
the water will enter the top splash down on the top drip plate and rain down the bio balls the balls will keep the water broken into droplets.
ozone will enter through the top pressurizing the chamber forcing the water up the cenetr tube and out to the reactor to a carbon reactor of similar construction than the treated water returns to the sump.
the reactor will be fitted with a pressure gauge, the water level in the reactor is controle by the in comming 03/air via a john giest ball valve.
I'll proably use and ehiem hobby pump or submerisable Gen-X pump to feed this.
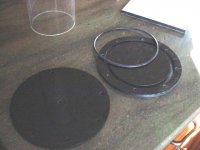
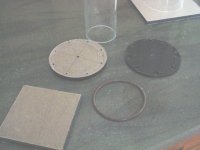
her are some pics
the top flange and cover are 2 piece sealed with an ozone safe o-ring
I didn't keyhole the cover I don't for see any reason to disassemble the reactor once it's together the cover will be held on with 1/4" nylon screws.
this is labor intensive the flanges, drip plates start out as flat sheet once I lay out screw holes, grooves to the o ring it gets clamped to the drill press, and it's cut into a circle.
once the cirlce are cut the top and flange are bolted together and using the layout I drew on the masking the bolt holes are drilled. in spite of the time I took to layout the bolt holes I still have to mark the both because it will only firt one way.
once the work is done on the drill press I go to the router table and cut the groove for the o-ring.
before I attach the flange to the tube I polish the edges tap the hole to accept the nylon screws.
I plan to bond the tube and the flange together later today if I feel up to it.
once thats done I'll post more pictures.
Attachments
Last edited:


