
We did our test with the Cetus 2 in the DaniReef Lab, where we measured the PAR and created the relative distribution curves. Let’s see how it went.
Cetus 2 by HM Electronics is a highly requested ceiling light that is especially good for nanoreefs. We had to put it to the test!
Technical characteristics of the Cetus 2
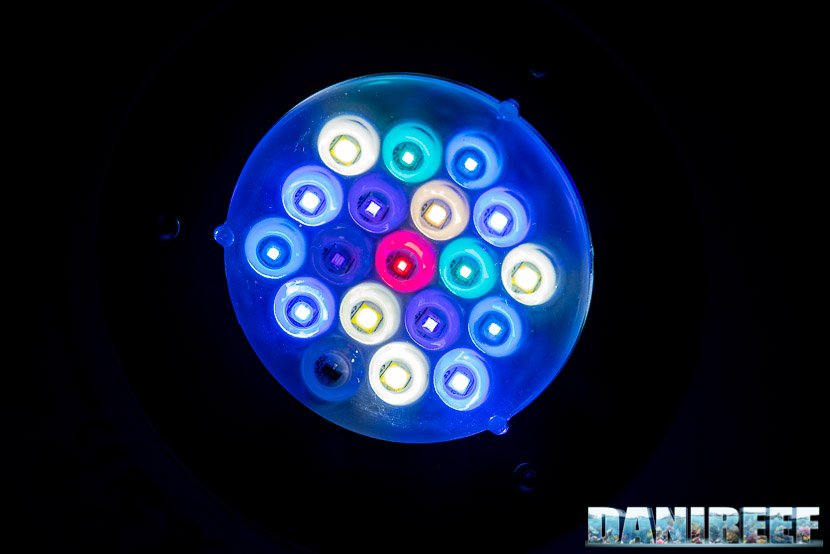
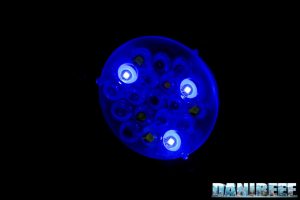
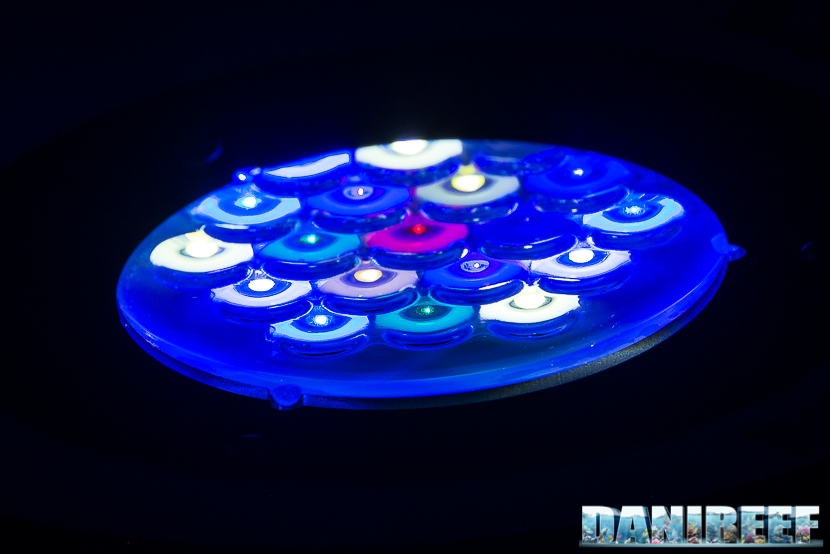
The LED has 8 different colorations that are divided in 6 channels. There are 15 LEDs in each cluster.
The LEDs are:
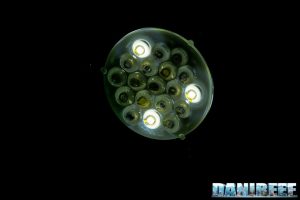
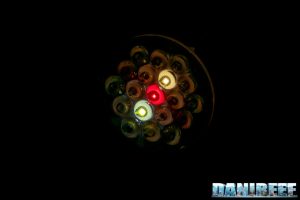
- 4 LEDs cool white;
- 1 LED warm white;
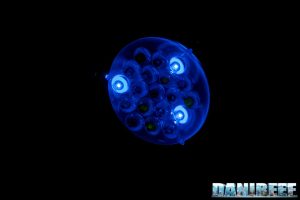
- 4 LEDs deep blue;
- 3 LEDs blue;
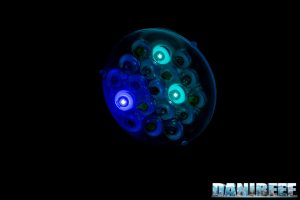
- 2 LEDs cyan;
- 2 LEDs purple;
- 1 LED UV;
- 1 LED red.
The other declared characteristics are:
- Power: 84 w
- Dimensions: 10.9 x 10.9 x 5(h) cm
- Selling price: 215 euro ($246 USD), vat included
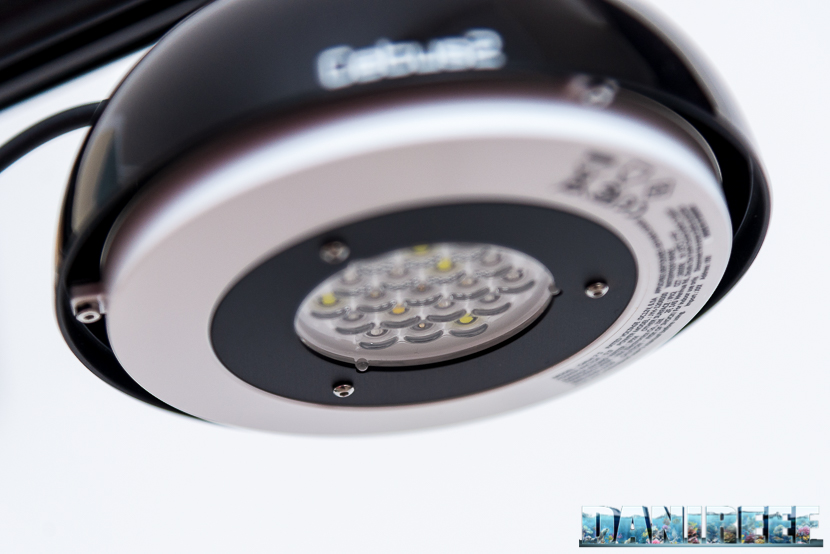
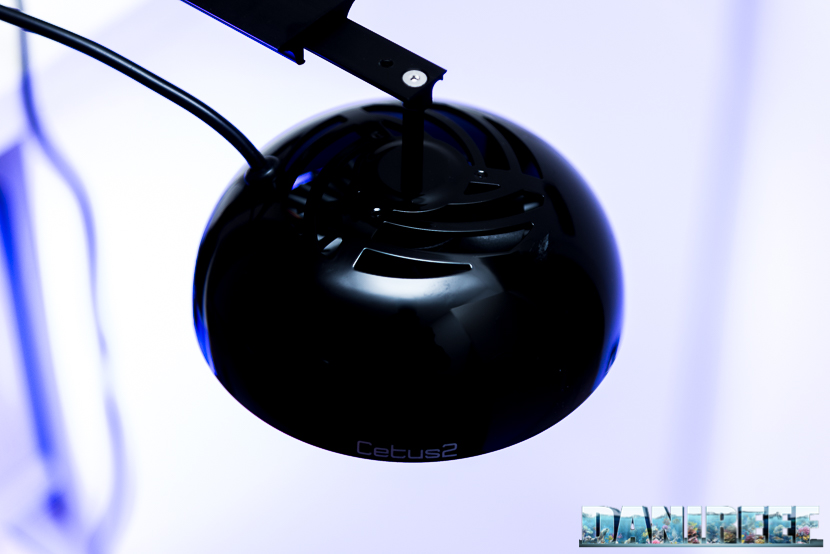
Construction
This ceiling light is very well built, the software it is equipped with is among the most beautiful and fastest I’ve ever seen and, most of all, it’s very easy to set.
There’s also a useful bracket sold separately for hanging the ceiling light on the aquarium’s sides. The bracket can be adjusted and the hanging system is handy and versatile. 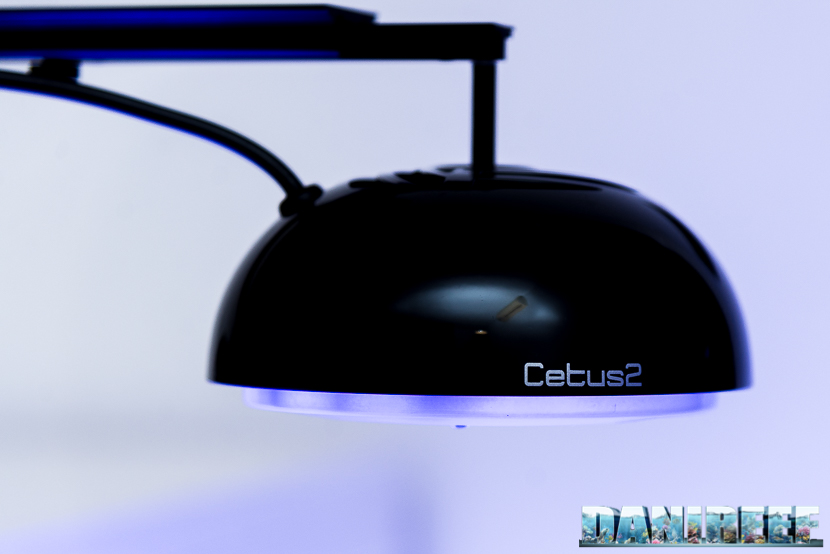
The Programming
The ceiling light can be used through an app available for Apple or Android by Bluetooth. This assures speed and stability and avoids any problem a WiFi network can cause. When launching the app you will be asked to activate Bluetooth, then the app will search for the ceiling light. A few moments later, everything will be within the reach of your fingertips. You can set each channel of the ceiling light, or you can choose among the preset programs within a worldwide map. I really like this feature: handy, funny, and intuitive. 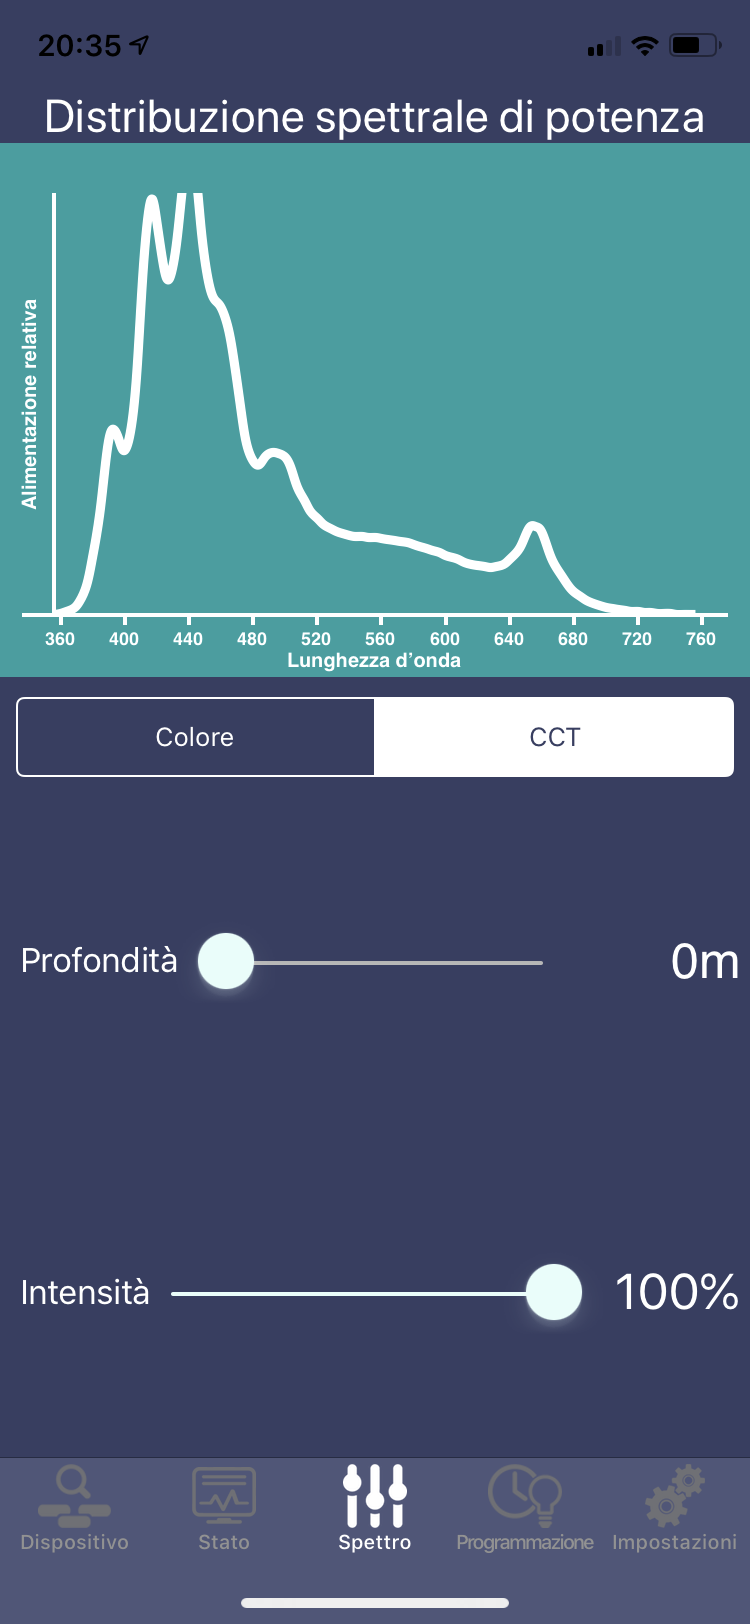
Pictured above, you can see the manual control as it is on iPhone, where you can simulate the depth and the intensity. Pictured below is an illustration of how you can interact with every channel, easily and singularly. Notice that there is no lag between the control on the smartphone and the changing in the ceiling light. Some of the best software I’ve ever seen. 
Questions and comments, as always, are welcomed. [Translated by Agnese Poggi]
Our new working method DaniReef LAB for PAR measurements
Backstory: During the long nights spent on our forum (here) we always wondered how could we compare PAR from different ceiling lights. Even though we had the perfect device, the Quantum Meter MQ-510 di Apogee, we only referred to the value measured at the center, at 20 cm of distance, more or less.
The Quantum Meter MQ-510 measures the PAR, expressed in PFFD, which is photosynthetic photon flux density, in μmol m-2 s-1. This device is calibrated to work underwater, so if it’s in air the measured value has to be divided by 1.32, the dive factor. We have to do the conversion. The values you’re going to see are correct. 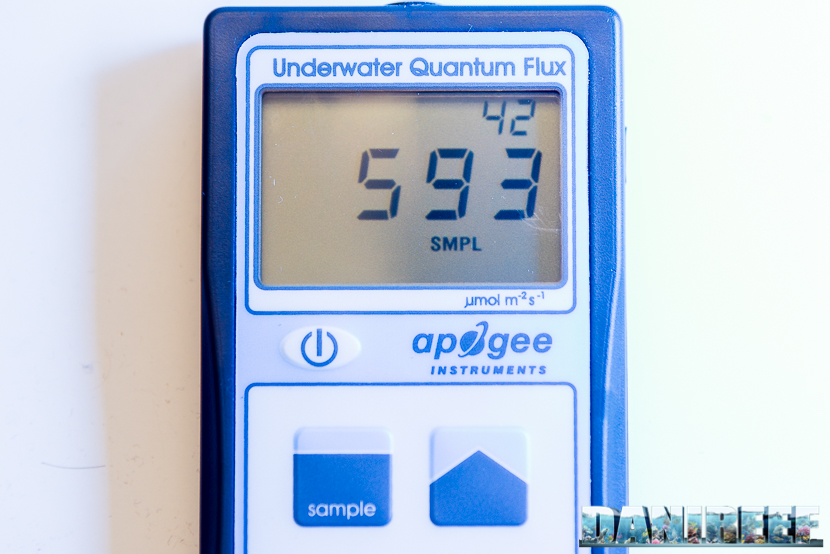
We decided to make a square base of 70×70 cm. We set 17 fiducial points where we placed the Quantum Meter MQ-510 and we also made 3 lifts of 20, 40, and 60 cm for the ceiling light, in order to have the same distance from the sensor. This allowed us to create the curves which can be compared to other ceiling lights’, all tested at the same distances. Note that this distance is measured from the base of the sensor to the ceiling light. Really, it should be decreased by 3.5 cm, which is the height of the measurement cylinder, and increased by 0.5 cm, which is the dimension of the spacers that lift the ceiling light. 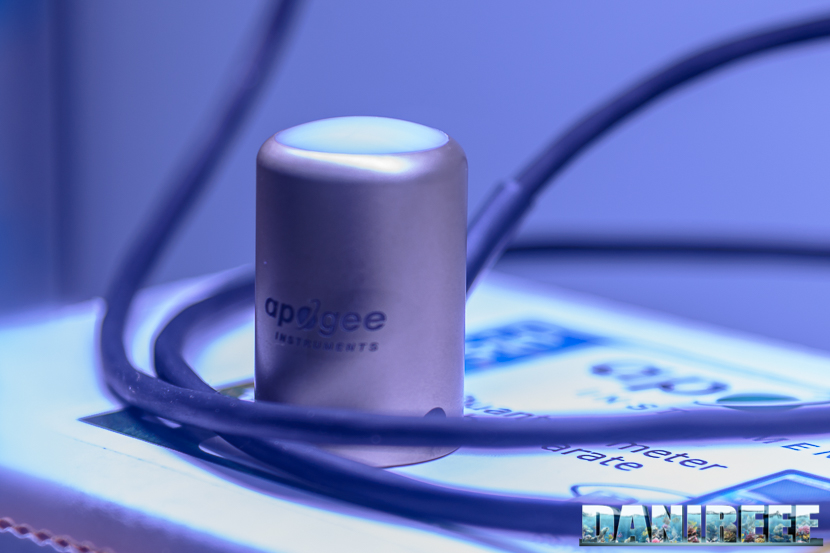
In total the three measurements were made at 17, 37, and 57 cm.
PAR measurement at 17 cm
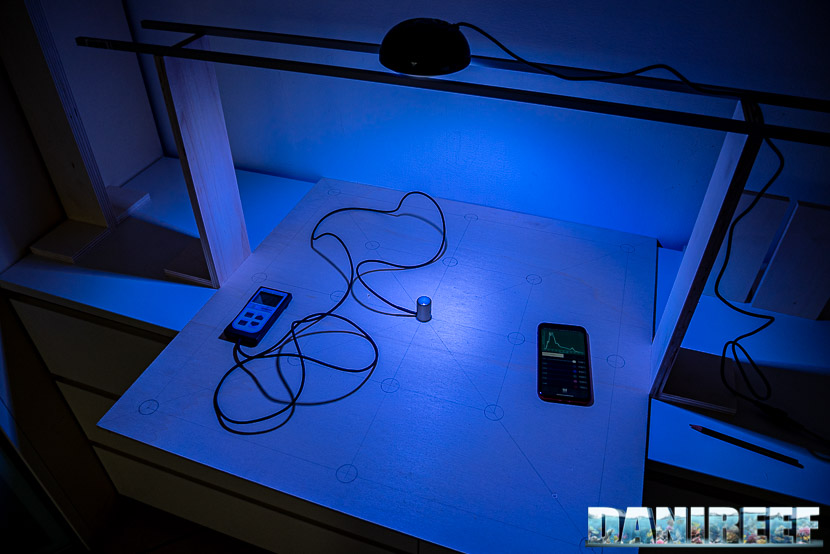
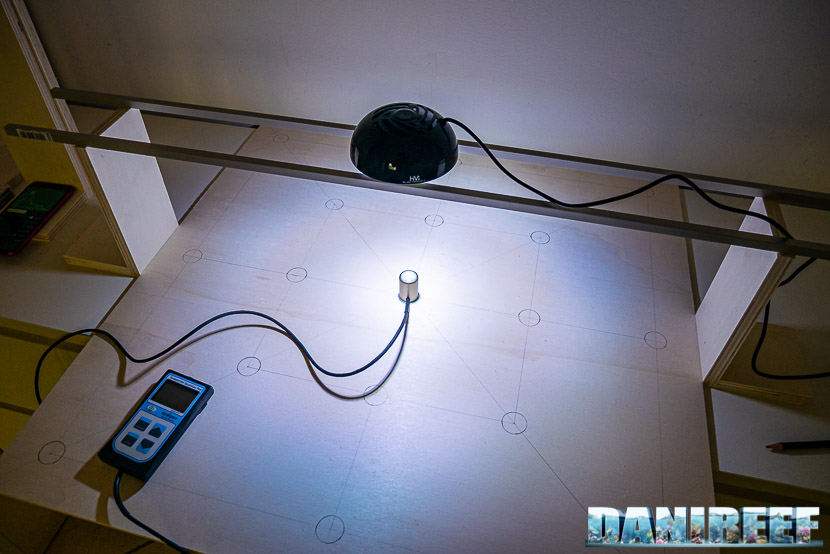
This is what the test layout looked like. Below is the chart and the device, above is the ceiling light placed on the aluminum bars.
Here the collected values: 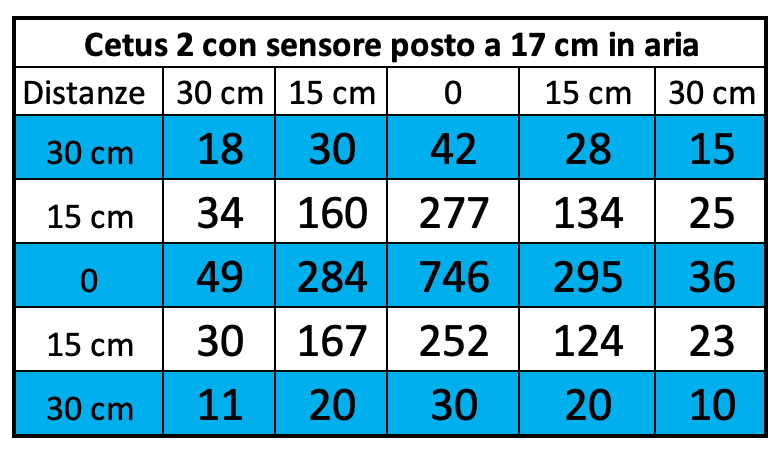
And here is the corresponding chart. We adopted a different scale because we have to consider that this ceiling light has a single cluster and it’s for quite different aquariums than other ceiling lights. With homologue ceiling lights we will use the same evaluation scale. ![]()
The first measurement always has the shortest distance between sensor and ceiling light. We noticed that the distribution is already well equilibrated, especially considering that we have a base of 60 x 60 cm, which is a definitely a lot for such a small ceiling light. However, it’s obvious that the PAR quickly decreased on all the sides.
PAR measurement at 37 cm
This is what the test layout looked like. Below is the chart and the device, above is the ceiling light placed on the aluminum bars.
Here is the collected values: 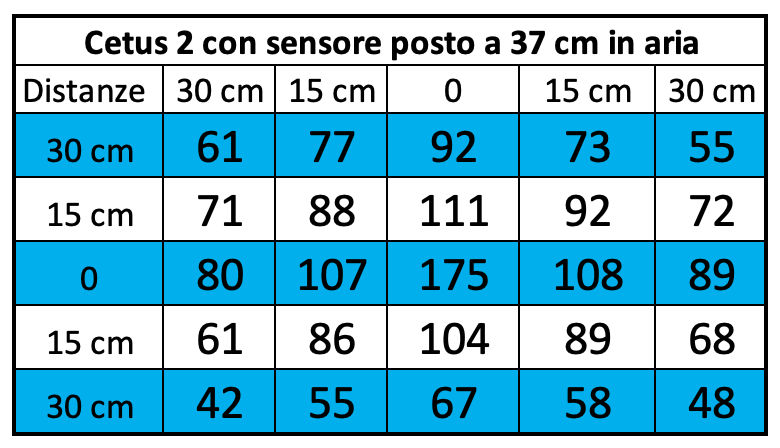
And here is the corresponding chart: 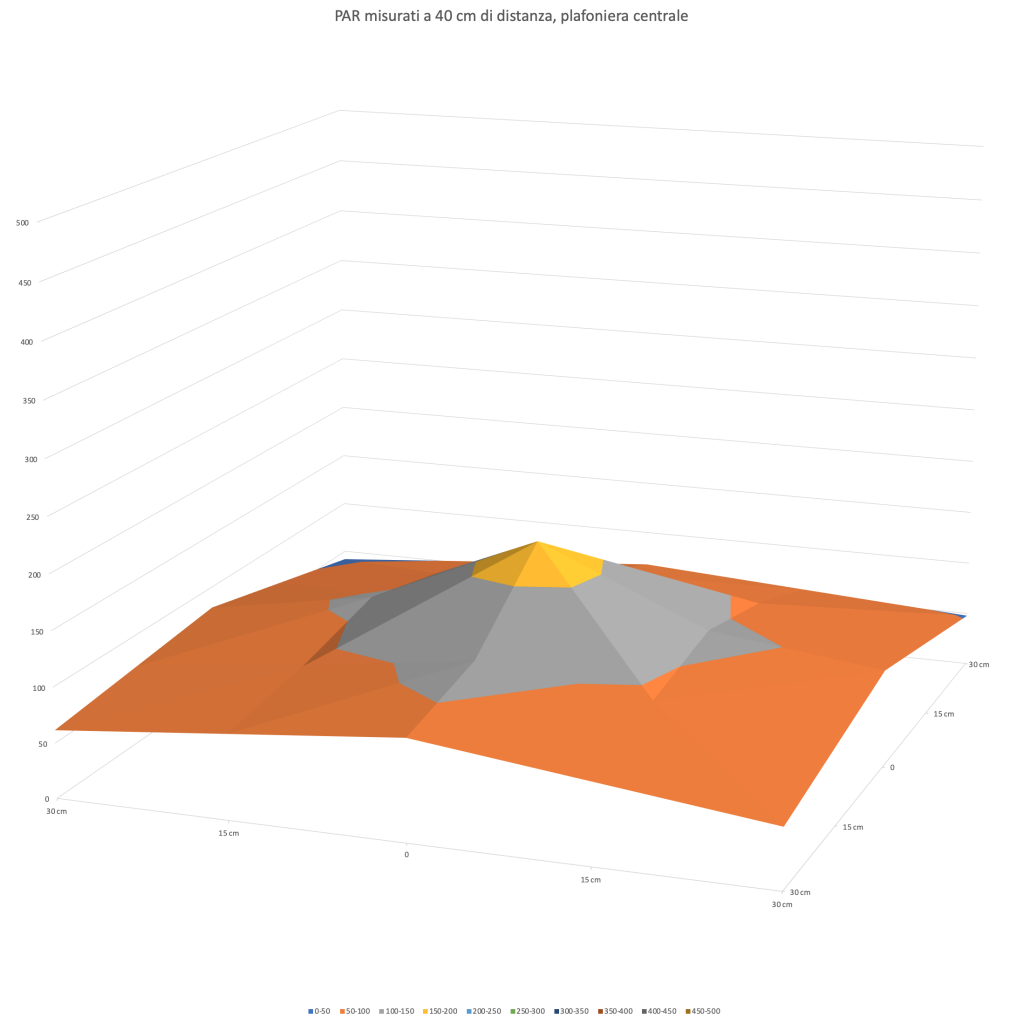
With a larger distance between the ceiling lights and the sensor, the difference between PAR in the middle and on the sides decreased. The light spreads, but the central value decreases from 746 to 175 μmol m-2 s-1.
PAR measurement at 57 cm
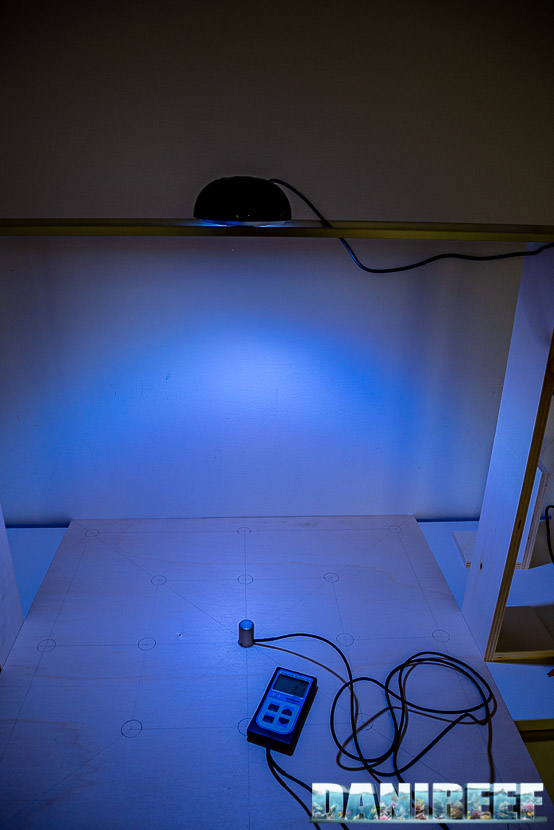
This is what the test layout looked like. Below is the chart; from this distance the device is very visible and the ceiling light is placed on the aluminum bars. Even visually, the illuminated area is a lot wider, and the power per cm decreases.
Here is the collected values: 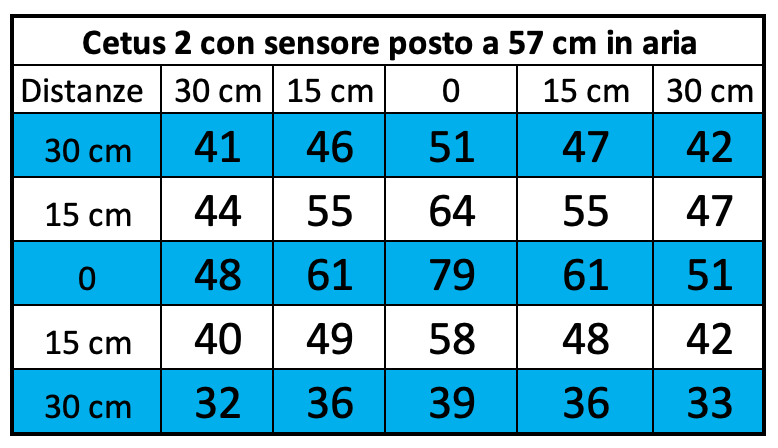
And here is the corresponding chart:![]()
Increasing the distance between the ceiling light and sensor even more, the difference between PAR in the middle and on the sides decreases. We have more uniformity, as expected, but the final power decreases a lot. The light spreads, while the central value decreases from 746 to 175 to 79 μmol m-2 s-1.
It’s worth noting that the coverage is uniform.
The PAR in the middle of the different configurations
Let’s continue with our technical measurements. We can see how, in a chart, the PAR collected in the middle decreases in the three different distances of our tests. 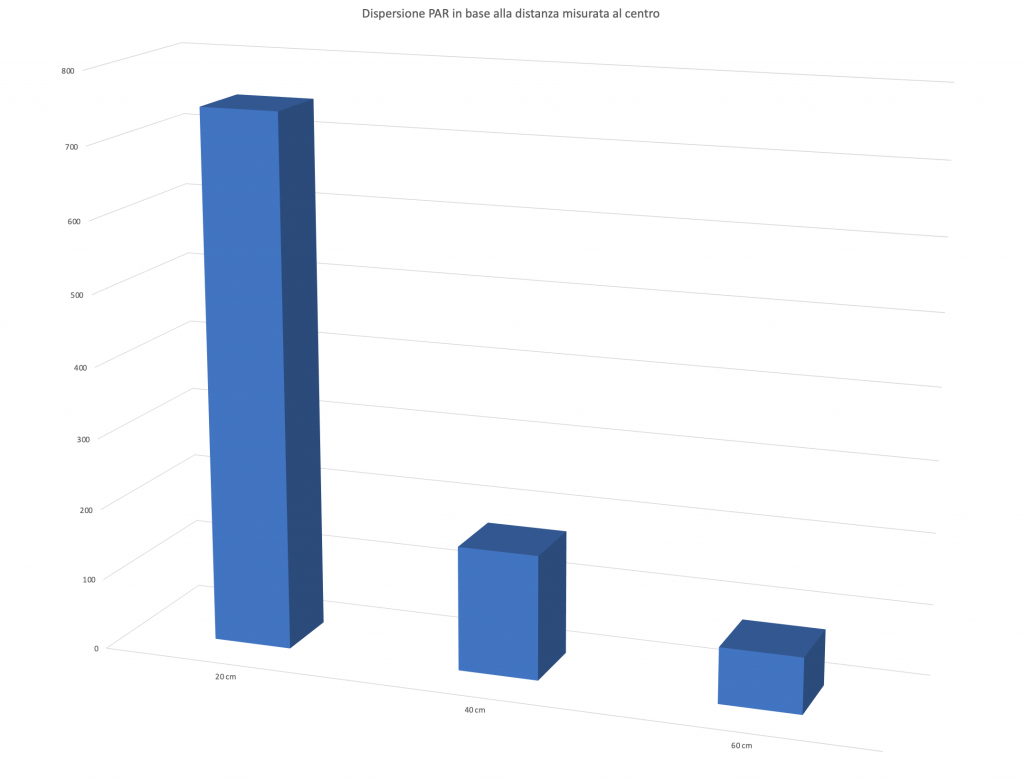
Energy variation of the Cetus 2 depending on the distance

This is the most significant and most easily-compared data: the energy variation. We calculated the volumes of the three surfaces previously seen. It’s obvious that moving away from the ceiling light the PAR decreases, but it also illuminates a wider space. In this way you can consider all the light energy contained in the 60×60 cm area subtended by the ceiling light. And the three values; 409.993, 290.886, and 173.651 assume a different connotation compared to the values in the middle. When the first values decrease because of an increase of distances, the subtended area, or energy, decreases less, because the main focus of the lighting is in the middle.
In fact, looking at the values of the three curves you can see that at the sides there’s more light at 37 cm than at 17 cm.
Values per channel in the middle in the three distances
We also measured the values for each channel, but only in the middle, in order to give you an idea of the contribution of the different channels on the PAR produced. 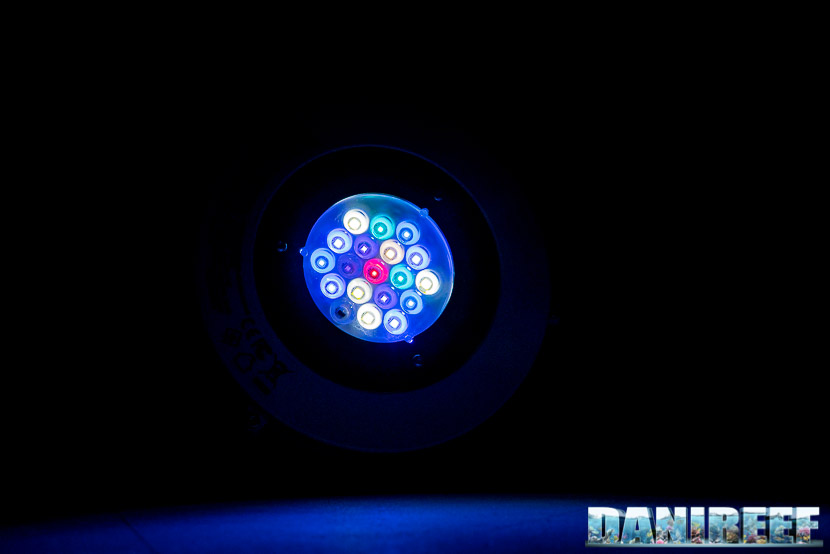
Let’s take a look at the measured values:
| Distance = 17 cm | Distance = 37 cm | Distance = 57 cm | |
| Channel 1 | 211 μmol m-2 s-1 | 52 μmol m-2 s-1 | 24 μmol m-2 s-1 |
| Channel 2 | 199 μmol m-2 s-1 | 48 μmol m-2 s-1 | 23 μmol m-2 s-1 |
| Channel 3 | 41 μmol m-2 s-1 | 30 μmol m-2 s-1 | 13 μmol m-2 s-1 |
| Channel 4 | 33 μmol m-2 s-1 | 23 μmol m-2 s-1 | 10 μmol m-2 s-1 |
| Channel 5 | 18 μmol m-2 s-1 | 15 μmol m-2 s-1 | 6 μmol m-2 s-1 |
| Channel 6 | 40 μmol m-2 s-1 | 30 μmol m-2 s-1 | 14 μmol m-2 s-1 |
The first channels, white and blue, are responsible for all the emission of PAR. 410 PAR against 130 from the other 6 channels, at 17 cm.
-
- Channel 1
-
- Channel 2
-
- Channel 3
-
- Channel 4
-
- Channel 5
-

- Channel 6
How to define these values in an aquarium?
This is a good question. At first we thought that we could transport these values to the aquarium tout-court. Than we filled the aquarium, inserted the probe, and redid the measurements. At 20 cm the result is practically the same, but as we progressed, thanks to the glass and the water itself reflecting the light, we found that the values doubled as compared to having been measured in air. Obviously this isn’t a detail that can be standardized, so we think that our method of calculation is the most correct, and the best for the comparison of coverages of different ceiling lights.
Consumption
The measurement of the consumption was made possible with the handy RCE PM600 that can also measure the Cos(fi) (or power factor). The result is already given in watts. 
Above is the the maximum power and below is the Cos(fi). 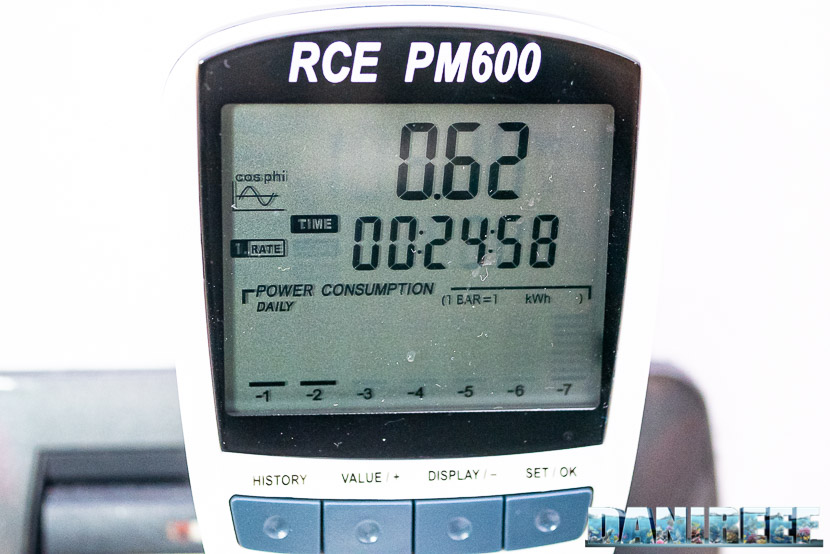
The calculation of the absorbed current, or power, follows:
Cetus 2 ceiling light: 60.68 watt. Considering that at 17 cm the ceiling light has at the middle 746 μmol m-2 s-1, we can guess that it will have a peak value of 29.67 μmol m-2 s-1 w-1 (PAR per watt), higher than the Aqamai LRM which has 25.14 as you can read here.
The current consumption is lower than advertised, probably due to the vent system. But we are more interested in the PAR value rather than the similarity with the declared data, because we want to understand what this ceiling light helps us breed corals.
The comparison with other ceiling lights on the market
Recently we started to use the new Apogee’s Quantum Meter MQ-510. Because of this, we can’t completely compare the data of other ceiling lights; we used to use the Seneye probe.
But considering the first ceiling lights we managed to test, we can make an interesting comparison about their produced energy:
| Energy | Cost | Consumption | Energy/€ | Energy/w | |
| Aqamai LRM at 17 cm | 642.649 | 465 | 90,88 | 1.382 | 7.071 |
| Aqamai LRM at 37 cm | 721.676 | 465 | 90,88 | 1.552 | 7.941 |
| Aqamai LRM at 57 cm | 616.470 | 465 | 90,88 | 1.326 | 6.783 |
| Cetus 2 at 17 cm | 409.993 | 215 | 60,68 | 1.906 | 6.756 |
| Cetus 2 at 37 cm | 290.866 | 215 | 60,68 | 1.353 | 4.793 |
| Cetus 2 at 57 cm | 173.651 | 215 | 60,68 | 807 | 2.861 |
| Philips CoralCare at 17 cm | 1.858.572 | 749 | 190,50 | 2.481 | 9.756 |
| Philips CoralCare at 37 cm | 1.340.533 | 749 | 190,50 | 1.790 | 7.037 |
| Philips CoralCare at 57 cm | 933.246 | 749 | 190,50 | 1.246 | 4.899 |
The energy per watt is similar to the Aqmai LRM, even if the latter has 50% more power. Then it decreases in line with the power and the cost. In fact, the energetic value per euro is best at at 17 cm.
| Ceiling light | PAR | Watt | Prezzo | PAR/watt | euro per watt | euro per PAR |
| GNC 466 | 696 (Seneye) | 120 | 1.400 euro | 5,8 spread | 11,7 | 2,01 |
| Orphek Atlantik V4 | 1.515 (Apogee) | 226 | 1.099 euro | 6,7 spread | 4,9 | 0,73 |
| Philips CoralCare 2019 | 2.088 (Apogee) | 190 | 749 euro | 11 spread | 3,9 | 0,35 |
| Maxspect Ethereal | 689 (Seneye) | 130 | 500 euro | 5,3 semi-spread | 3,8 | 0,72 |
| Barra Led Askoll Pure Marine | 237 (Apogee) | 28 | n.d. | 8,4 | ||
| Zetlight UFO ZE-8000 | 791 (Seneye) | 91,5 | 500 euro | 8,6 cluster | 5,5 | 0,63 |
| Aqamai LRM | 2.285 (Apogee) | 90,88 | 465 euro | 25,14 double cluster | 5,1 | 0,20 |
| Cetus 2 | 746 (Apogee) | 60,68 | 215 | 12,29 cluster | 3,5 | 0,28 |
The Cetus 2 has a euro per PAR value among the lowest in the category. In other words, it’s one of the most efficient ceiling lights; for its 215 euro, it would be hare to ask for more. With its watts and PAR where they are, it can’t go over a certain level. At this price, it’s impossible to obtain more watts.
Cost
The Cetus 2 ceiling lights costs 215 euro ($246 USD).
The absorbed power is 60.68 watts, so the cost/watt ratio is about 3.5 euro per watt. To do a comparison with the other ceiling lights you can refer to this chart:
| Ceiling light | Price | Consumption | Relationship euro per watt | |
| Cetus 2 | 215 euro | 60,68 watt | 3,5 euro per watt | |
| Philips Coralcare 2019 | 749 euro | 190 watt | 3,9 euro per watt | |
| Maxspect Ethereal | 500 euro | 126 watt | 4,0 euro per watt | |
| Radion XR30w G2 PRO | 790 euro | 170 watt | 4,7 euro per watt | |
| Radion XR30w G4 PRO | 915 euro | 190 watt | 4,8 euro per watt | |
| OceanLed Sunrise 600 | 870 euro | 180 watt | 4,8 euro per watt | |
| Orphek Atlantik V4 | 1099 euro | 226 watt | 4,9 euro per watt | |
| Radion XR30w G2 | 690 euro | 140 watt | 4,9 euro per watt | |
| Radion XR30w G4 | 760 euro | 150 watt | 5,1 euro per watt | |
| Aqamai LRM | 465 euro | 87,5 watt | 5,1 euro per watt | |
| Zetlight UFO ZE-8000 | 500 euro | 91,5 watt | 5,5 euro per watt | |
| CEAB Slide & Led | 2.700 euro | 275 watt | 9,8 euro per watt | |
| Sicce GNC 466 | 1.592 euro | 120 watt | 13,3 euro per watt |
The ceiling light is very well built; it’s small, but very solid. Very easy to set up, and is equipped with a very good software. Even though it has high efficiency, it’s difficult to obtain more PAR or watts with this money, at the end the values are perfect for a nanoreef, especially for LPS and soft corals, and also for SPS like montipora. The total expressed energy is very good, though it can’t (obviously) compete with ceiling lights that cost and consume double. What else do you need?
Questions and comments, as always, are welcomed. [Translated by Agnese Poggi]


0 Comments