• Why not take a moment to introduce yourself to our members?

ming

LE Coral Killer
Location
Flushing, NY
Rating - 100%
272   0   0
Based on the construction, it looks like the 2x4's should be able to support the weight of the tank. The wall probably helps a little but is not needed, so drilling the hole wouldn't have any effect except asthetics as long as the 2x4's aren't being drilled onto. Since its 4" thick, you could probably drill it and still not see it on the outside so I would say go ahead and drill it more until you can fit the bulkhead and flex tubing on.
 

pecan2phat

Professional Commuter
Location
Wallingford, CT
Rating - 100%
85   0   0
4" :eek:
I guess your dad can use a jig saw to cut out a rectangle instead of the 2 holes and dry fit the bulkhead with a 90 degree PVC elbow to see if you can clear the sidewall of the stand.
You can use 2 90 degree elbows to bring the line back down straight. Is this hole on the tank, the return or drain?
 

Marcellina

Advanced Reefer
Location
Merrick, NY
Rating - 100%
19   0   0
Ok that is what I thought. I got nervous for a minute!

I really dont think there is a chance you will be able to see the hole on the outside bc the wall part is very thick. The wall was put in solely for aesthetic purposes bc my father didnt want it to look unfinished.

The hole wont cut into the support beams at all. It just looks like its going to be a pain to cut it out. He wouldnt have to cut the wall all the way down right? just a few inches or so? And is it ok to use flex tubing? Is there any other alternative?
 

Marcellina

Advanced Reefer
Location
Merrick, NY
Rating - 100%
19   0   0
4" :eek:
I guess your dad can use a jig saw to cut out a rectangle instead of the 2 holes and dry fit the bulkhead with a 90 degree PVC elbow to see if you can clear the sidewall of the stand.
You can use 2 90 degree elbows to bring the line back down straight. Is this hole on the tank, the return or drain?


That hole is the bigger of the two so its got to be the drain right? (First time putting together a big tank so I will have lots of questions just bear with me! I have a biocube right now that doesnt have all this stuff LOL:eek:)

What he plans on doing is cut out a chunk of the side wallbut not all the way down to the floor of the tank.
 

ming

LE Coral Killer
Location
Flushing, NY
Rating - 100%
272   0   0
You'll need to cut enough down for the bulkhead to fit properly (it extends down a few inches) and then some more for either the flexible hose or PVC, that would be your own personal preference. I have seen some ideas on how to reduce bubbles using PVC, but flexible hose is easier to manipulate if you need to move it an inch.

And yes, the bigger hole should be the drain.
 

Marcellina

Advanced Reefer
Location
Merrick, NY
Rating - 100%
19   0   0
I have been on a little hiatus from MR ... Its a slow process getting my upgrade up and running, not bc I am lazy but bc there is never enough time to do everything!

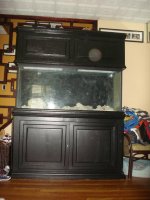
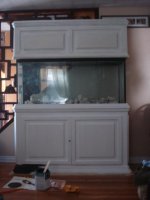
I finally put a lightly sanded, primed it again, and put two coats of 'caviar' black satin . ;) I left the inside of the stand and canopy white.

Also I painted the back of the tank in black highgloss. I put two coats on so far, it would have been enough but I was so eager to put the first coat I only waited an hour and the second coat started to pull some of the first coat away so I am waiting for it to cure really good before putting the final coat.

I know the tank had fine scratches on the inside and when its filled with water you dont really see them as bad as when there is no water in the tank so I COULD have left it alone BUT having been staring at it empty in my living room with the black in the background it looks so opaque and cloudy from the scratches, it looks like whoever cleaned it used a brillo pad or a steel brush. When I run my nail over it you dont feel the scratches so I looked online on a way to remove them.

I found a few sites that say you can use cerium oxide polishing compound safely in the tank. So I ordered some and I will document the whole project if anyone is curious to see if works. I have to buff it on using a powerdrill with buffing attachment. We shall see.

The floorbeams are super duper reinforced. 3 new beams added to strengthen the existing beams. And the 75G sump and stand are in place in the basement. Still lots to do but progress is being made!
 

tomtoothdoc

GOLFER WANNABE
Location
north jersey
Rating - 100%
390   0   0
two months summer hiatus.....but looks like you made some progress. you'll have it up and running before you know it. good things come to those who take their time doing it right.:wink1:
btw my up grade took more than a year to finalize.....actually it's not....i'm still testing/swapping out various equipments......i'm itching for a new skimmer.:shhh:
 

Marcellina

Advanced Reefer
Location
Merrick, NY
Rating - 100%
19   0   0
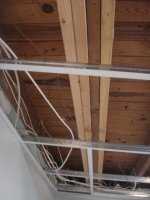
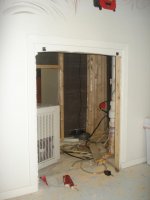
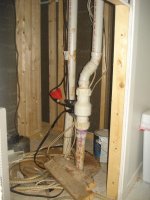
Here are some photos of the progress:
The reinforced beams and the section under the stairs that will house the RODI filter and brute buckets and I think I can have a direct drain as well, I have a door in place to hide the hole already ;)
 

Attachments

  • DSC07245.jpg
    DSC07245.jpg
    44.5 KB · Views: 273
  • DSC07249.jpg
    DSC07249.jpg
    36.2 KB · Views: 276
  • DSC07250.jpg
    DSC07250.jpg
    56.7 KB · Views: 275

Marcellina

Advanced Reefer
Location
Merrick, NY
Rating - 100%
19   0   0
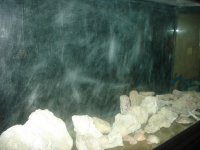
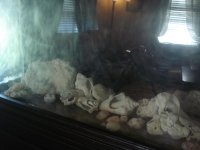
Here is the tank stand/canopy primed in white and then painted in black with back glass in black high gloss. I have some close ups of the glass so you can see the scratches.

When I tested it with water you dont notice the scratches as much as you see them here, there is no water in it in these photos.

I have some shells and deads coral pieces that my mom and dad got scuba diving in cancun in there right now, I need SOMETHING to look at ;)
 

Attachments

  • DSC07359.jpg
    DSC07359.jpg
    91.9 KB · Views: 270
  • DSC07362.jpg
    DSC07362.jpg
    59.8 KB · Views: 267
  • DSC07356.jpg
    DSC07356.jpg
    56.8 KB · Views: 267
  • DSC07229.jpg
    DSC07229.jpg
    32.9 KB · Views: 271
Last edited:

Marcellina

Advanced Reefer
Location
Merrick, NY
Rating - 100%
19   0   0
I cant believe its been 3 months since I have done anything to my tank. Its still in the living room just sitting on the stand with no plumbing done to it yet.

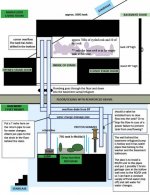
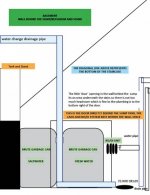
I have been trying to figure out the next steps and the plumbing and finally got it down on paper. If anyone on here can give me any critiques if this is a good way to do the plumbing please do so.

I am going to include a diagram but will try to explain it first.

The 100 G tank has to holes drained in the bottom of the overflow that is located in the back left of the tank. The first hole is the drain and the second is the return. I will make two small holes through the floor to go down into the basement where I have a 75 G tank that I am making into a sump/refugium.

The return pump is going to be in the first section of the 75G tank so it will have better flow without having any elbows. The middle section will be the refugium with a deep sand bed and chaeto and the third section will be where the water drains into and will hold the Protein SKimmer. So the flow will be from Right to Left. I am thinking to put a valve on the pipe that will drain into the sump so that I can slow down the flow and also to stop it completely if I ever need to.

On the return pipe I want to put a T Valve so that I can put another pipe that will go to a floor drain that is directly behind the wall of this tank. That way I can turn this valve on and use the pressure from the return pump to pump out the water for a water change.

Behind the tank is a hollow wall that is underneath the stairs so there is space but not much headroom which is ok. There is access to water and drain pipes and also a drain in the cement floor in there. I want to install a RO/DI unit to the water pipe and have it fill up two Brute Cans. The first Brute that will fill up will be fresh water and then it will feed the second one that I will make into Saltwater.

That is as far as my plans go so far. Anyone find any faults or any good advice for me? Looking forward to hearing them.

======================================================
Anyone have any good comments for me? Is my diagram confusing? I dont want to start the plumbing until I get some feedback to improve the design. Please help!

**** Updated the diagrams and uploaded the new design for the plumbing part. Waiting anxiously and patiently for anyones responses. I wont be insulted, I have never done plumbing or anything of this magnitude for my current saltwater tank, cant do too much with a 29G Biocube, its an all in one system. I want to do everything right the first time with this BIG tank so please help. Thanks in advance!
======================================================
 

Attachments

  • 100G tank setup 1.13.jpg
    100G tank setup 1.13.jpg
    63.3 KB · Views: 201
  • 100G tank setup rodi v13.jpg
    100G tank setup rodi v13.jpg
    44 KB · Views: 200
Last edited:

Marcellina

Advanced Reefer
Location
Merrick, NY
Rating - 100%
19   0   0
Tell me about it! Was going through pain management therapy for a neck and shoulder injury I have so had to put alot of stuff on pause for a bit. Had to see my new big (but empty) tank in the living room all this time. But now Im back!
 

pauliwalnuts

Advanced Reefer
Location
Elizabeth, NJ
Rating - 100%
56   0   0
On the return line, make install a "George Fisher Wye check valve". This will help prevent water from being sucked down and overflowing your sump.
After the check valve, comes the T coupler with one ball/gate vavle heading back to the DP and another vavle for you waterchange. This way you can stop the flow to the DP and drain from your sump.
 

Marcellina

Advanced Reefer
Location
Merrick, NY
Rating - 100%
19   0   0
This is a great idea I found the valve on Bulk Reef Supply for $44 is that about what it costs? They have a video explaining how it works, I will definitely have to incorporate this in the plumbing. Thanks so much Paulie!


On the return line, make install a "George Fisher Wye check valve". This will help prevent water from being sucked down and overflowing your sump.
After the check valve, comes the T coupler with one ball/gate vavle heading back to the DP and another vavle for you waterchange. This way you can stop the flow to the DP and drain from your sump.
 

Marcellina

Advanced Reefer
Location
Merrick, NY
Rating - 100%
19   0   0
I would think you would want the drain line going straight down so it dosent mess with the flow. With the return line you can always use a bigger pump to make up for elbows and such. How big is your drain line?


I had planned it that way bc I thought it was better to have the return line with no angles that way I didnt have to get a stronger (thus more expensive) pump? I thought the more important flow was the one returning to the DT and the drain line should be slowed. I might be completely wrong I a newbie when it comes to sumps and plumbing.

Is my sump/refugium design done properly? With the fuge in the middle and the return and drain section on either side? I know there are many more complex ways of making one but I wanted to stick with a simpler basic design.
 

Sponsor Reefs

We're a FREE website, and we exist because of hobbyists like YOU who help us run this community.

Click here to sponsor $10:


Top