About a month ago I built a tank cover to keep my Wrasse's from carpet surfing...
the idea for the design had come up in this link thread that Jon Hale had started:
http://www.manhattanreefs.com/forum/diy-do-yourself/20529-mesh-tank-cover.html
When I built mine I added doors to make target feeding my Sun corals and others
easier, while keeping most of the tank covered so I wouldn't have to try & catch
flying wrasses while holding a turkey baster in one hand...
Down side was I ended up with a shadow 1 1/2" wide across my rocks. That wasn't
acceptable, so I came up with a new plan.
I visited an acrylic fabricator and we did some brainstorming on the best size of plexi
to use that wouldn't sag under the metal halides & glues to use.
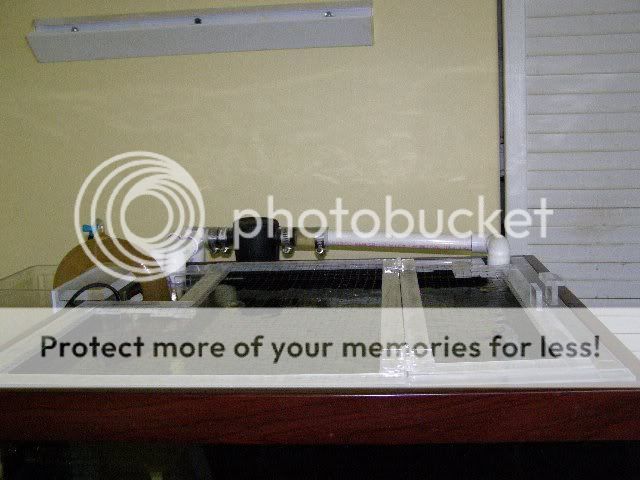
This cover was built for my 33g Oceanic cube (haven't gotten around to posting a tank
thread for this one yet..do have all the pics..one of these days..), where I had to build
'around' the OFB & scwd returns. When I build the next one for my 75g, I will post the
pics here.
Here is what we came up with and how it was made.
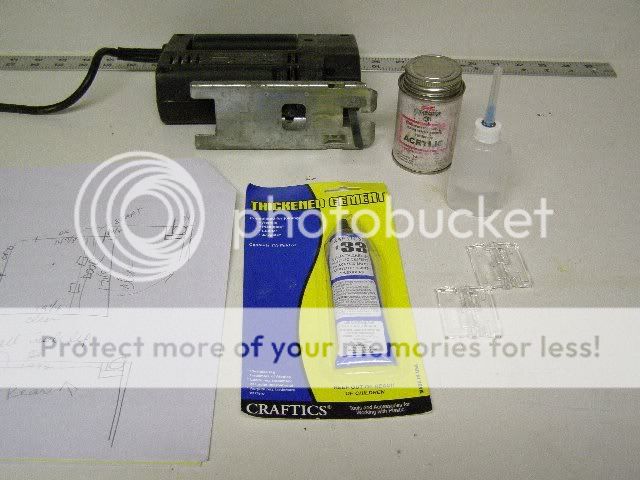
Parts:
1/8" x 3/4" x 48" strips of plexiglass
3/16" x 3/4" x 48" strips...
# 3 Weldon and applicator bottle
Craftics # 33 Clear Thickened Acrylic Cement
Acrylic hinges
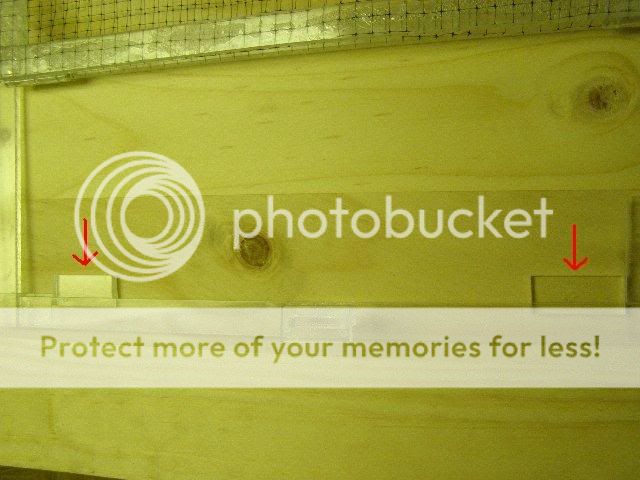
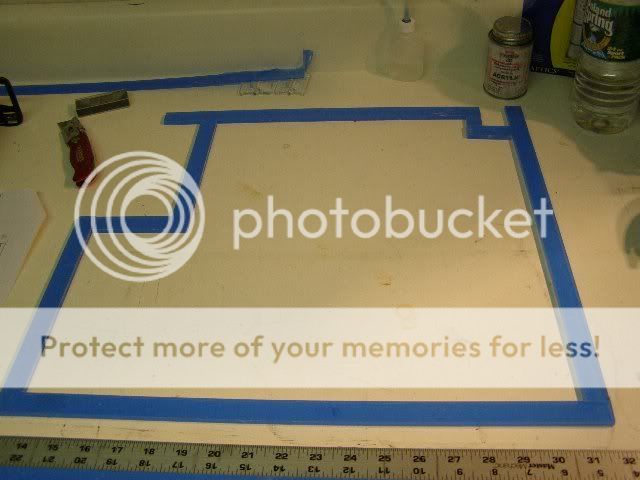
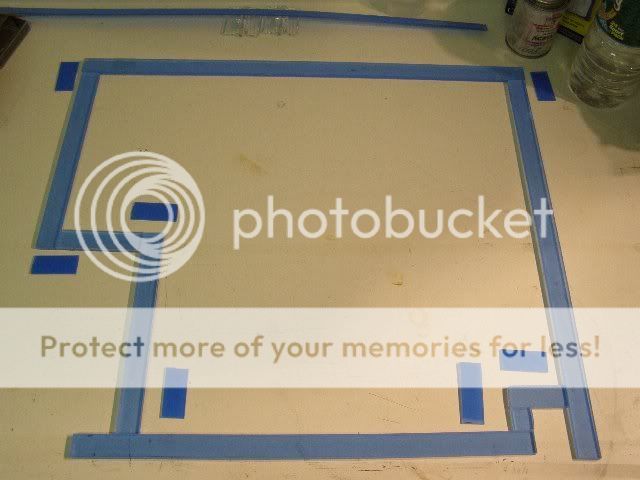
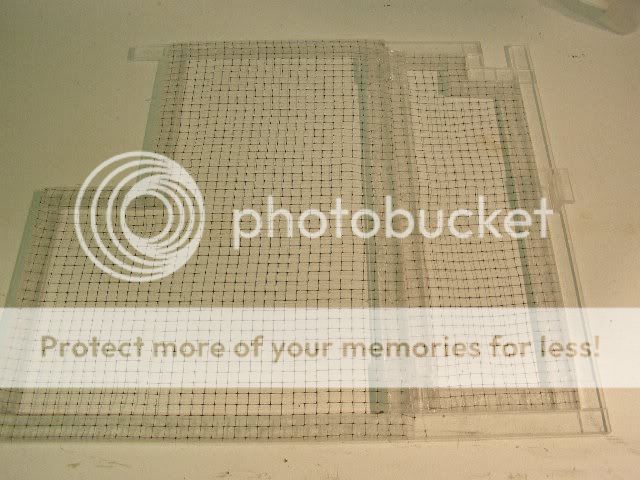
First I measured & cut the frame using the 3/4" plexi. I designed this to sit on the 'lip'
inside the tank. When measuring I deducted 1/16" on all sides to give me enough wiggle room
for expansion due to the lighting.
Then I flipped the frame upside down and glued 1 1/2" strips of the 1/8" plexi to the UNDERSIDE
of the frame to hold it together. The fabricator fellow said glueing the edges to themselves
wouldn't hold well enough and this was his suggestion. (do remove the blue protective covering
before gluing!)
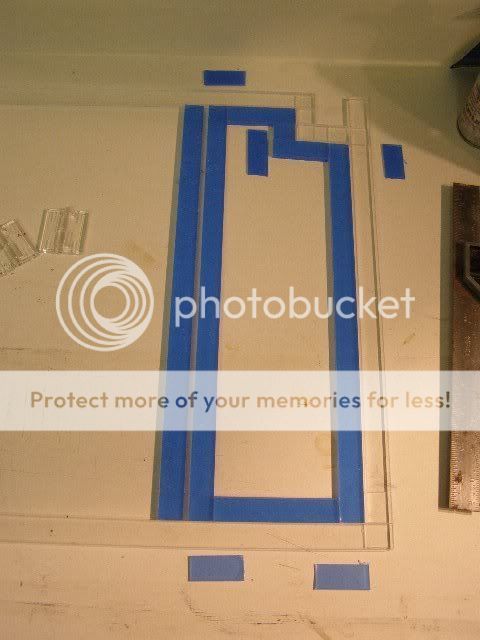
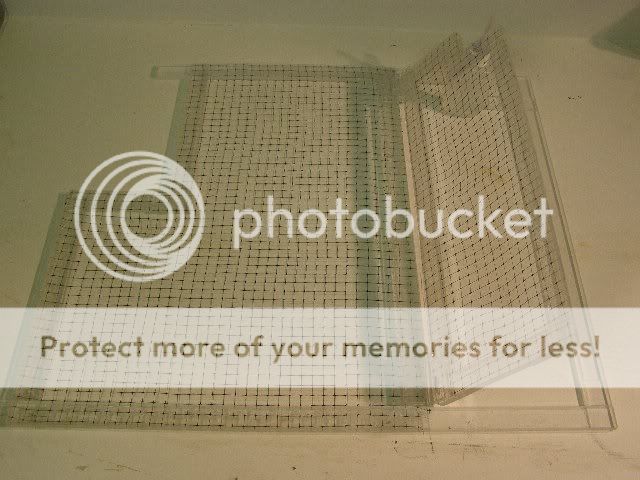
Here is the door panel
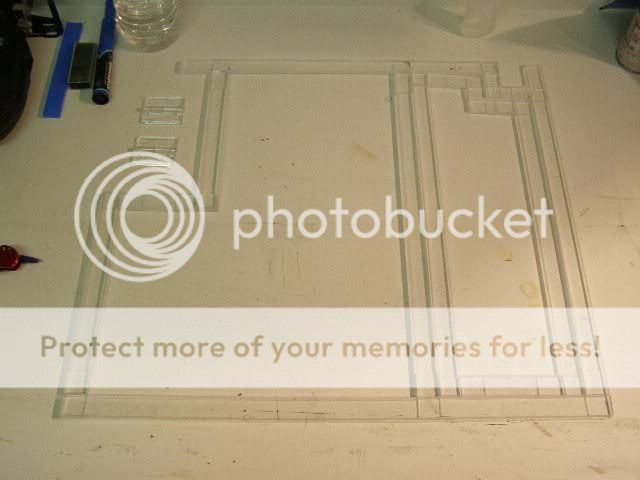
Next I turned the frame right side up and had by now removed all of the protective blue
covering. Note the 2 hinges in the upper left.
Next came adding the netting to the frames. I used the Craftics # 33 thickened glue - the
instructions on this tell you to lightly sand the 2 pieces of plexi..did that. I cut a piece of
netting
slightly larger than the main frame and sandwiched it between the 1/4" thick lower using the
1/8" plexi as the top of the 'sandwich' after running a bead of the thickened
cement along the frame. I used clothespins as clamps...
You will want to cut your 1/8" strips so they butt against each other all the way around
the frame. Also cut them so they don't match the same overlap pattern as the 1/8" pieces
you used to bond the frame together. The frame will be stronger this way.
Also be sure to carefully install this 1/8" upper piece so that it lines up perfectly with the lower
piece. Otherwise you will be sanding the edges so it will fit inside the lip of your tank.
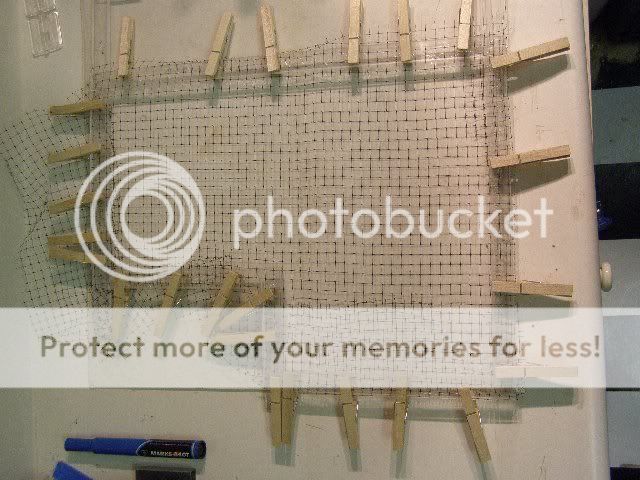
Within about 30 minutes the glue was solid enough to remove the clothes pins & trim away the
excess netting. (btw..the netting is black, not sure what photographic anomaly is responsible
for the way it came out in the pics...)
The hinges are difficult to see (that was the point...)and they need to be glued with
Weldon # 3 with the LUMPY side DOWN. I put a weight on them until they dried. Note: I chose
to use 3/4" plexi for the frame as that was the size of the hinges. Piano type hinges are also
available in acrylic. The ones I used are 1 1/2" long.

Here are pics of the finished cover. I added a small handle made from 2 extra pcs of the 1/4"
plexi. I suggest you attach your handle to the door edge and not the outside frame as I did..I
guess I was really tired (or high from the glue fumes...) by that point since I attached my handle
to the outside frame...where it serves absolutely no purpose what so ever...
I'm very happy with the way it turned out as there are NO shadows on my rockwork with this
new frame. (I should have tightened the netting on the door portion...)
I will be moving that handle to the right location..one of these days..and I will post a pic of the
tank with the cover on it..soon.
Thanks for looking!
the idea for the design had come up in this link thread that Jon Hale had started:
http://www.manhattanreefs.com/forum/diy-do-yourself/20529-mesh-tank-cover.html
When I built mine I added doors to make target feeding my Sun corals and others
easier, while keeping most of the tank covered so I wouldn't have to try & catch
flying wrasses while holding a turkey baster in one hand...
Down side was I ended up with a shadow 1 1/2" wide across my rocks. That wasn't
acceptable, so I came up with a new plan.
I visited an acrylic fabricator and we did some brainstorming on the best size of plexi
to use that wouldn't sag under the metal halides & glues to use.
This cover was built for my 33g Oceanic cube (haven't gotten around to posting a tank
thread for this one yet..do have all the pics..one of these days..), where I had to build
'around' the OFB & scwd returns. When I build the next one for my 75g, I will post the
pics here.
Here is what we came up with and how it was made.
Parts:
1/8" x 3/4" x 48" strips of plexiglass
3/16" x 3/4" x 48" strips...
# 3 Weldon and applicator bottle
Craftics # 33 Clear Thickened Acrylic Cement
Acrylic hinges
First I measured & cut the frame using the 3/4" plexi. I designed this to sit on the 'lip'
inside the tank. When measuring I deducted 1/16" on all sides to give me enough wiggle room
for expansion due to the lighting.
Then I flipped the frame upside down and glued 1 1/2" strips of the 1/8" plexi to the UNDERSIDE
of the frame to hold it together. The fabricator fellow said glueing the edges to themselves
wouldn't hold well enough and this was his suggestion. (do remove the blue protective covering
before gluing!)
Here is the door panel
Next I turned the frame right side up and had by now removed all of the protective blue
covering. Note the 2 hinges in the upper left.
Next came adding the netting to the frames. I used the Craftics # 33 thickened glue - the
instructions on this tell you to lightly sand the 2 pieces of plexi..did that. I cut a piece of
netting
slightly larger than the main frame and sandwiched it between the 1/4" thick lower using the
1/8" plexi as the top of the 'sandwich' after running a bead of the thickened
cement along the frame. I used clothespins as clamps...
You will want to cut your 1/8" strips so they butt against each other all the way around
the frame. Also cut them so they don't match the same overlap pattern as the 1/8" pieces
you used to bond the frame together. The frame will be stronger this way.
Also be sure to carefully install this 1/8" upper piece so that it lines up perfectly with the lower
piece. Otherwise you will be sanding the edges so it will fit inside the lip of your tank.
Within about 30 minutes the glue was solid enough to remove the clothes pins & trim away the
excess netting. (btw..the netting is black, not sure what photographic anomaly is responsible
for the way it came out in the pics...)
The hinges are difficult to see (that was the point...)and they need to be glued with
Weldon # 3 with the LUMPY side DOWN. I put a weight on them until they dried. Note: I chose
to use 3/4" plexi for the frame as that was the size of the hinges. Piano type hinges are also
available in acrylic. The ones I used are 1 1/2" long.
Here are pics of the finished cover. I added a small handle made from 2 extra pcs of the 1/4"
plexi. I suggest you attach your handle to the door edge and not the outside frame as I did..I
guess I was really tired (or high from the glue fumes...) by that point since I attached my handle
to the outside frame...where it serves absolutely no purpose what so ever...
I'm very happy with the way it turned out as there are NO shadows on my rockwork with this
new frame. (I should have tightened the netting on the door portion...)
I will be moving that handle to the right location..one of these days..and I will post a pic of the
tank with the cover on it..soon.
Thanks for looking!
Last edited:
")