
After three months of trials, we’re finally here with our review of the Rossmont Riser 3200 return pump, which we introduced in this article.
Rossmont Riser is unique, as it is an alternating current non electronic pump, but it can become adjustable if paired with the Rossmont Waver (review).
We measured prevalence, flow rate, and consumption. We did so without pairing the pump with its Waver controller, and thus we only measured the maximum values. Considering the controller category, there aren’t predetermined values for flow rate and head max, but it’s possible to adjust the pump on every pair of flow rate and head value, and that’s why we chose to measure only the maximum value.
Concerning head max, we used the usual flawless static method. Regarding flow rate, we used the DigiFlow 6710M flowmeter, and for consumption we used the RCE PM600.
Rossmont Riser 3200 Technical Characteristics
| European Version 230 V – 50 Hz | American Version 120 V – 60 Hz | |
| Flow rate: | 3.200 l/h | 850 gph |
| Consumption: | 52 watt | 55 watt |
| Head max: | 2,9 meter | 115 in |
| Width: | 12,5 cm | 4.93 in |
| Depth: | 8 cm | 3.15 in |
| Height: | 12,7 cm | 5.00 in |
| Price: | 114,90 euros | $99 USD + VAT |
The Rossmont Riser 3200 claims to have an energy efficiency equal to 61.54 liters per every consumed watt. An economic efficiency equal to 27.85 liters per second per euro and thus a reference value of 4,640 l*m/h.
At a relatively low cost of 114,90 euros we can acquire a great pump, which has a fixed flow rate and prevalence, but you only have to add the Rossmont Waver for it to transform into an adjustable, hyper modern pump. The economic efficiency is good, especially when including the Waver, whereas the technical efficiency is ordinary. But this is all on paper; let’s see what we measured and how it gets included in the values that we have measured up to now for every other pump (on page 3). At present, it’s the pump I use for my aquarium.
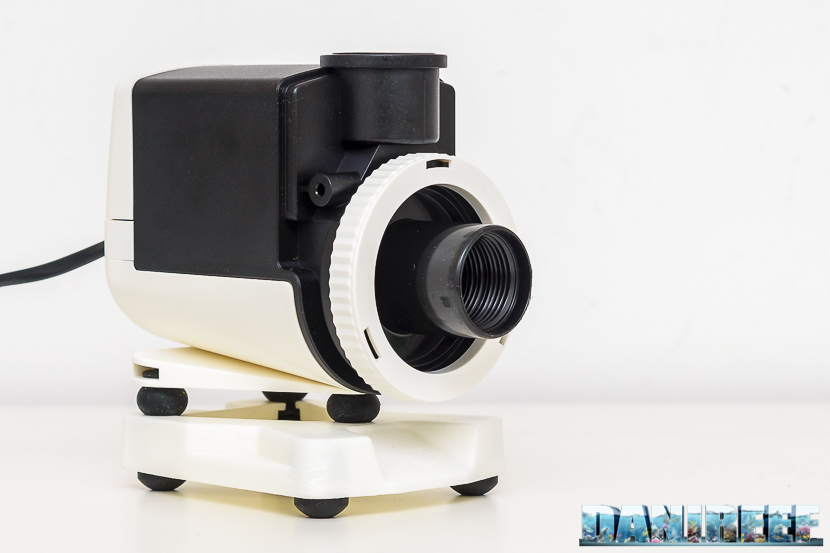
The construction
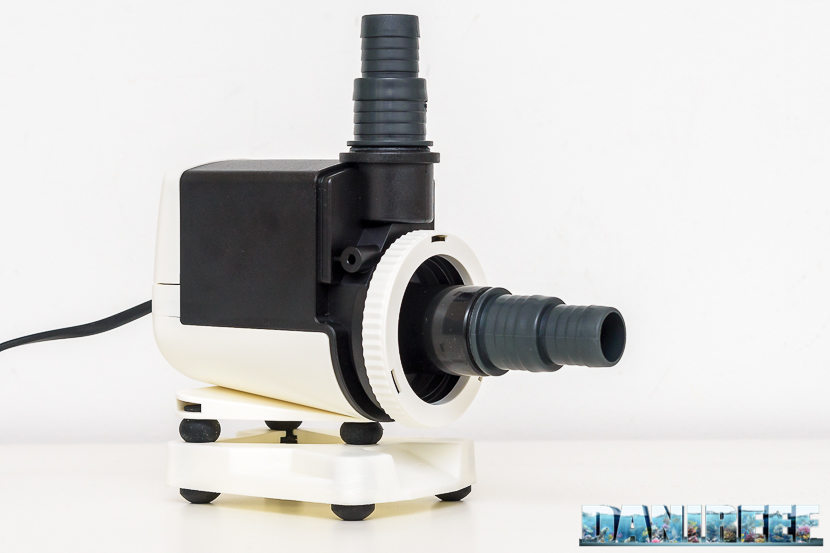
The pump is simple. Square. In a two-tone black and white livery.

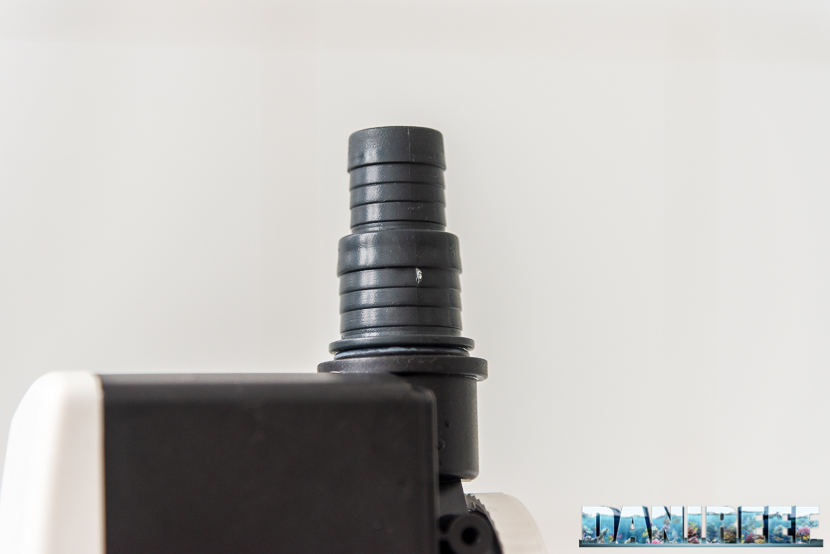
Inside the packaging is the pump and a pair of identical hose connectors. The hose connectors can be sectioned based on their own return pump’s diameter. The water entry and exit can measure from 3/4 of an inch up to one inch depending on whether you use the hose connectors or you decide to cut them.
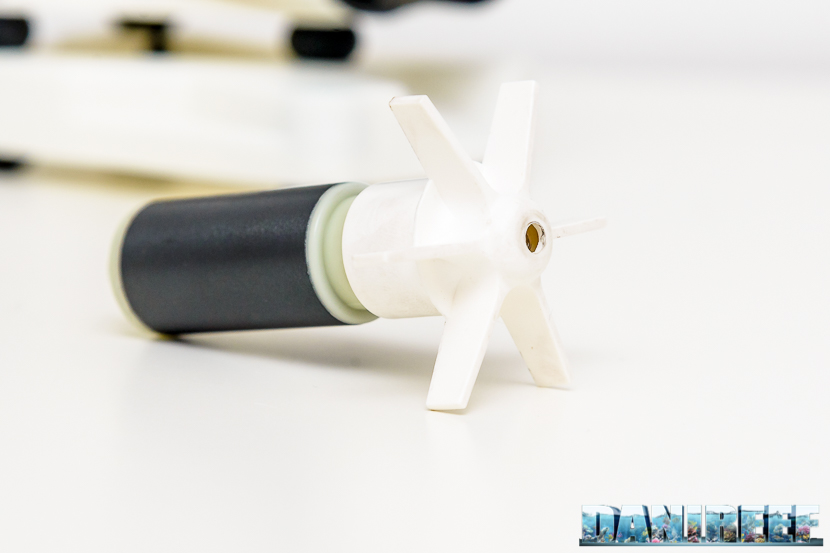
We immediately proceeded to disassemble the pump to see how its impeller was built.

The impeller has a traditional form, and 6 straight blades which rotate around a ceramic shaft, held by the two traditional pads. Dimensions are not too big.
How to control the Riser pump with the Waver
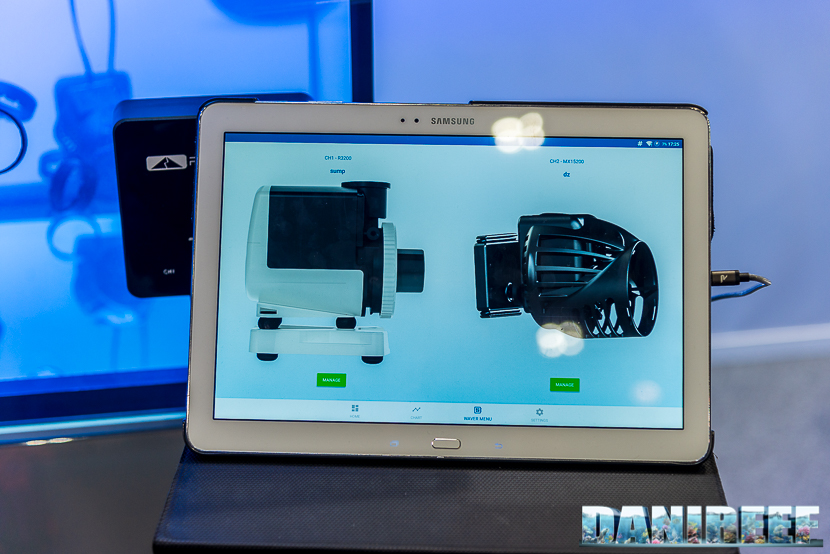
This pump’s main characteristic, as we said, is that if used as a stand-alone it’s a very typical alternating current pump. But when you pair it with a Waver (review), the pump becomes extremely adjustable and ductile.
Using the controller, it’s possible to vary the flow rate during the day; moreover, it’s possible to calibrate the pump, which I find extremely useful. Through this modality you can tell the pump how much power has to be used from the pump so that the flow rate between the sump and the tank is absolutely equal to zero. This way, you can feed your animals in the aquarium without there being any type of flow, but without the sump getting full of water. A function that, needless to say, I really like. It’s not a new function, but I belive that only Ecotech Marine implements it on its Vectra.
Of course, you have to pay attention because when you activate this function, the water level in the aquarium drops a bit; it’s absolutely normal. But it becomes priceless when at night I find myself feeding my corals through the pipette whilst all the pumps are turned off and without having the sump become full of water arriving from the tank.
As for the rest, it’s possible to configure the pump at a specific flow rate for every single moment of the day, without being constrained by fixed flow rates. I can choose the one I prefer with my finger on the chart.
Head Max Trial
The first trial we did was measuring the prevalence. As you know, the prevalence is the pump’s capacity to elevate water over a certain altitude. To do that, we measured the water level reached inside a rubber hose. We didn’t measure every single intermediary step as we usually do, because, as we wrote on the previous page, there are no intermediary steps. But we can choose any step seamlessly.
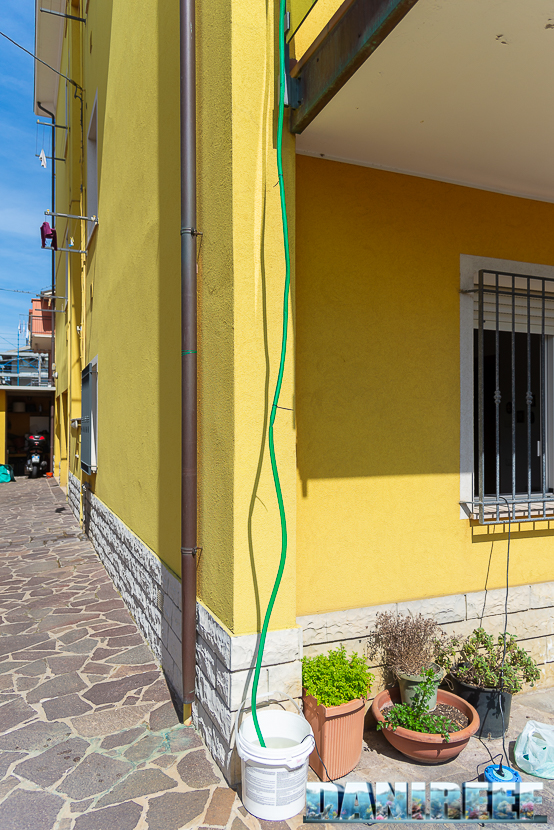
As you can see from the picture above, we blocked the hose to the terrace. We then turned on the pump, waited about 10 minutes for the pump to stabilize, and then we performed the measurement.

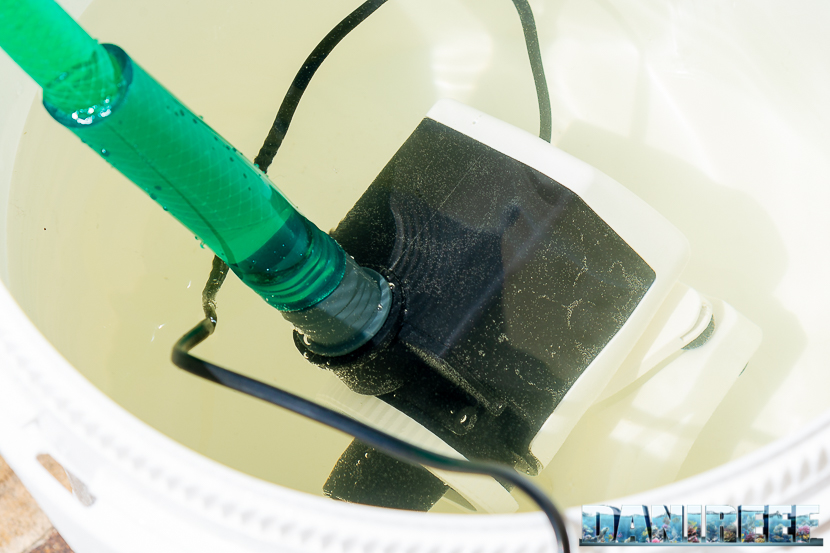
We measured a maximum head equal to 2.81 meters against the declared 2.9 meters.
The difference between the declared and measured prevalence is equal to 3%. A remarkable result.
Flow Rate Trial
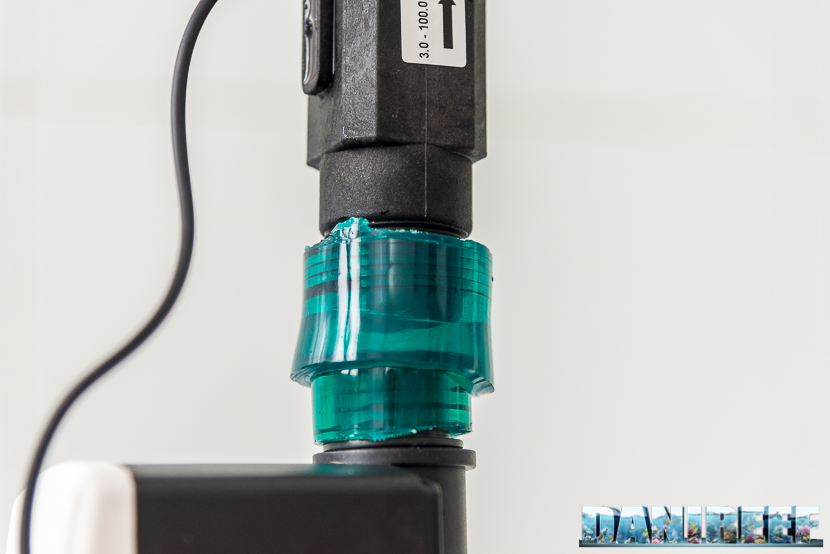
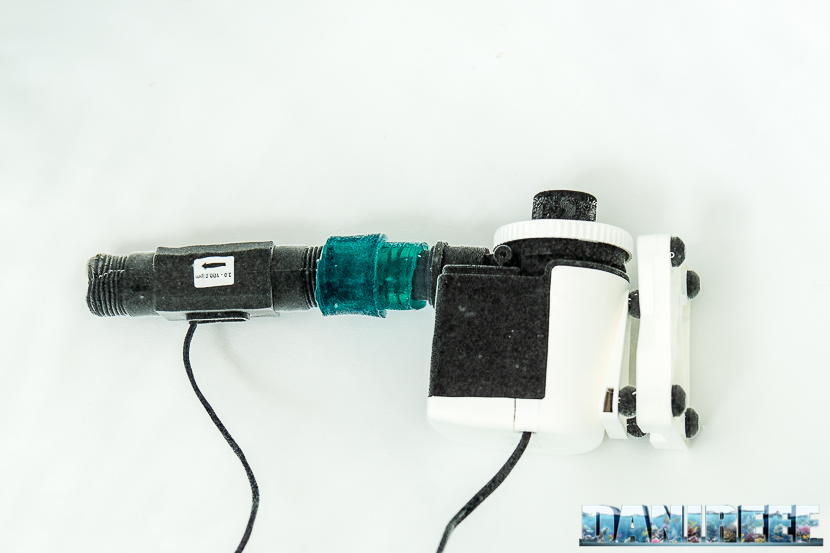
Measuring the flow rate was easy thanks to the DigiSavant DIGIFLOW 6710M flowmeter. First, we linked our connecting hoses to our flowmeter, as you can see in the following picture:
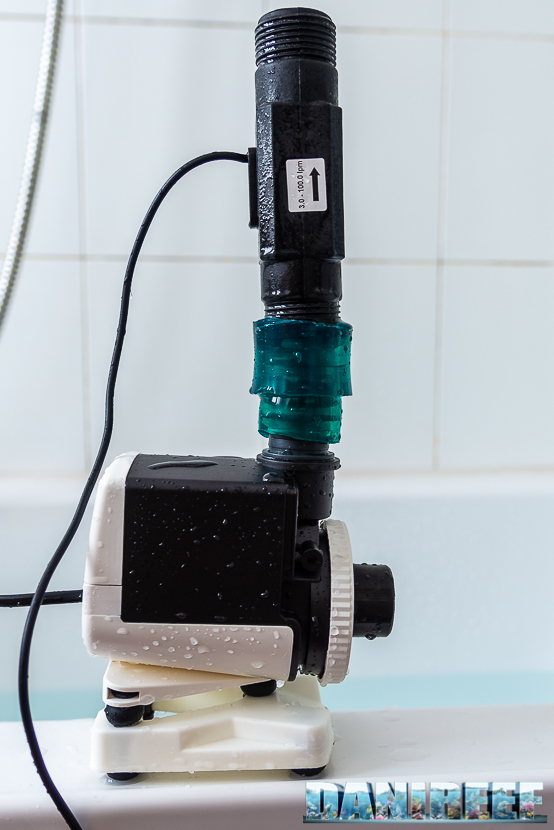
We tried to make it so the flowmeter adhered flawlessly to the pump’s exit.

The measurement is expressed in liters per minute; we multiplied the result by 60 to get the liters per hour.
We’d like to point out that the measurement applies within the conditions under which we did the measurements. The connecting hose could have induced some losses in the system.
The system delivered the following value:
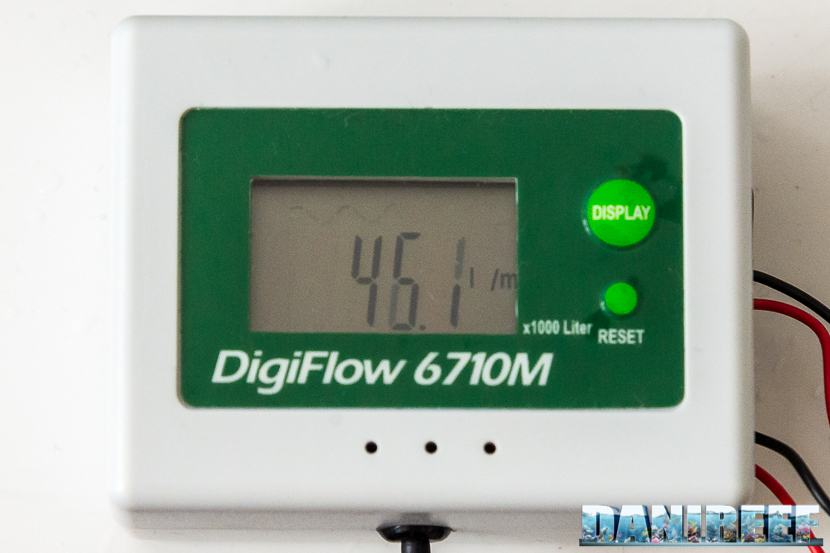
The maximum flow rate was 2,766 l/h (or 46.1 l/m*60), slightly under the declared 3,200 l/h. The pump thus reached 86% of the declared value, within the test’s conditions. A resounding result if you consider the Ecotech Marine Vectra M1‘s 66% (article) or the Waveline DC6000‘s 67% (article).
When you have to use a return pump, pay attention to the following aspects which can lower, sometimes drastically, the flow rate. Use the biggest hose that is supplied. Always use a sufficiently wide hose. The hose has to be as short as possible and make as few 90° curves as possible. Otherwise, the flow rate will decrease even more.

Characteristic Curve
The characteristic curve is the specific curve that combines the various flow rate values and head max. It’s not possible without the adequate equipment to recreate such a curve. Moreover, in this specific case it was very complicated to measure every potentiometer setting’s prevalence, since there were no established intermediate points. So we settled for combining the flow rate and prevalence at two extreme points.
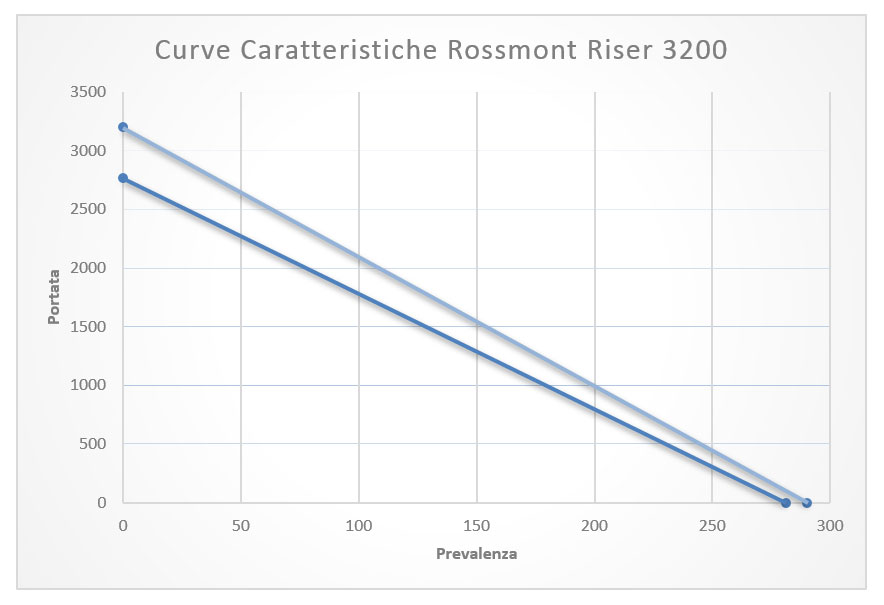
You can then see how the difference between the declared value, the highest curve, and the measure value is almost insignificant.
In theory, if you put in the prevalence you need, for example 200 cm, you should draw a line at a 200 prevalence value, and where the line crosses the characteristic line, read the corresponding prevalence value. With the Rossmont Riser 3200 at the corresponding 200 cm of prevalence, you should have a flow rate estimated at approximately 800 l/h against the declared 1000. Inside the aquarium the situation will be even worse because you will have added the hose friction and the curves you have to consider.
To calculate the estimated flow rate in your own aquarium, we direct you to this useful article with an included calculator: the automatic flow rate calculation.
Energy Consumption Trial
Collecting the instant consumption was made possible thanks to the the convenient RCE PM600 which is able to measure even the Cos(fi) (o discrepancy). The result is immediately provided in watts.
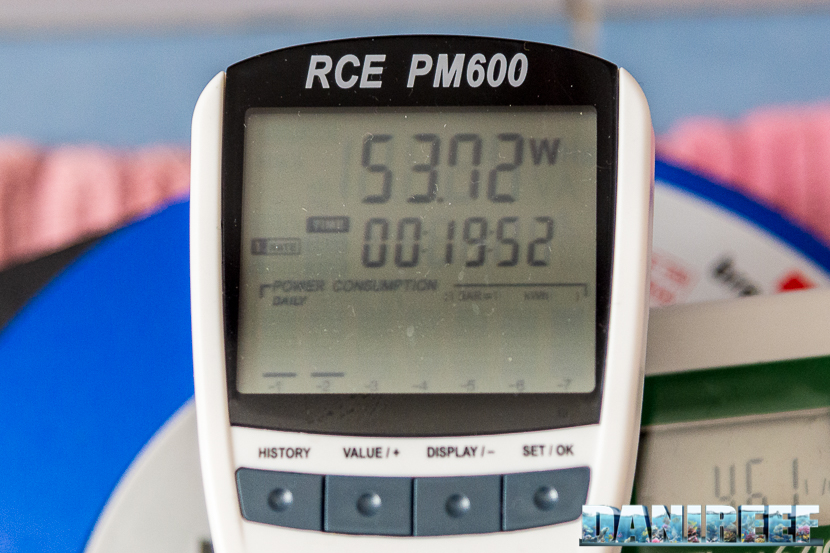
The maximum declared consumption of the Riser is equal to 53.72 watts. According to our measurements it’s about 3% over the declared value- a totally insignificant difference.
If you consider a consumption of 53.72 watts, and an energy cost equal to 0.27 euros per kwh, we could use this pump continuously for a whole year, at maximum power, with a consumption equal to 470 kwh, at a cost of 127 euros per year, or 10.6 euros per month.
Given the pump’s dimensions and its flow rate value, it wasn’t possible to conduct our usual trial for noise. We can however confirm that the pump is very quiet; as we are using it on a permanent basis on our aquarium, we would have noticed any difference.
Our comments
As we usually tell ourselves over and over again, the adjustable electronic pump is one of the best things to have in our sumps, for a lot of reasons. The simplicity of being able to vary the power to adapt to the aquarium’s conditions is, at least in my opinion, priceless.
With the Riser‘s calibration function you can change the water without having to turn off the return pump, and this is, for me, extremely convenient. Moreover, it’s possible to feed the corals by eliminating all of the aquarium’s flow. In addition, you can activate it through a tablet, smartphone, apple watch, or similar devices.
The conclusions page is really full of material, including the comparison we have done with similar pumps whose performances we have measured in the past.
The comparison with other pumps
The following chart turns out to be very interesting; I have inserted the measured values of other pumps, such as Eheim, Tunze, Sicce, Corallinea, Waveline, and Ecotech Marine, which we could test previously, as you can read on our reviews page. They’re sorted by what we determined to be the product of the flow rate multiplied by the head max divided by half. This way you get the area underlined by the two dimensions.
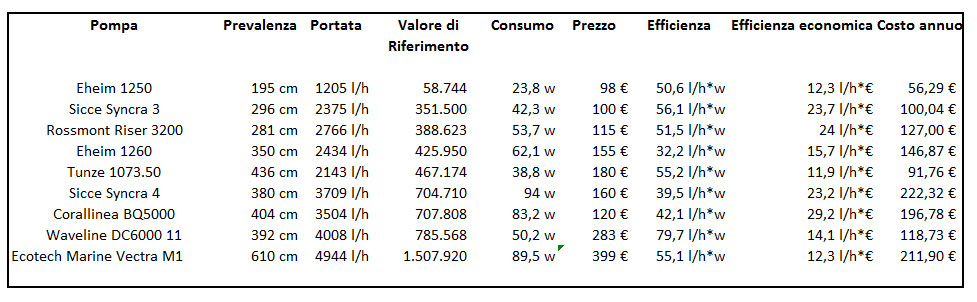
In the chart are the values of some pumps tested on DaniReef . Especially the last four varying flow rate pumps, the tunze 1073.50, the Corallinea BQ5000, the Waveline DC6000, and the Vectra M1.
From the chart you can see that, from an economical point of view, or compared to the flow rate generated for every single euro, the Corallinea pump is the most convenient, immediately followed by the Rossmont Riser 3200. In terms of technical efficiency, if we consider the maximum values only, the most convenient in the Waveline DC6000, while the Riser is absolutely average. So if the pair of values that you need match with the Riser then you can relax, knowing you’re getting an absolutely average technical efficiency and an economic efficiency among the category’s best. With the bonus that you can add the Waver and transform the pump.
The relation with the declared data
Let’s see how our measurements compare with the data declared by the manufacturer.
Head Max
| pump | head max | measurement | deviation |
| Rossmont Riser 3200 | 290 cm | 281 cm | – 3.1 % |
The maximum prevalence measurement has a minimal deviation. Completely insignificant. The Riser keeps its promises.
Flow Rate
| pump | flow rate | lab measurement | deviation |
| Rossmont Riser 3200 | 3,200 l/h | 2,766 l/h | – 13.6 % |
The deviation between measured and declared flow rate is close to 14%, an incredible result especially taking into account the much higher differences we found in other pumps.
Energy Consumption
| pump | consumption | lab measurement | deviation |
| Rossmont Riser 3200 | 52 w | 53.7 w | + 3.3 % |
The energy consumption is just over 3%. Great confidence with the declared data.
Correspondence compared to the declared data
Finally, only as a frame of reference, we give a correspondence value compared to the manufacturer’s declared data for flow rate, prevalence, and consumption.
| pump | head max | flow rate | consumption | Final Value (in absolute terms) |
| Rossmont Riser 3200 | 96.9 % | 86.4 % | 103.3% | 93.3 % |
To understand if the pump will do the trick, based on your aquarium’s prevalence I suggest you read the following articles:
- How to choose a return pump for a marine aquarium
- Calculate the return pump’s flow rate in the aquarium automatically
The second one particularly will show you the estimated flow rate in your aquarium based on your boundary conditions.
Conclusions
The Rossmont Riser 3200 reference value at maximum power equals 388,623 l*cm/s, while the declared value is 464,000. Please keep in mind that the reference value is represented by the area underlined by the flow rate and prevalence values, simplified by the maximum values. Basically, the formula is (flow rate x prevalence)/2.
The 16% loss actually represents a great value, since all of the direct competitors are a lot worse.
We still have to consider what the pump can deliver. It was good of Rossmont to adhere to the declared values, but we have to choose a pump based on the fact that, having our measured data, it can do the trick for us and maybe cost a little bit less than the competitors, while possibly adding something more. Of course you have to consider that to the pump’s cost, so that you can have all of the setting-induced options, you have to add the Waver‘s cost.
PROS
![]() Great performance and very close to the declared values
Great performance and very close to the declared values
![]() The pump is adjustable on every accessible flow rate value
The pump is adjustable on every accessible flow rate value
![]() Very well built
Very well built
![]() Extremely quiet
Extremely quiet
![]() We really liked the calibration modality that stops the tank-sump exchange
We really liked the calibration modality that stops the tank-sump exchange
![]() Cost-effective pump without regulation, at the top for economic efficiency
Cost-effective pump without regulation, at the top for economic efficiency
CONS
![]() High price with the optional Waver module
High price with the optional Waver module
| Build Quality | |
| Quality | |
| Price Performance |
.
 Disclaimer: We’d like to thank Rossmont for letting us use the Rossmont Riser 3200 pump for this review.
[Translated by Matilde Capannini]


0 Comments